How to Set Up a Proxy Server on Any Device (Beginner’s Guide)
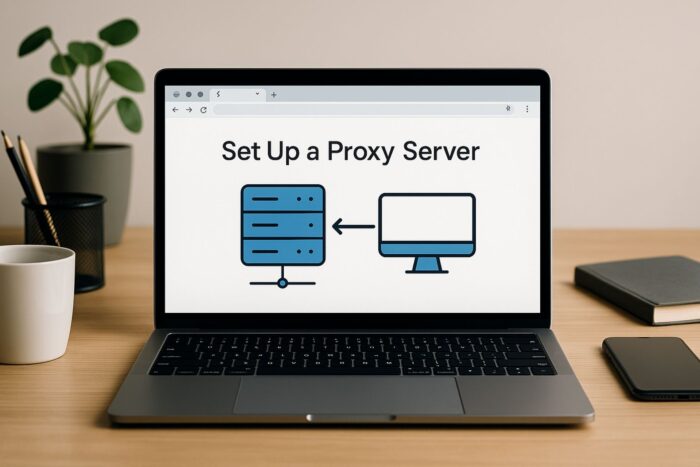
Learning how to set up a proxy server gives you more control over your online experience. A proxy can hide your IP address, filter unwanted traffic, and improve browsing speed.
In this guide, you’ll discover step-by-step methods to configure one on Windows, macOS, Linux, or mobile. You’ll also learn when a DIY setup makes sense and when it is better to rely on a managed provider.

Access content across the globe at the highest speed rate.
70% of our readers choose Private Internet Access
70% of our readers choose ExpressVPN
Browse the web from multiple devices with industry-standard security protocols.

Faster dedicated servers for specific actions (currently at summer discounts)
Table of contents
1. Understand what a proxy server is
A proxy server sits between your device and the internet. Instead of connecting directly, your traffic routes through the proxy. This setup can improve privacy, performance, and security.
Common types include:
- Forward proxies route client requests to the internet.
- Reverse proxies sit in front of servers to balance load and secure applications.
- Caching proxies store frequently accessed content to reduce load times.
2. Choose your proxy setup type
When setting up a proxy, you can either host your own or use a managed service. The choice depends on your budget, technical skill, and goals.
Self-Hosted Options (DIY)
- Squid Open-source proxy with caching and content control features.
- Privoxy Lightweight, focused on filtering ads and improving privacy.
- Nginx Reverse Proxy Commonly used to protect web apps and distribute traffic across servers.
These tools work best if you want low cost, hands-on control, and custom rules.
Managed Proxy Providers
- Smartproxy Affordable rotating residential and datacenter proxies, ideal for SEO and scraping.
- Oxylabs Enterprise-grade solution with one of the largest IP pools available.
- NetNut Stable residential proxies with long sessions for automation.
- ProxyEmpire Flexible plans and worldwide coverage, good for smaller teams.
These are best if you want scalability, simplicity, and global reach, though they come with subscription costs.
3. Set up a proxy on different platforms
Windows
- Open Settings → Network & internet → Proxy.
- Enable Automatically detect settings or manually toggle Use a proxy server.
- Enter the IP and port, then save.
macOS
- Go to System Settings → Network → Advanced → Proxies.
- Choose manual or automatic configuration.
- Enter the server details and apply.
Linux
- Use network manager GUI or configure via terminal.
- For advanced setups, install Squid with:
sudo apt install squid. - Edit config files (for example
/etc/squid/squid.conf) and restart the service.
Mobile Devices
- On iOS or Android, open Wi-Fi settings.
- Select your network, then choose Configure Proxy.
- Enter server details manually or via script.
Configuration steps vary by system. For a more detailed walkthrough, see this guide on how to change proxy settings across different devices.
4. Build your own proxy server (DIY example with Squid)
Squid is one of the most popular free proxy tools. It can run on Linux, Windows, and macOS, though Linux is the most common choice for stability and ease of setup. Here’s how to install it quickly on each platform:
Linux (most common setup)
- Open your terminal.
- Run:
sudo apt update && sudo apt install squid - Edit the config file with:
sudo nano /etc/squid/squid.confHere you can allow specific IPs, set caching rules, and adjust ports. - Start Squid:
sudo systemctl start squid - Test:
curl -x https://your-server-ip:3128 https://example.com
Windows
- Download a Windows build of Squid from the official site or a trusted community mirror.
- Extract and install it on your computer.
- Open the
squid.conffile in theetcfolder and adjust settings like allowed IPs and ports. - Run
squid.exeto start the service. - Point your browser or app to
127.0.0.1:3128or your server IP.
macOS
- Install Homebrew if you don’t already have it.
- Run:
brew install squid - Find the config file, usually in
/usr/local/etc/squid.conf, and edit it. - Start Squid with:
sudo squid - Test by setting your proxy in system preferences or using curl.
Squid works on Linux, Windows, and macOS. Linux or a VPS is the most recommended for reliability. On Linux and macOS you simply install it with a package manager.
On Windows, you need to download the installer. You never need to sign up anywhere to use Squid, because it is open-source and free. If you prefer a ready-made solution, managed providers like Smartproxy or Oxylabs give you credentials instead of software to install.
5. Secure and monitor your proxy
- Enable authentication to restrict access.
- Use firewall rules to limit traffic.
- Keep software updated to patch vulnerabilities.
- Monitor logs for suspicious activity, and use failure codes to spot issues like proxy 429 errors efficiently.
Remember: proxies secure routing, not endpoints. If you need device-level protection, see VPN vs antivirus to understand what each tool covers and where they differ.
6. Test and verify
- Visit an IP-checking site to confirm your traffic routes through the proxy.
- Benchmark performance and adjust settings for speed.
- If the bot stops responding, it may stem from miscommunication or even reach a case like the proxy error no response from bot PSGHAG2. In that case, follow troubleshooting steps.
- Regularly review logs to ensure stability.
DIY vs Managed Proxy: Which should you choose?
There are two main ways to use a proxy: DIY (self-hosted) or managed providers. Both route your traffic through an intermediary, but they differ in complexity and convenience.
DIY / Self-Hosted Proxies
With DIY tools like Squid, Privoxy, or Nginx, you set up and control everything yourself. This option is low-cost and gives you full customization, but it requires technical knowledge to configure, secure, and maintain. It is best for home use, small teams, or tech enthusiasts who want to learn how proxies work.
Managed Proxy Providers
Services like Smartproxy, Oxylabs, NetNut, or ProxyEmpire make things simple. You pay a subscription and get access to global IP networks, dashboards, and support. Setup takes minutes, and the provider handles uptime and security. This option is best if you need scale, reliability, or a quick solution without managing servers yourself.
Quick Comparison
| Feature | DIY / Self-Hosted | Managed Providers |
|---|---|---|
| Cost | Low (server only) | Subscription-based |
| Setup | Technical, manual | Easy, plug-and-play |
| Scale | Limited resources | Millions of IPs |
| Best for | Learning, small use | Businesses, global tasks |
Tip: Choose DIY if you want to experiment and save costs, but go with a managed provider if you need results quickly and at scale.
Conclusion
Setting up a proxy server can be as simple or advanced as you need. If you prefer hands-on control and low cost, go with a self-hosted solution like Squid or Nginx. If you need scale and reliability without maintenance, managed services such as Smartproxy or Oxylabs deliver.
Proxies are also useful in specialized scenarios. For example, some users configure a Telegram proxy for messaging, while networks may benefit from an IGMP proxy for optimized traffic. If you want an easy browser-based option, consider tools reviewed in the CroxyProxy overview. Proxies can even help bypass restrictions, such as learning how to unblock YouTube at school or work. And for those targeting specific regions, the best proxies for Vancouver highlight how location choice impacts speed and access.
Ran into issues after setting it up? Follow this step-by-step guide to fix a proxy not working on Windows 11.
Both DIY and managed approaches improve privacy, security, and flexibility when browsing or running applications.
Read our disclosure page to find out how can you help VPNCentral sustain the editorial team Read more

Improve this guide

User forum
0 messages