Truth Social Not Working with a VPN? [6 Simple Fixes]
Truth Social not working with VPN? Follow these expert tips to regain access!
Truth Social not working with VPN? You’re in the right place! If you’re outside the US and relying on a VPN to access the website, check the tested fixes below to get it back on its feet.
So, if you’re ready to get unrestricted access to the”free-speech alternative” to Twitter (now X), keep reading.

Access content across the globe at the highest speed rate.
70% of our readers choose Private Internet Access
70% of our readers choose ExpressVPN
Browse the web from multiple devices with industry-standard security protocols.

Faster dedicated servers for specific actions (currently at summer discounts)
Why is Truth Social not working with a VPN?
A few potential reasons can cause this issue:
- Blocked servers — Truth Social implemented a security network block that might affect some VPNs
- DNS leaks — If your DNS queries and IP address are exposed, that will alert the platform of your actual location.
- IPv6 leaks — Most VPNs can’t safely connect to IPv6-enabled websites, which can result in data leaks.
- WebRTC leaks — Your browser’s WebRTC protocol can interfere with your VPN and reveal your IP address.
Now that you know the potential causes, here’s how you can address them:
How to fix Truth Social not working with a VPN?
Depending on the cause, you can try several solutions when Truth Social is not working with VPN:
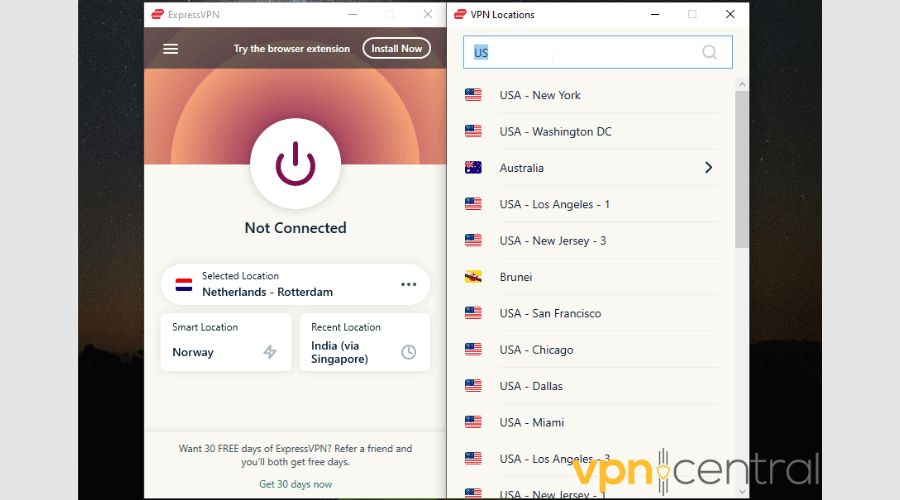
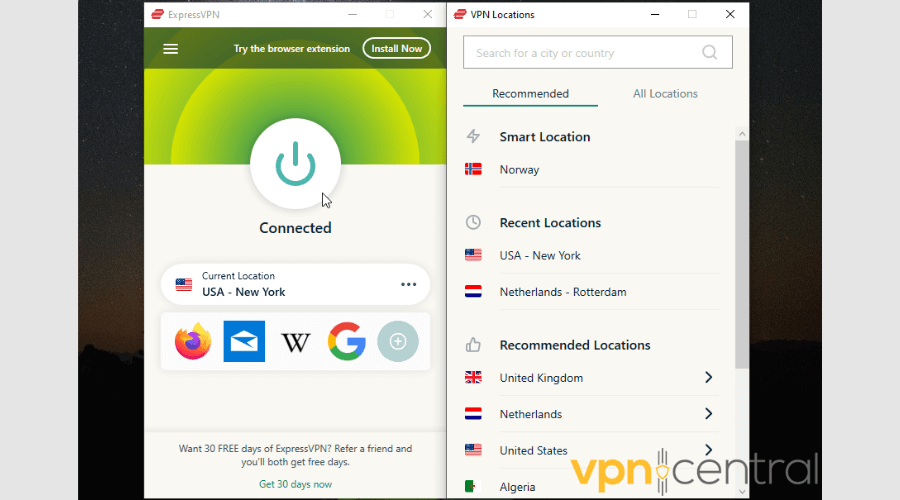
1. Change the server
Sometimes, it’s just a single server that’s not working properly with Truth Social.
It happens even to the best VPN services!
In that case, disconnect from your current one and open up the locations list. Select a new US server, and you should be good to go.
2. Clear your cache
Every time you visit a website, cookies store information about how you use it, including your preferred language settings, login details, and IP address.
That can undermine your VPN’s protection and reveal your actual location to websites.
That’s why you need to clear your browser cache and cookies regularly. The process slightly differs depending on your browser.
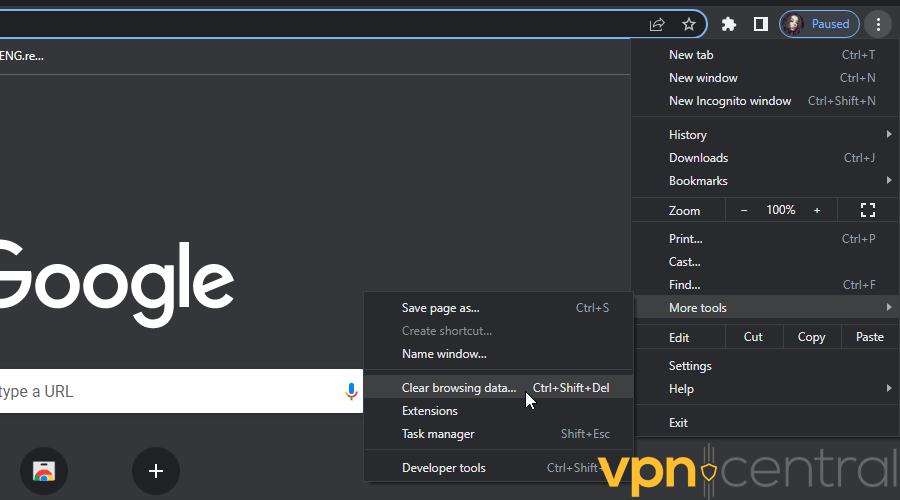
Clear Cache in Google Chrome
1. Open it, click on the three-dot menu in the upper right corner, and mouse over More tools. Select Clear browsing data.
2. Click the checkboxes for Cached images and files and Cookies and other site data.
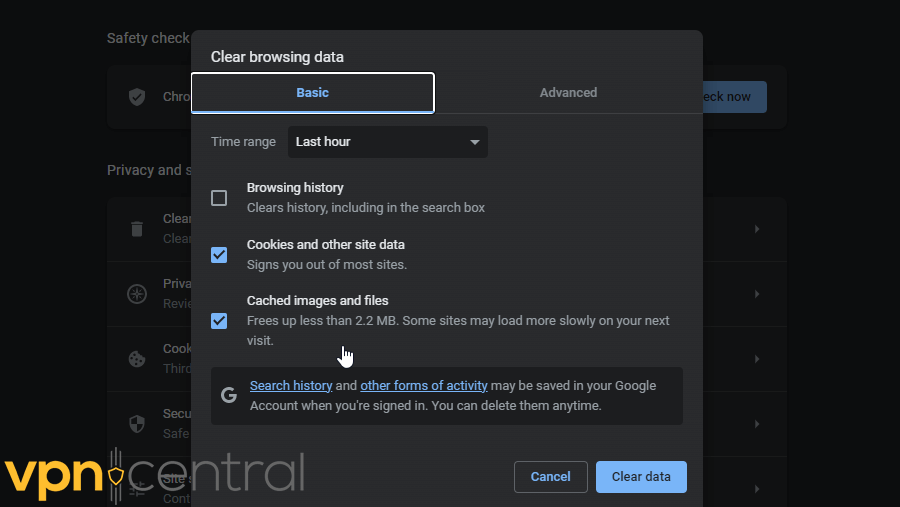
3. Choose All time for the time range for which to delete the browsing data.
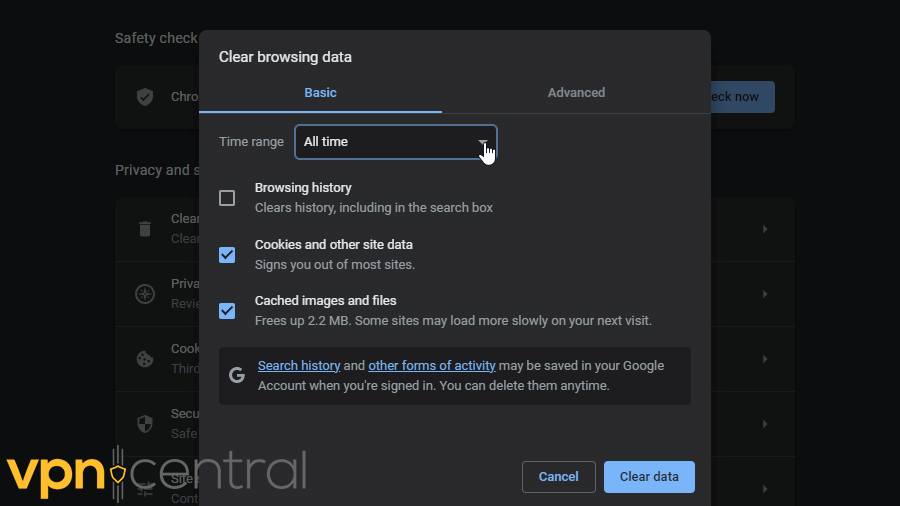
4. Finally, click Clear data.
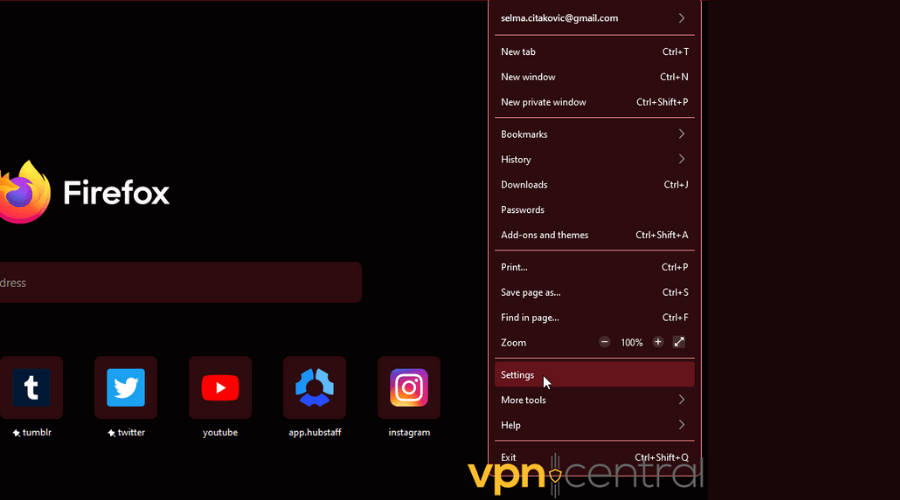
Clear Cache in Mozilla Firefox
1. Open it, click the three bars in the upper right corner, and then Settings.
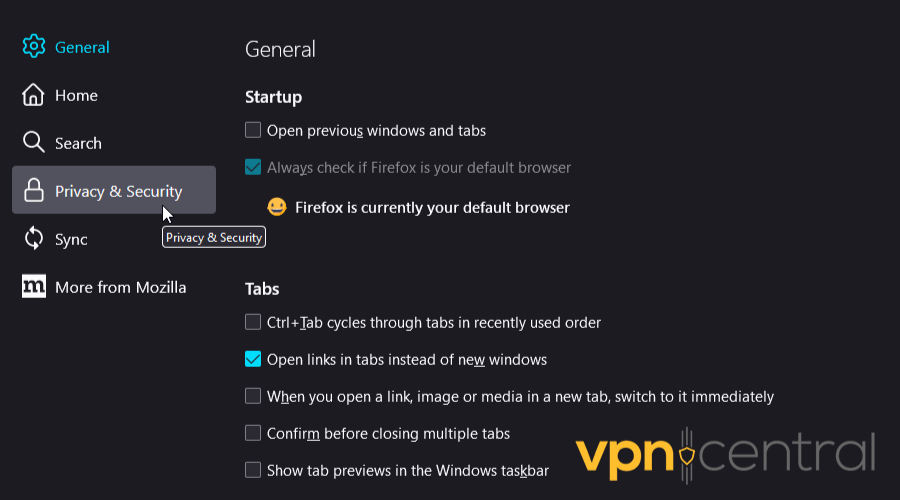
2. On the side menu, select Privacy & Security.
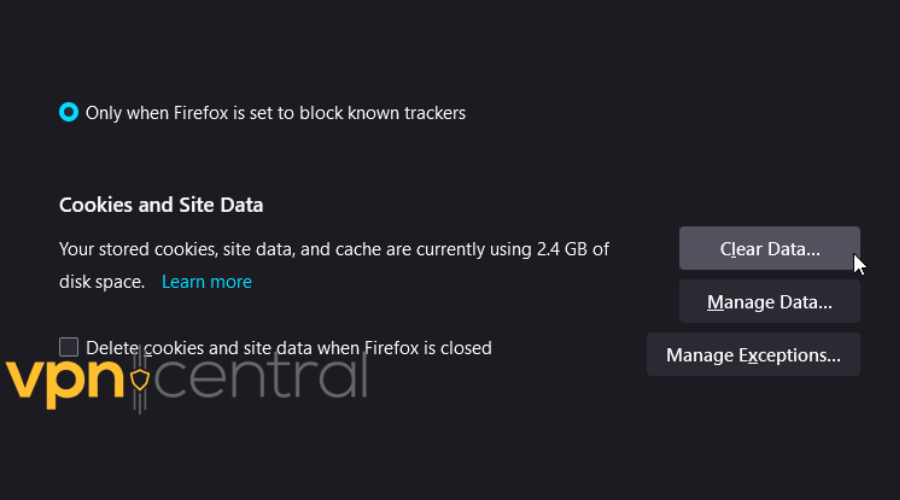
3. Scroll down to Cookies and Site Data and click Clear Data.
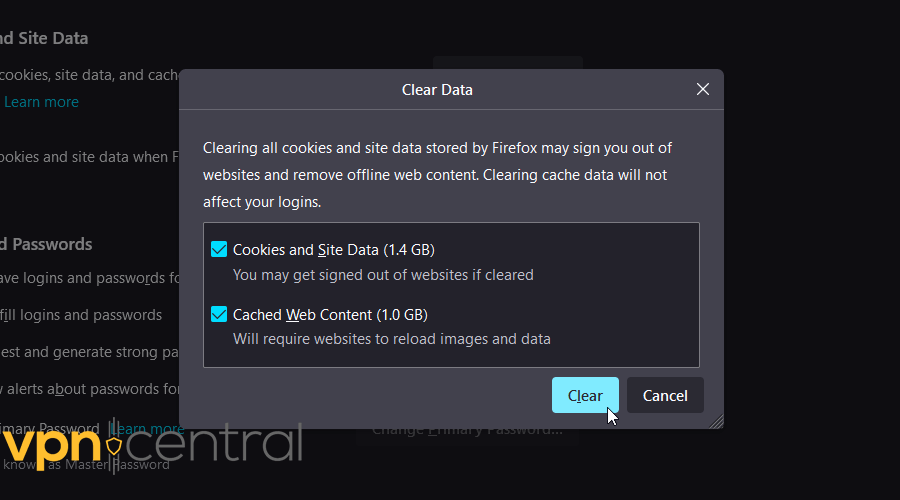
4. Confirm that you want to clear all data and cookies and press Clear.
3. Fix a DNS leak
Ideally, your VPN’s encrypted tunnel should conceal and protect all your traffic. But sometimes, your DNS requests might slip through and give away your IP address.
You can do a quick test for this privacy threat:
1. Turn off your VPN and go to ipleak.net, dnsleaktest.com, or dnsleak.com.
2. Click to start the test. It will display your IP, Hostname, ISP, and country.
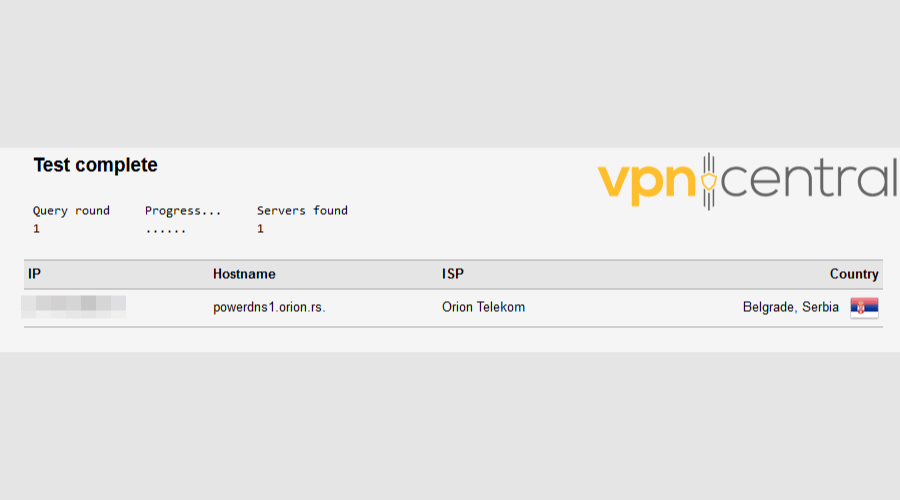
3. Now, turn on your VPN, pick any location, and revisit the page. It should show you a different IP address, ISP, and location. That means you’re leak-free!
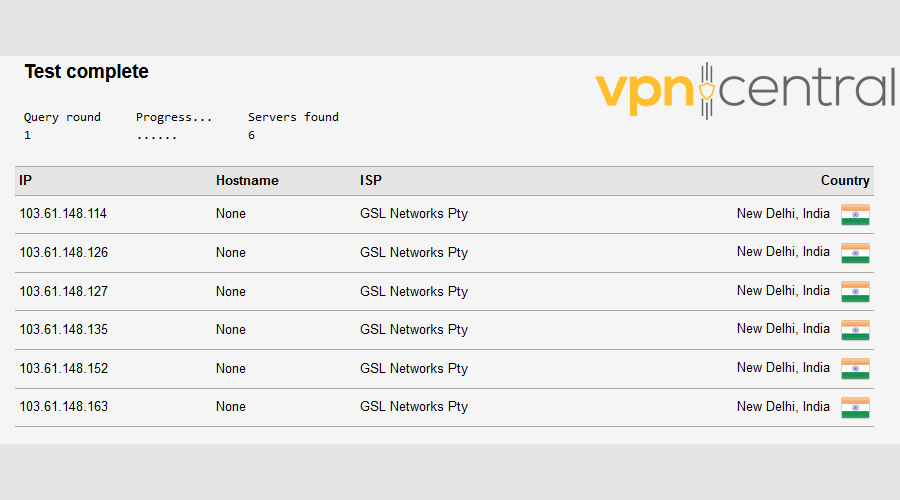
4. If it, again, shows your actual information, that indicates that you’re experiencing a DNS leak.
In that case, follow these steps to fix it:
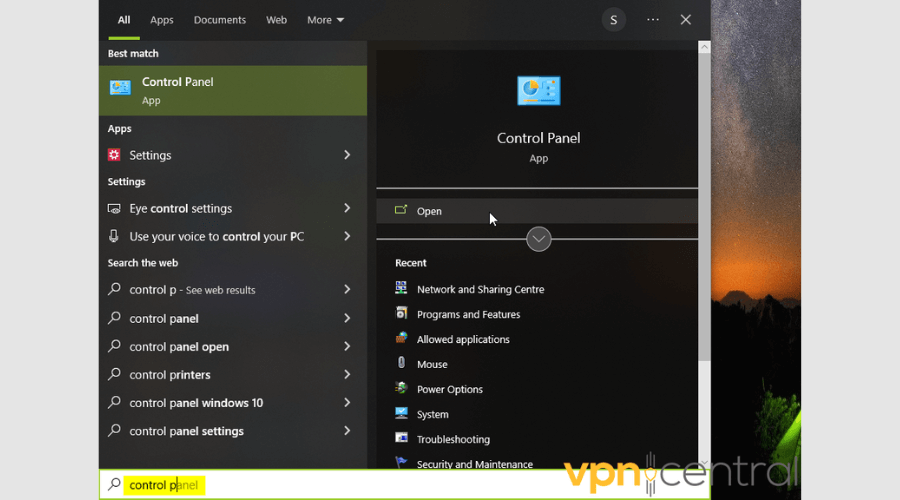
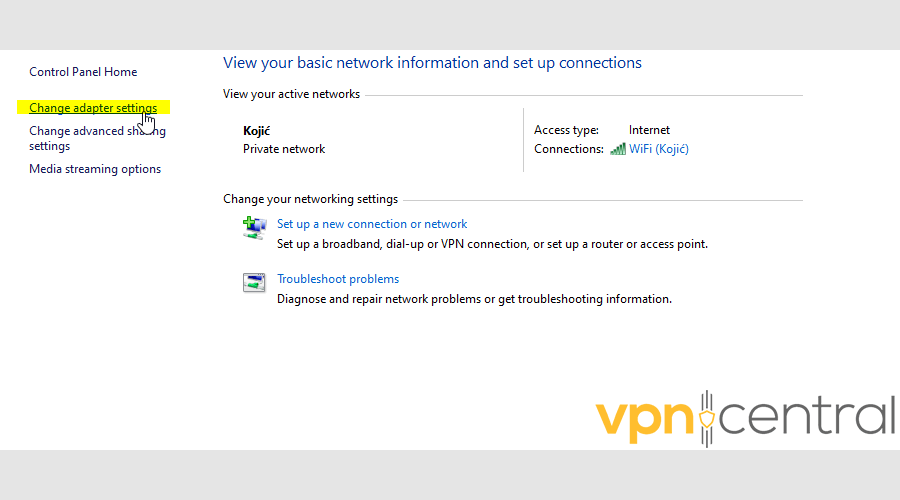
1. Type Control Panel in the Windows search bar and click on it.
2. Find Network and Sharing Center.

3. Select Change adapter settings from the left side of the screen.

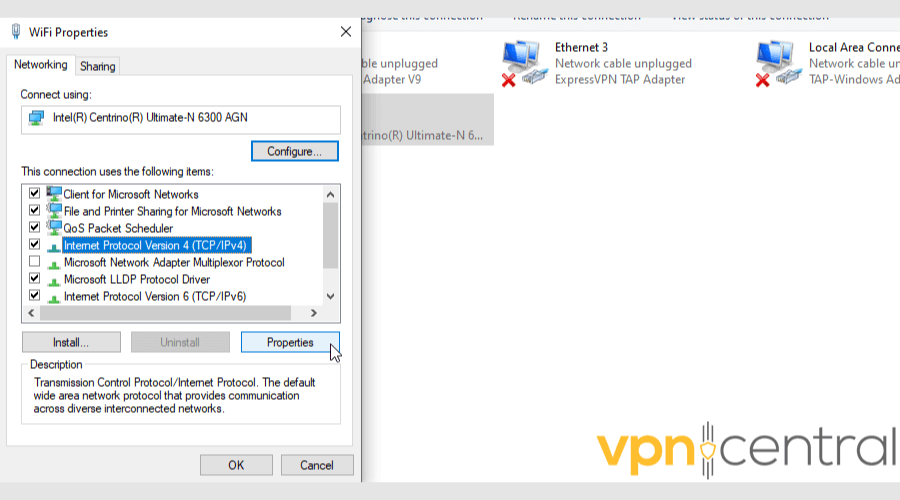
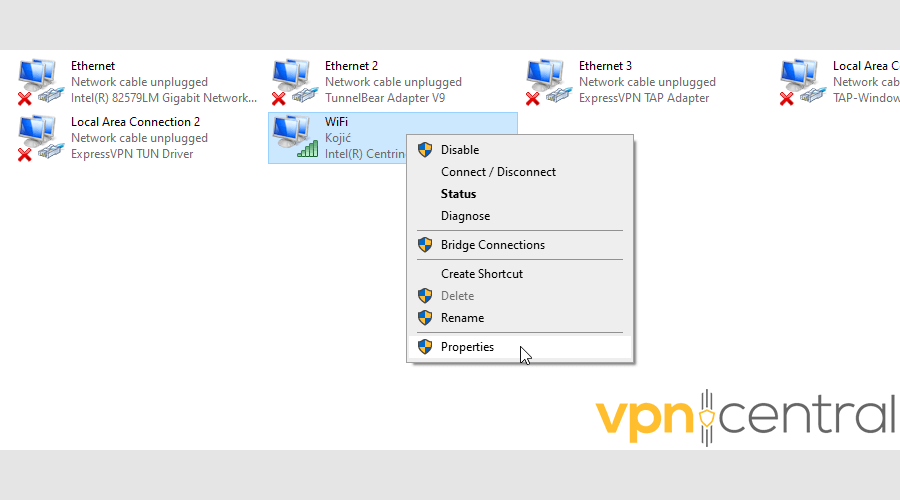
4. Right-click the connection you want to alter and choose Properties.

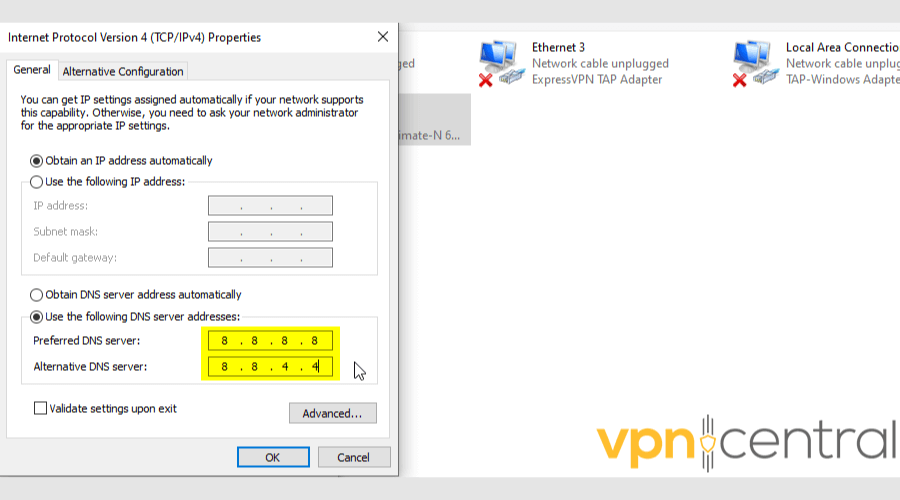
5. Click on Internet Protocol Version 4 (TCIP/IPv4), then Properties.
6. In the new pop-up, select Use the following DNS server addresses. Type in the new addresses and click OK.
7. Repeat the process for Internet Protocol Version 6 (TCIP/IPv6).
You can use free public DNS servers like:
- Google — 8.8.8.8 and 8.8.4.4
- Cloudflare — 1.1.1.1 and 1.0.0.1
- OpenDNS — 208.67.222.222 and 208.67.220.220
- Quad9 — 9.9.9.9 and 149.112.112.112.
They are optimized for security and won’t record sensitive information, including your IP address.
4. Block WebRTC leaks
WebRTC leaks can affect most browsers and de-anonymize you even when using a VPN. The easiest way to put a stop to that is via browser add-ons.
So, check first whether your VPN has an extension with protection against WebRTC leaks.
If not, you’ll have to do some extra steps.
Firefox users can directly disable WebRTC. Here’s how:
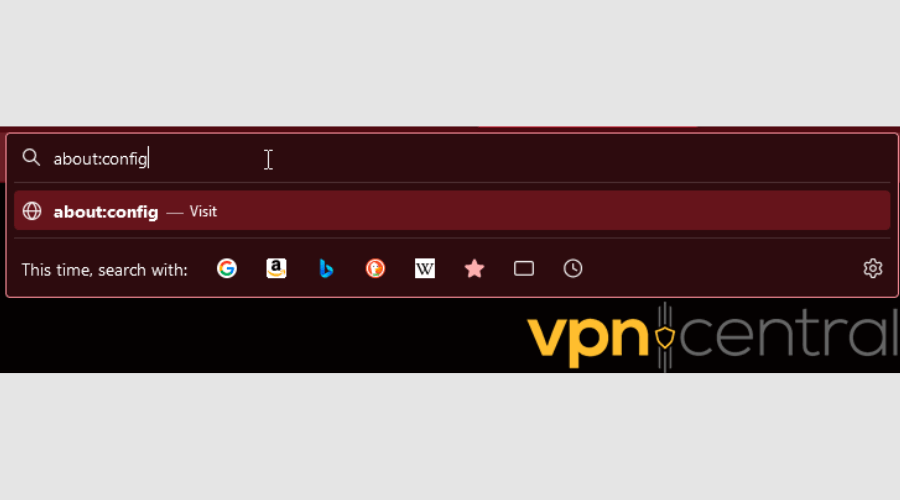
1. Open Firefox and type about:config in the URL bar, and press Enter.
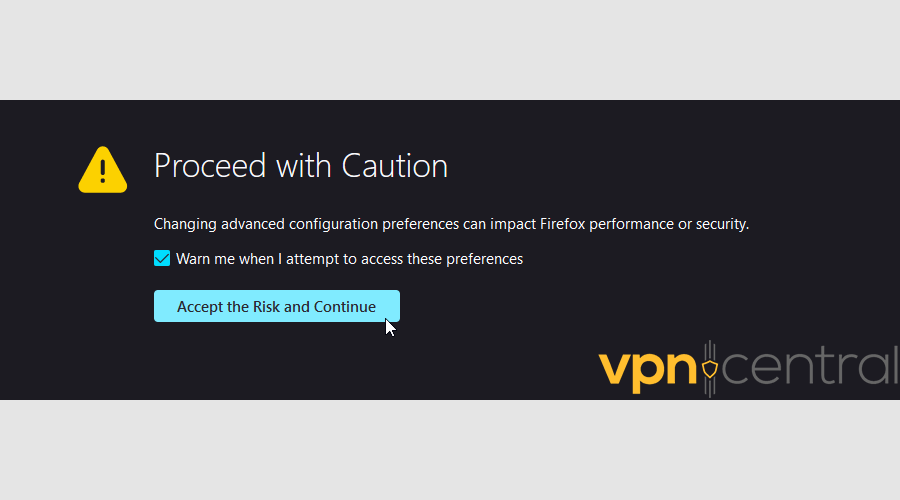
2. Agree that you want to continue.
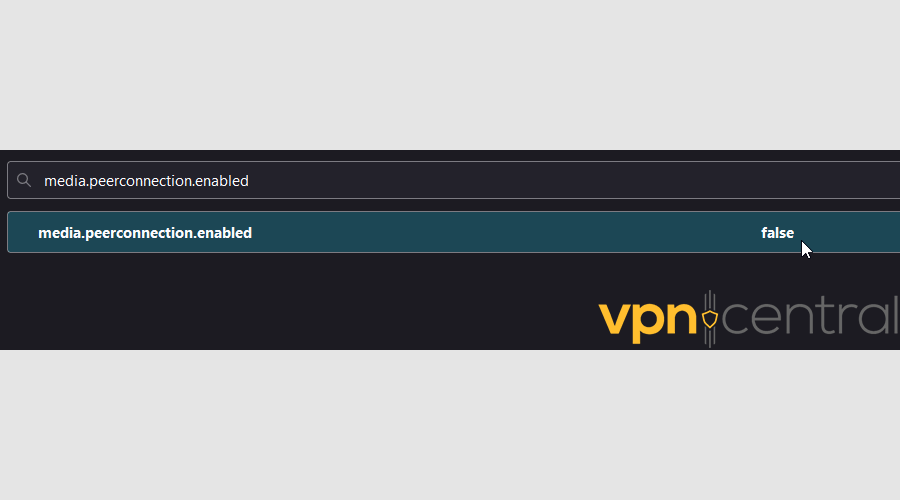
3. Type in media.peerconnection.enabled. Double-click it to change its value to false.
You can’t do this on Google Chrome and Chromium-based browsers. You’ll have to use specialized extensions like WebRTC leak prevent and uBlock Origin.
Once you download them, enable and add them to your browser bar.
5. Prevent IPv6 leaks
IPv6 is the latest internet protocol. Unfortunately, most websites still only support IPv4, leading to IPv6 leaks.
Many VPNs let you disable this protocol in their settings, so make sure to check that out first.
If that’s not an option, you can disable IPv6 on a system level:
1. Type Control Panel in the Windows search bar and click on it.
2. Find Network and Sharing Center.
3. Click on Change adapter settings in the upper left corner.
4. Right-click on your network adapter and choose Properties.
5. Uncheck Internet Protocol Version 6 (TCP/IPv6) on the list. After that, click OK and Close.

6. Change your provider
Finally, you could switch to a more robust VPN service. ExpressVPN is a great candidate!
It can unblock even the best-guarded platforms, like Netflix, BBC iPlayer, and Prime Video.
It’s also very easy to use:
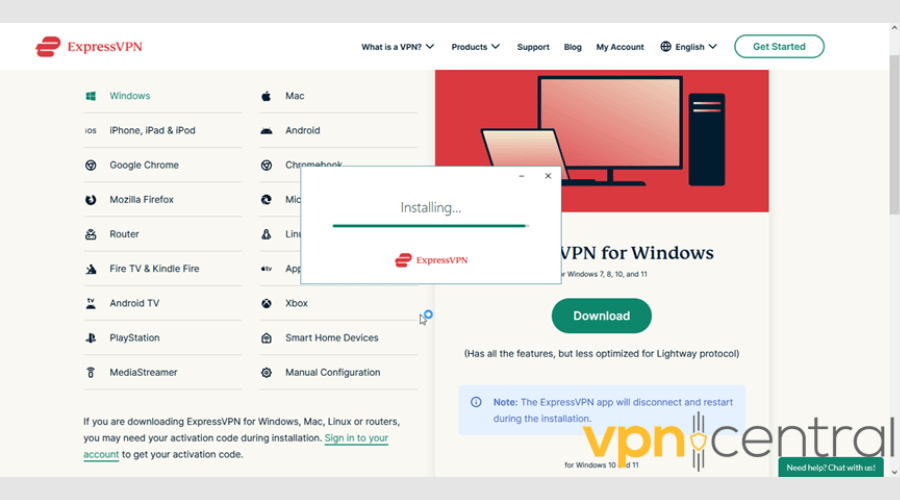
1. Subscribe to ExpressVPN and download the software.
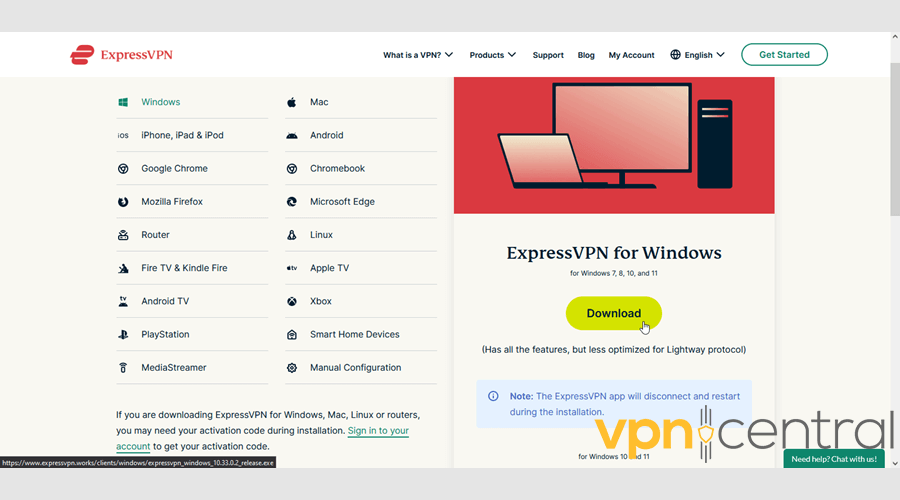
2. Follow the instructions to install the app.
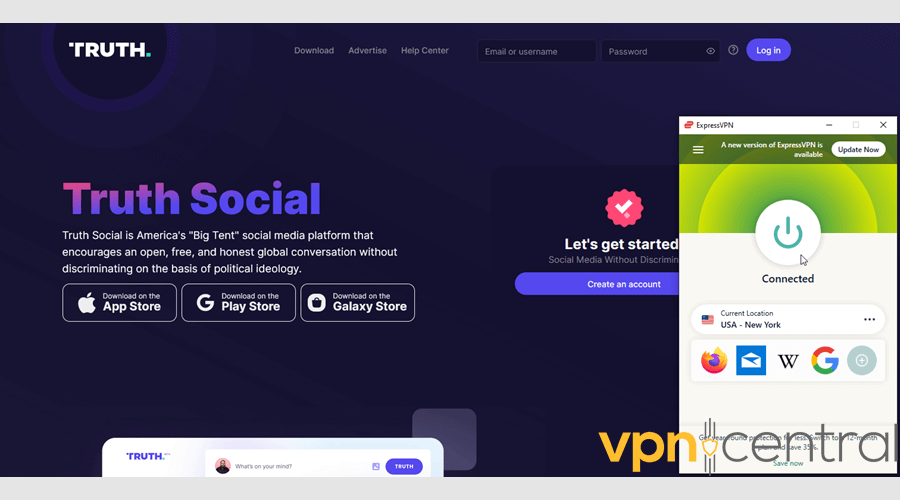
3. Open it and choose a suitable server option in the US.
4. Click the big power button, and you’ll be notified when connected.
5. You’ll now be able to sign or log into Truth Social.
ExpressVPN has over 3000 servers in 94 countries, including 20+ in major US cities. It’s also consistently leak-proof, so there won’t be any accidents accessing Truth Social.
It uses 256-bit encrypted DNS on every server and offers IPv6 leak protection.
You can also use the nifty ExpressVPN extension (Chrome, Firefox, and Edge) to block WebRTC.

ExpressVPN
Geo-restrictions won’t stop you from accessing your favorite social media platforms with this top-notch VPN service.Truth Social not working on an iPhone
If Truth Social isn’t working on your iPhone, try the following:
- Check Internet Connection: Switch between WiFi and mobile data to test connectivity.
- Restart Truth Social App: Close and reopen the app to clear temporary glitches.
- Update the App: Ensure Truth Social is updated to the latest version via the App Store.
- Restart Your iPhone: Power off and then turn your iPhone back on to resolve background issues.
- Reinstall the App: Delete and then reinstall Truth Social to fix potential data corruption.
- Check for iOS Updates: Update your iPhone to the latest iOS version for compatibility.
- Disable VPN: If you’re using a VPN, try disabling it to see if Truth Social works without it.
- Change VPN Server: If the VPN is necessary, switch to a different server location and try again.
- Update VPN App: Make sure your VPN app is updated to the latest version.
- Contact Support: Reach out to Truth Social or your VPN’s support team for further assistance.
Wrap up
If Truth Social is not working with your VPN, it’s probably due to blocked servers or VPN vulnerabilities.
So, always check for leaks if you experience any troubles.
If all else fails, you should change your provider to upgrade your online security measures. ExpressVPN is a safe bet, as always.
Read our disclosure page to find out how can you help VPNCentral sustain the editorial team Read more

Improve this guide
User forum
0 messages