Can VPN Change NAT Type? Here's What You Need To Know
Can VPN change NAT type? Yes, but there are some things you should know.
Setting up VPNs can sometimes be tricky. Configuring NAT type on gaming consoles like the PS4 and dealing with instability caused by having two routers at home (double NAT) is challenging.

Access content across the globe at the highest speed rate.
70% of our readers choose Private Internet Access
70% of our readers choose ExpressVPN
Browse the web from multiple devices with industry-standard security protocols.

Faster dedicated servers for specific actions (currently at summer discounts)
Understanding how VPNs work and their impact on Network Address Translation (NAT) types can be challenging. In this guide, we’ll explore how VPNs affect NAT types and provide step-by-step instructions on changing NAT types using VPNs and other methods.
What are NAT types?
Network Address Translation (NAT) is a method of mapping multiple local private addresses to a single public one. There are three main types of NAT:
- Open NAT (Type A): This is the least restrictive type, allowing all incoming requests from the internet. It’s ideal for gaming and hosting servers.
- Moderate NAT (Type B): This type allows most incoming requests, but some may be restricted. It’s the most common type and is suitable for general internet use.
- Strict NAT (Type C): This type doesn’t allow any incoming requests from the internet, resulting in limited connectivity. It’s the most secure but least convenient type.
That being said, using the Open NAT is the best bet that you will be able to access any lobby and host servers that will allow any other NAT type to connect without issues.
Can VPN change NAT type?
Using a VPN typically alters your NAT type, but not always. For instance, if you have a Type B NAT, VPN won’t change it much. Yet, for strict NAT types, VPNs can notably enhance gaming, bypassing Type C NAT issues. However, using VPNs with direct internet connections may limit Open NAT types, acting as intermediary routers.
How to change NAT type?
1. Use an Open NAT-type VPN
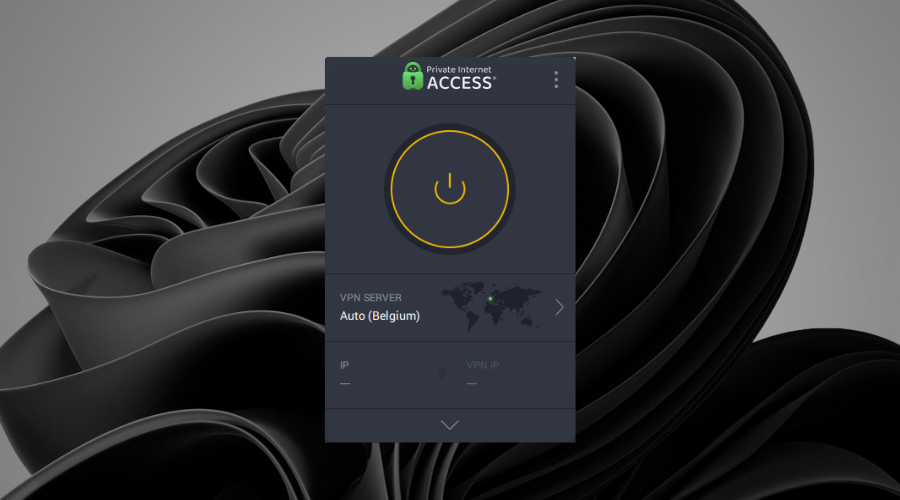
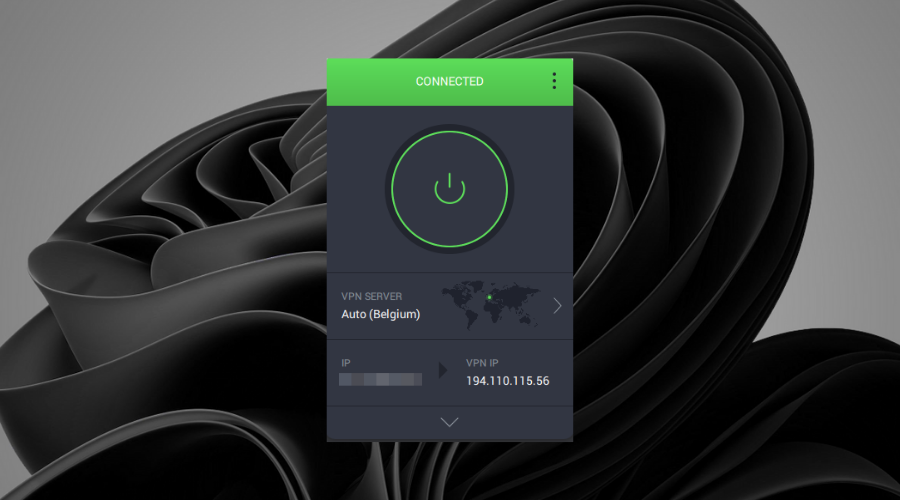
Private Internet Access is an excellent choice that can help you change your NAT type to moderate (Type B | 2) without additional steps. You just select the server you want to connect to and let it do all the work for you.
- Download Private Internet Access.
- Install it on your computer.
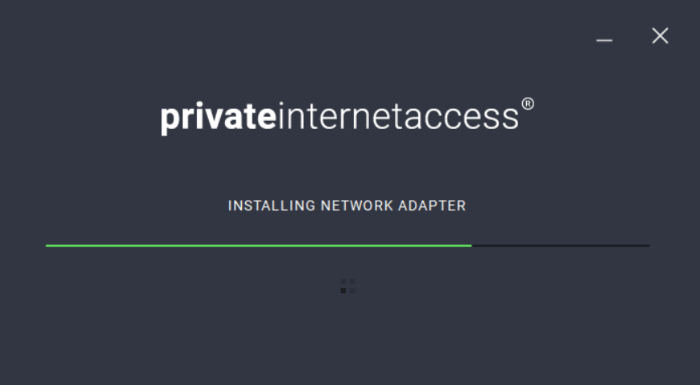
- Launch it by clicking the respective icon.
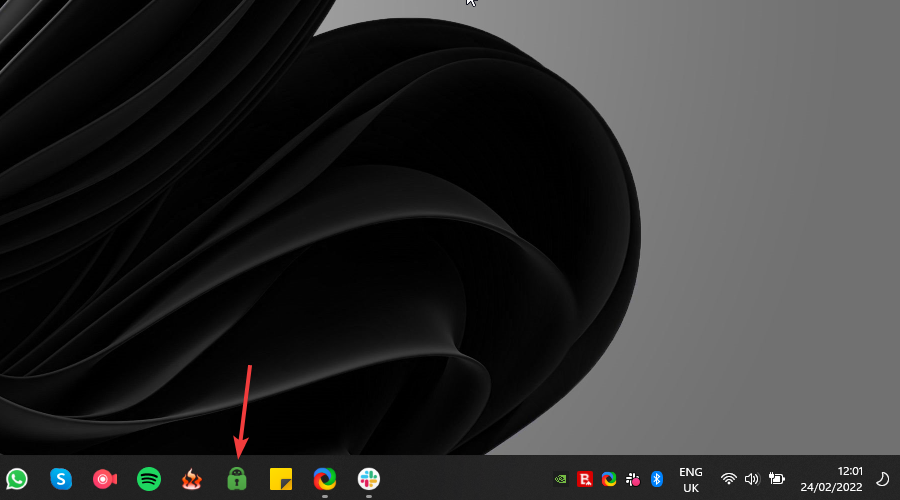
- Log into your PIA account.
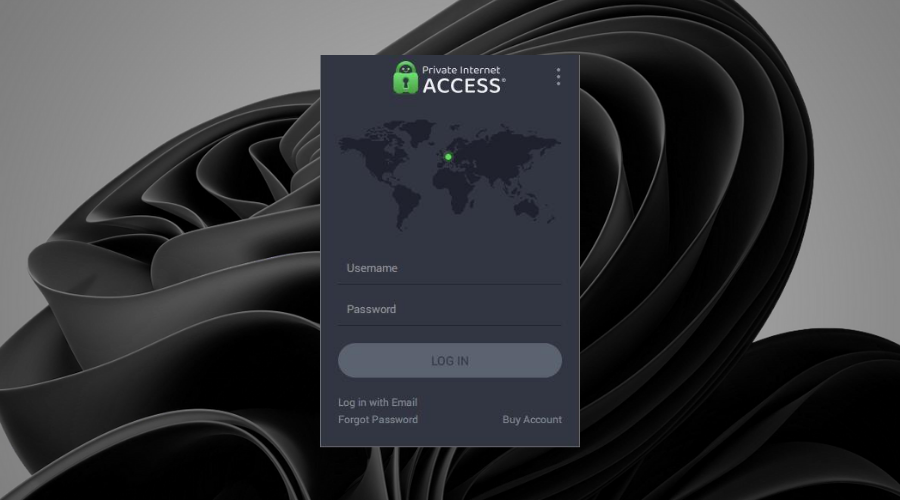
- Connect to a server by clicking the big power button (location not important).
- Enjoy less restrictive NAT on your device.
The same principles apply to other VPN software that has this capability, including ExpressVPN and NordVPN.
As in the case of PIA, the software options mentioned above also perform the same task by installing the software and activating the VPN.

Private Internet Access
Fix your system’s NAT type with ease and rapidity by using this powerful VPN service today.2. Use port-forwarding on your router
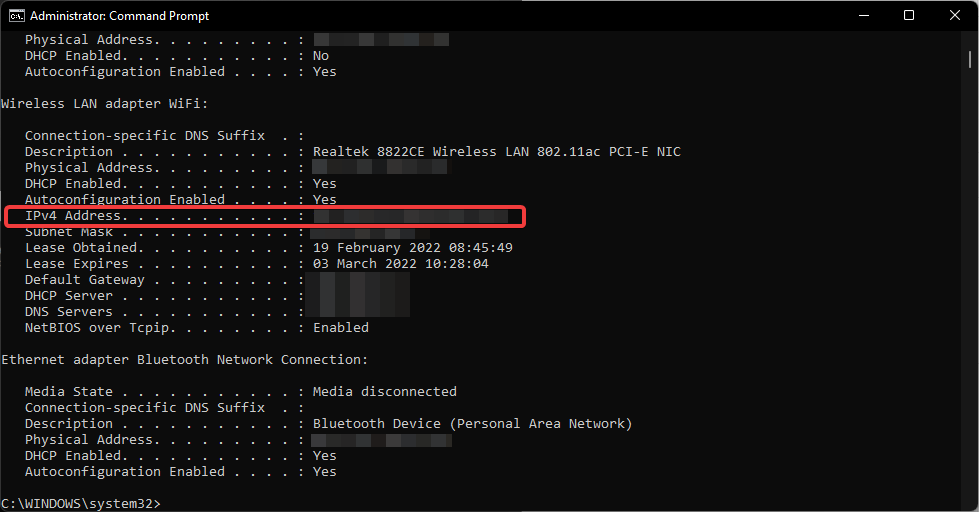
➡ Identify your system’s IP address
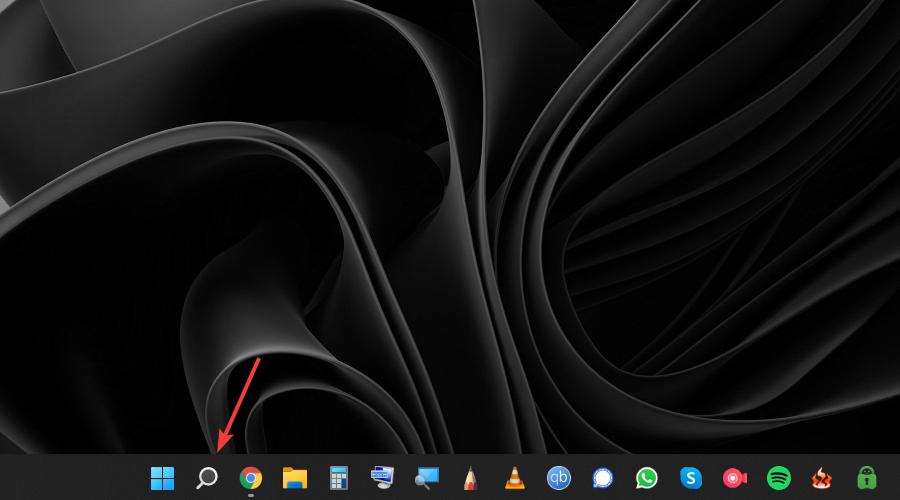
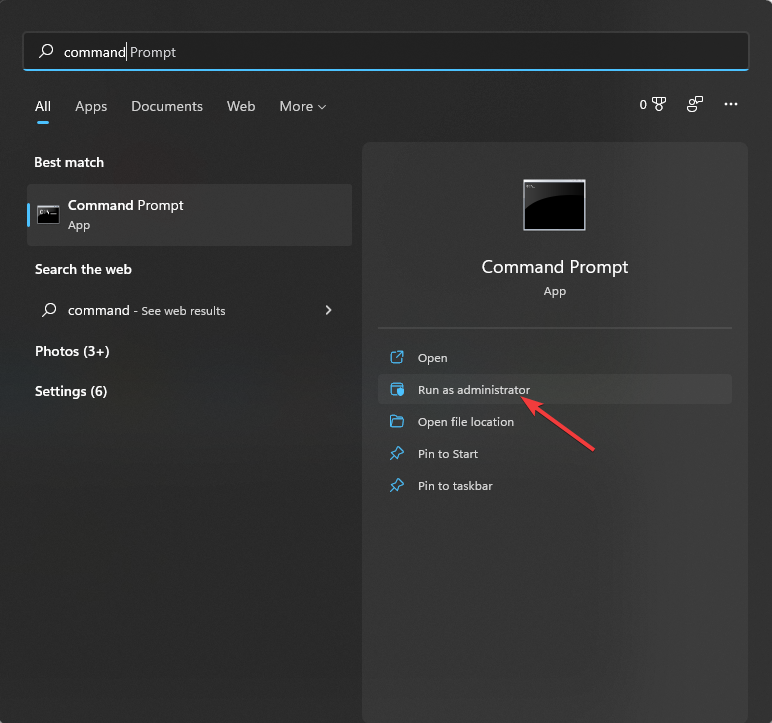
- Press the Search button in your taskbar and write command.
- Choose Run as administrator for the Command Prompt option.
- Type the following command and run it by pressing Enter:
ipconfig/all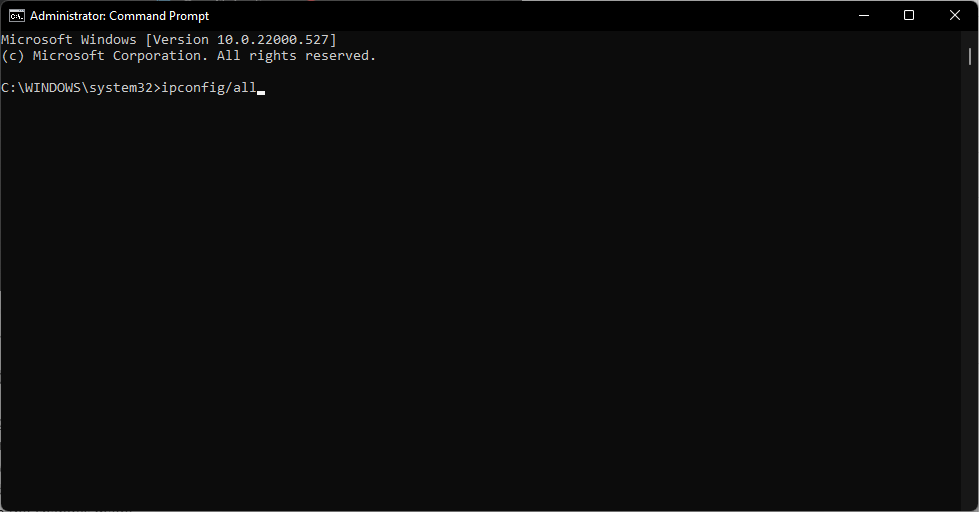
- Note the device IP in a text document or on a piece of paper.
➡ Modify the router settings
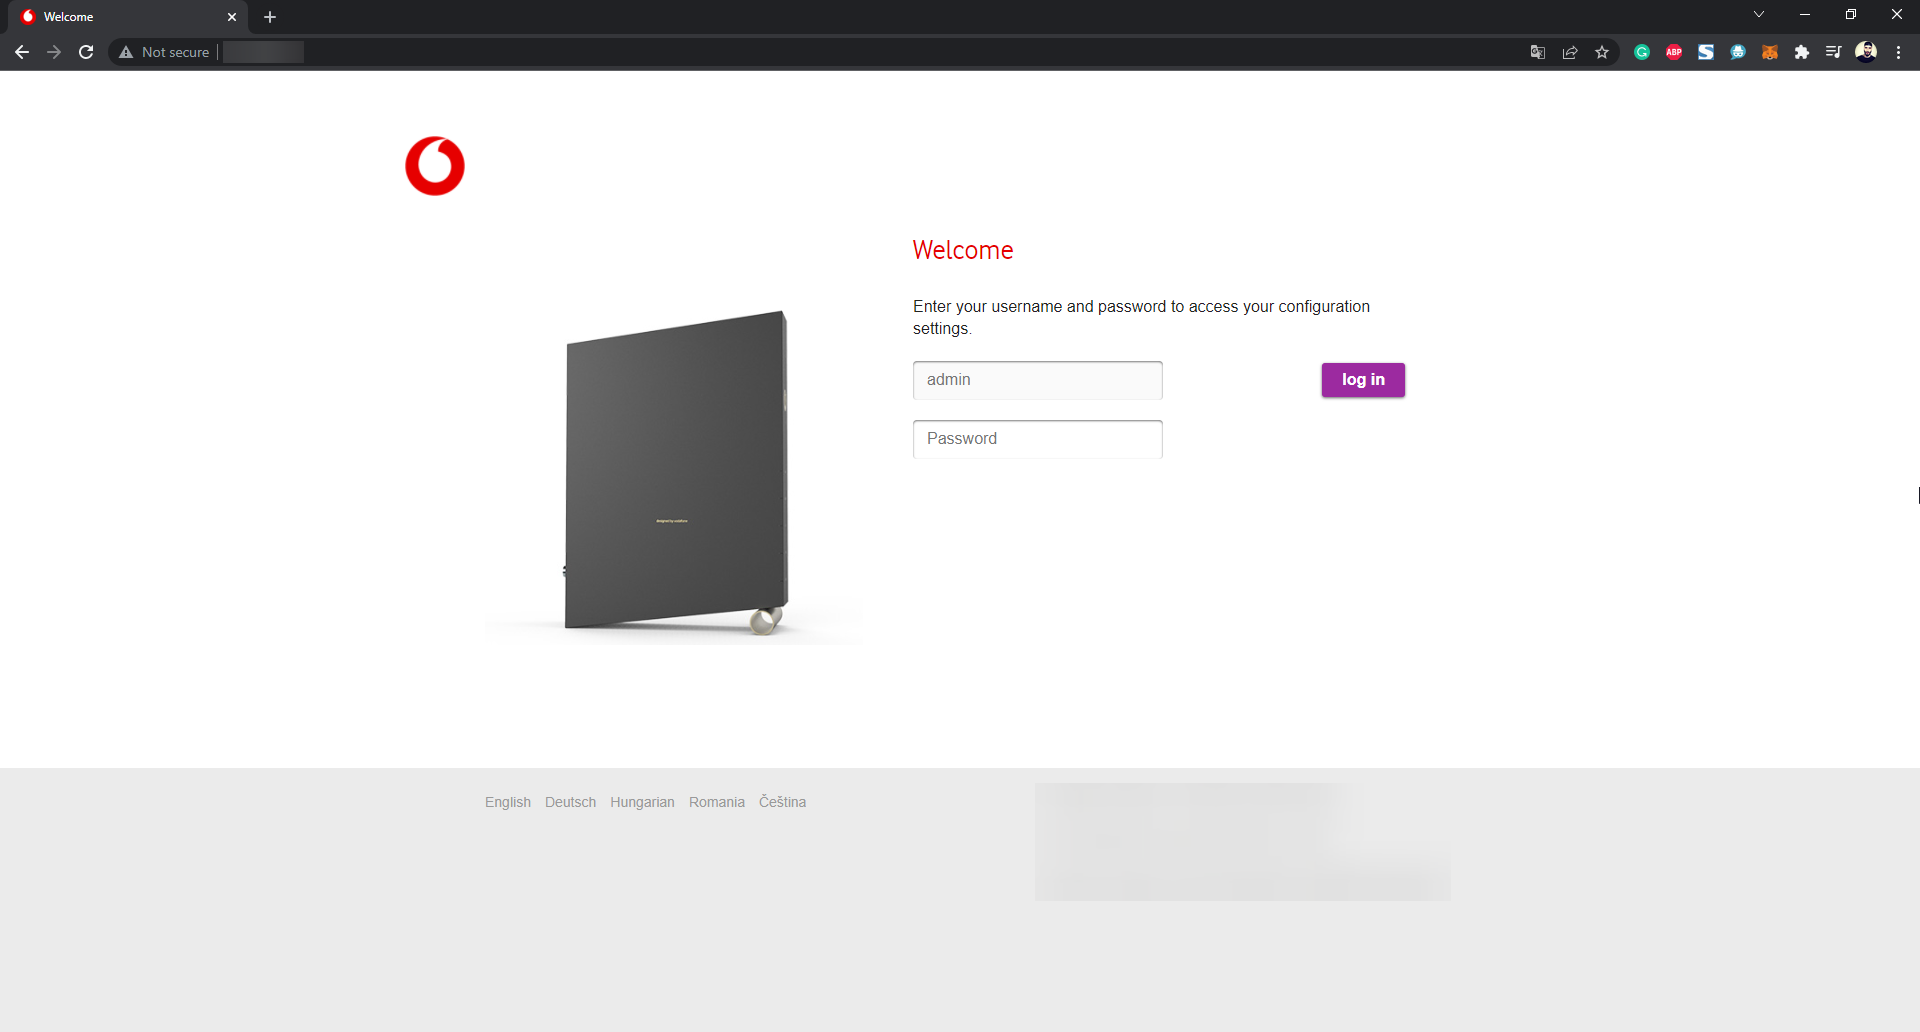
- Log into your router settings page in a web browser.
- Find the Port forwarding (or Port mapping) and open it.
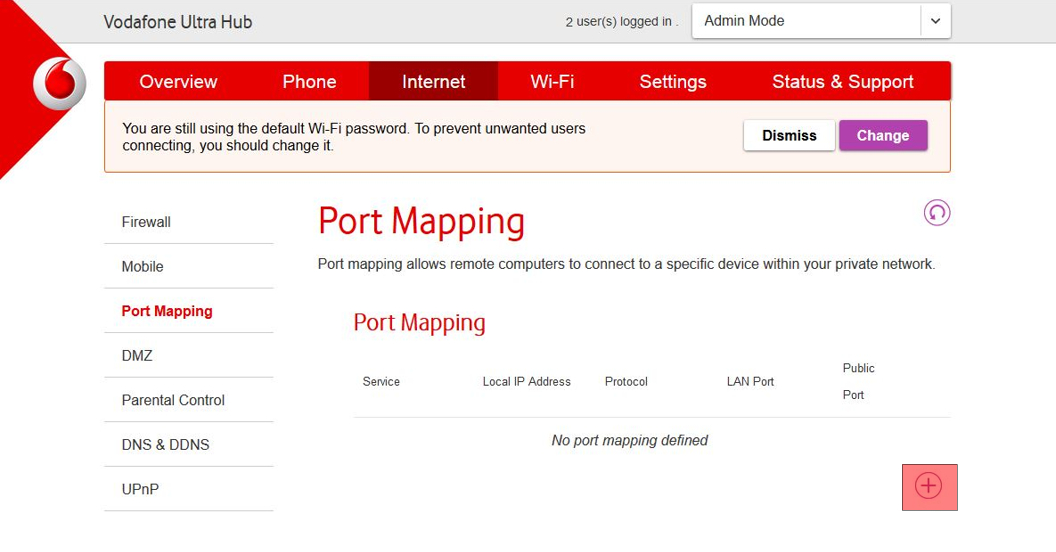
- Identify the port on which you want to activate NAT.
- Input the correct ports and IP address noted from before.
- Reset your PC and router to save the changes made.
3. Use Universal Plug and Play (UPnP)
- Type the IP address you’ve noted at the previous step into your browser.
- Log into your router’s settings page with the network credentials (if not changed, the username will be Admin).

- Navigate to the UPnP settings menu (usually found under Settings, Advanced Setttings, or Settings).
- Enable the UpnP option by toggling it on.
- Reset the router and device to apply the settings.
4. Use the Network Discovery feature
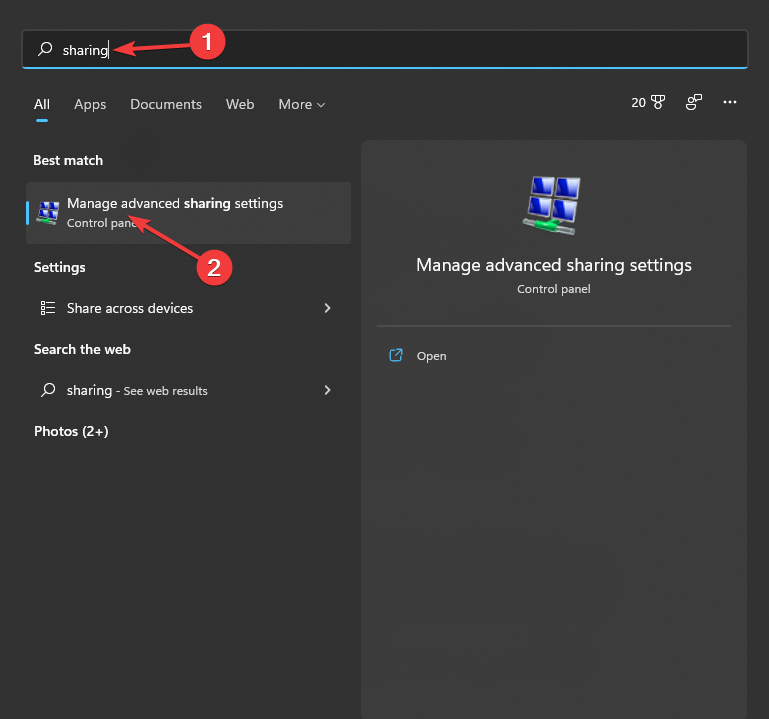
- Click on the Search button from the taskbar.
- Search for sharing, and choose the Manage advanced sharing settings option.
- Tick the box next to the Turn on network discovery option.
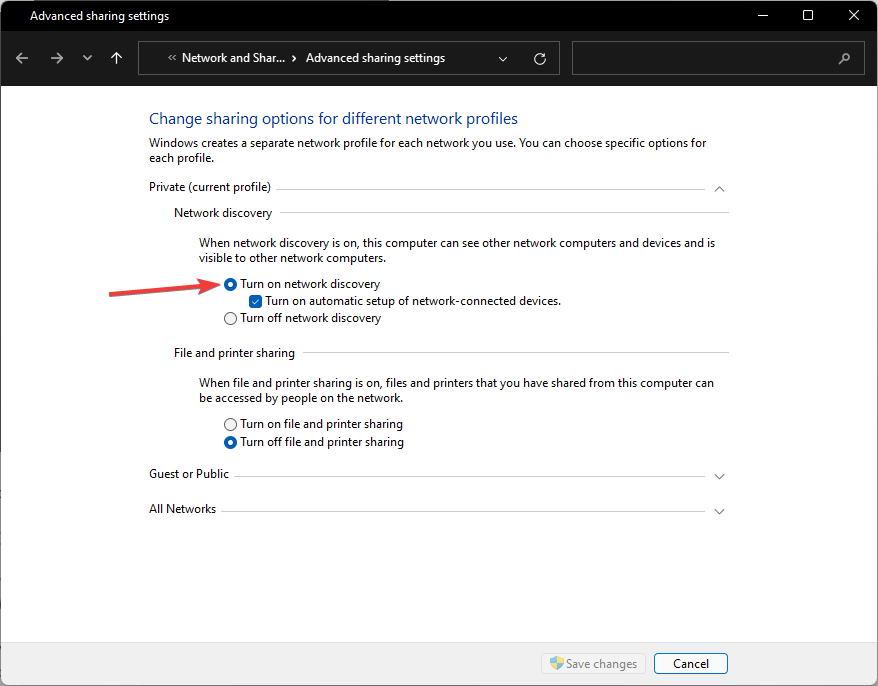
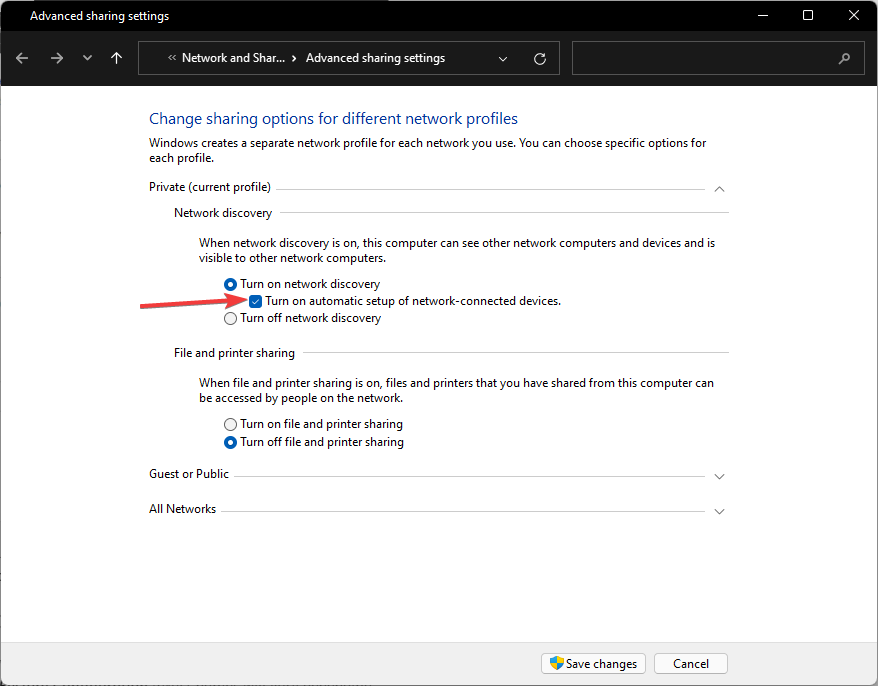
- Activate the Turn on automatic setup of network connected devices box.
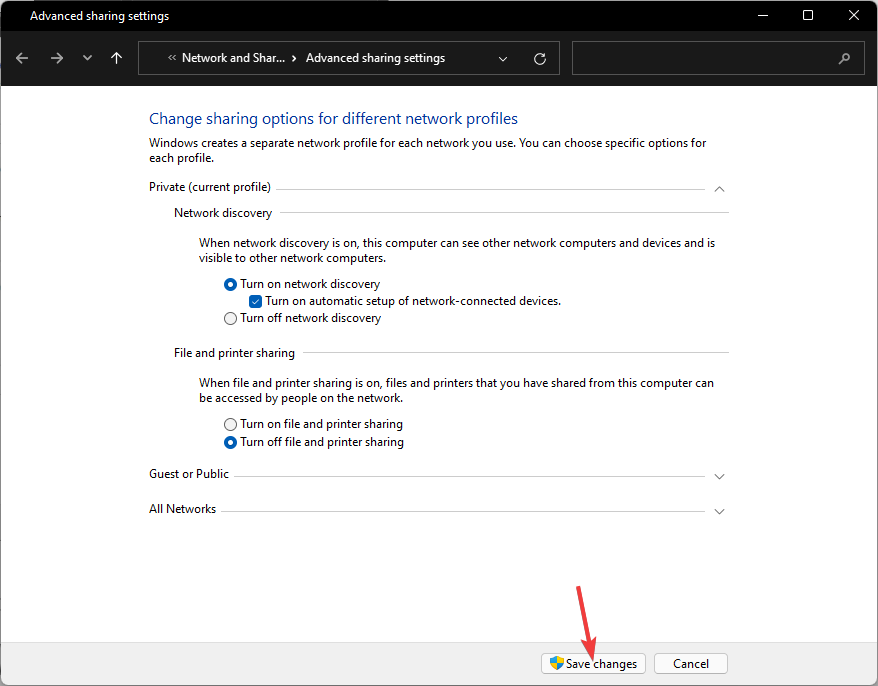
- Click Save changes.
5. Upload a text file to your router’s configuration
- Navigate to your router’s setup page by using a browser.
- Find either an option called Save Configuration, or Restore Configuration (exact names will vary depending on the router).
- Back up the current configuration and save the file when a window appears.
- Create an extra copy of the configuration file downloaded to have it as backup.
- Open the download file.
- Find the ”last bind” entry inside the file.
- Under the above-mentioned entry, type in “bind application=CONE(UDP) port=5555-5555” (replacing the port number with the ones used by your game).
- Save the file, and upload it to your router’s settings page by finding the respective option.
- Click the Restore configuration option or similar name (exact name will vary depending on the router).
- Restart the router to apply the new configuration.
Can I change NAT types with other well-known VPNs?
1. ExpressVPN
With ExpressVPN NAT type can be changed as you can use it for an Open or Moderate NAT Type connection. It will allow you to join and host games online at will.
You can follow these steps to set it up accordingly:
- Download ExpressVPN on your PC.
- Run the installer and follow the on-screen instructions.
- Press the Win + X key combination, and choose Settings.
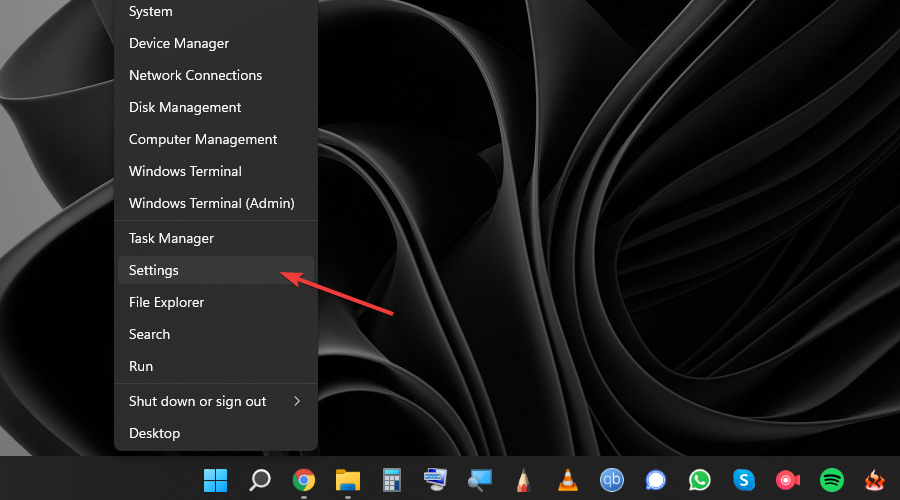
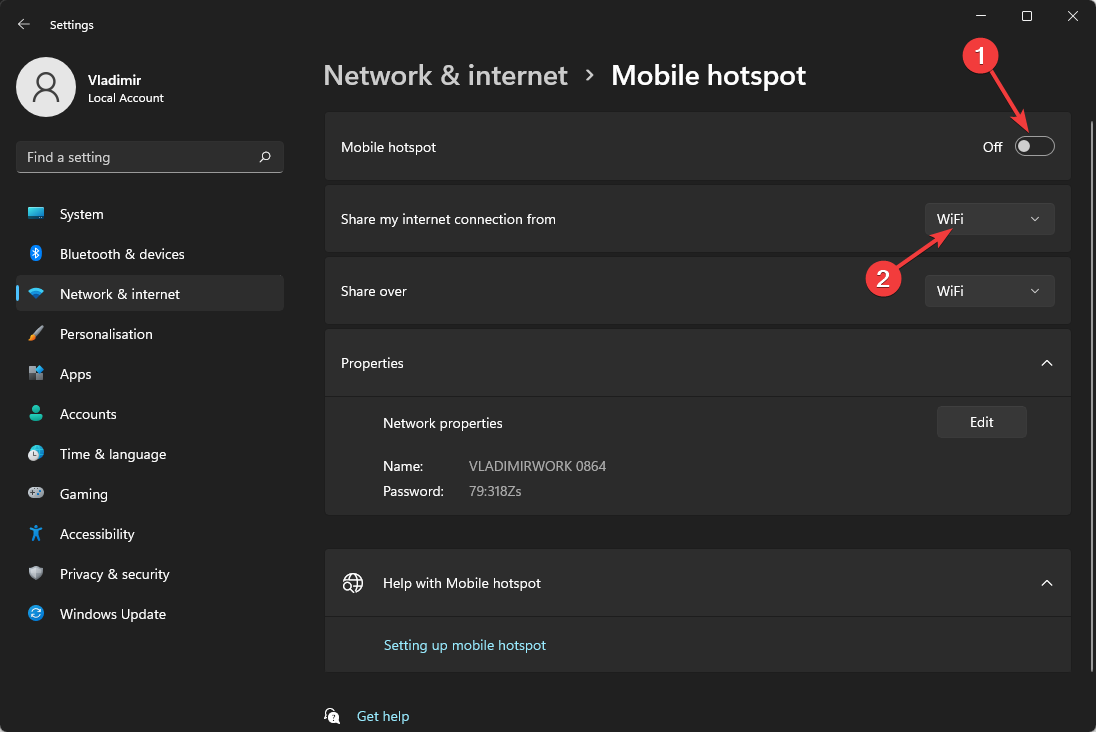
- Click on Network & Internet, and choose Mobile Hotspot.
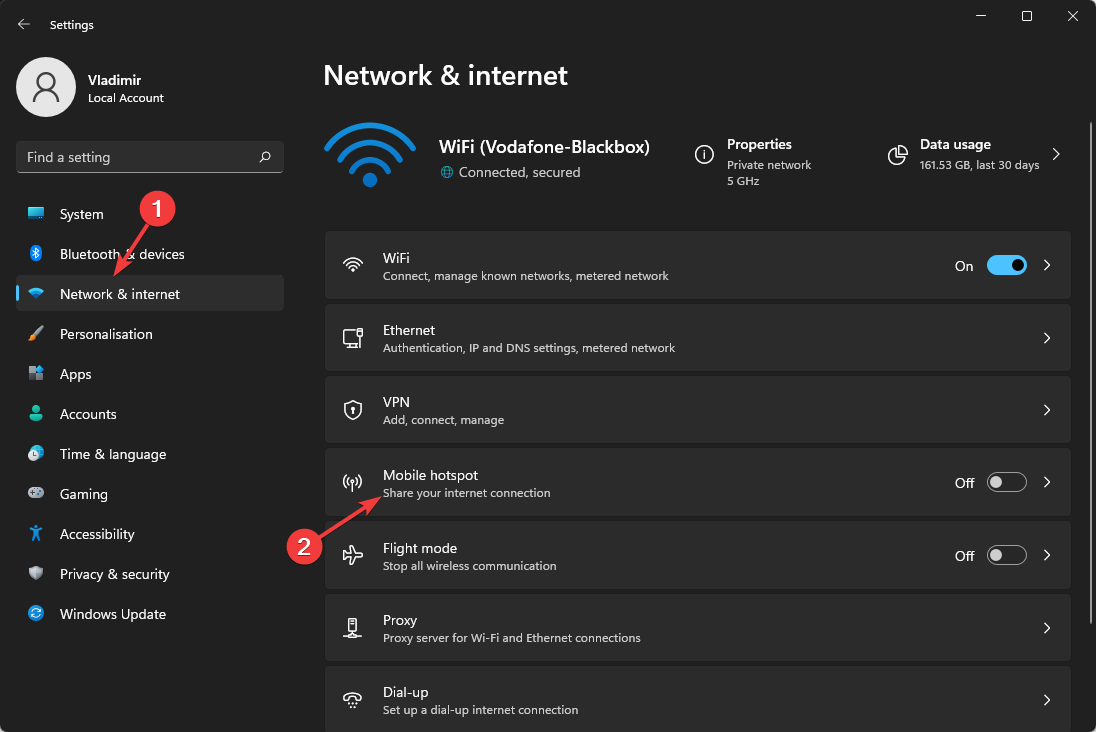
- Enable the Mobile Hotspot option and choose to share your internet connection from Wi-Fi.
- Click on Network & Internet again, and choose Advanced network settings.
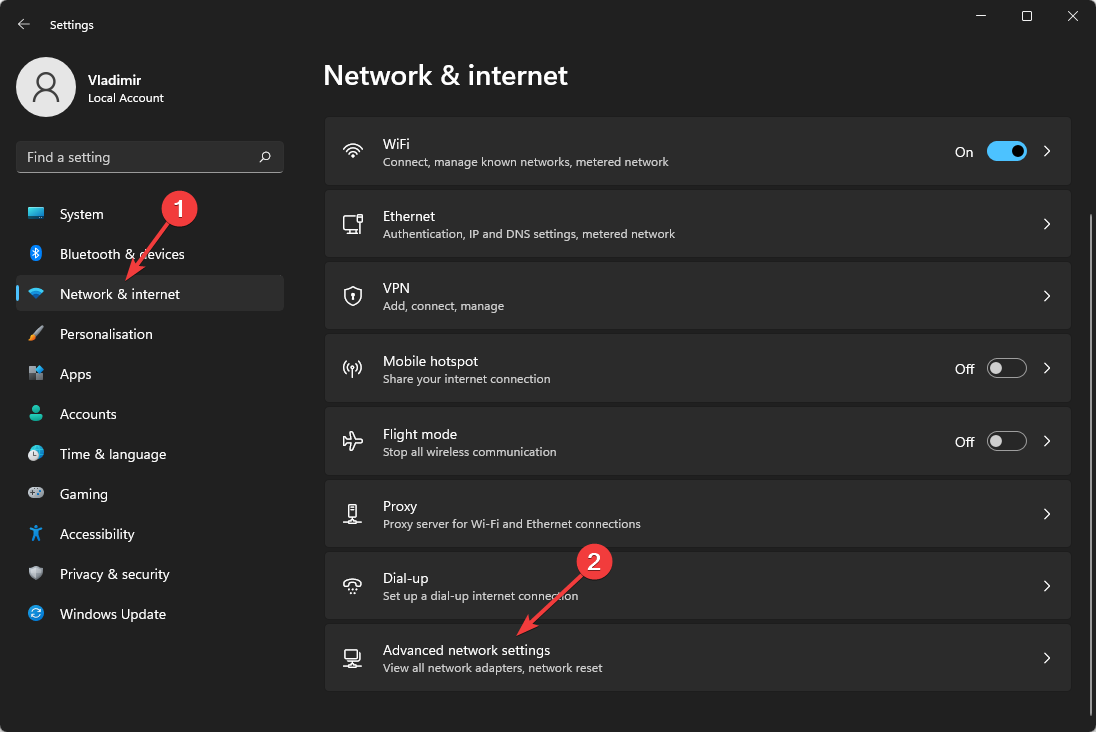
- Find your VPN service in the list, right-click it, and choose Settings.
- Click on the Sharing tab, and choose the Allow other network users to connect through this computer’s internet connection option.
- Select the Home networking connection drop-down, and choose the hotspot created before.
- Run ExpressVPN on your PC and choose a server location.
- Using your gaming device, connect to the hotspot to have a Moderate NAT Type connection.
As you can see, there are a few steps that need to be covered before being able to use ExpressVPN with a Moderate NAT Type connection.
2. NordVPN

NordVPN does allow the usage of an Open or Moderate NAT Type, and in order to do so successfully, you will need to follow the steps described in the methods above to enable this NAT Type on your router’s settings page.
Then, after successfully completing the steps mentioned above, simply run NordVPN, and connect to a server of your choosing.
3. ProtonVPN
Unfortunately, the default NAT type for any connection through ProtonVPN will have a Strict NAT (Type D) configuration.

As you can see from the screenshot taken from the official Twitter account of ProtonVPN, and after researching if the situation has changed since then, the conclusion remains the same: ProtonVPN will not change your NAT type to Open or Moderate.
4. Meraki VPN
It is worth noting that only two types of authentication mechanisms are supported with Meraki VPN.
- User authentication: Active Directory (AD), RADIUS, or Meraki-hosted authentication
- Machine authentication: Preshared keys (eg. shared secret)
If using the Meraki-host authentication option, the VPN account is the user email address entered in the software’s dashboard.
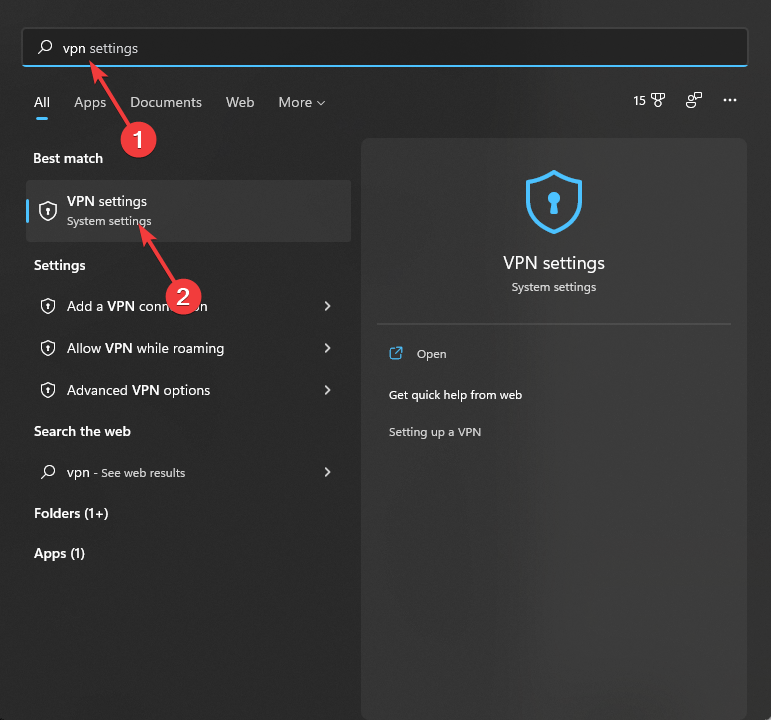
➡ Add a VPN connection
- Click the Search button on the taskbar.
- Type VPN, and choose the VPN Settings option.
- Click the Add VPN button.
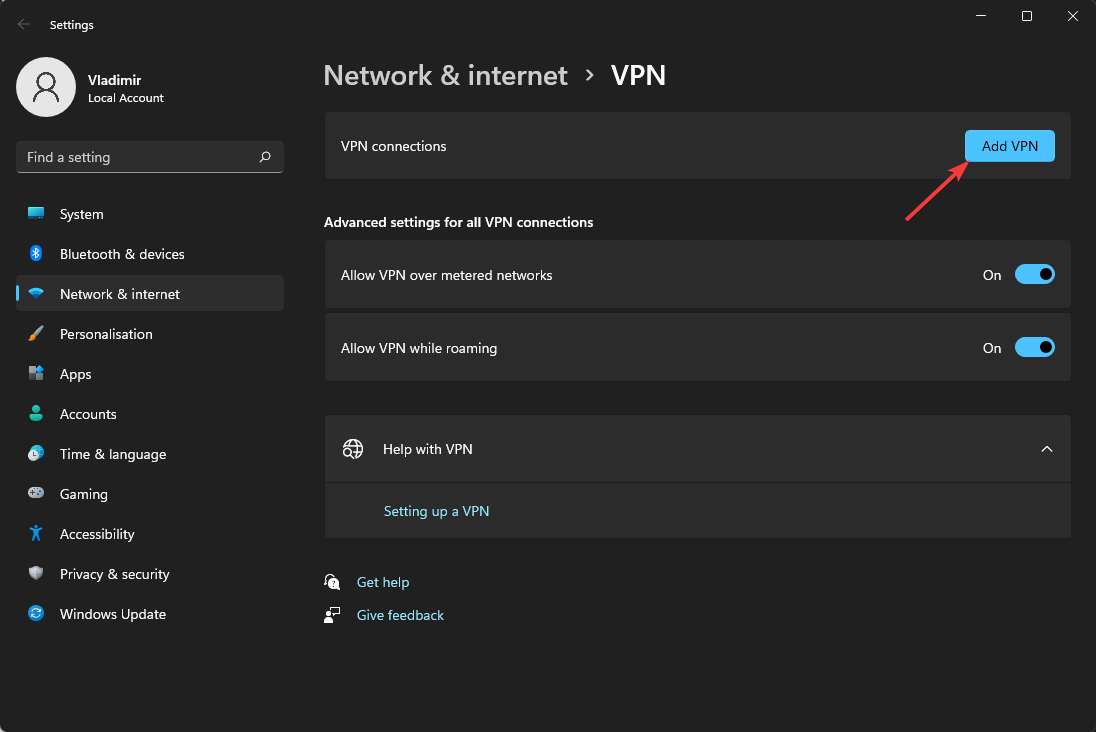
- In the pop-up that appears use the following information, and press Save.
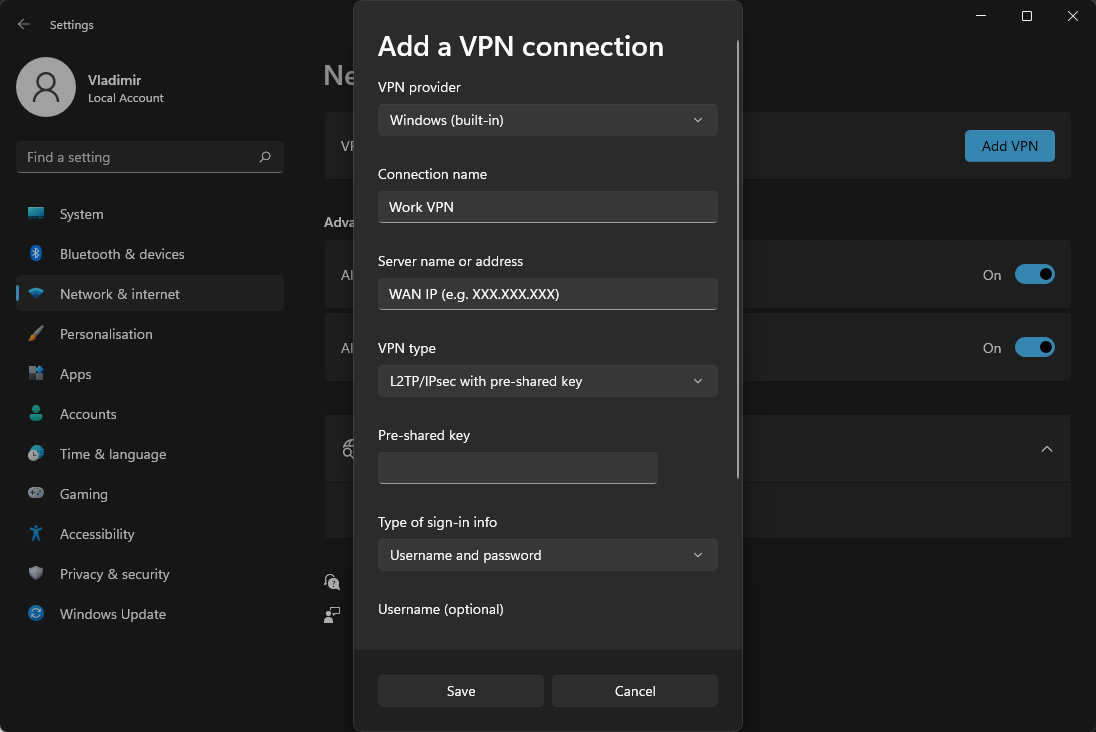
- VPN provider: Set to Windows (built-in)
- Connection name: This can be anything you want to name this connection, for example, “Work VPN”
- Server name or address: Enter the hostname (e.g. .com) or the active WAN IP (e.g. XXX.XXX.XXX). Hostname is encouraged instead of active WAN IP because it is more reliable in cases of WAN failover; admin can find them in the dashboard under Security appliance > Monitor > Appliance status
- VPN type: Select L2TP/IPsec with preshared key
- User name and Password: optional
➡ Set up Windows
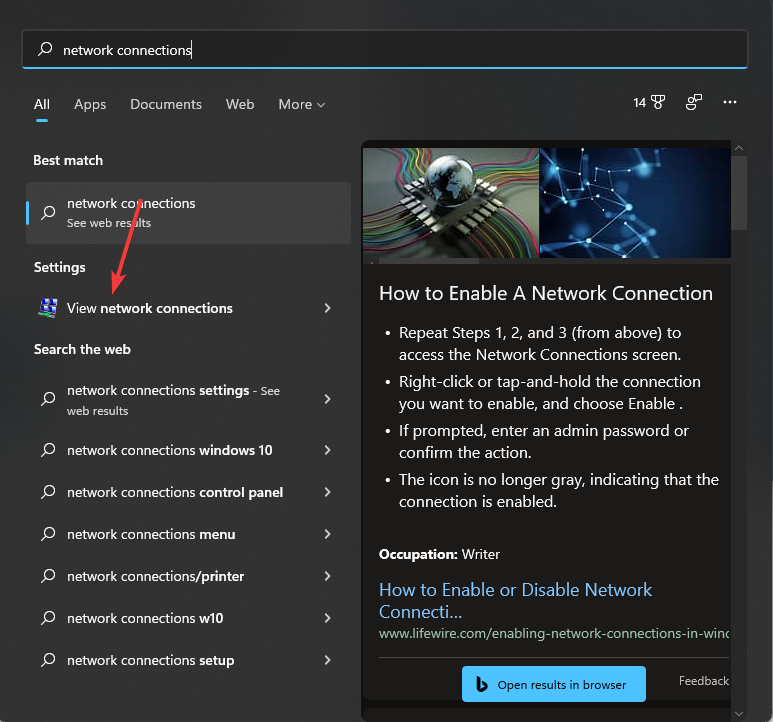
- Click the Search button and type network connections.
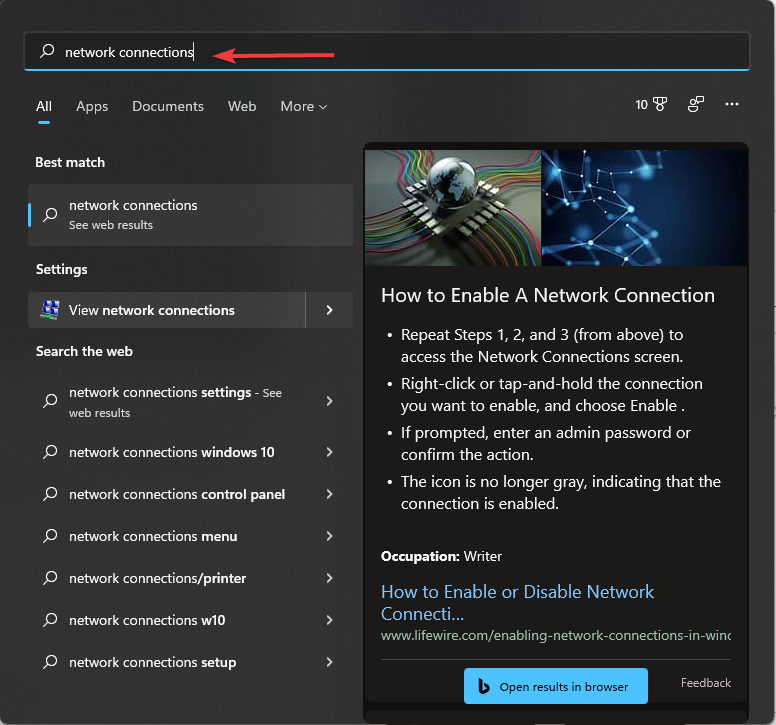
- Choose View network connections.
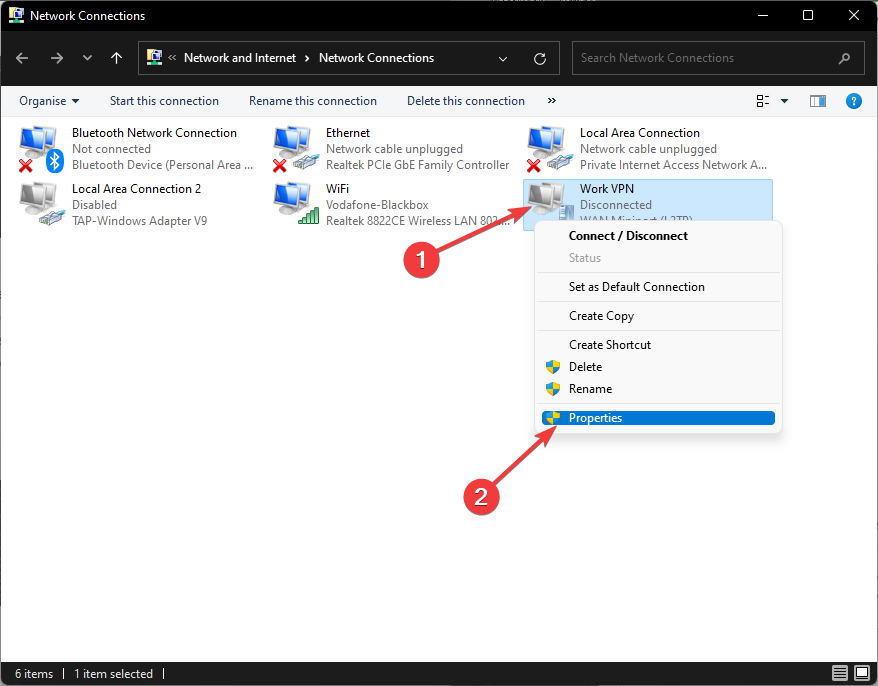
- Right-click the VPN connection you created previously, and choose Properties.
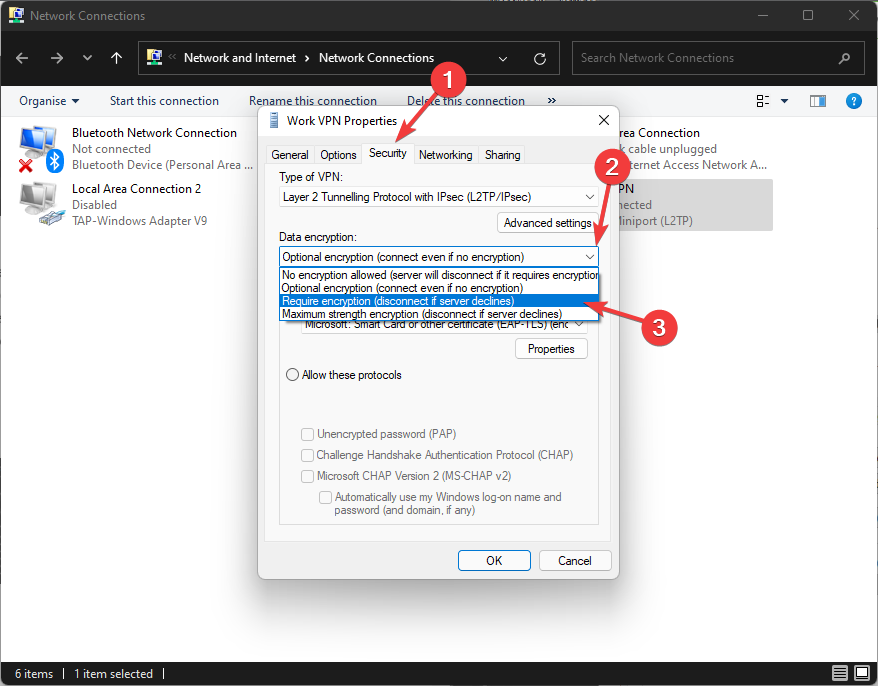
- In the Security tab, under Data encryption choose Require encryption (disconnect if sever declines).
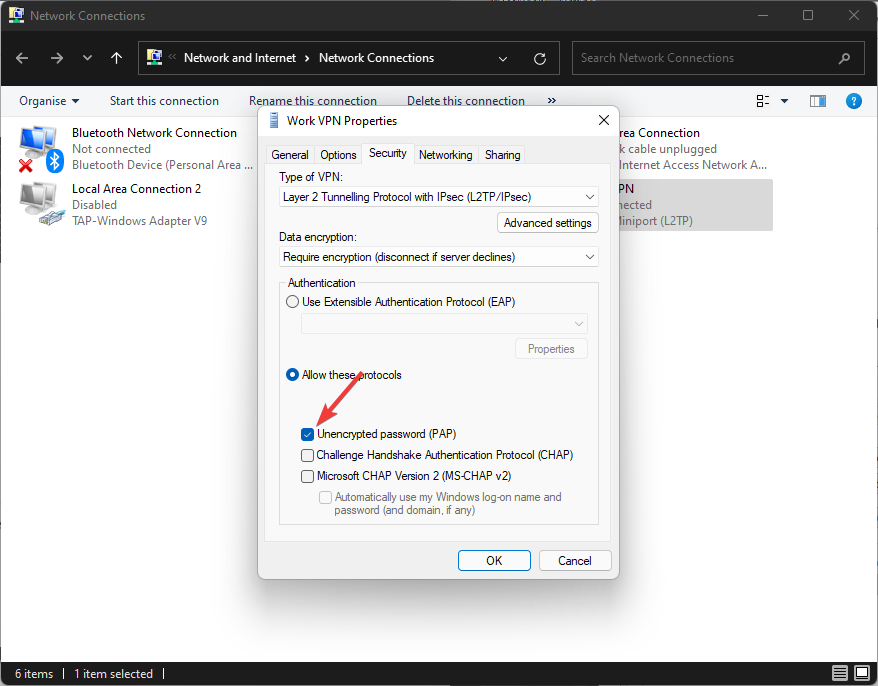
- Tick the Allow these protocols option.
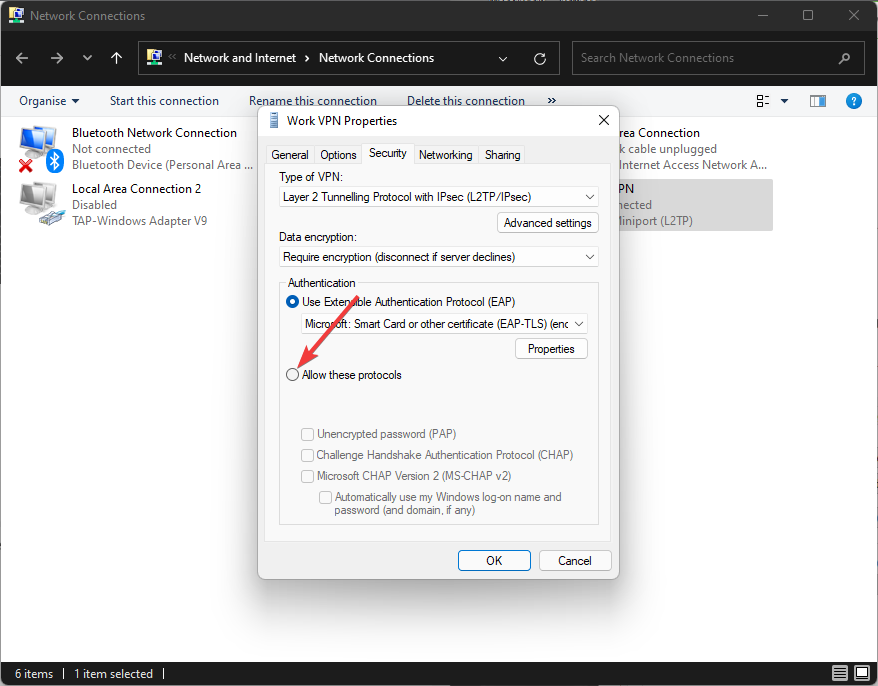
- Only check the Unencrypted password (PAP) option, and deselect any others.
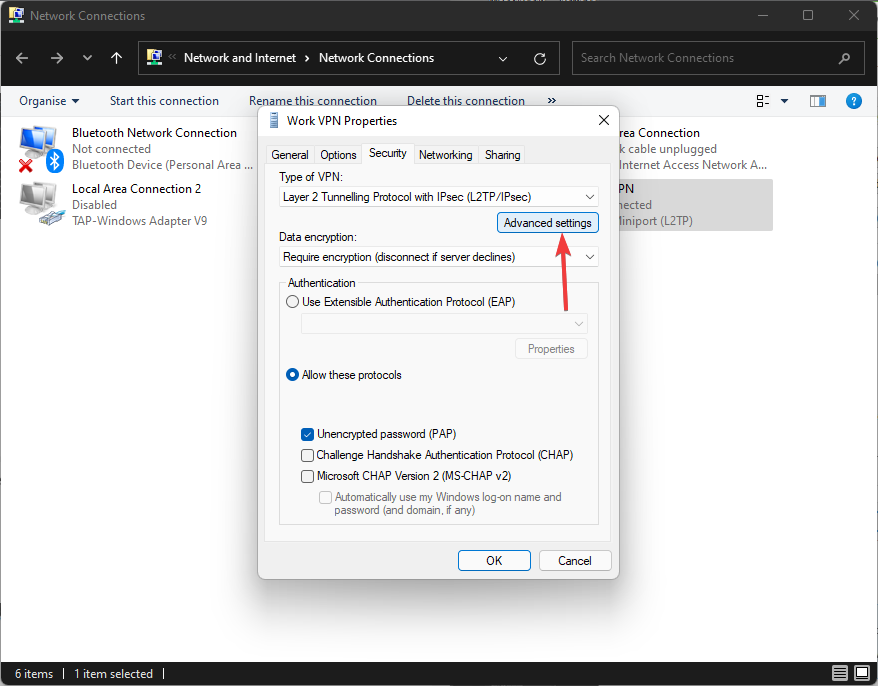
- Click the Advanced settings button.
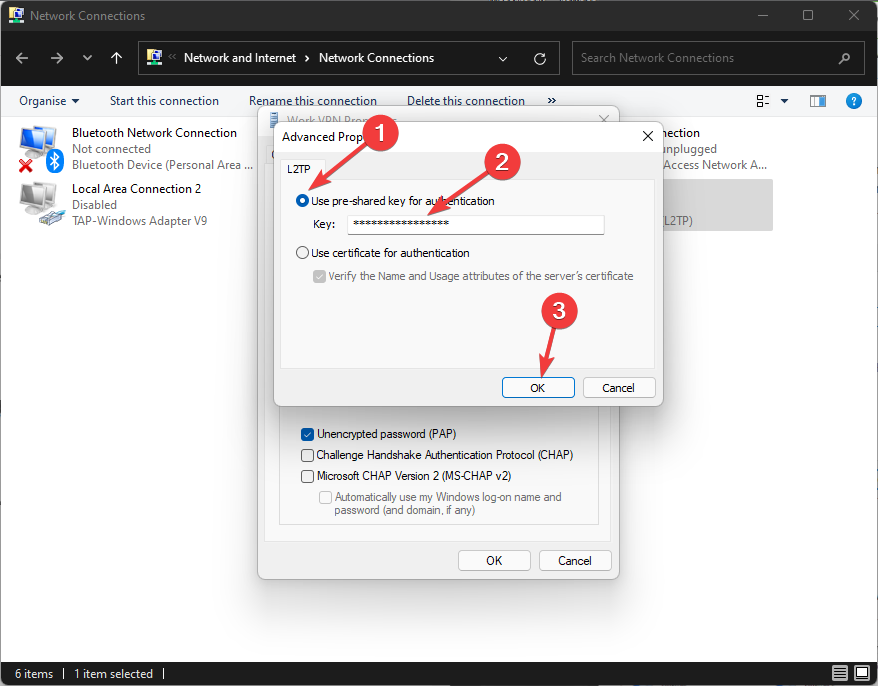
- Choose the Use preshared key for authentication option, and type in the key created by the admin, and click OK.
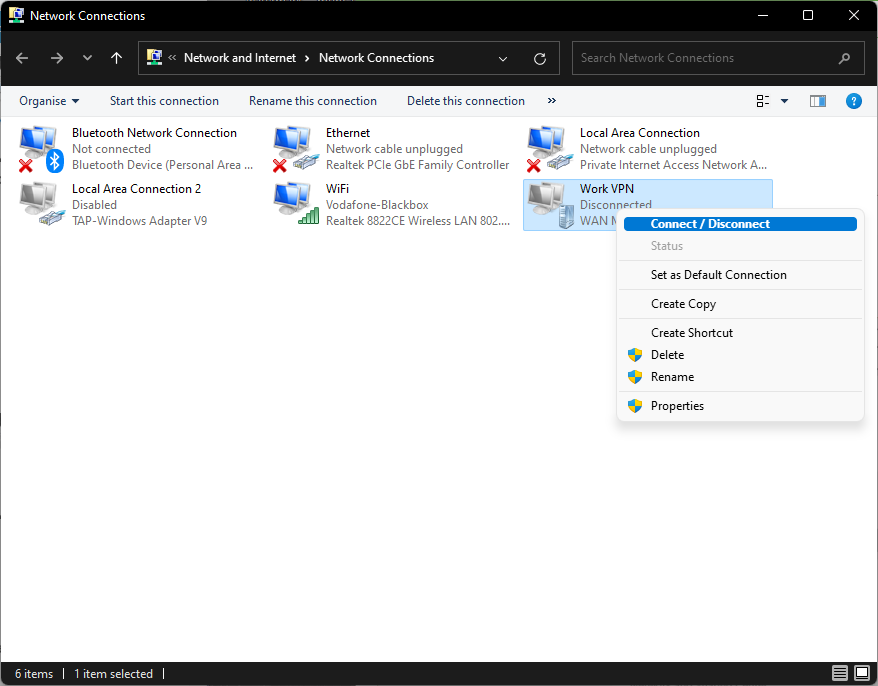
- Inside the Nework connections window, right-click the VPN connection and choose Connect/Disconnect.
Is changing the NAT type safe?
Yes, changing your NAT type is safe, and will only affect your system’s capability to connect to other players in lobbies.
What happens if your NAT type is strict?
In case your NAT type is strict, then the connecting device, no matter if it’s a PC, Xbox, mobile phone, or PS4, will not be able to communicate effectively with the router or routers, thus causing system instability, games closing, and even browsing sessions being cut short.
When it comes to gaming specifically, using a NAT strict type will stop you from being able to host any multiplayer lobbies, get into contact with your fellow players, or even have video conferences.
As you can imagine, this can be extremely infuriating for some people, especially if they are in this field professionally.
How to change the NAT type on a mobile hotspot?
Even though changing the NAT type on a mobile hotspot works the same as in the steps presented above, there are a few elements that can make a big difference, and we will be covering them in this part.
The methods presented above will ensure that you will be able to change the NAT type, while the following elements will ensure that the connection is optimal:
➡ Select the best mobile carrier
As we all know, not all mobile carriers offer the same service quality, and this element is heavily influenced by both your location and the effectiveness of the service itself.
Before going for a mobile carrier, make sure to research the company online and find information about signal quality coverage for the area that you live in.
Some companies will allow you to get a full signal in one area, while in others you will maybe get only half of the signal strength, even though the same package is paid for.
Choosing the right mobile carrier will save you a lot of hassle in the future, while also preventing you from experiencing issues with your connection at the present time.
➡ Ensure the appropriate router for your device is used
Another important element when setting up your mobile hotspot is the quality of signal which can be produced by the respective router, and its compatibility with the device that you use predominantly.
Users have reported that sometimes, even though the signal coverage of the router is very good, the lack of compatibility with their mobile phone is causing interruptions in the connections, and even disconnecting entirely at random times.
Beyond that, you also need to consider the capability of the router itself, coverage area, signal strength, and even its location in your home.
➡ Choose the 5Ghz option
Because routers and modems can operate on two main frequencies, choosing the right one for your needs and device is very important.
Enabling the 5GHz connection will of course be faster than the 2.4 GHz one as long as your device is capable of this feature.
The 5Ghz bandwidth, besides being more capable of transferring data at greater speeds, is also less congested than in the case of the alternative.
➡ Opt for the best plan
A thoughtful decision when it comes to choosing the right plan for your needs is another aspect that will have a tremendous impact on both the quality of your connection and its stability, no matter what device you use it on.
Make sure to study the local market in depth before choosing a plan that sounds good, as signing a contract with a company will most likely be a lengthy one.
That being said, you will need to ensure that the plan you choose is affordable enough for your financial situation, while also considering the connection and data transfer speeds it offers.
Using a VPN can help bypass strict NAT
All things considered, if your strict NAT gets in your way of having fun, a VPN can certainly help. VPNs such as PIA bypass NAT, so you’ll enjoy a bit more freedom behind a moderate/Type B NAT instead.
However, note that using a VPN will almost always switch to Type B NAT, regardless of your default type.
So, if you’re not comfortable switching from Open to Moderate, a VPN might not exactly be what you’re looking for.
Feel free to share your experience with us by using the comment section found below this guide.
Read our disclosure page to find out how can you help VPNCentral sustain the editorial team Read more

Improve this guide

User forum
0 messages