How To Set Up OpenVPN With DigitalOcean [Step-By-Step]

In this tutorial, we show you the steps you can follow to set up your own OpenVPN server in less than fifteen minutes with DigitalOcean.
We’ll explain the main benefits of doing it and guide you through the entire process.

Access content across the globe at the highest speed rate.
70% of our readers choose Private Internet Access
70% of our readers choose ExpressVPN
Browse the web from multiple devices with industry-standard security protocols.

Faster dedicated servers for specific actions (currently at summer discounts)
Keep in mind that we’ve prepared this article with novice users in mind and all the setup steps are adapted to provide the bare minimum for setting up a working OpenVPN server.
If you have little to no experience in Linux system administration, we encourage you to seek professional help with further server security hardening or to use commercially available VPN solutions.
But before that, we bring you up to speed on what is OpenVPN and why the protocol is the best.
Why is OpenVPN highly recommended?
OpenVPN is a software application that was written by James Yonan and published under GNU General Public License (GPL). The open software uses Virtual Private Network (VPN) techniques to secure point-to-point connections in routed configurations.
There are several main benefits to using OpenVPN:
- Simplicity – As you will appreciate later in this guide, OpenVPN is simple to install and configure. In most cases and especially when using DigitalOcean, OpenVPN can be deployed and configured in less than 15 minutes. Another great feature is that you can easily store OpenVPN in a single config/certificate file.
- Compatibility – OpenVPN is available on every platform and is compatible with a broad range of devices including Servers, PCs, Macs, Android, iPhones, and Routers to protect your private network traffic as it transits the internet.
- Security – OpenVPN uses a highly robust OpenSSL encryption library extensively with up to 1024-bit encryption as well as the TLSv1 protocol and contains many control and security features. It protects your private traffic and can navigate firewalls. You can configure any port for service.
- Reliability – OpenVPN is an open-source solution as such; it enjoys the backing of a massive open-source community. It has a flexible framework that allows for fast and simple repairs.
OpenVPN is open source, and therefore the source code is available and thus free for modification.
After this brief overview of OpenVPN, we come to the main part of this guide:
How to set up an OpenVPN server with DigitalOcean
First, let’s see the entire process at a glance:
- Set up a new droplet at DigitalOcean.
- Install the required software.
- Set up the VPN.
- Proceed with Docker and OpenVPN installation.
- Continue with OpenVPN server installation and setup.
And now it’s time we get to the nitty-gritty:
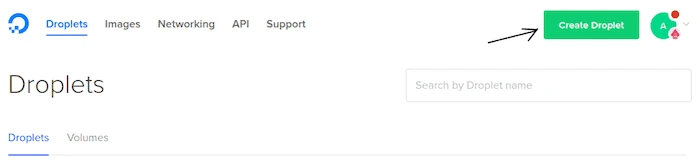
1. Set up a new droplet at DigitalOcean
- Sign up for a DigitalOcean account.
- Log in to the droplet management console and create a new droplet (a server which will run your VPN).
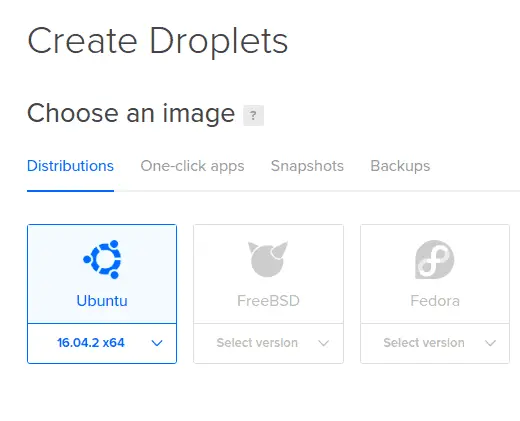
- From the droplet creation page, you can choose which OS it will be running on. We recommend using Ubuntu 16.04 distro:
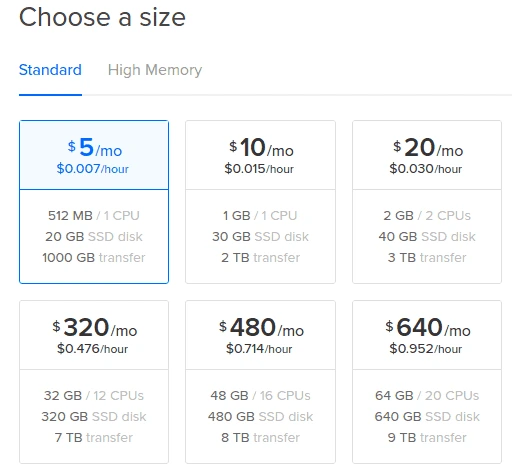
- Next, choose the size of the droplet.
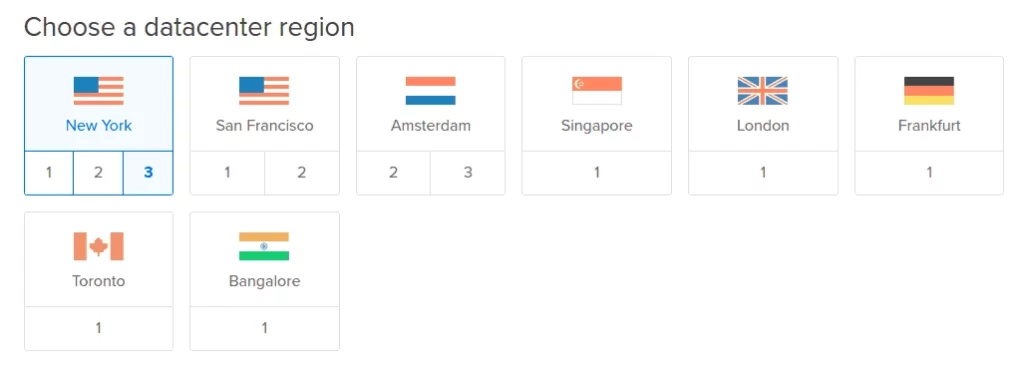
- Then, you can choose the preferred location for your droplet. Please note that the closer the server to you geographically, the faster the connection.
- Next, you can leave all the other fields with no changes and optionally give a name to your droplet.

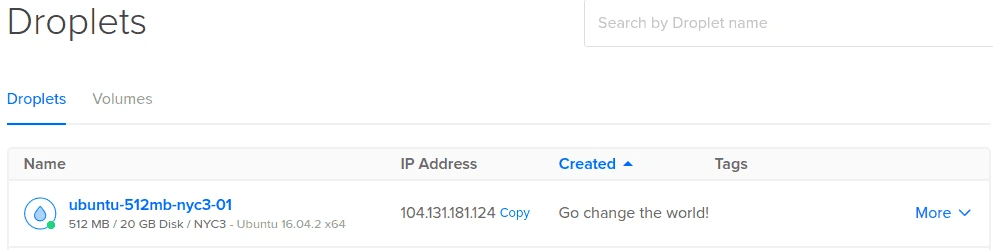
- After all the fields have been filled, just click the Create button and wait a few seconds for server creation. When a server is created you will see it in the list of your droplets:
- You will also get an email with all the droplet connection details in your inbox:
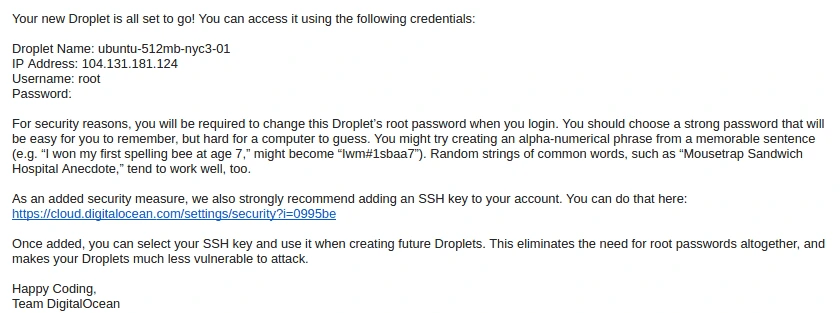
- Make a note of droplet IP address, username, and password. You will need them later.
2. Install the required software
Now let’s install the required software for VPN configuration and usage. You will only need two additional applications for that:
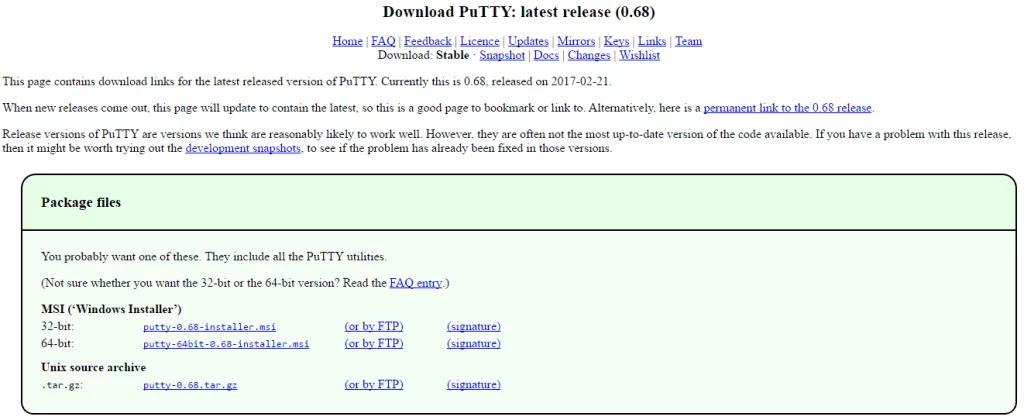
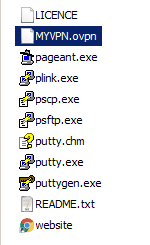
- PuTTY Client – The PuTTY Client is a program that helps you access your newly built server in DigitalOcean
- OpenVPN client – The OpenVPN client application is used for connecting your VPN.
For PuTTY client, you need to choose the MSI (Windows Installer) file, which is suitable for your PC architecture.
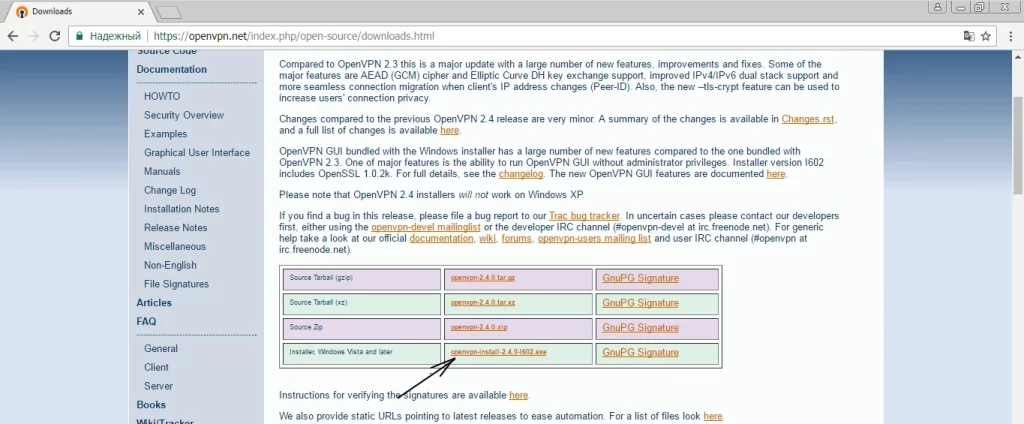
For OpenVPN client, you can simply use Windows installer.
VPN Setup
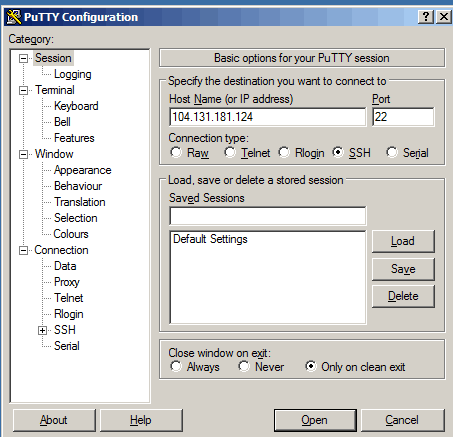
First, let’s connect to the newly created droplet via PuTTY.
- Open the PuTTY program from your Start menu and type in the droplet IP address (that you got in your email) in the Host Name field and click the Open button.
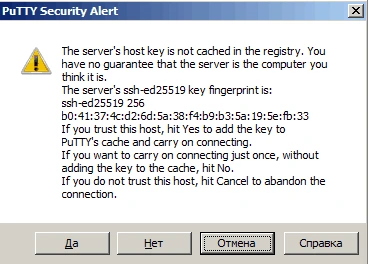
- You will get the Security Alert pop-up during the initial login attempt, just click OK and continue:
- Enter “root” as a username prompt and the server will ask you to input your current root password (you will find it in the email you received after creating the droplet) and reset it to the new value at initial login:
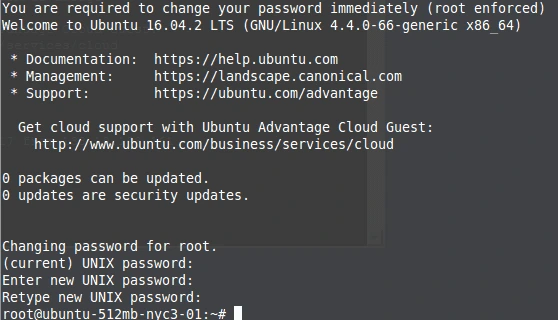
- Type in the current root user password you received in your email and then type in a new password you want to set for the root account twice, to confirm it.
Note that this will be your VPN server, which holds valuable private information about the resources browsed through the VPN.
So, make sure to think of a very strong password to protect your privacy! Make sure the password is at least 8 characters long, one that contains both upper case and lower case alpha-numeric characters, and at least one special symbol.
Proceed with Docker and OpenVPN installation
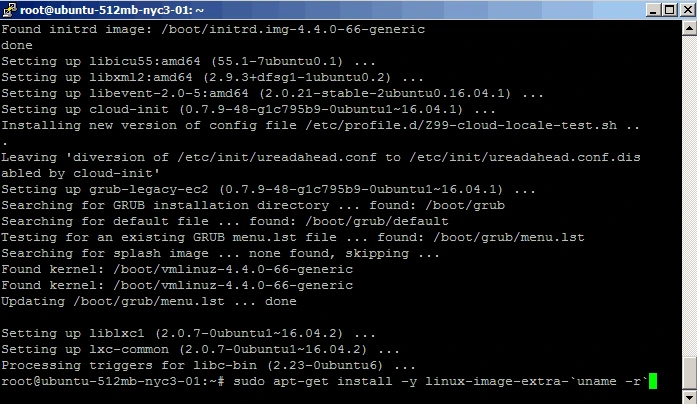
Type in the commands below in the terminal (the right mouse button in PuTTY will paste the contents of your text buffer in the airport) and then hit enter:
- sudo apt-get update; sudo apt-get -y upgrade
- sudo apt-get install -y Linux-image-extra-
uname -r

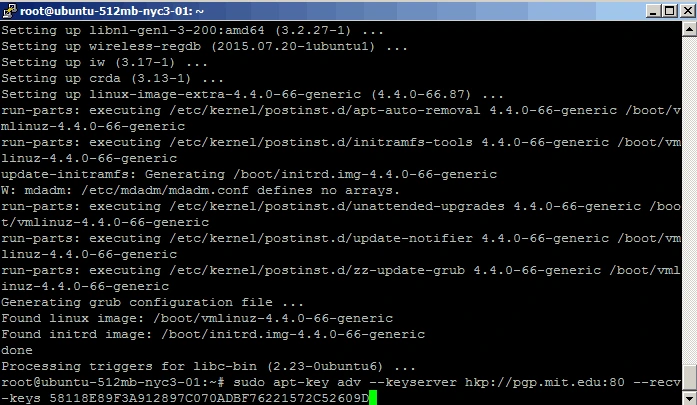
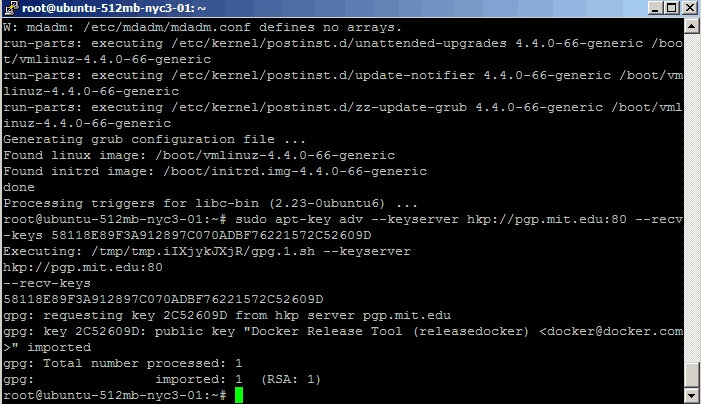
- sudo apt-key adv – -keyserver hkp://pgp.mit.edu:80 – -recv-keys 58118E89F3A912897C070ADBF76221572C52609D
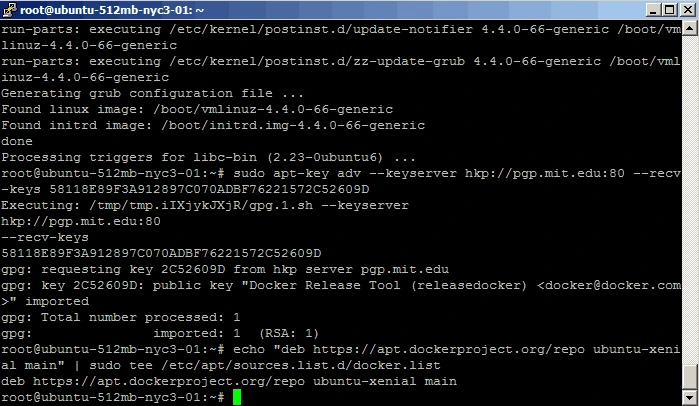
- echo “deb https://apt.dockerproject.org/repo ubuntu-xenial main” | sudo tee /etc/apt/sources.list.d/docker.list
- sudo apt-get update; sudo apt-get install -y docker-engine
The above steps will install Docker on your droplet.
Continue with OpenVPN server installation and setup
We are going to use kylemanna/docker-openvpn docker file, as the most straightforward in setup.
Write the following commands:
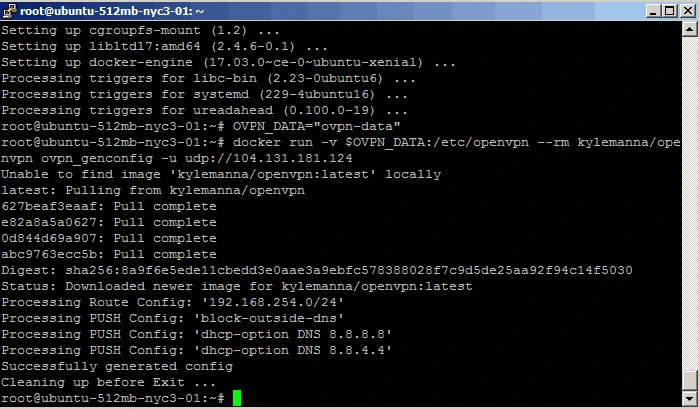
- OVPN_DATA=”ovpn-data”
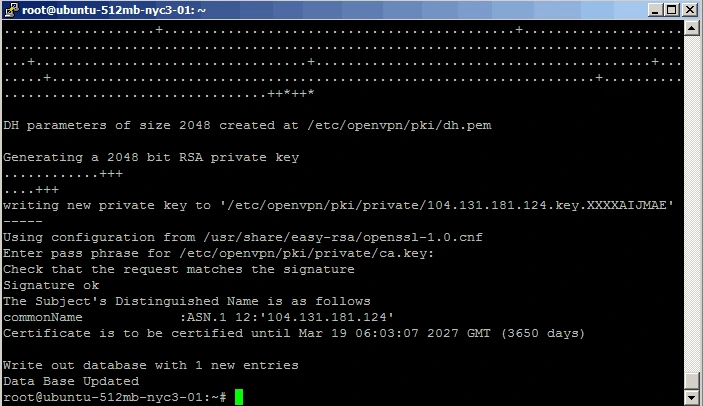
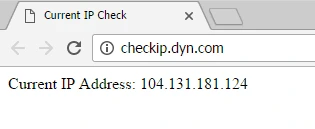
- docker run -v $OVPN_DATA:/etc/openvpn – -rm kylemanna/openvpn ovpn_genconfig -u udp://104.131.181.124
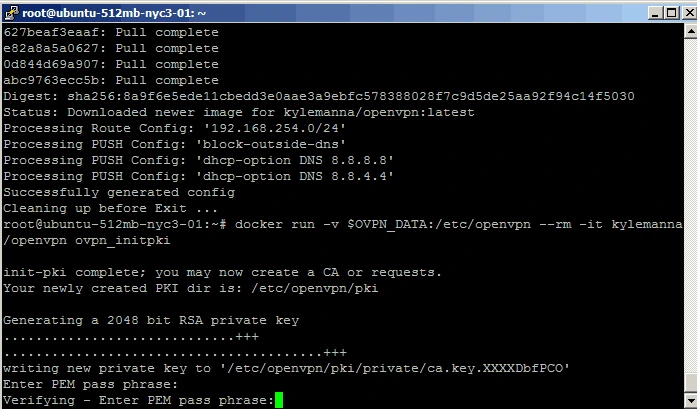
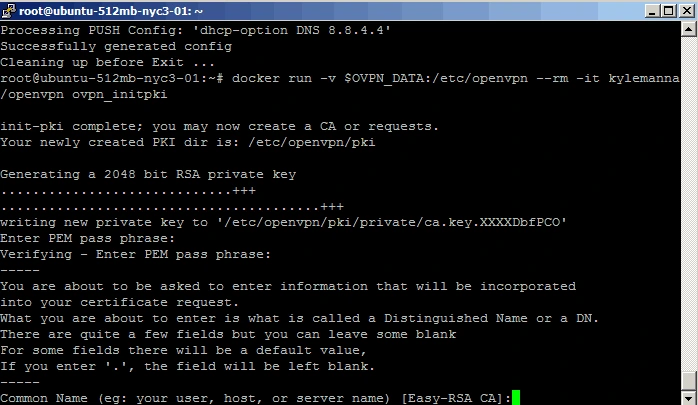
- docker run -v $OVPN_DATA:/etc/openvpn – -rm -it kylemanna/openvpn ovpn_initpki
Be sure to use the IP address of your server which you got in your email in the above command (highlighted in red).
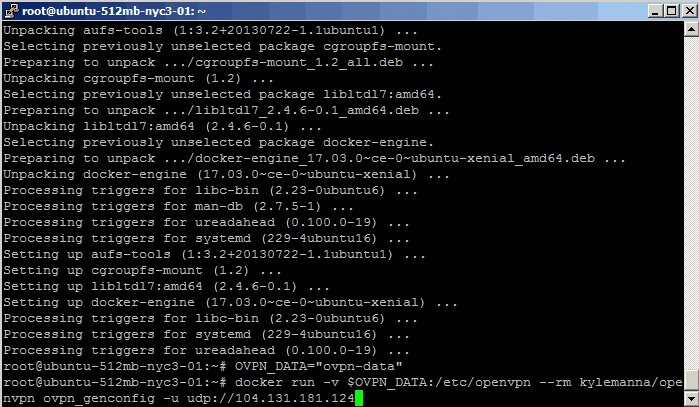
You will get an output that’s similar to the one below, once the first command is completed:
Then the next command will prompt you to set a passphrase for your keystore. Please set any passphrase you like and make a note of it as you will need it later.

That’s because you need to type in the passphrase twice for verification:
Then on the next prompt just hit Enter without providing any input:
Afterward, the server will start generating a private key and this process will take a few minutes, so be patient! Finally, you’ll get a prompt for the keystore passphrase one last time:
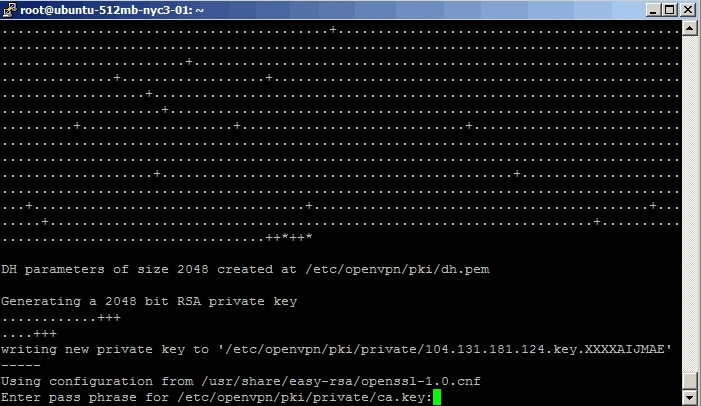
And you will see something like this:
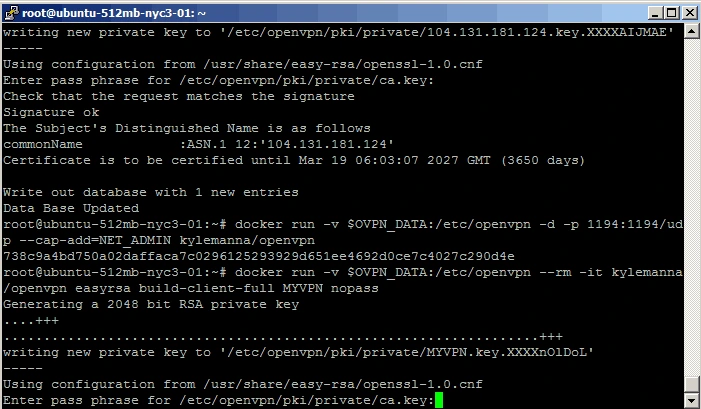
Next, type in the two commands below:
- docker run -v $OVPN_DATA:/etc/openvpn -d -p 1194:1194/udp – -cap-add=NET_ADMIN kylemanna/openvpn
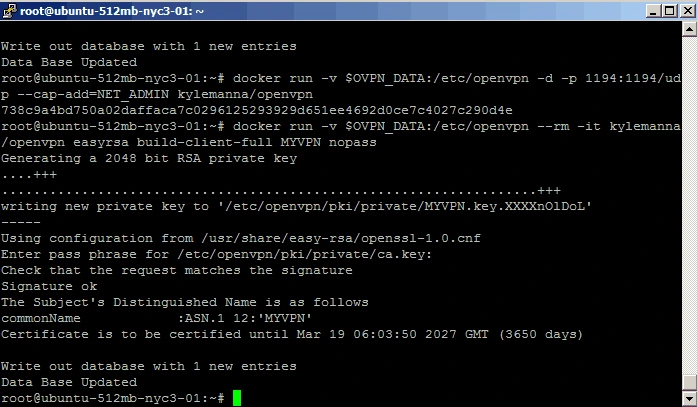
- docker run -v $OVPN_DATA:/etc/openvpn – -rm -it kylemanna/openvpn easyrsa build-client-full MYVPN nopass
And type in your passphrase when prompted:
You should get output similar to this:
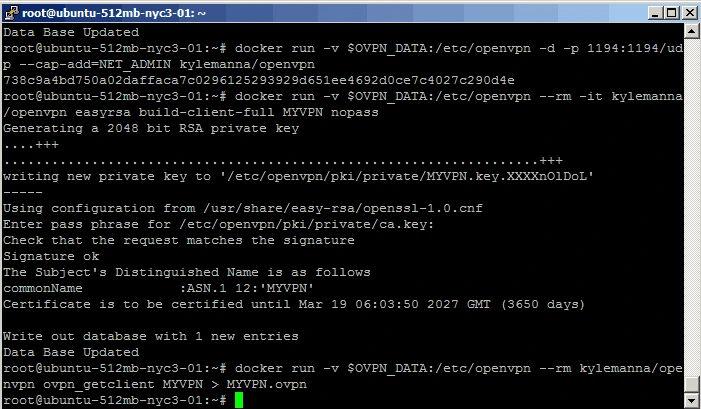
Now let’s generate a configuration file for our client to use:
- docker run -v $OVPN_DATA:/etc/openvpn – -rm kylemanna/openvpn ovpn_getclient MYVPN > MYVPN.ovpn
Alright! All the setup is done and you are now a few steps away from using your VPN.
Next, you will need to get the config file from the server.
To do that, you will use the PSFTP program, which was installed along with PuTTY. To do that start PSFTP from your Start menu and type in the below commands:
- open 104.131.181.124 root
- <password>
- get MYVPN.ovpn
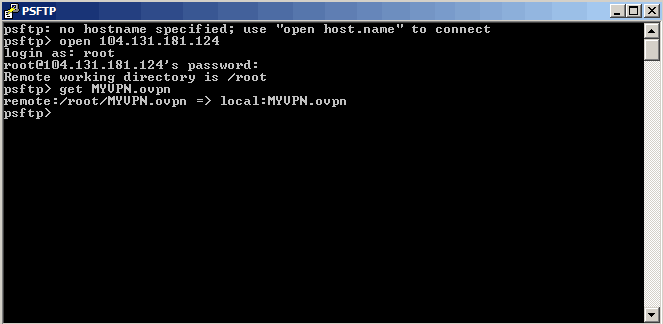
NOTE: Use your own droplet server IP from the email you got and root server password you set upon initial login in puTTY.
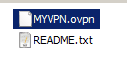
Now you have the file on your PC in the C:\Program Files\PuTTY directory:
All you need to do now is to copy it over to OpenVPN config directory in C:\Program Files\OpenVPN\config:
That’s it! You are now ready to use your VPN server. Just start the OpenVPN GUI client and it will show up in your system tray area:
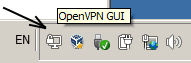
Right-click on it and choose Connect and you will get a pop up like this which will disappear after the connection is successfull:

Congratulations! You now have your VPN connected!
To verify that you can go to What Is My IP webpage and compare the IP address shown there with the IP address of your droplet. If you did everything correctly, they should match.
How to have OpenVPN without going through manual installation
Today, there are plenty of VPNs that support OpenVPN and are a valid alternative to manual installation on DigitalOcean.
Moreover, we actually recommend you consider certain important facts before making your decision.
For instance, when you subscribe to a VPN that supports OpenVPN, you don’t need to go through the installation we just explained. The only thing you need to do is to install the VPN software.
Cost-wise, we can affirm that at the end of the day, a good VPN service is cheaper than having an OpenVPN server with DigitalOcean.
For instance, ExpressVPN is a leader in the market and you can subscribe to a plan starting from $6.67 per month.
DigitalOcean will cost you $5.00 a month which is slightly cheaper. But it will never offer you the flexibility of a VPN connection.
The possibility to connect to so many servers around the world will open to you the complete potential of the Web.
At the same time, your traffic will be always protected by the OpenVPN protocol and the best encryption algorithm available today.
Besides that, depending on your task, you can even choose between several VPN protocols.
Through a VPN you can even geo-spoof your IP address and pretend to be connecting from wherever you like around the world. Therefore a VPN consent you to access services like BBC, Netflix, and Spotify from wherever you are around the world.
These are just a tiny part of the benefits you can enjoy while using a VPN compared to DigitalOcean.
We are pretty confident you will agree that a premium VPN is the best solution to implement OpenVPN on your device.
Read our disclosure page to find out how can you help VPNCentral sustain the editorial team Read more

Improve this guide

User forum
0 messages