Radmin VPN Not Connecting? 5 Ways To Fix It!
Now more downtime running remote tasks when using Radmin VPN.
5 min. read
Updated on
Read our disclosure page to find out how can you help VPNCentral sustain the editorial team Read more

Is your Radmin VPN not connecting to your remote computer? Let me help!
This problem is a common problem that most of its users face. Having been there before, I know how annoying it can get.

Access content across the globe at the highest speed rate.
70% of our readers choose Private Internet Access
70% of our readers choose ExpressVPN

Browse the web from multiple devices with industry-standard security protocols.

Faster dedicated servers for specific actions (currently at summer discounts)
The good news is there are different workarounds to resolve this problem. Moreover, they require zero technical know-how, making them easy to implement.
But, let’s start with the basics.
Why does Radmin VPN fail to connect?
Radmin VPN may fail to connect for various reasons. These are mostly related to network glitches, including complete software malfunction.
Here’s the breakdown:
- Poor connectivity: A stable internet connection is essential for Radmin VPN to work. Even a slight inconsistency can cause the application to fail.
- Antivirus and firewall issues: Radmin VPN usually establishes a remote connection to pair with your other devices. Your antivirus/firewall can sometimes restrict such activity by flagging it as suspicious.
- Software malfunction: An outdated version of Radmin VPN can cause problems over time. The developer constantly upgrades the software, requiring regular updates.
Fortunately, all the above issues are easy to resolve.
Radmin VPN not connecting – Fixed
Here are different ways to get your Radmin VPN working. I’ll guide you through each step with easy-to-follow instructions.
1. Whitelist Radmin VPN
As said before, your antivirus/firewall can block Radmin VPN over suspicious activity. This is usually a false flag and not an error on your end.
To resolve this, you have to whitelist the app on your security software. Doing so allows it to trust Radmin VPN’s outgoing and incoming connections.
Here’s how it’s done:
- Open your antivirus/firewall software.
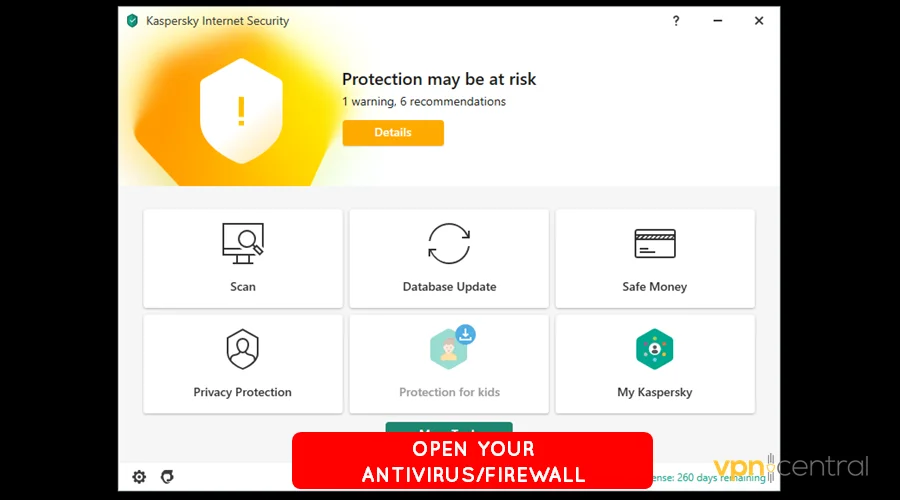
- Navigate your way to the exclusion/whitelisting settings.
- Search for Radmin VPN and add it to the trusted list.
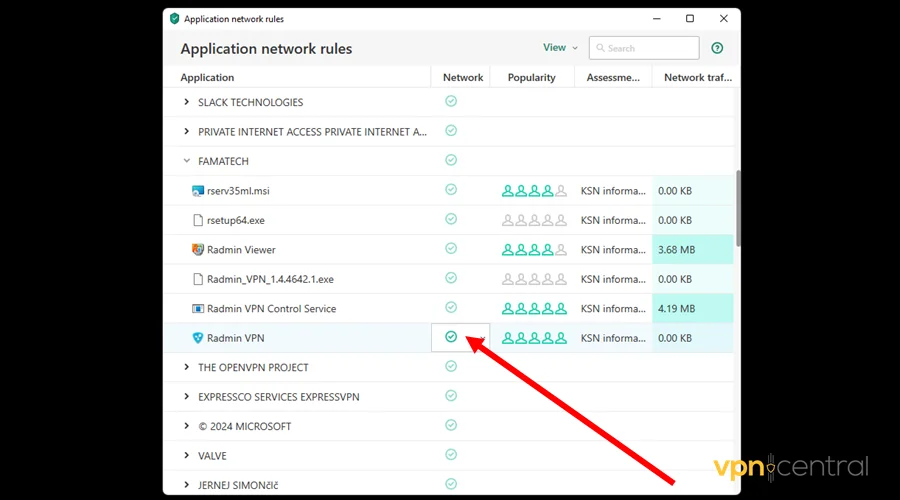
- Save, relaunch Radmin VPN, and reconnect.
The steps above may defer, depending on your antivirus/firewall. If so, refer to your vendor’s documentation for details.
2. Reboot your router
A faulty internet connection can also be the culprit causing trouble. You can use various tools, like Speedtest and Fast, to double-check this.
Speeds below 3Mbps should indicate an underlying problem with your service. As you’re aware, remote desktop connections require fast connectivity to work flawlessly.
Rebooting your router should help fix this problem. Here’s what to do:
- Locate the power button on your router.
- Press it for about three seconds to shut down the device.
- Disconnect it from the power source for about five minutes.
- Plug the router back and power it on.
- Run Radmin VPN and connect.
If the situation persists, consider changing your internet service providers. With better speeds, you’ll enjoy a butter-smooth experience.
Or else…
3. Use a proxy server
A proxy server is a gateway that sits between your computer and the internet. Think of it as a middleman that handles connection requests on your behalf.
Using one can help resolve issues arising from poor internet connectivity. Another advantage of proxies is they’re fast and require no additional software.
Here’s how to use one:https://vpncentral.com/does-proxy-server-increase-internet-speed/
- Sign up for any Smartproxy service.
- Access your account and generate your proxy details.
- Run Radmin VPN and open Settings.
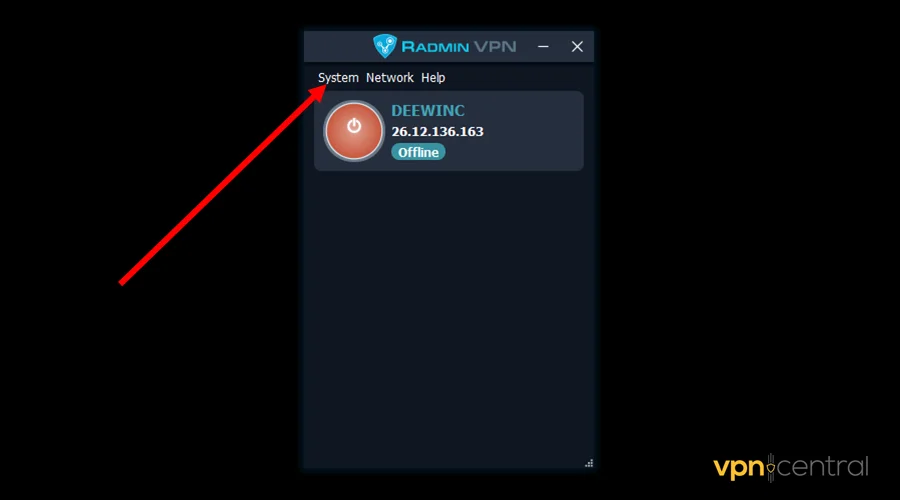
- Switch to the Advanced Tab.
- Enable Proxy Server and enter your proxy’s credentials.
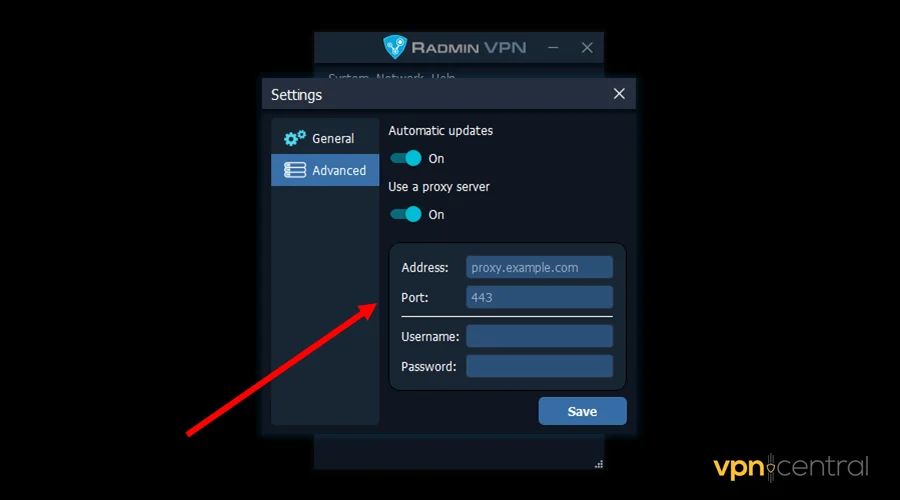
- Save and reconnect Radmin VPN.
Ensure that you use Smartproxy’s HTTPS/SOCKS5 proxies for better security. They encrypt your traffic, providing VPN-like protection.

Smartproxy
Streamline your remote desktop connection via Radmin VPN using Smartproxy’s bulletproof proxy service.4. Use the registry editor
The registry editor can help fix underlying software issues when done with caution. This should reverse incorrect entries, which are causing Radmin VPN to fail.
Unlike other solutions, this one needs some work. So, ensure you follow this guide carefully.
- Press the Start button on your computer and locate Search.
- Type Registry Editor and run the application.
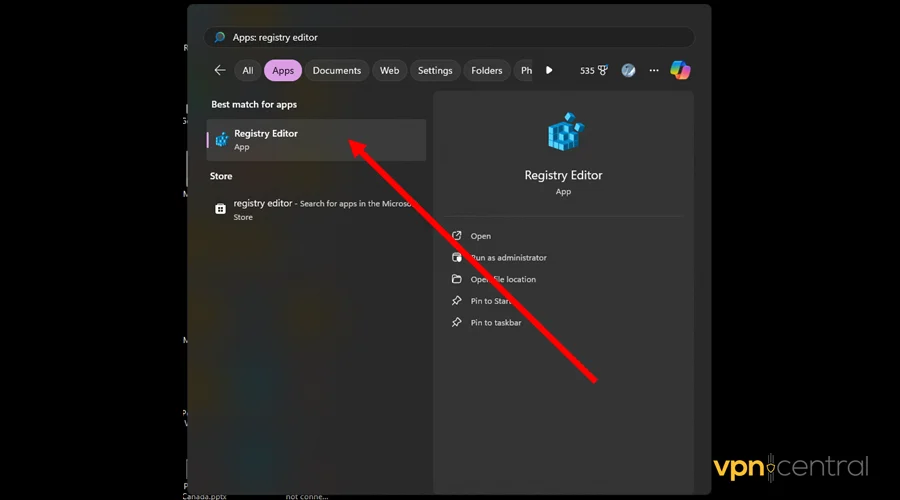
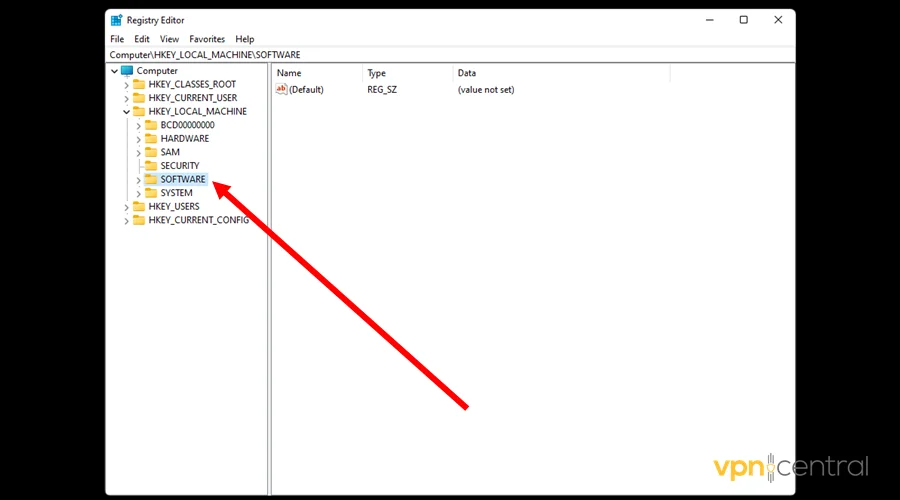
- Select Computer, followed by Local Machine, and choose Software.
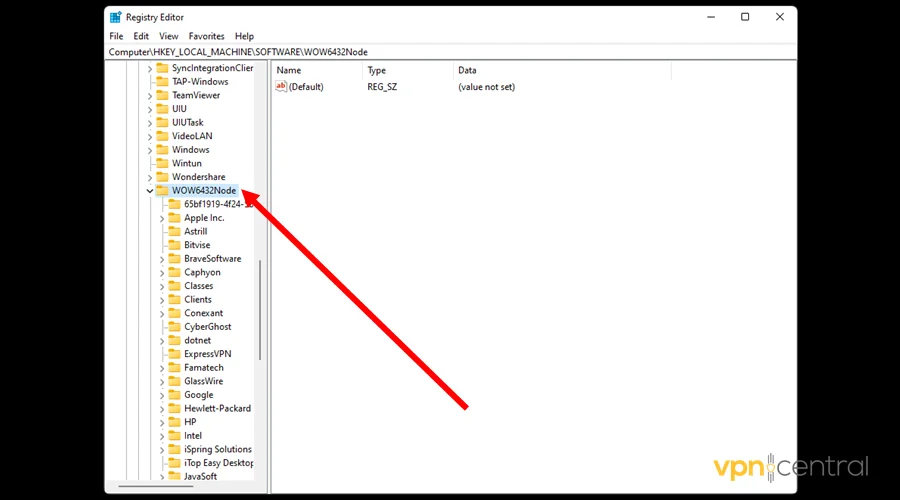
- Scroll down to the list of options and expand the WOW6432Node folder.
- Open Famatech, then expand Radmin VPN and choose the 1.0 folder.
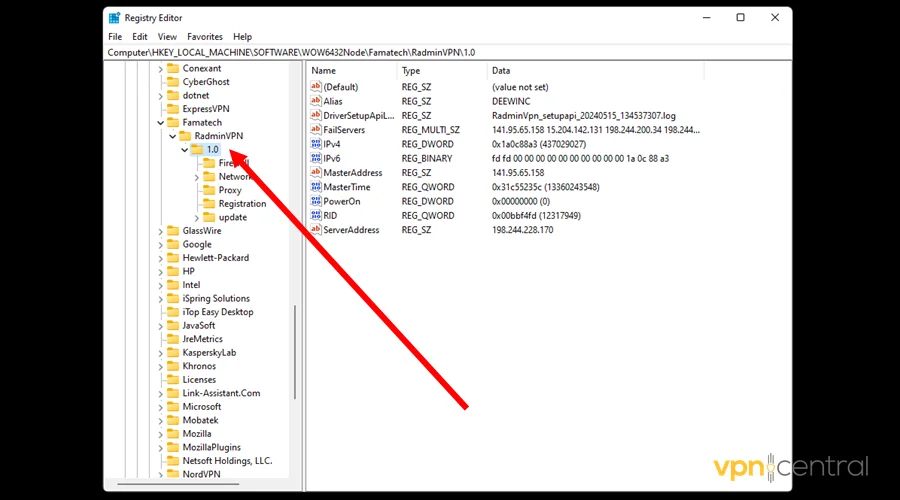
- Right-click the IPv4, IPv6, and RID registry items and select Delete.
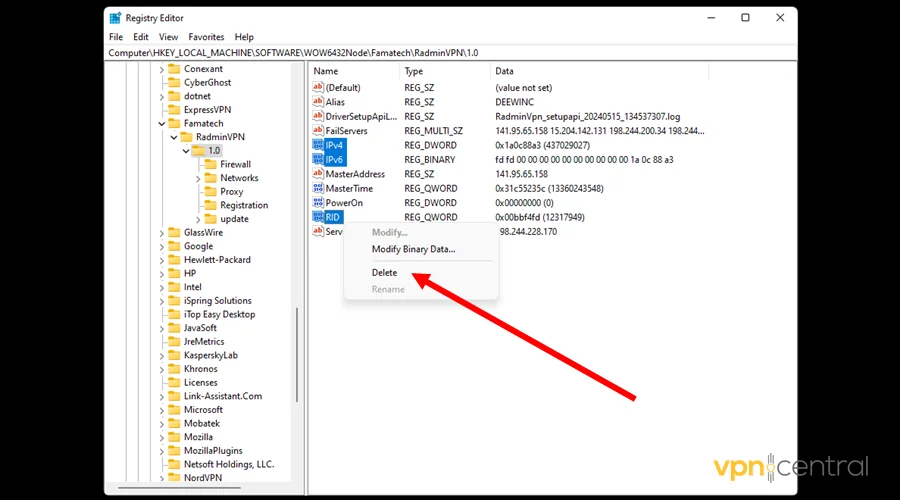
- Reboot your PC and reconnect the Radmin VPN.
The above restores Radmin VPN back to its optimal functioning state. Remember to follow the instructions carefully for the best results.
5. Clean reinstall admin VPN
If editing the registry doesn’t work, consider clean reinstalling Radmin VPN. This process involves removing the software along with its entire data.
Sadly, the unbuilt Windows PC unistaller doesn’t offer such a function. It’s a pity, right? Fortunately, you can get Revo Unistaller to do the job.
Use the guide below:
- Download and install Revo Uninstaller.
- Run the app and choose the Uninstaller tab.
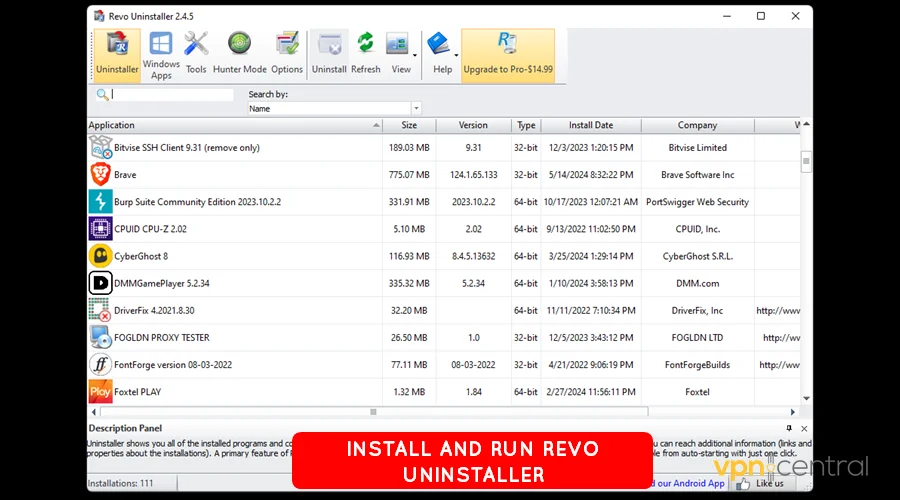
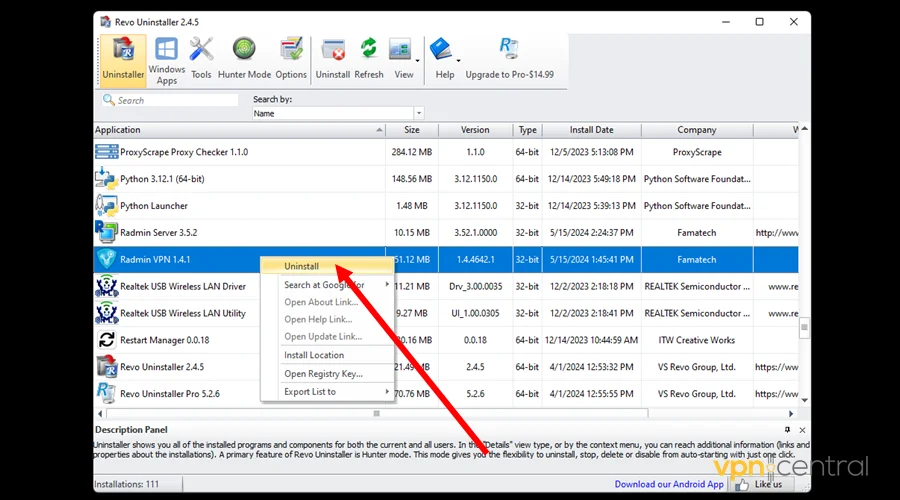
- Search for Radmin VPN, right-click on it, and select Uninstall.
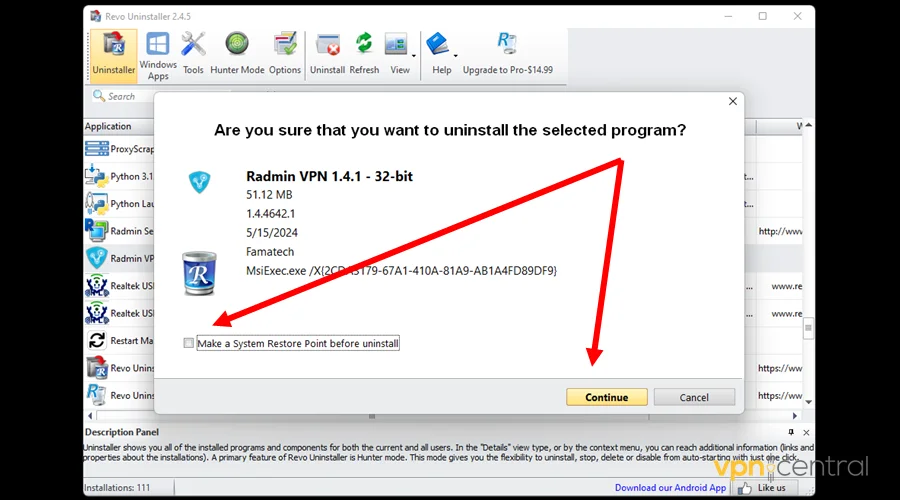
- Uncheck, making a system restore point, and choose Continue.
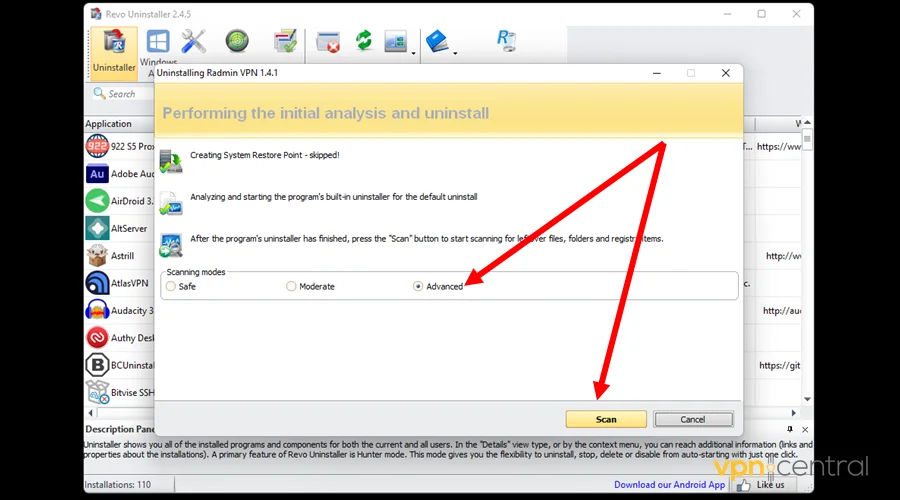
- Select Advanced under Scanning Mode and click Scan. This process may take a few seconds to complete.
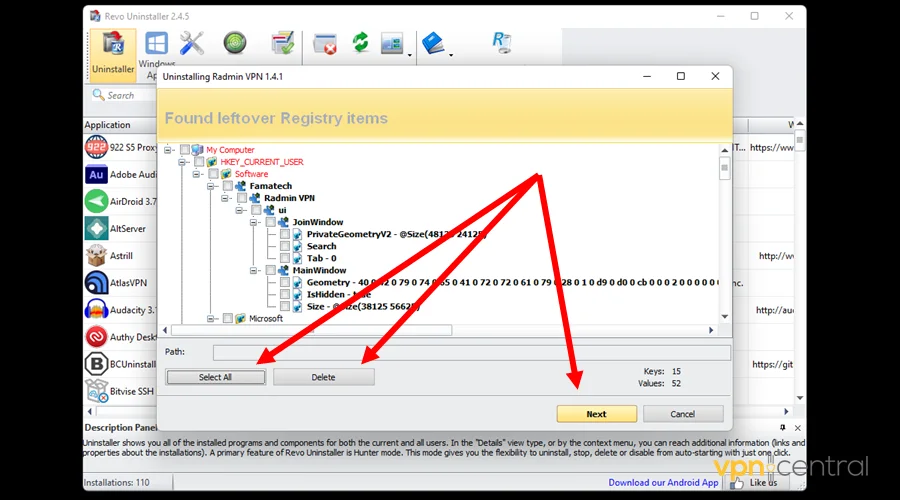
- Choose all Radmin VPN’s registry items and Delete them.
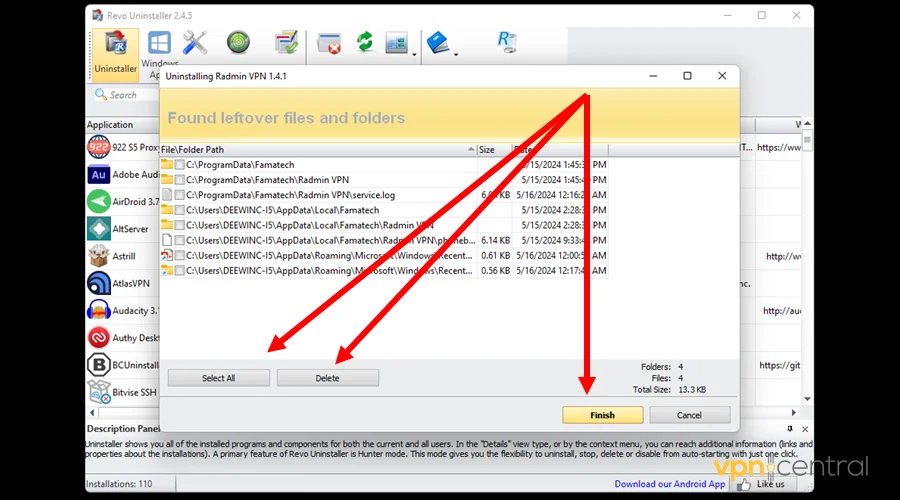
- Select all Leftover Files and Folders on the next window and Delete.
- Reboot your PC and reinstall Radmin VPN.
- Run the app and connect.
Following the above allows you to have a fresh start. You should be able to establish remote connections without hiccups.
Wrapping up
I trust you’re now fully equipped to fix Radmin VPN when it’s not connecting.
You can start by whitelisting the app on your antivirus/firewall software. If it’s still not working, check your internet or use a proxy service.
Another workaround involves modifying the app’s registry files. If everything fails, a clean reinstallation is a sure way to resolve it.


User forum
0 messages