How to Enable Destiny 2 Port Forwarding [Easy Guide]
Ensure better Destiny 2 connection through port forwarding!

Port forwarding in Destiny 2 can improve your gaming experience. But how do you do that?
I’m here to show you.

Access content across the globe at the highest speed rate.
70% of our readers choose Private Internet Access
70% of our readers choose ExpressVPN
Browse the web from multiple devices with industry-standard security protocols.

Faster dedicated servers for specific actions (currently at summer discounts)
Prepare for a smoother ride in the world of Guardians.
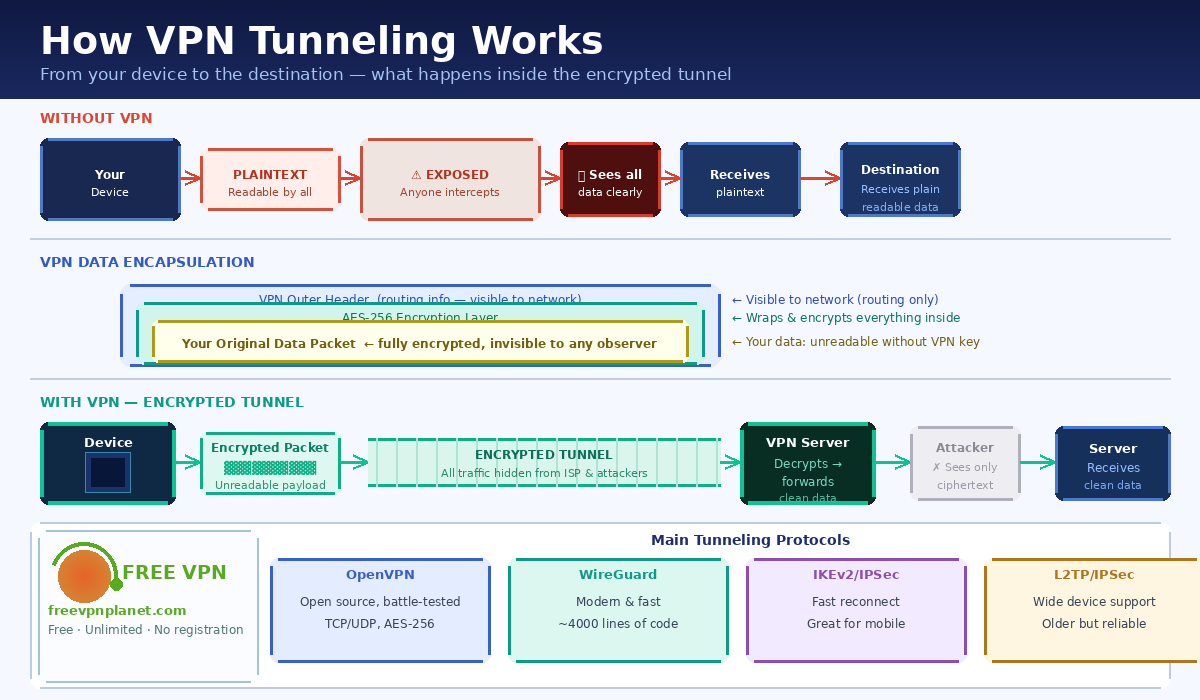
What is Port forwarding?
Port forwarding is a network configuration method that directs traffic to a specific IP address and port number, paving a clear path for data transfer.
It ensures an optimal route to the Destiny 2 servers making sure your traffic doesn’t get stuck along the way.
Why do you need port forwarding for Destiny 2?
Port forwarding is an important tweak to your network settings that can greatly impact your gameplay.
It’s not just about opening gateways; it’s about crafting a dedicated route for your game’s traffic, bypassing the chaos of congested network highways.
This technique is especially critical when you’re in the thick of action-packed encounters or engaging in the strategic teamwork of a raid.
With ports efficiently forwarded, your network can transmit and receive Destiny 2 data with precision and priority. Here’s how it benefits you:
- Reduce game lag: Streamlines your connection for quicker response times.
- Enhance connection stability: Minimizes the chances of disconnection or interruptions.
- Improve matchmaking times: Connects you faster to other players.
- Resolve NAT type issues: Helps in resolving the NAT type issues that might prevent you from joining other players’ games.
By forwarding your ports, you’re essentially creating a direct line between your console or PC and Destiny 2 servers, ensuring your connection is as strong as the Traveler itself.
How to set up Destiny 2 port forwarding
Let me walk you through each step to adjust your router settings for optimal Destiny 2 gameplay:
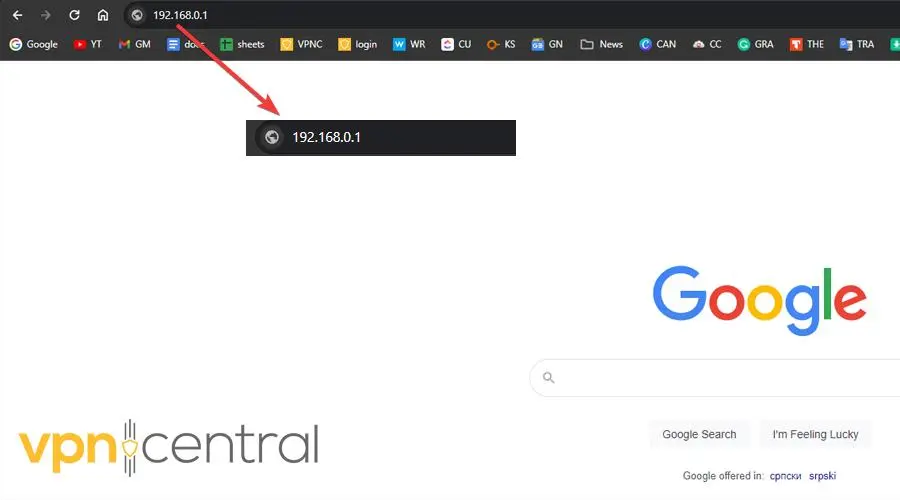
- Access your router settings: Type your router’s IP address into the address bar of your web browser. It’s usually 192.168.1.1 or 192.168.0.1.
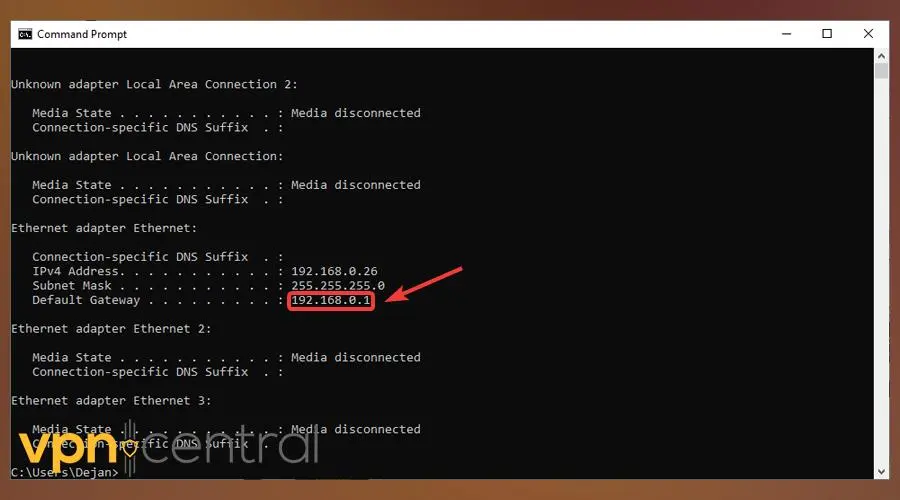
- Find your router’s IP address: If you’re unsure of the IP, on Windows, open Command Prompt and type ipconfig, then look for the Default Gateway. For Mac, go to System Preferences, select Network, and look under Status.
- Access router settings: Open a web browser, enter the IP address, and log in with your router’s username and password.
- Navigate to the port forwarding section: Search for the Port Forwarding, Advanced, or NAT section in your router’s interface.
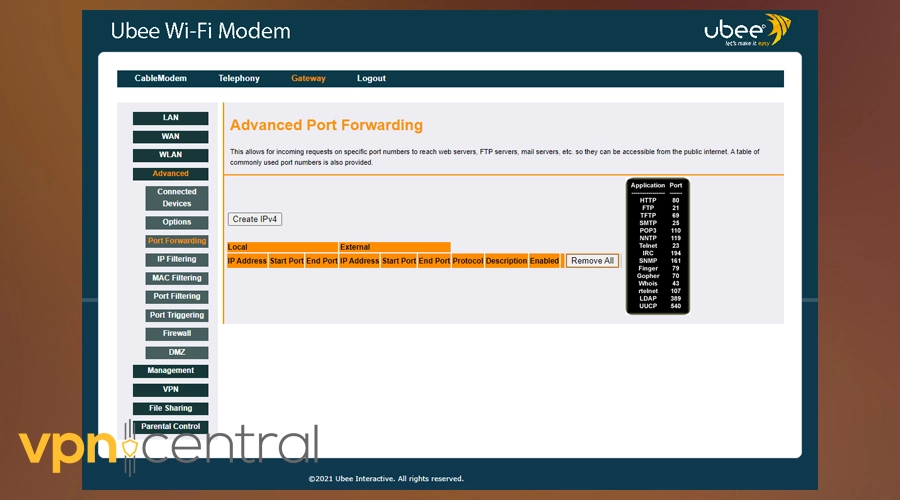
- Configure port forwarding: Choose Add Service, Add Rule, or a similar option to create a new port forwarding rule and name it Destiny 2.
- Configure Port Forwarding for Destiny 2:
- For PlayStation: Set TCP: 1935,3478-3480 and UDP: 3074,3478-3479.
- For Xbox: Set TCP: 3074 and UDP: 88,500,1200,3074,3544,4500.
- For PC: Set TCP: 3074,27015-27030,27036-27037 and UDP: 3074,4380,27000-27031,27036.
- Enter your device’s IP address: Find and input the IP address of the device you use to play Destiny 2 in the IP Address field.
- Save and apply changes: After entering the necessary details, save the changes.
- Restart your router and device: Restart both to ensure the new settings take effect.
- Test the connection: Open Destiny 2 and check for improved connectivity.
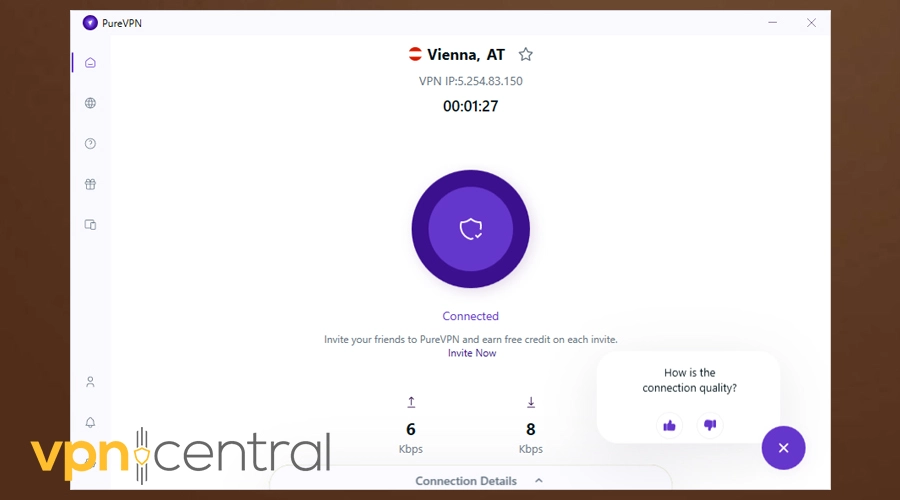
How to set up Destiny 2 port forwarding with a VPN
As an alternative to standard port forwarding, an add-on from PureVPN offers a specialized solution for Destiny 2 players. Using it enhances your gaming by specifically targeting and improving network paths, making it ideal for resolving connectivity challenges and minimizing lag.
Follow this detailed guide to effectively set up port forwarding for Destiny 2 with PureVPN’s add-on:
- Sign up for PureVPN: Go to the PureVPN website and sign up for an account. Ensure you choose a plan that includes the port forwarding add-on.
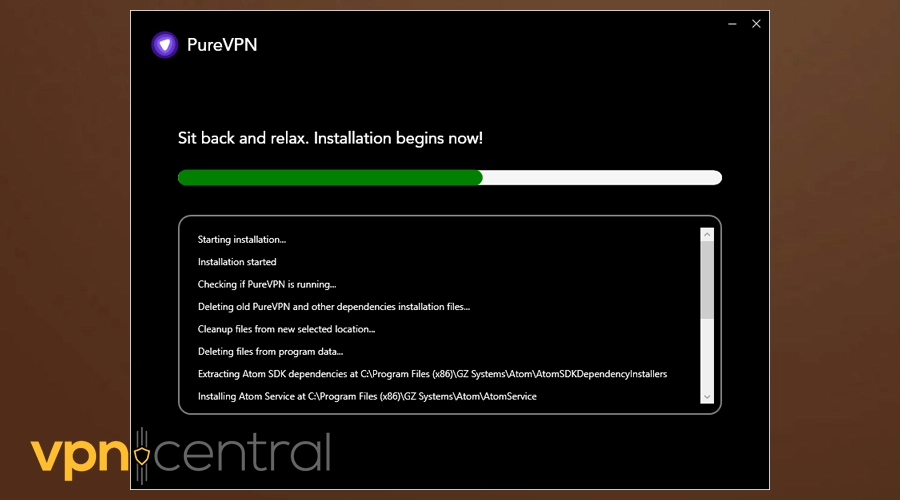
- Download and install PureVPN: After signing up, download and install the PureVPN client on your device.
- Enable the port forwarding add-on: Log into your PureVPN account and enable the port forwarding add-on from the dashboard.
- Connect to PureVPN: Launch the PureVPN client and connect to a server that offers the best performance for online gaming.
- Access port forwarding settings: In the PureVPN client, locate and access the port forwarding settings.
- Configure Port Forwarding for Destiny 2:
- For PlayStation: Set TCP: 1935,3478-3480 and UDP: 3074,3478-3479.
- For Xbox: Set TCP: 3074 and UDP: 88,500,1200,3074,3544,4500.
- For PC: Set TCP: 3074,27015-27030,27036-27037 and UDP: 3074,4380,27000-27031,27036.
- Save and Apply Changes: After setting up the required ports, save your configurations within the PureVPN client.
- Restart Your Device: Restart the device you use for playing Destiny 2 to ensure the new settings are active.
- Test the Connection in Destiny 2: Open Destiny 2 and check the connectivity and performance improvements.
PureVPN
Besides offering fast and secure servers, PureVPN is one of the best VPNs for port forwardingSummary
Destiny 2 port forwarding can transform your gaming experience by stabilizing your connection and reducing lag.
Just follow the steps above to set it up either on the router level or through a VPN and enjoy the smoothest possible gameplay.
Gear up, Guardian – it’s time to jump back into the action!
Read our disclosure page to find out how can you help VPNCentral sustain the editorial team Read more

Improve this guide

User forum
0 messages