How To Change DNS - The First Step To Internet Security
The Domain Name System – DNS is an essential part of Internet communications that makes it easy for anyone to navigate the web.
Basically, DNS translates IP addresses into readable, human language, and vice-versa. That’s why you can type VPNcentral.com into your browser and get to this website.
Otherwise, you’d have to remember its IP address. Given most of us access hundreds of websites daily, that’s not very feasible, is it?
DNS is also crucial when it comes to security and privacy.
Knowing how to change your DNS will help you bypass Internet censorship (to a certain degree), prevent ISP tracking, and potentially improve the quality of connection.
We shall, therefore, go through some DNS basics that will surely help you to hit the ground running with your DNS configuration.
This DNS guide should get you to understand the terminologies used in the field, then give you the know-how to change DNS to improve Internet security.
Why is DNS so important?
I use the internet a lot, and the chances are that you do too.
However, did you know that DNS is one of the pillars on which the internet is built?
As a matter of fact, we would not have the internet without the Domain Name System!
The internet is made up of millions of computers that are connected to large networks.
These networks are identifiable and communicate through strings of numbers that are known as IP addresses.
Computers don’t understand domain names, but then neither can our human minds memorize the IP addresses of all sites that we would wish to visit.
That’s where the DNS system comes in.
What is DNS?
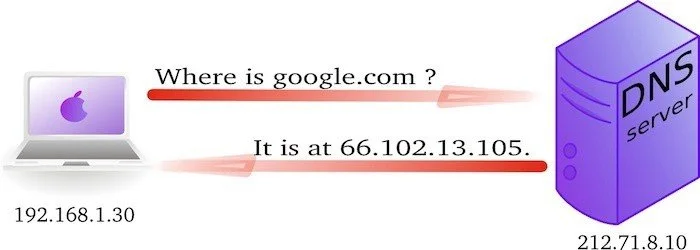
DNS is a service/ tool that translates domain names into IP addresses.
Without the DNS system, you would have to type the IP address of the Website, to access the homepage.
Basically, DNS translates the language of the computer into human language -making internet navigation easy and accessible to anyone.
For example, once you type vpncnetral.com on your browser, the system automatically interprets that to the website’s IP, and then your computer can communicate with the servers.
Domain terminology
Now let’s have a look at some of the commonly used terms that you should know.
IP Address
We have already seen what an IP address is, but nevertheless, we can try to understand it even better.
We can say that an IP address is what we call a network addressable location.
One important thing you should understand about an IP address is that it’s unique for every connection within a specific network.
The most common forms of IP addresses are IPv4 addresses. They are written as four sets of numbers, and each contains up to 3 digits, with the sets separated by a dot.
For example, 111.222.111.222 could be a valid IPv4 IP address. 111.222.011.01 could also be a valid IPv4 address.
In cases where a set is preceded by zeroes like in the latter case, the IP address is usually written as 111.222.11.1.
❗ With a DNS, we map a name to that address so that you do not have to remember a complicated set of numbers for each place you wish to visit on a network.
Domain name
As mentioned above, the domain name is the human part of the website, which you can type on your browser.
For example, google.com is a domain name.
The URL www.google.com is associated with the servers owned by Google Inc. Once you open it, it will direct you and you will be able to access Google servers.
Top-level domain
This can be referred to as the TLD.
It is the most general part of the domain and is the furthest part on the right. It’s usually separated by a dot.
The most common TLDs are .com, .net, .org, .gov, .edu, and .io.
Why would I change my DNS?
When you change your DNS, you take the first fundamental step to safeguard your privacy and protect yourself on the Internet.
Your DNS is provided by your ISP.
If you have a contract with Verizon you are using their DNS and the same goes for AT&T and any other Internet Service Provider (ISP.)
This is where the problem lay.
Your ISP keeps logs of your internet activity for many years to come. When you use their DNS, they know every website you visited over the years and all your activity on the Internet.
If you engage in activities like Bittorrent download or P2P, this is for sure a problem.
However, everybody should be worried about that, even if you don’t torrent.
If the database of your ISP is violated, there could be a major leak of sensitive information about any user whose activity has been stored using the DNS.
If this information, including yours, happens to be in the wrong hands, you are for sure dealing with a serious problem.
By changing DNS you can easily avoid finding yourself in such an unwelcome situation.
NOTE: Changing DNS is a vital step to protect your privacy but it is not equivalent to the protection offered by one of the best VPN connections.
Here is a list of the main reasons why changing DNS is always a good idea:
- First of all, for safety purposes: Changing your DNS improves your privacy as you prevent your ISP from handling DNS requests. Some VPNs also have DNS leaks. Setting a third-party DNS provider is therefore the best security option.
- To avoid internet censorship: you can easily avoid DNS censorship (aka DNS poisoning) by simply altering your DNS to be able to use a SmartDNS service.
- Fix Internet Connectivity Issues: Sometimes when a VPN connection may drop. Though no longer connected, your DNS may remain pointed to the VPN servers. In order to reconnect to the internet, you may need to change the DNS settings.
Having known some DNS basics and why you would need to change your, let’s look at how you can actually change it.
IMPORTANT: The DNS need to be changed even if you use a VPN.
Changing DNS tutorial
In this tutorial, we shall look at changing DNS using both Windows and Android.
IMPORTANT NOTE:
Before you change the DNS, take note of the DNS in use on your device right now. In case something goes wrong, you can easily restore them.
DNS options
Here are some DNS options you may choose from. You can use these to redirect your DNS traffic from your ISP.
Once you setup any of the following DNS on your device, you ISP can no longer track your activity online.
Google Public DNS
NS1: 8.8.8.8
NS2: 8.8.4.4
Open DNS
NS1: 208.67.222.222
NS2: 8208.67.220.220
Comodo Public DNS
NS1: 8.26.56.26
NS2: 8.20.247.20
- Change DNS on Windows
Here is a simple guide on how to change your DNS using Windows 10.
1. Access your Control Panel. You can do this by right-clicking the Start Menu Button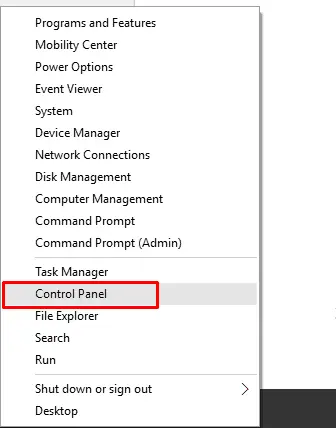
2. Select Network and Internet.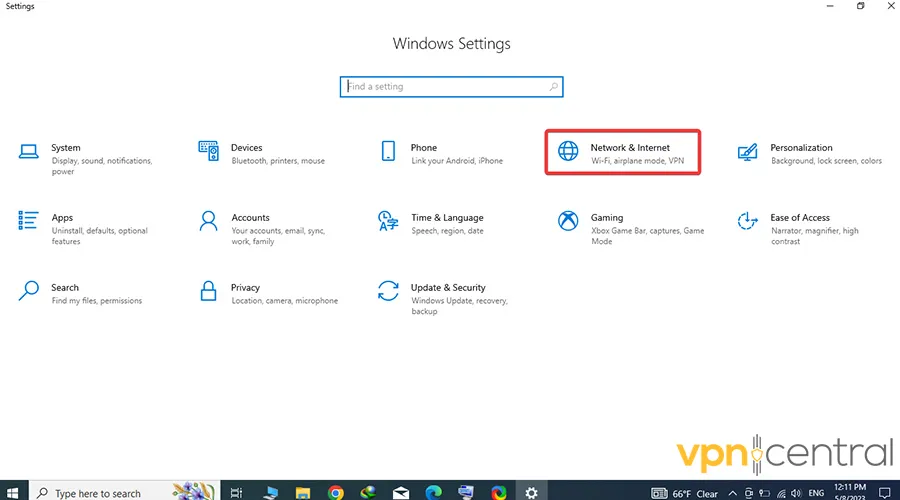
3. Go to Network and Sharing.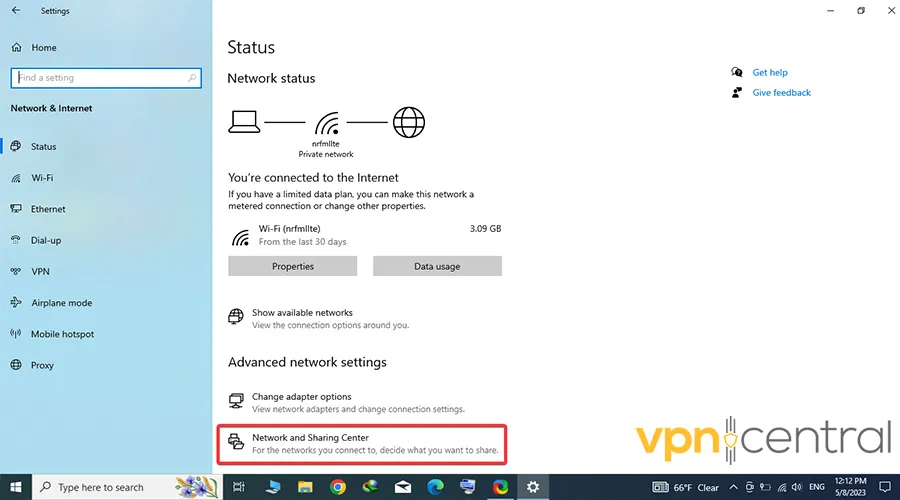
4. Select Adapter Settings.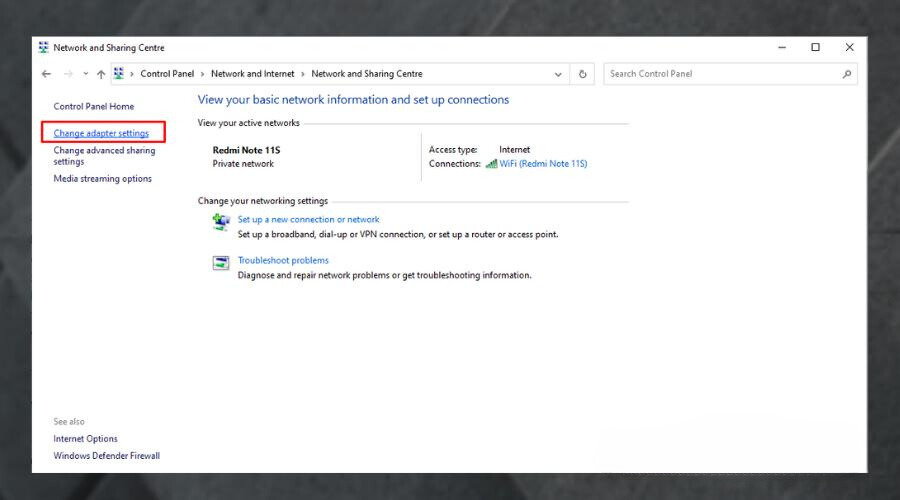
5. Depending on your Internet connection right-click on your Adapter and select Properties.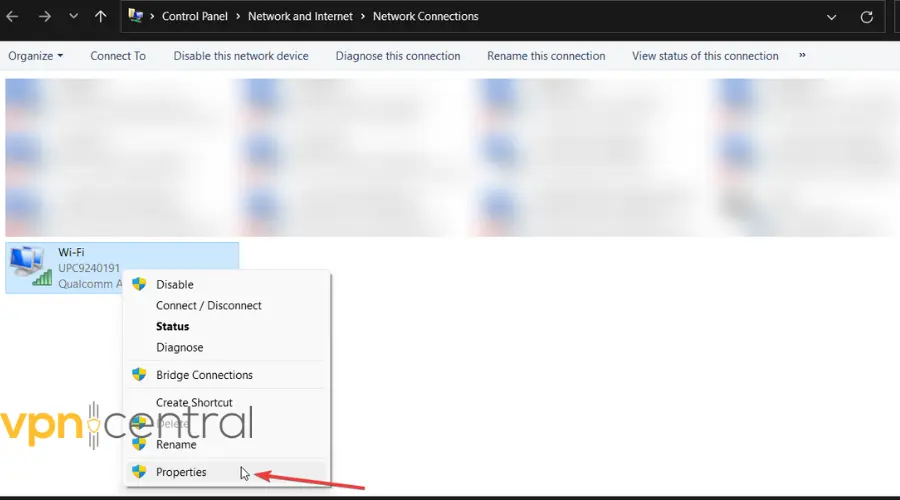
6. Next, open the adapter’s Properties.
7. Select the IPV4 Protocol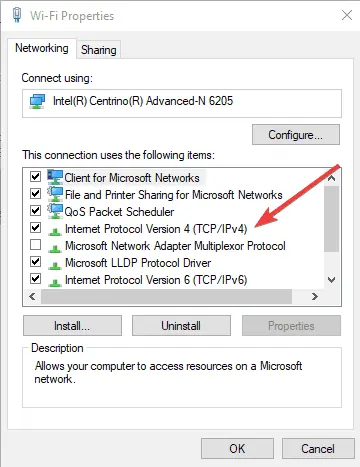
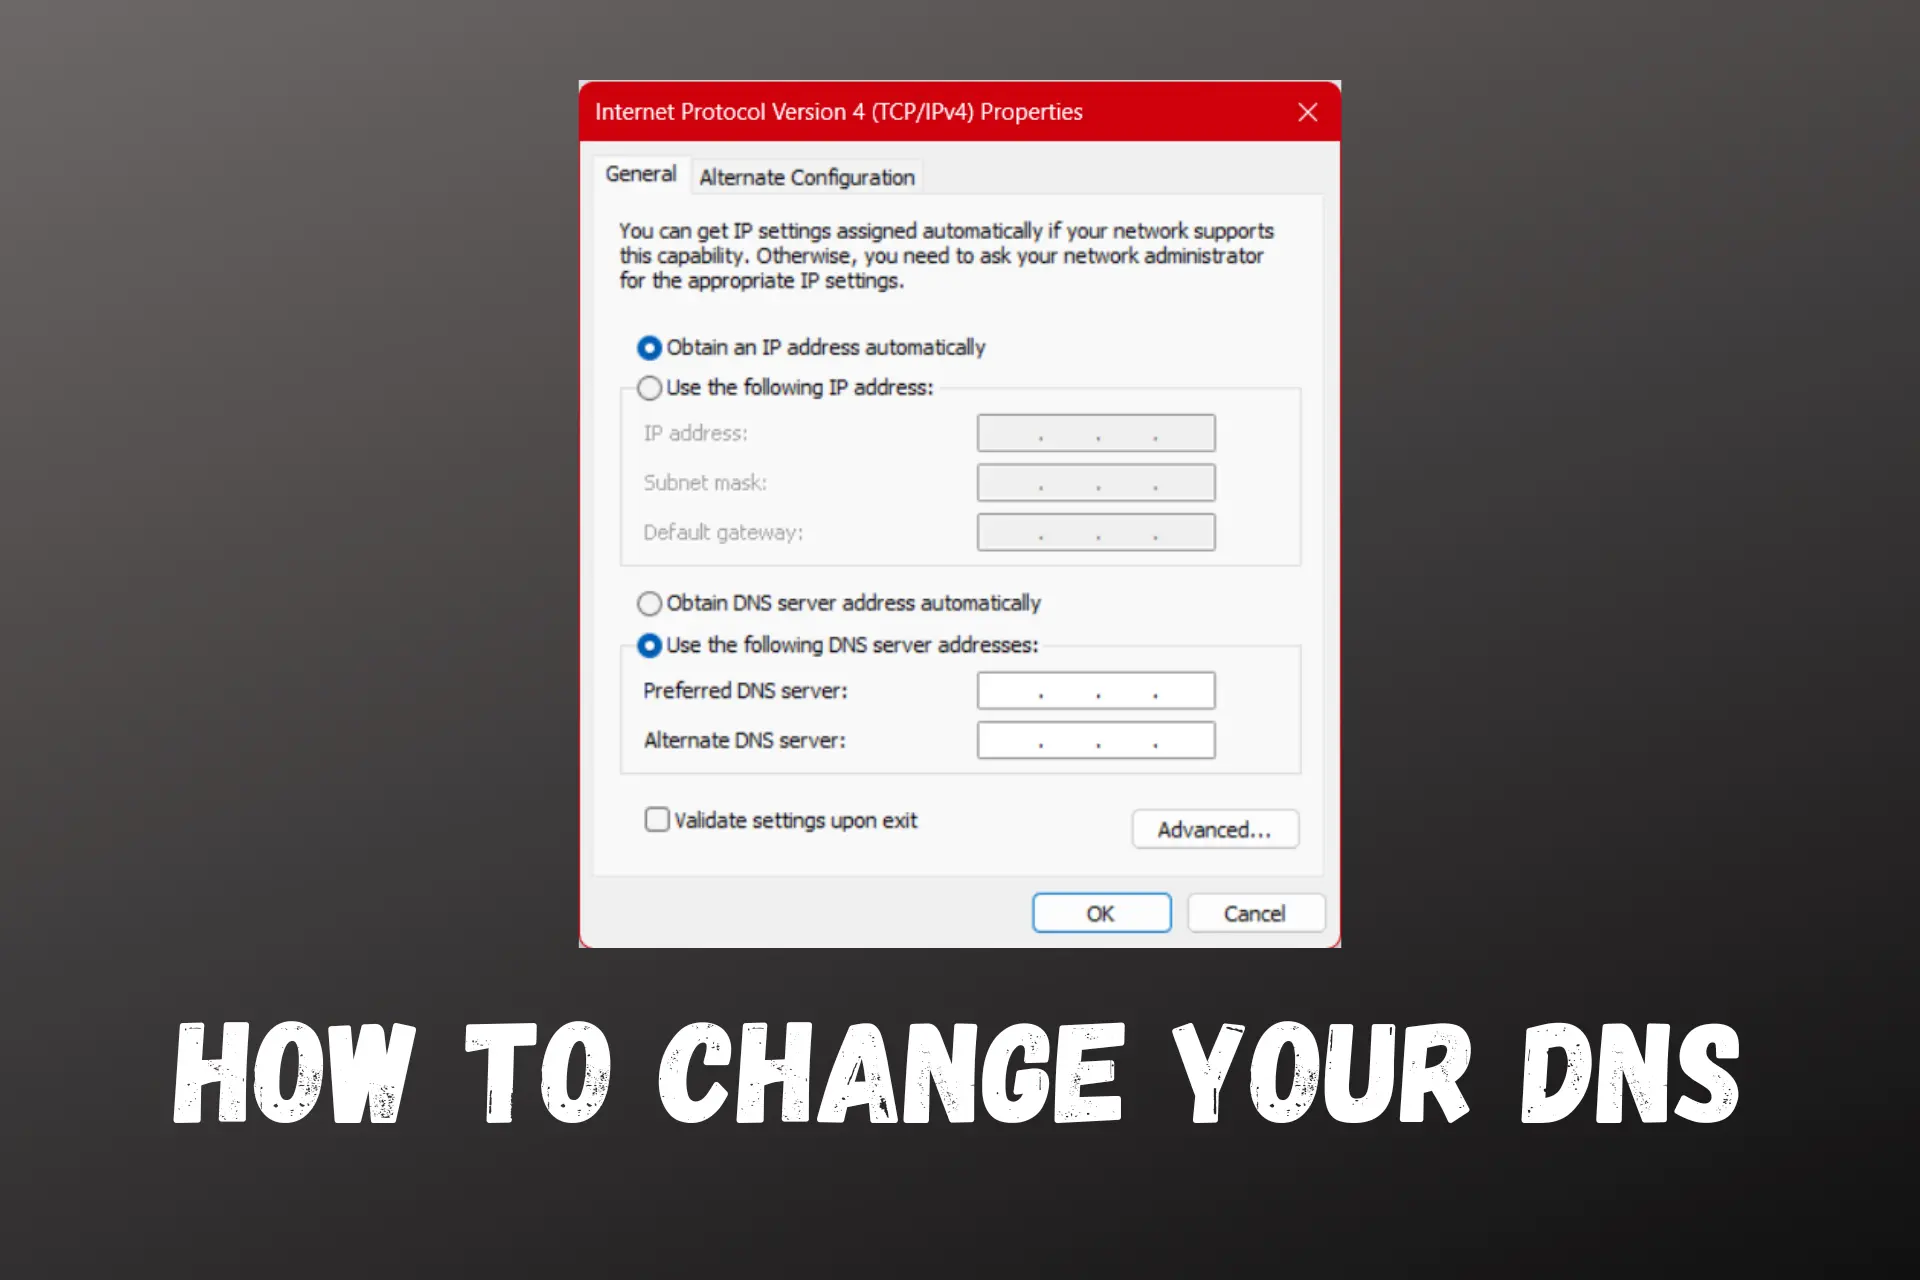
8. The next step is to switch from Obtain DNS Server Automatically to Use the following DNS Server and Use the following DNS Server Addresses: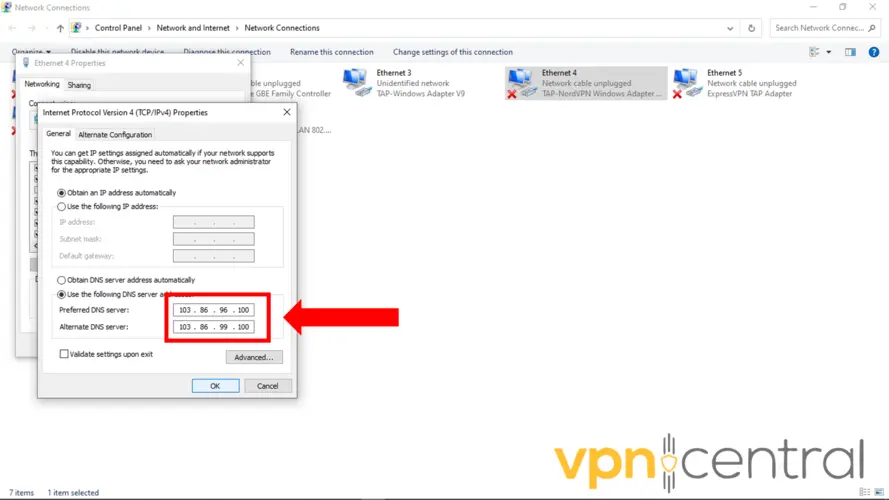
9. You can now fill the DNS fields with your new DNS IP addresses.
If changing to use a smart DNS address, using the closest servers of your physical location is advised. It will give you better speeds of DNS resolution.
In case you need to use more than two DNS addresses, click on the Advanced button, and use the DNS tab to add, edit, and remove DNS IP addresses.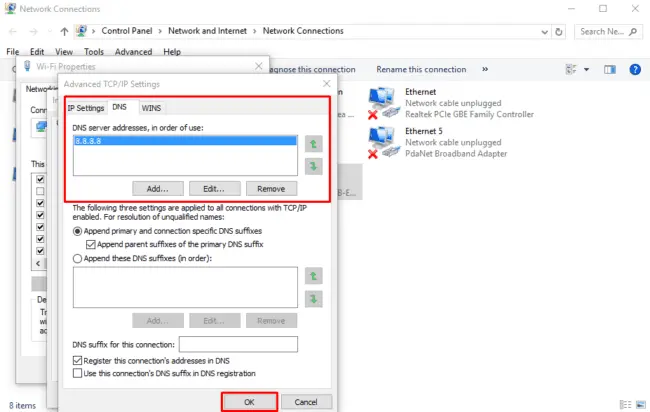
10. Click the OK button to apply the settings and close the control panel.
Note: If you’re using an office computer, consult with the network admin before you change the DNS as it can result in communication problems. - Changing DNS on Android
You can be able to change the DNS for even unrooted Android devices.
However, DNS in these devices can only be changed for connected WiFi Networks.
1. Go to Settings. Here, the first option should be Wi-Fi. Open it.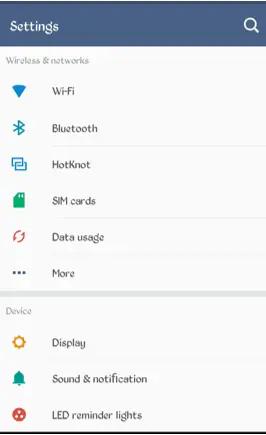
2. Tap the Wi-Fi network you want to connect to. It should bring you an option, to modify the network config. Select this one, then Show Advanced Options.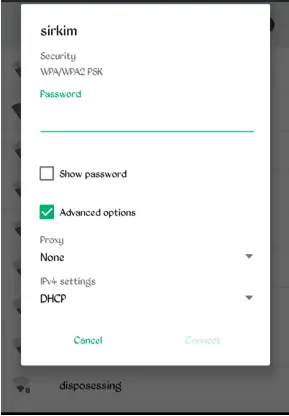
3. Once you scroll down, you will be able to see IP Settings. In the drop-down menu, change this to Static. You can now scroll a little further down. You should be able to DNS 1 and DNS 2 fields.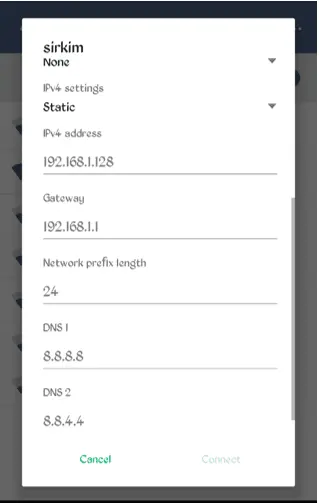
4. This is where you should enter your DNS settings.
5. You can click Connect once you’re done. - Changing DNS on Mac
Here is how you can change your DNS on Mac:
1. Choose Apple menu > System Preferences, then click Network.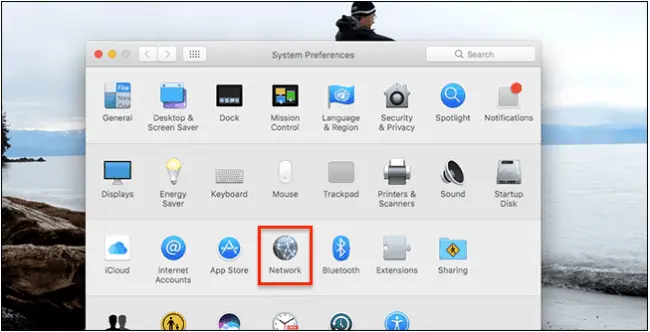
2. Select the network connection service you want to use (such as Wi-Fi or Ethernet, unless you named it something else) in the list, then click Advanced.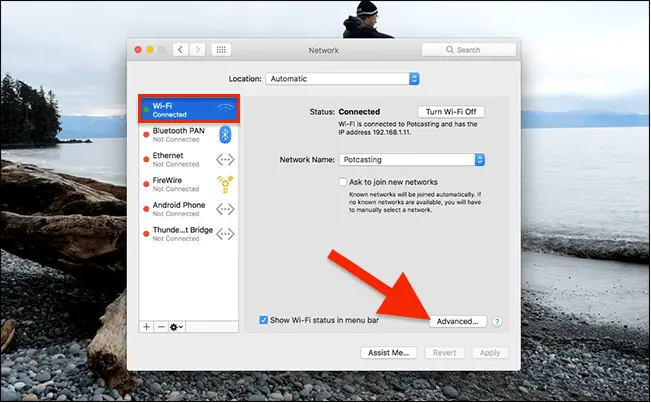
3. Click DNS, then click Add + at the bottom of the DNS Servers list. Enter the IPv4 or IPv6 address for the DNS server.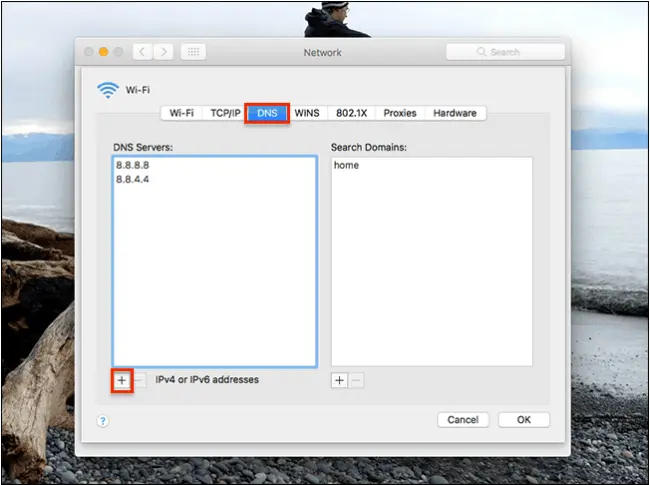
4. Highlight the old DNS and click on the symbol “-” at the bottom of the DNS server list to delete them. When you’re finished, click OK. - Change DNS on iOS
Also, the changes are network specific, so you’ll need to change the DNS servers every time you connect to a new wireless network.
Fortunately, iOS remembers the settings, so you won’t have to re-enter the settings the next time you connect to the same network.
Here’s how you can change your iPhone’s DNS servers:
1. From the iPhone’s home screen, tap Settings.
2. Tap Wi-Fi. The screen shown below appears. The available wireless networks in range of your iPhone appear, as shown below.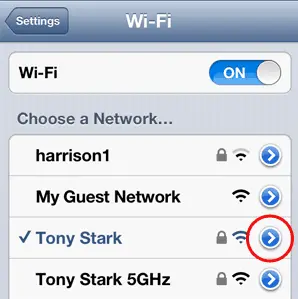
3. Find your wireless network in the list, and then click the arrow. The screen shown below appears.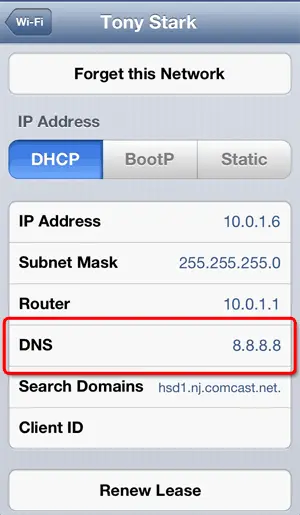
4. Tap the DNS. Delete the current DNS servers, and enter the new DNS servers.
Remember to separate the servers with commas, if you enter more than one DNS server.
Conclusion
The use of DNS is inevitable as it is a core structure in the backbone of the internet. The above guide should give you some info about DNS, and help you with changing your DNS.
You can increase your security by using a VPN and a smart DNS proxy. If you’re on Linux, follow this dedicated guide on how to change DNS on Linux for detailed steps tailored to your system.
This way, you’ll tunnel your traffic through secure servers while enjoying the benefits of changing your DNS.
Read our disclosure page to find out how can you help VPNCentral sustain the editorial team Read more

Improve this guide


User forum
0 messages