How to Trick Apple TV Location - 3 Tested Ways

Even though Apple TV is available worldwide, streaming platforms on it are geo-locked.
But how do you access a show you’ve anticipated but not available in your region? Fret not. Whether you use the Apple TV 4K, HD, or 3rd Generation, this article is for you.

Access content across the globe at the highest speed rate.
70% of our readers choose Private Internet Access
70% of our readers choose ExpressVPN

Browse the web from multiple devices with industry-standard security protocols.

Faster dedicated servers for specific actions (currently at summer discounts)
I’ll teach you tested methods you can use to trick your Apple TV’s location settings.
How to trick Apple TV location?
You can trick Apple TV’s location by using a tool that can change your IP address.
This is because streaming services on Apple TV use your IP address to determine your location.
Here are several tested and trusted methods to spoof your location:
1. Install a VPN on your router
A tool that can change your IP address is VPN, but you’ll need to install it on your router because Apple TV doesn’t support it.
Here’s how to set up CyberGhost VPN on a DD-WRT router using OpenVPN configuration files.
Get your VPN configuration files
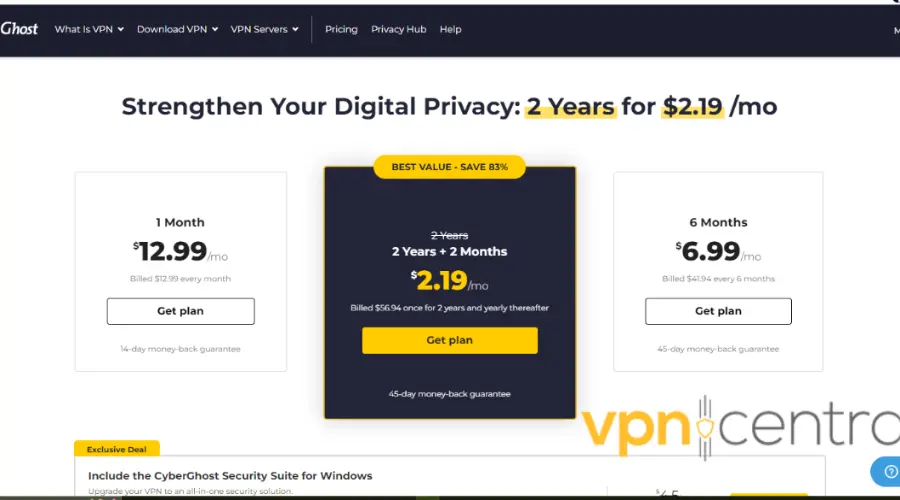
- Visit CyberGhost’s official website and select your preferred VPN subscription plan.
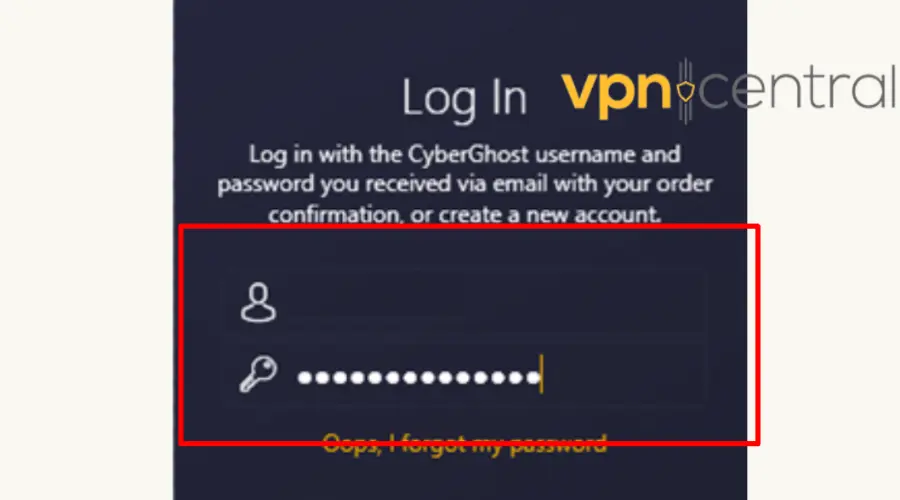
- Log in to your user dashboard on their website using your account credentials.
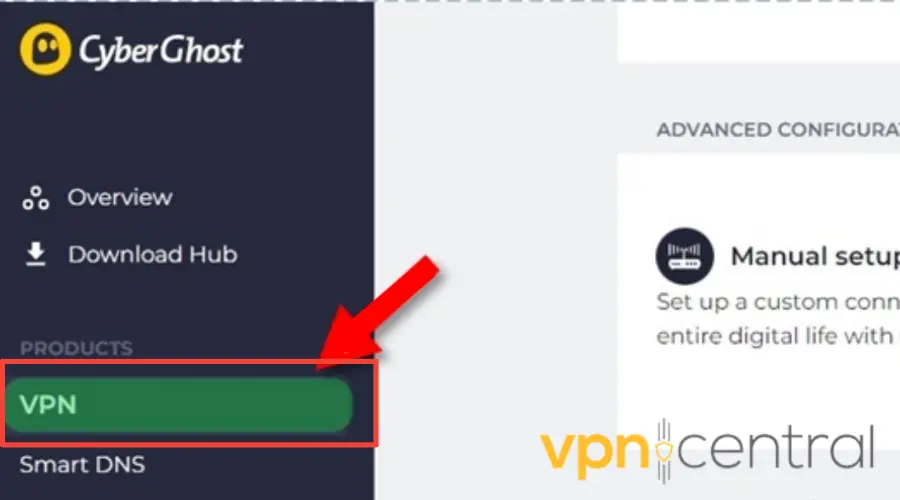
- On the left-hand menu of your VPN account dashboard, locate and click on the VPN option.
- Select Configure Device.
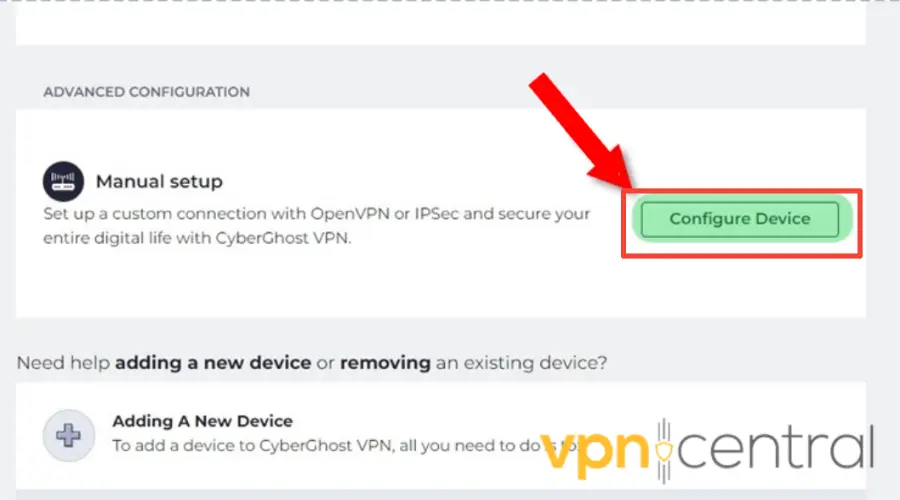
- Create your Server Configuration. Select the protocol (OpenVPN), the country (where the service you intend to watch is available), the server group (UDP or TCP), and other features you like.
- Click on Save Configuration.
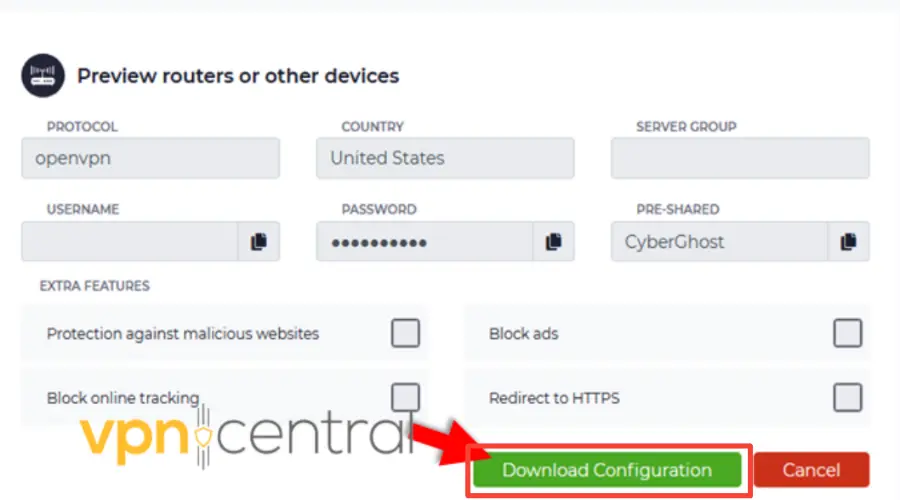
- Download the Configuration by clicking on the download button. Ensure you keep the username and password you acquired during the configuration process readily available. These credentials will be required later in the setup, so having them on hand will streamline the process and prevent unnecessary delays.

Configure your router
- Access your Router Management console from your preferred browser — 192.168.1.1 for my router. (You can check for yours at the back or base of the router). Log in with your credentials.
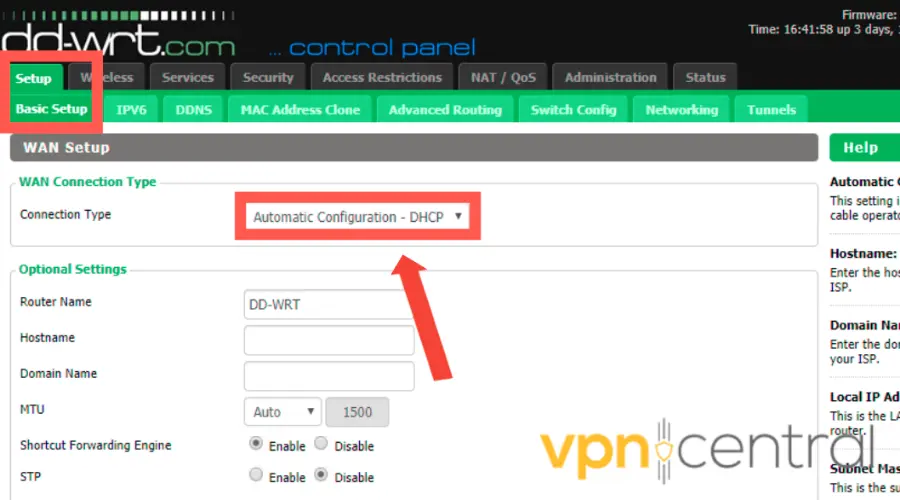
- Click on Setup > Basic Setup.
- Ensure the connection type is set to Automatic configuration.
- Click on Setup and then select IPv6. Disable IPv6 to ensure there is no IP leak.
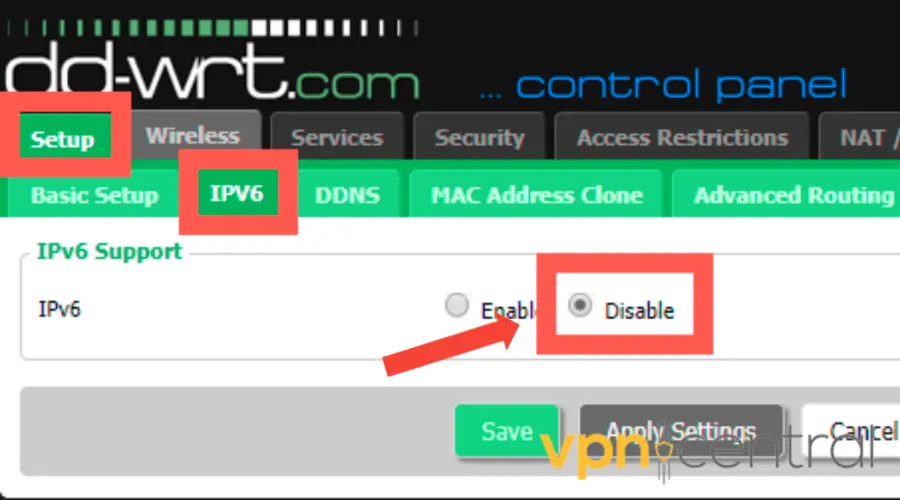
- Click on Save and then Apply Settings.
- Return to your router management console, navigate to the Services section, and select VPN.
- Enable the OpenVPN Client.
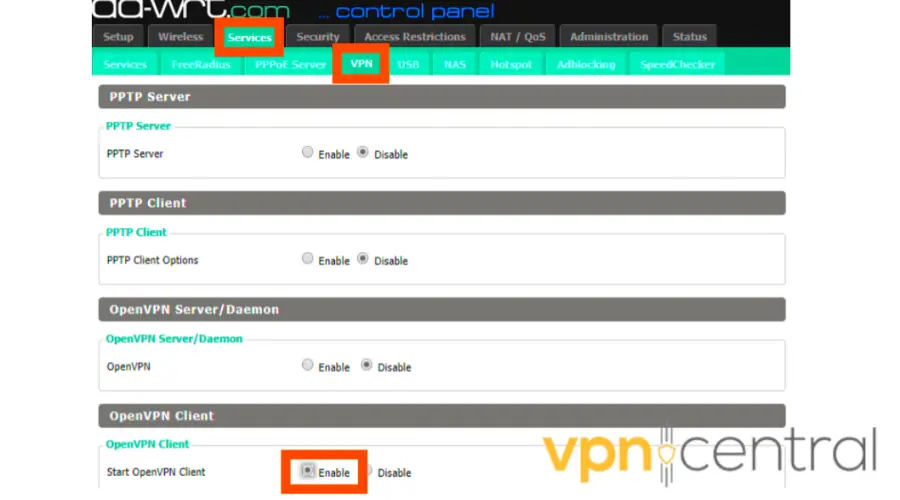
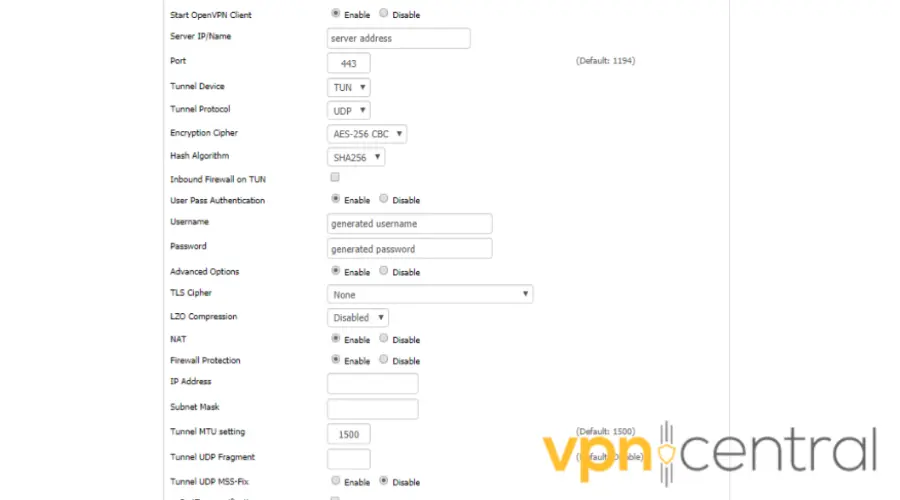
- Fill in the Client’s settings as shown in the image below. (Remember to use the username and password you generated earlier)
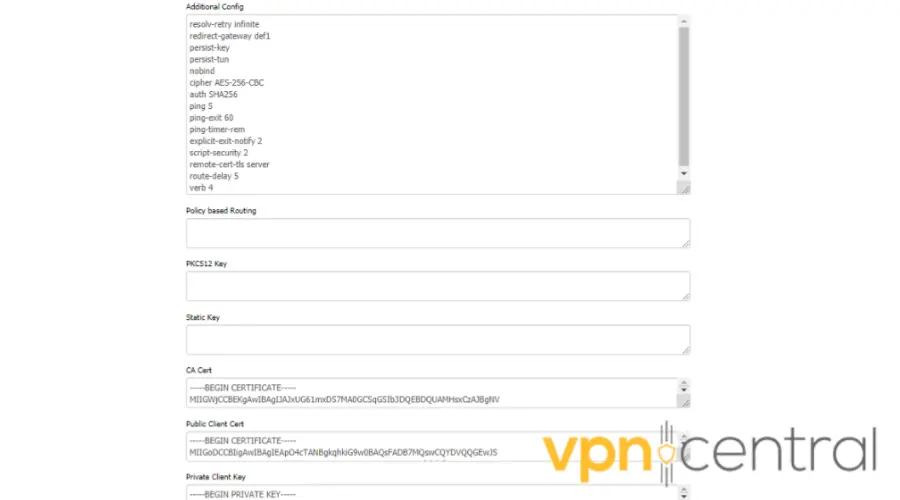
- For Additional Config, go to the file you downloaded, extract it, and open openvpn.ovpn with a TEXT editor (WordPad is preferable as it displays the configuration more clearly.)
- Copy out the passage from resolv-retry infinite to verb 4. For instance:
resolv-retry infinite
redirect-gateway def1 auth SHA256 explicit-exit-notify 2
persist-key
persist-tun
nobind
cipher AES-256-CBC
ping 5
ping-exit 60
ping-timer-rem
script-security 2
remote-cert-tls server
route-delay 5
verb 4
- Copy all the text in the ‘CA.crt’ file and paste it into the designated field on your router’s dashboard. Do the same for Public Client Cert (client.crt file) and Private Client Key (client.key file).
- Click on Save and then on Apply Settings.
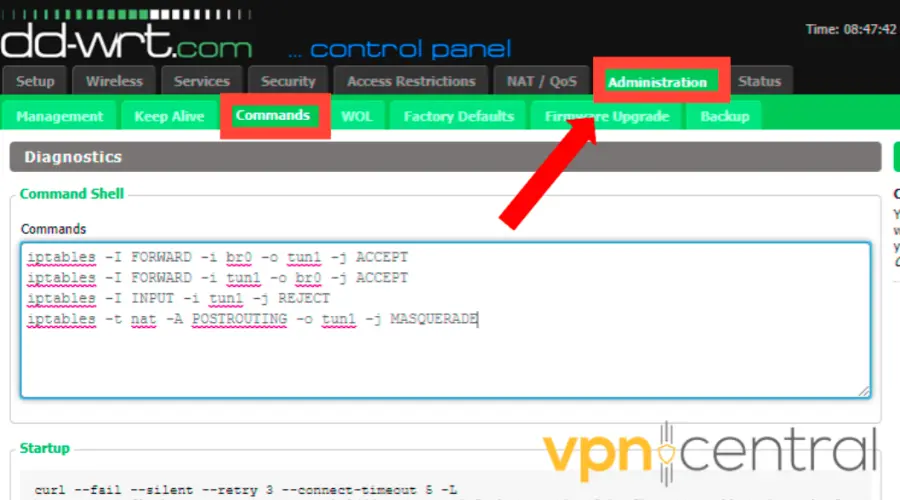
- Select the Administration tab.
- Click on the Commands button. Copy the text below and paste it into the command box.
iptables -I FORWARD -i br0 -o tun1 -j ACCEPT
iptables -I FORWARD -i tun1 -o br0 -j ACCEPT
iptables -I INPUT -i tun1 -j REJECT
iptables -t nat -A POSTROUTING -o tun1 -j MASQUERADE
- Click on Save Firewall.
- Reboot your Router and connect your Apple TV via WiFi or Ethernet cable.
You’ve successfully tricked your Apple TV location to the United States but if you use a VPN like CyberGhost, you will have access to locations in 90+ countries.
In addition, CyberGhost gives you a fast streaming experience and has a good unblocking record with Apple TV. Unfortunately, some VPNs have issues unblocking services on the device.
By installing the VPN on the router, all devices connected to the network, including your Apple TV, benefit from the VPN’s location-changing capabilities without individual setup.
However, note that because of content blocks on certain streaming apps, the VPN may not always work. That’s cause services like Netflix can detect certain VPN IPs.
But the good news is that you can easily fix this by simply using a different server.

CyberGhost
Set up CyberGhost to get unrestricted access on your Apple TV apps.2. Use a DNS proxy or Smart DNS
Domain Name System translates website names to IP addresses.
Smart DNS services, like SmartDNS Proxy or ExpressVPN’s MediaStreamer, reroute parts of your traffic through servers in different locations, enabling access to geo-restricted content without full encryption.
These services offer a simple way for Apple TV to configure location settings and unlock restricted content.
While not as secure as a VPN, they can be faster for streaming purposes.
Here is how to set up Smart DNS Proxy for AppleTV below:
- Go to SmartDNS proxy official website.
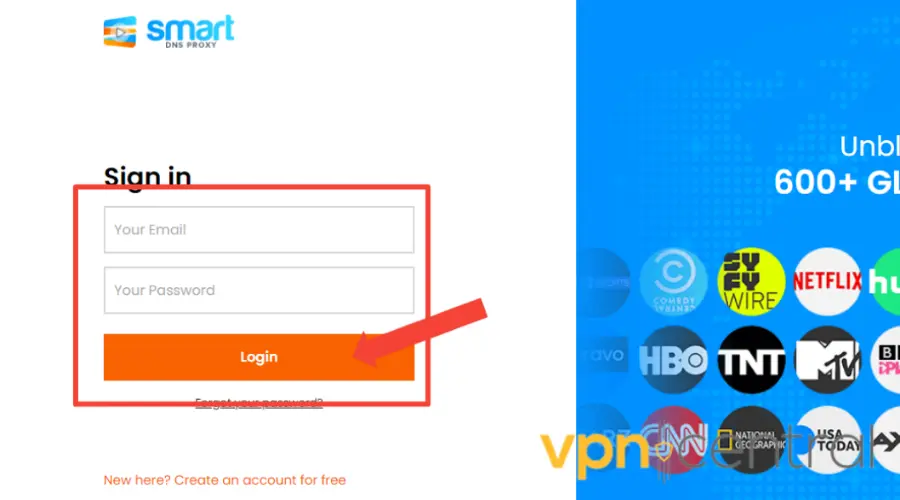
- Log in with your credentials or sign up to create an account. You can get a 14-day free trial.
- Go to the server list, and select your preferred location address where the service you want to unblock is available.
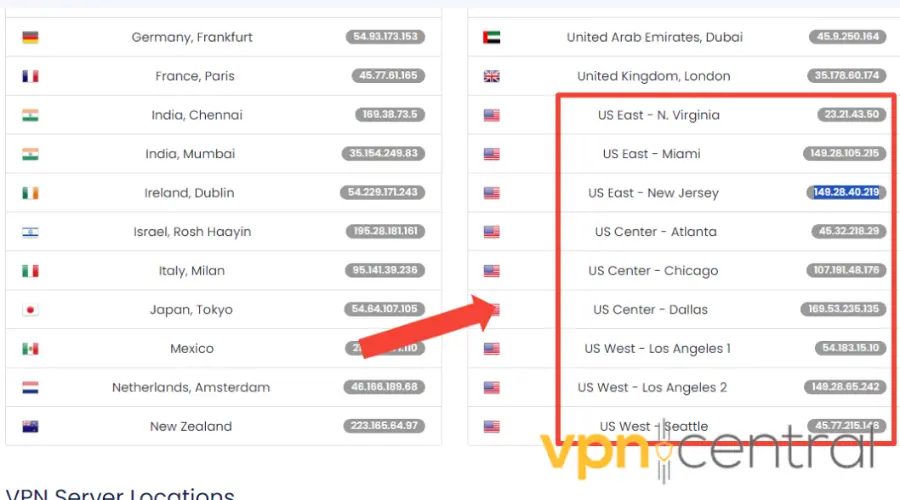
- On Apple TV, go the Settings > General > Network.
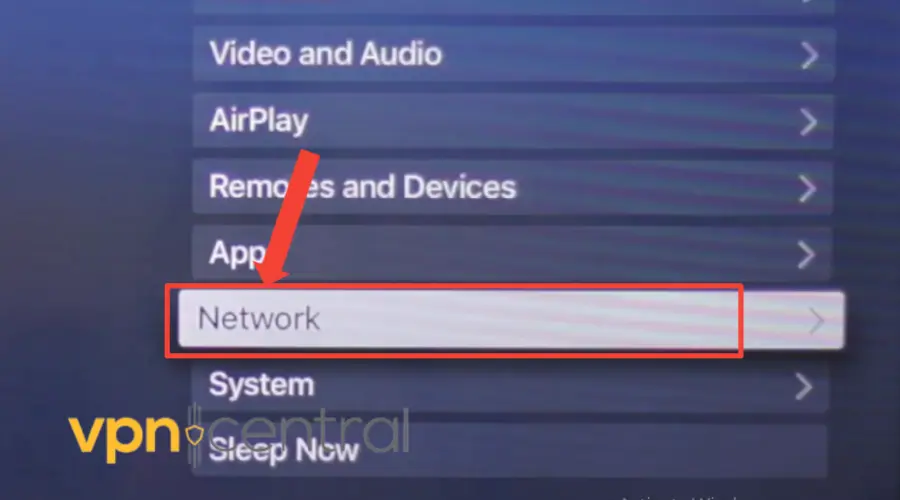
- Select WiFi for a wireless network or Ethernet if you have a wired connection.
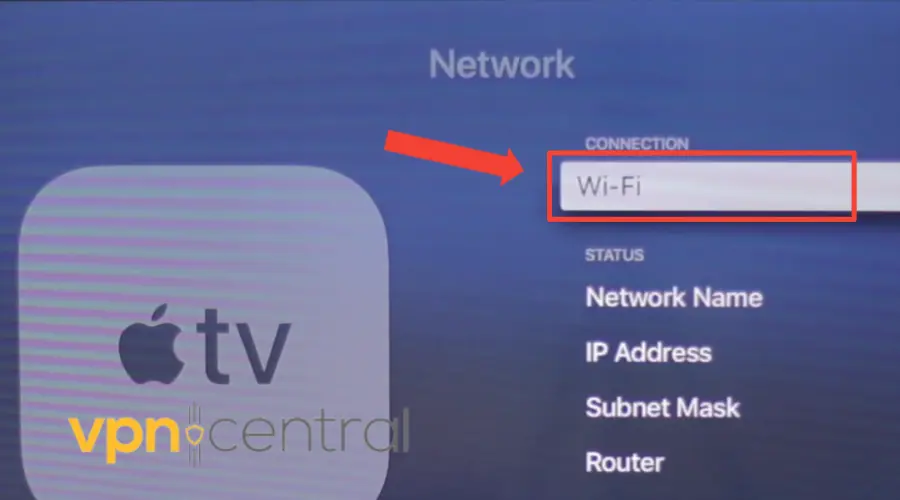
- Click on Configure DNS from the list.
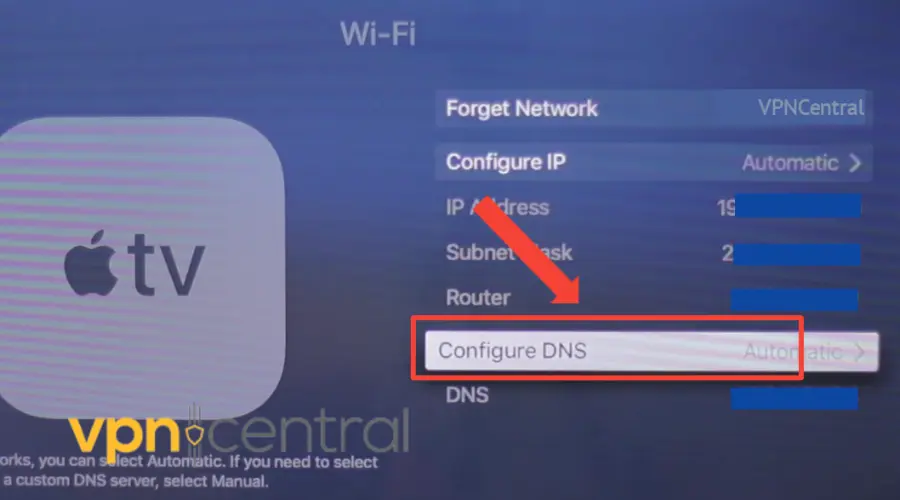
- Select the Manual button.
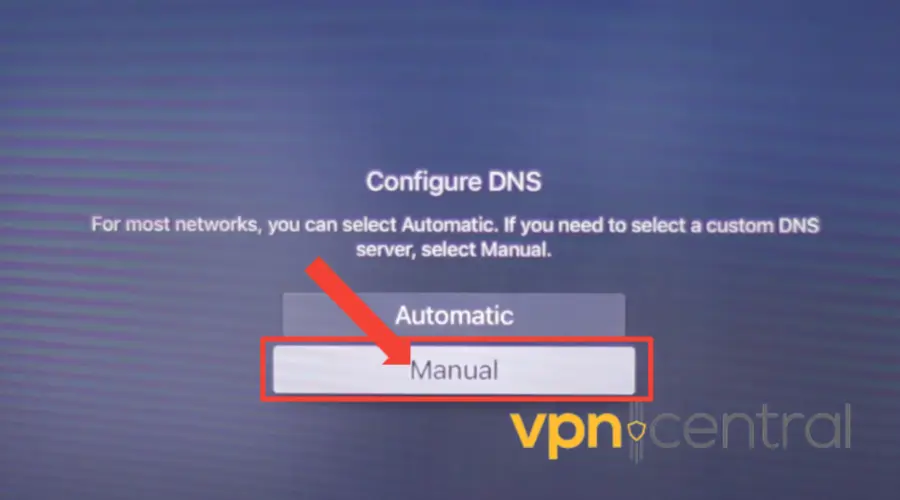
- Enter Smart DNS Proxy IPs for the Preferred DNS server.
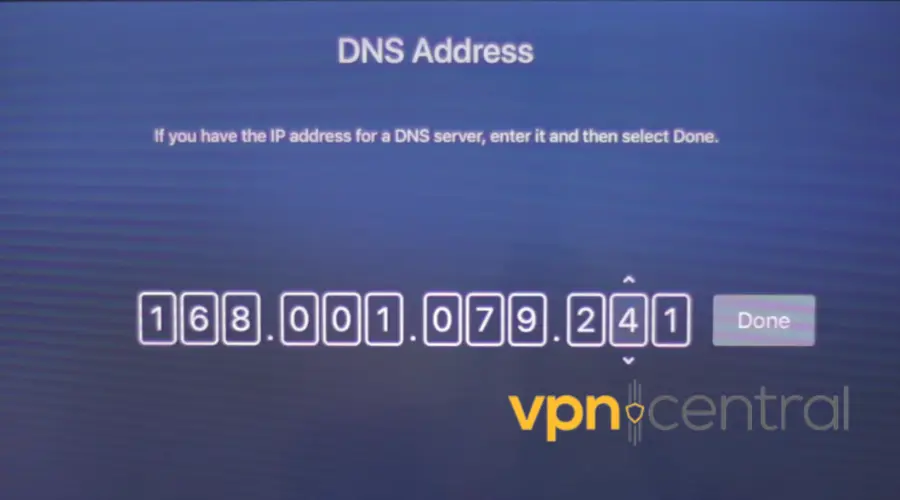
- Confirm on the Network screen the DNS address is the number you entered (omit the leading zeros).

- Click on Done.
- Return to the main screen.
- Put the Apple TV to sleep with the Sleep Now command in Settings.
- Unplug the Apple TV power cord, wait ten seconds, then plug the Apple TV back in. Alternatively, restart your Apple TV.
- You can now stream shows in the new region.
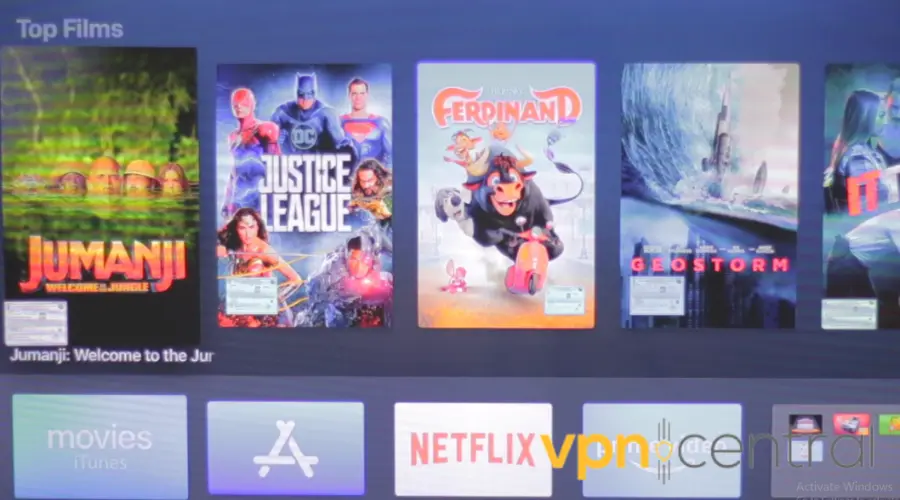
Alternatively, you can change your router’s DNS settings.
Is that a good choice? Well, that means all devices connected to your router will use the DNS server it responds to.
Besides bypassing location-based restrictions, changing your DNS settings can provide various benefits, including faster internet access and improved security.

SmartDNSProxy
Unlock global content on your Apple TV with SmartDNS Proxy.3. Use a virtual router with VPN
A virtual router is a software-based solution that emulates the functions of a physical router, allowing devices to connect to the internet through a simulated network.
It operates within your computer or device and creates a virtual hotspot that other devices can connect to, just like they would with a physical router.
Interestingly, one of the notable applications of a virtual router is the ability to change your device’s apparent location by altering the network settings.
To set up CyberGhost on a virtual router (PC), follow these steps:
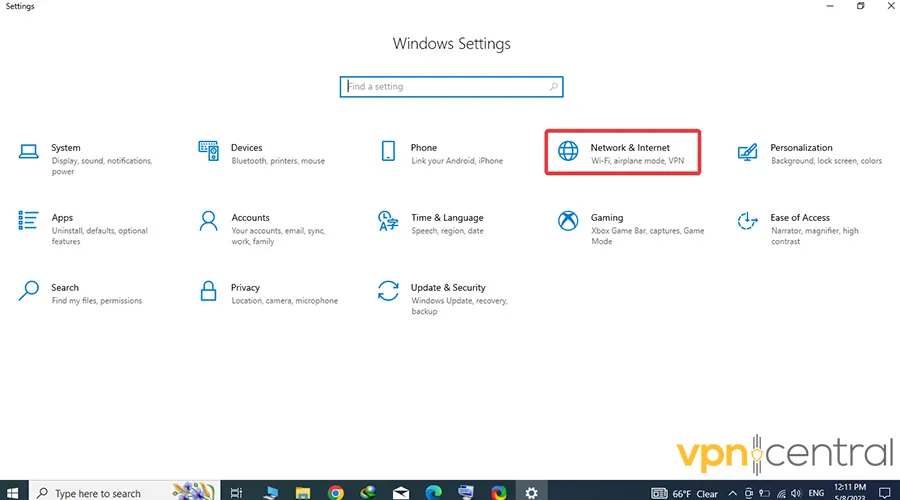
- Right-click on the Start menu (Windows icon) and select Settings.
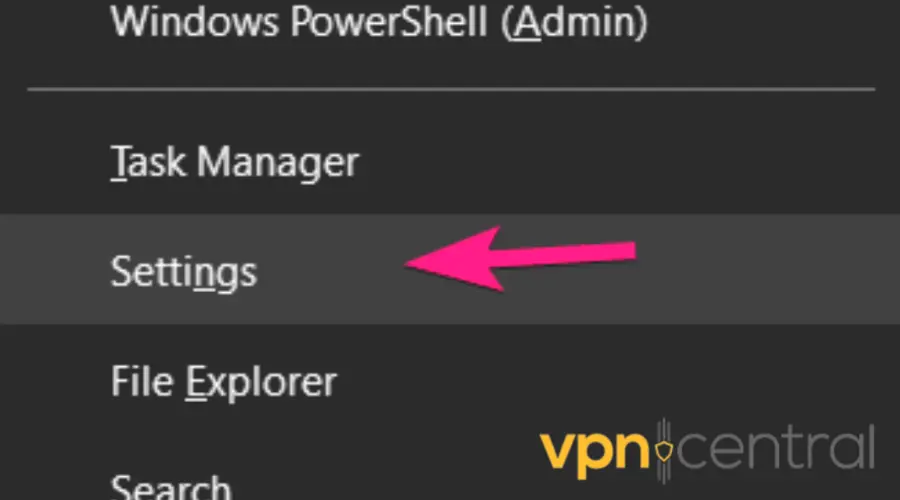
- Select Network & Internet.
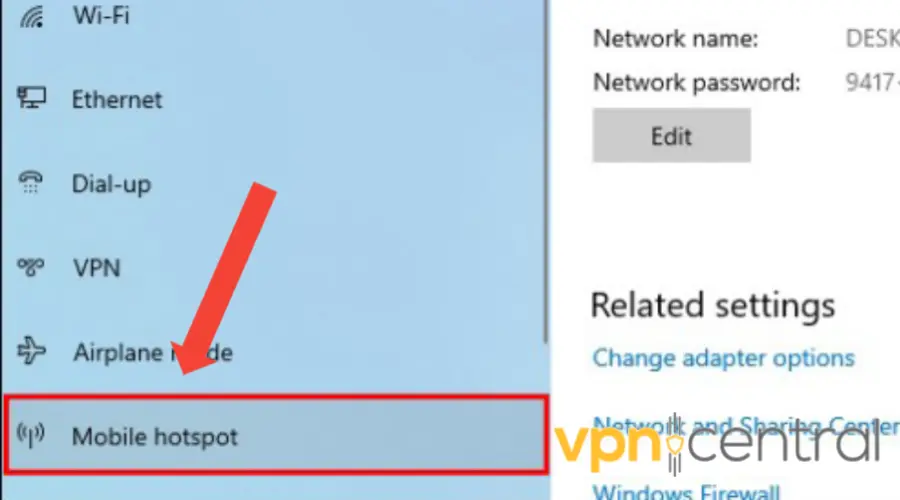
- Click on Mobile Hotspot on the list.
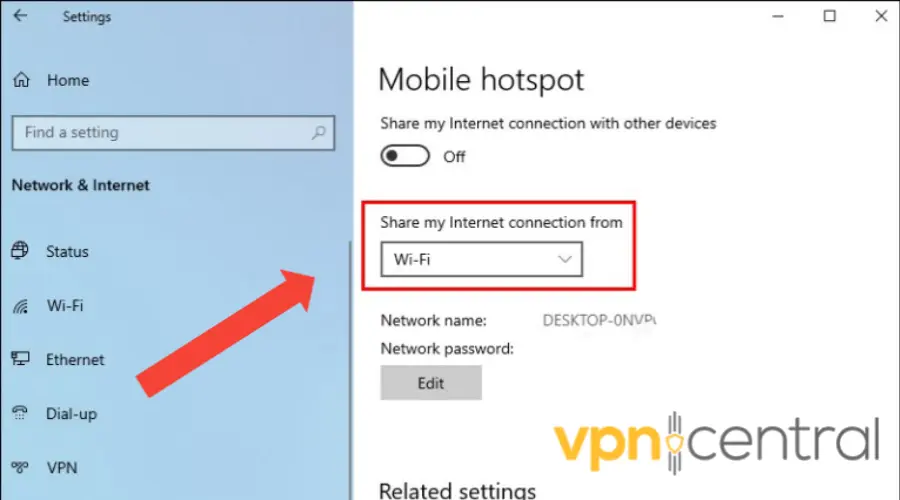
- Click on Share my Internet and select the WiFi option. Note: If you wish to use an ethernet cable to connect to your Apple TV, choose Ethernet.
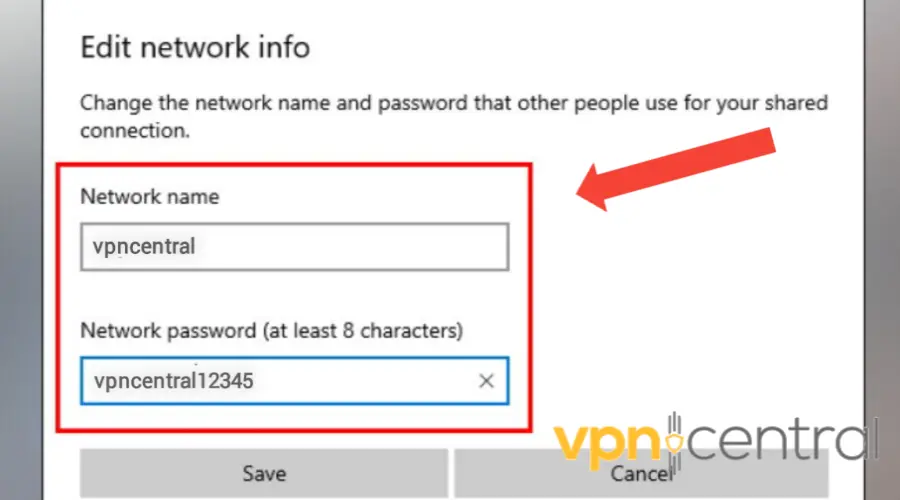
- Click on edit to choose a suitable name and password for your network.
- Visit CyberGhost’s official website and select your preferred VPN subscription plan.
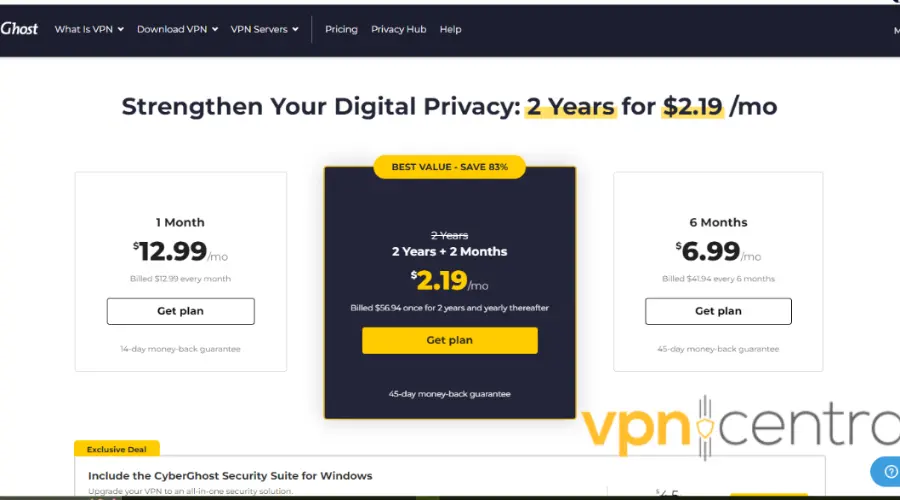
- Download and install the CyberGhost app on your PC.
- Log in using your account credentials. Ensure the VPN is not yet connected.

- Click on the expand server button and select a server location where the service is located.
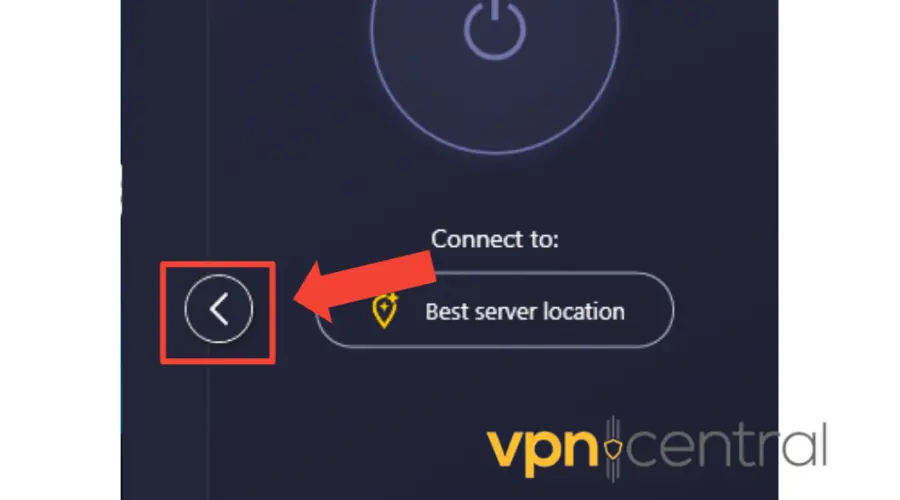
- Connect to the server.
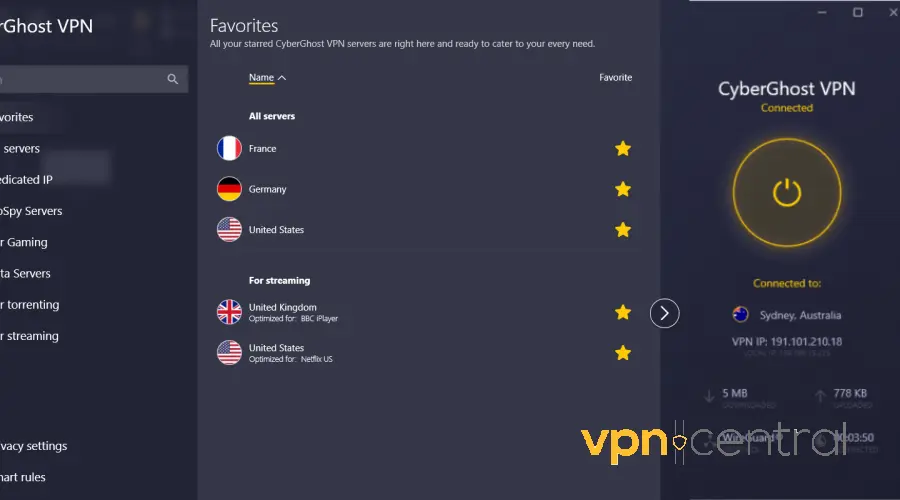
- Return to Settings, and select Network & Internet.

- Click on Change adapter options.
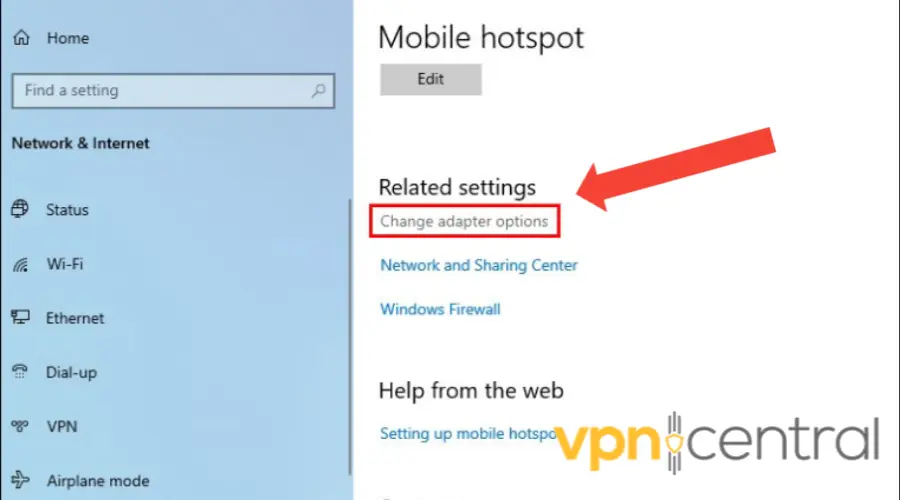
- Right-click on the VPN connection and select Properties.
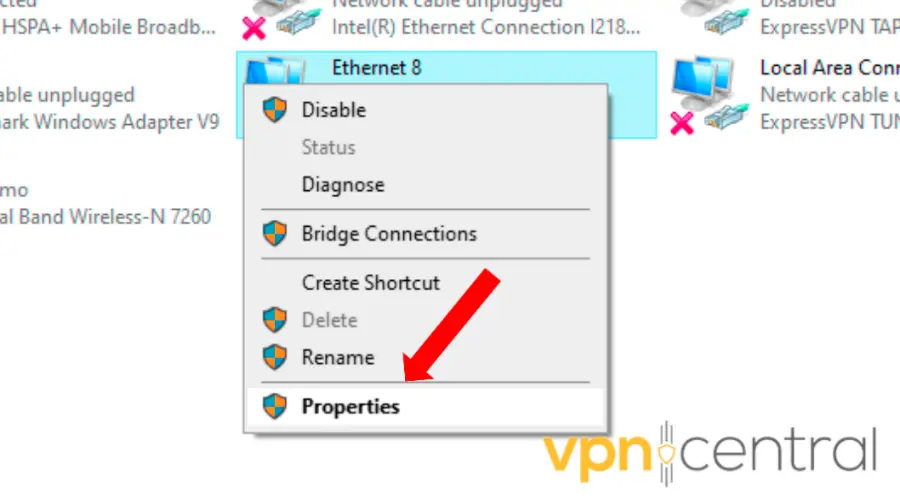
- Click on the Sharing tab, and check the box – Allow other network users to connect through this computer’s internet connection.
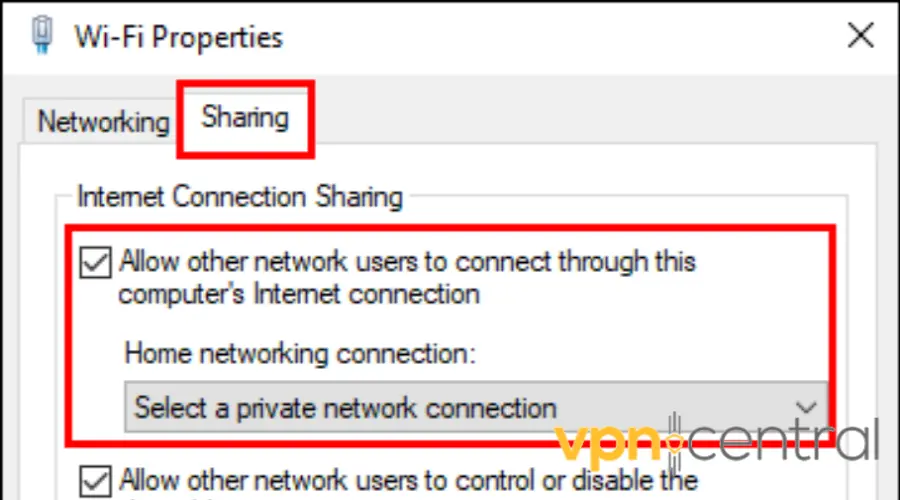
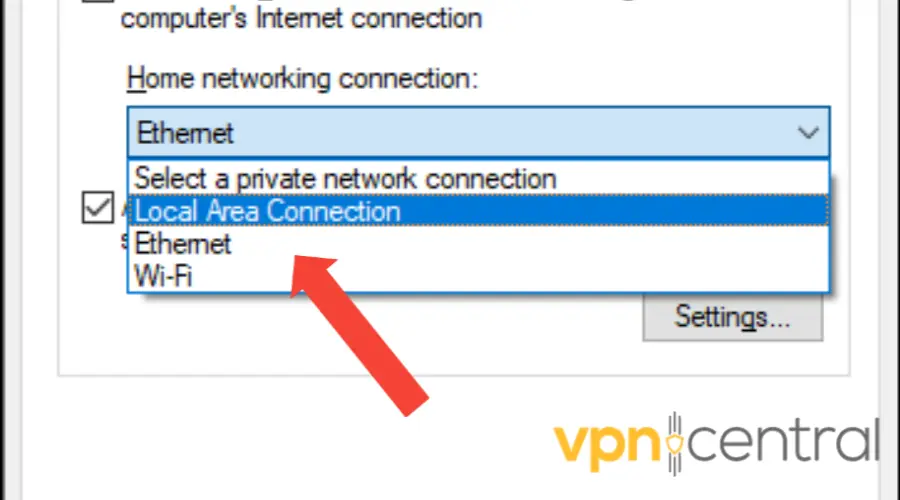
- Select the virtual router you created earlier from the Home networking connection drop-down menu.
- Click on OK to save your changes.
- Connect your Apple TV to the virtual router using the network name and password you created earlier.
- Your Apple TV will now detect your VPN location instead of your actual location.
Why you might need to trick Apple TV location?
You might need to trick your Apple TV’s location information to enjoy a broader range of streaming experiences. What do I mean?
Here is a list of various reasons and benefits that prompt users to trick their Apple TV’s location.
- Geo-restricted content access: Altering your Apple TV’s location lets you watch restricted media, including exclusive streaming, movies, TV shows, and apps.
- Varying prices in different regions: Economic differences lead to different prices for content or services. Changing your Apple TV’s location might let you access cheaper subscriptions, rentals, or purchases from other countries.
- Early content releases: Content like TV episodes can debut earlier in specific regions due to time zones or promotions. Switching your Apple TV’s location could give you first access to new content.
- Testing and development: App developers always ensure products work everywhere. Therefore, changing Apple TV’s location helps test localization, settings, and performance in different places, simulating varied user experiences.
- Privacy and security: Concealing your location can also enhance privacy, deterring third parties from tracking your online actions. Therefore, altering the device’s location makes it tougher to trace or profile your activities based on where you are.
Summary
Apple TV is no doubt one of the biggest names in the TV market. Its streaming service Apple TV Plus has rapid growth, showcasing the brand’s popularity.
However, geo-restrictions are a big downside for its users. But the good news is that you can bypass them if you change your IP address.
The best tool to do that is a VPN, closely followed by smart DNS.
So don’t miss out on exclusive content or suffer from region-based limitations any longer. Follow the guide above to trick Apple TV’s location.
Read our disclosure page to find out how can you help VPNCentral sustain the editorial team Read more



User forum
0 messages