How to Fix Warzone Lag Issues on PS4, PS5 and Xbox
Call of Duty: Warzone is arguably one of the most popular battle royale game at the moment.
Unfortunately, it’s also infamous for its performance issues. It’s so bad that lag has become one of the deadliest things in any given match.

Access content across the globe at the highest speed rate.
70% of our readers choose Private Internet Access
70% of our readers choose ExpressVPN
Browse the web from multiple devices with industry-standard security protocols.

Faster dedicated servers for specific actions (currently at summer discounts)
Here’s why you might be finding Warzone unplayable and what to do about it.
How to fix Warzone lag issues?
Here’s what you can do when lag is killing your Warzone session:
1. Use a VPN
One of the best gaming VPNs to use with Warzone, ExpressVPN can conceal your PS or Xbox traffic from your ISP even if your console doesn’t have native VPN support.
Install ExpressVPN on a router
- Create an ExpressVPN account.
- Set it up on your existing or new router.
- Follow the specific on-screen setup instructions for your unit.
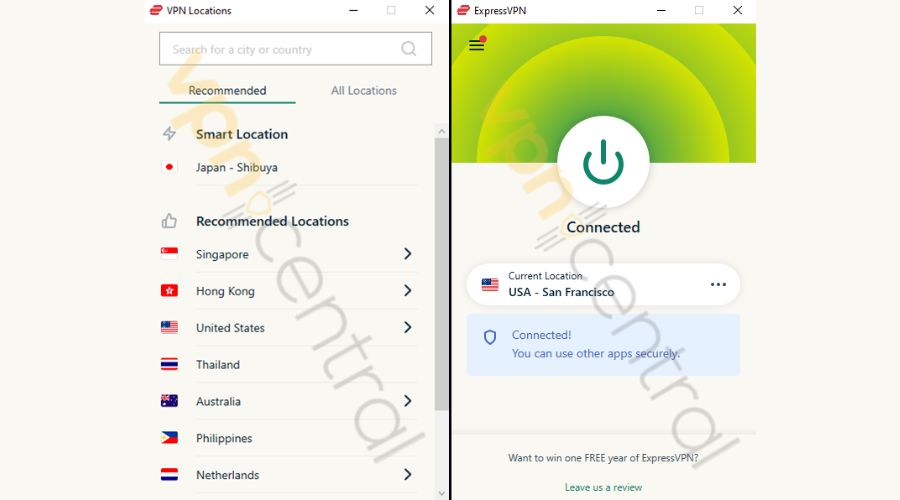
Choosing an OpenVPN configuration file for a server that works well for Warzone matters. Remember: the closest servers generally have the lowest ping rates.
Create a virtual router on Windows 8
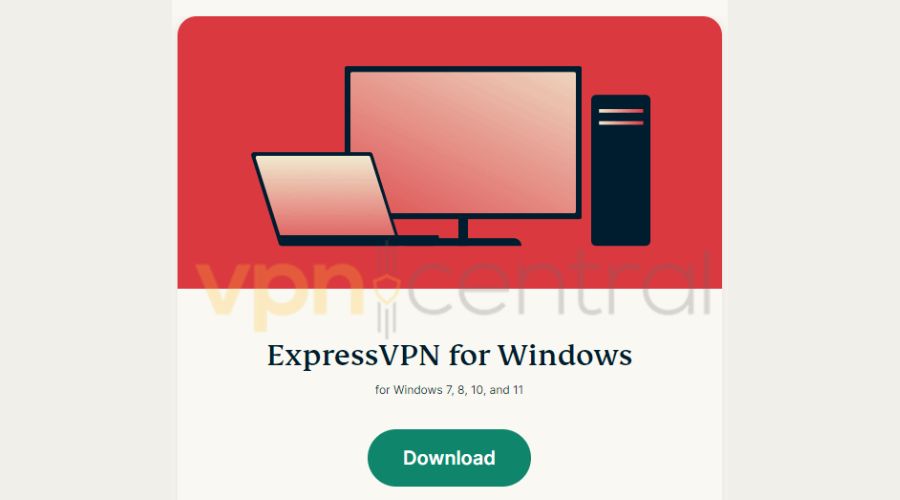
- Download ExpressVPN for Windows, but don’t run it yet.
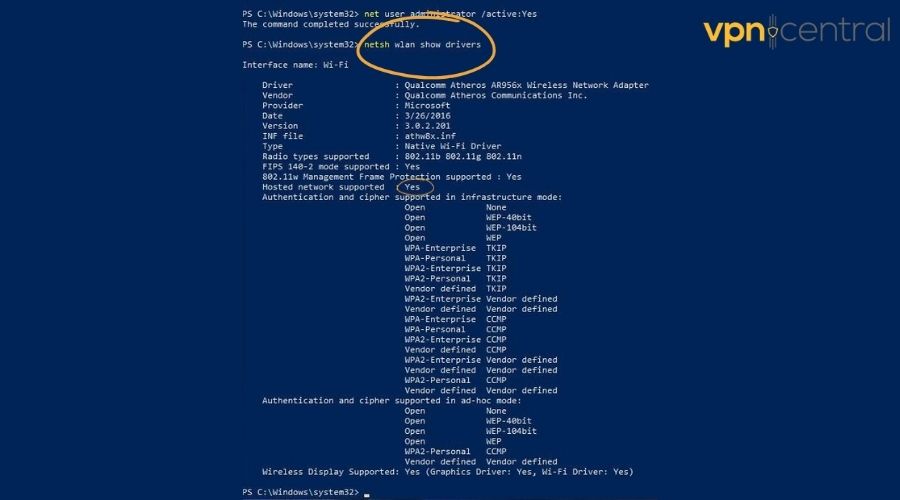
- Type cmd in the Search field for Command Prompt.
- Right-click Command Prompt and choose Run as an administrator.
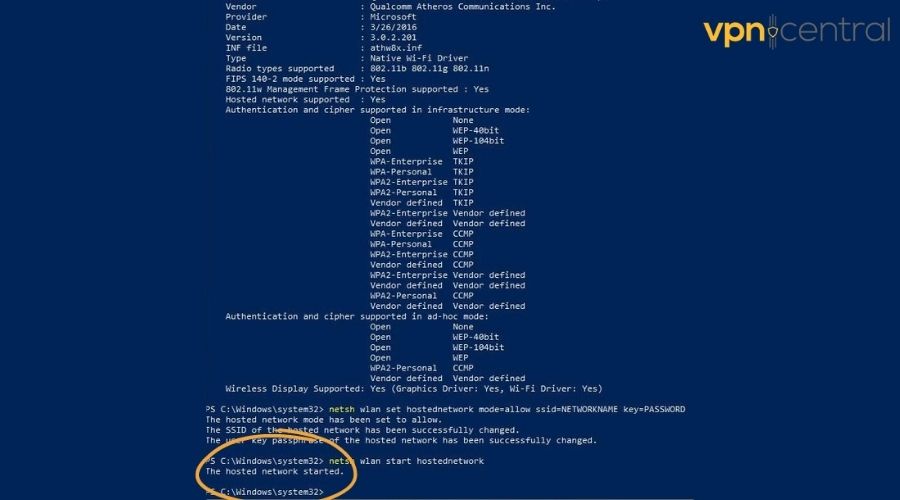
- Enter the command: netsh wlan show drivers.
- Look for Hosted network supported: Yes to verify that your PC has virtual router support.
- Set your own network name and password before entering this command: netsh wlan set hostednetwork mode=allow ssid=NETWORKNAME key=PASSWORD.
- Create a new virtual server.
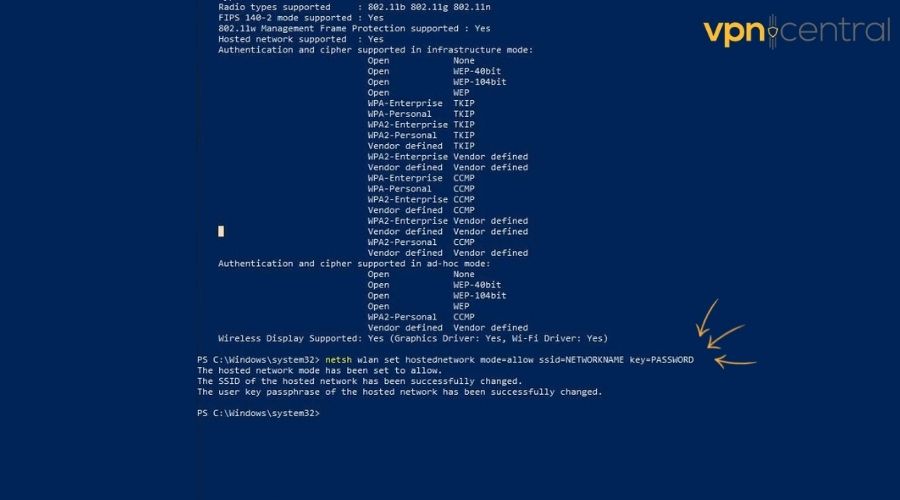
- Enter this command in the Command Prompt: netsh wlan start hostednetwork.
- Make sure it says The hosted network started to determine whether you still need to update your network adapter drivers.
- Prompt Run by hitting the Windows icon + R.
- Enter this: ncpa.cpl and click OK.
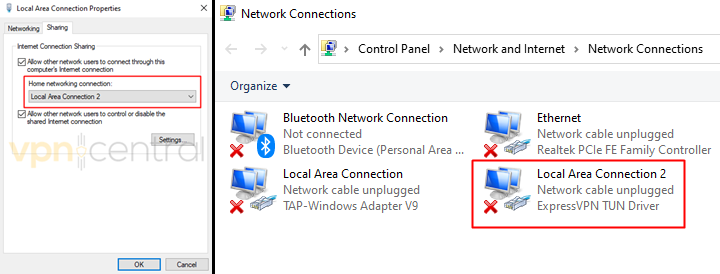
- Right-click Ethernet 2 and go to Properties.
- Check the Allow other network users to connect through this computer’s Internet connection box in the Sharing tab.
- Choose Local Area Connection* under Home networking connection, which is the name of the virtual router you created, and click OK.
- Launch ExpressVPN for Windows and select a VPN server.
Share your connection on Windows 10
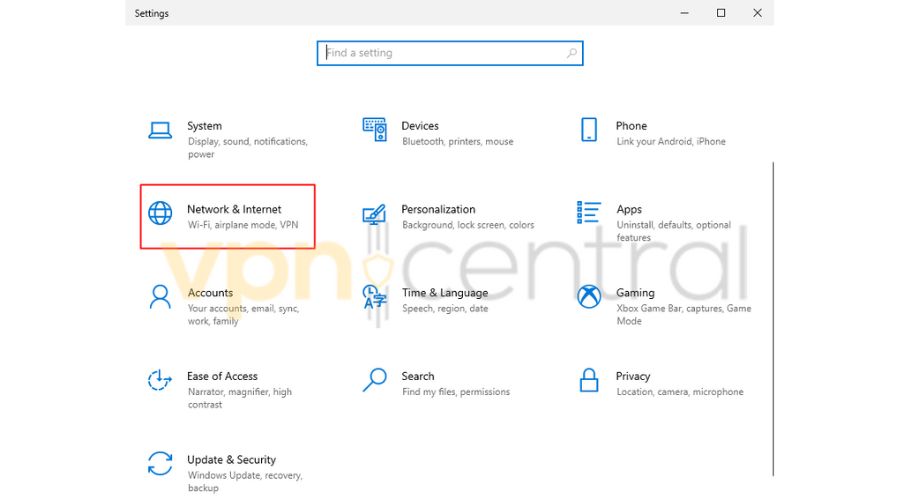
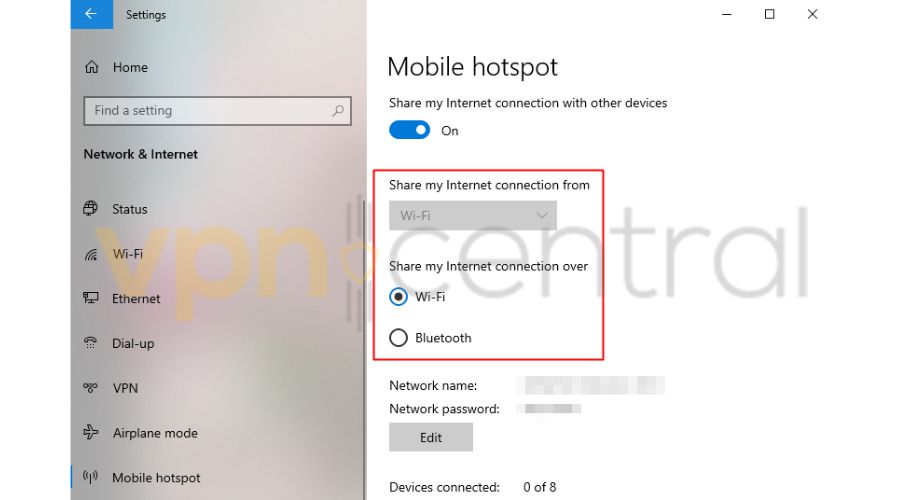
- Go to Settings > Network & Internet.
- Toggle on Mobile hotspot.
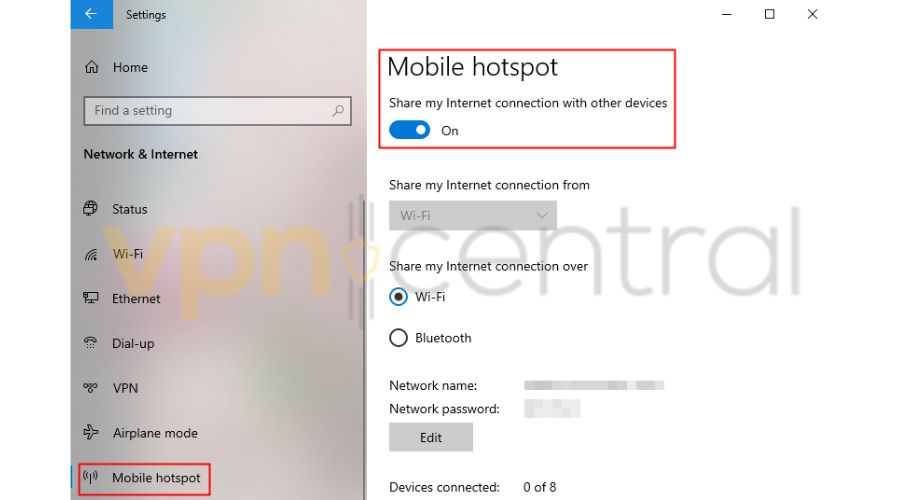
- Select Wi-Fi under Share my Internet connection from.
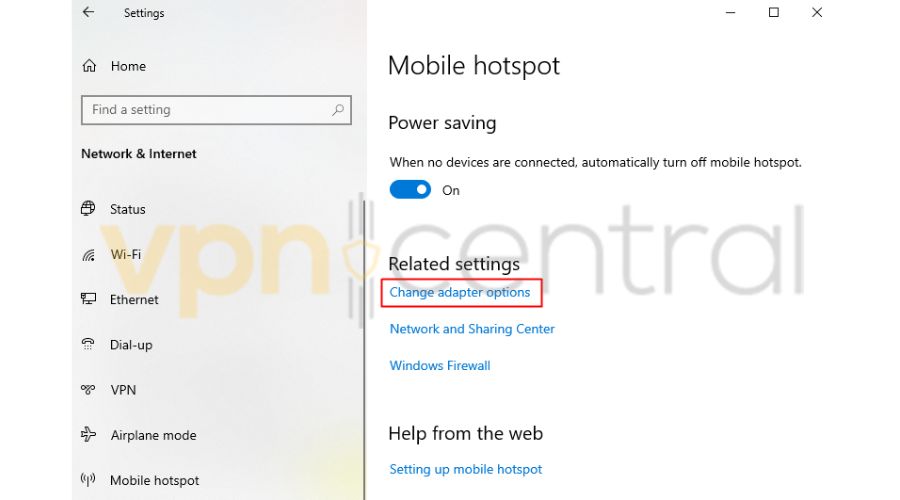
- Choose Change adapter options under Related settings.
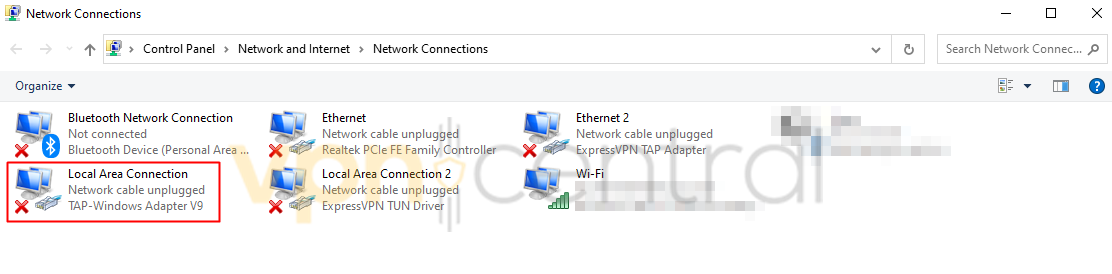
- Right-click Local Area Connection in the Network Connections window and select Properties.
- Check the Allow other network users to connect through this computer’s Internet connection box in the Sharing tab.
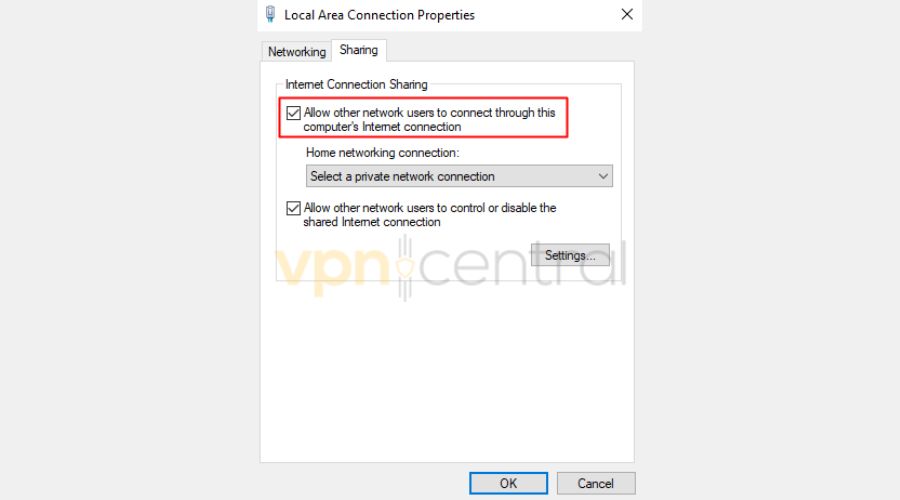
- Choose Local Area Connection* under Home networking connection, which is the name of the mobile hotspot you created, and click OK.
- Launch ExpressVPN for Windows and select a VPN server.

Set up and share a VPN connection on Mac
- Connect your Mac to an Ethernet cable.
- Sign on the ExpressVPN setup page.
- Enter the verification code sent to your registered email.
- Select L2TP/IPsec.
- Keep the browser window open.
- Click the Apple logo.
- Go to System Preferences… > Network.
- Click + in the Network window.
- Enter VPN, L2TP over IPsec, and a name to identify your VPN connection in the Interface, VPN Type, and Service Name fields, respectively.
- Enter Default, one of the server addresses shown on the open browser window, and your username in the Configuration, Server Address, and Service Name fields, respectively.
- Check the Show VPN status in the menu bar box to render the VPN connection status visible.
- Click Authentication Settings.
- Enter your password and 12345678 in the Password and Shared secret fields, respectively, and click OK.
- Go to Advanced.
- Check the Send all traffic over VPN connection box and click OK.
- Click Apply to save everything.
- Click Connect in the Network window to start sharing your ExpressVPN connection.
- Go back to System Preferences.
- Check the Internet Sharing box on the left panel after clicking Sharing.
- Select L2TP/IPsec VPN connection under Share your connection from on the right side of the screen.
- Check the Wi-Fi box under To computers using.
- Click Wi-Fi options.
- Create a network name and password.
- Leave Channel as default.
- Choose WPA2 Personal for Security and click OK.
For your VPN to work properly with Warzone, you have to configure it properly, as shown above. Additionally, if it’s not working properly, make sure your security permissions allow VPN usage.
2. Change the graphical settings
To increase the FPS on PS5 to experience no Warzone lag, do this:
- Go to Settings > Screen and Video > Video Output from the main menu.
- Set Enable 120 Hz Output to Automatic.

- Go to Settings > Saved Data and Game/App Settings > Game Presets.
- Set Performance Mode or Resolution Mode to Performance Mode.
- Set the resolution to 1080p by going to Settings > Screen and Video > Video Output if you have HDMI 2.0 hooked into your TV or monitor.
- Don’t bother with any additional manual configuration if you have HDMI 2.1.
On Xbox, you can try this:
- Click the Xbox button on your controller.
- Go to Profile & system > Settings > General > TV & display options > Video modes.
- Choose your preferences based on the settings your TV supports.
If you have an audio-video receiver (AVR) connected between your console and your TV and are experiencing Warzone stuttering, follow these steps instead:
- Power on your devices in this order: TV, AVR, and Xbox.
- Switch your AVR’s input source away from your Xbox using the TV remote.
- Switch back to your Xbox’s input source.
- Restart your AVR.
- Click the Xbox button.
- Go to Profile & system > Settings > General > TV & display options.
- Choose Video fidelity & overscan.
- Pick HDMI from the Overrides dropdown.
By boosting your game console’s FPS, Warzone would look more fluid and realistic. It would be like playing it on a PC.
3. Change your router’s DNS settings
Using a DNS server not owned by your ISP can speed up your internet connection. But you’d have to do it at the DNS level to fix any lag in Warzone on gaming consoles.
Here’s how to get started:
- Find out your router’s make and model.
- Google the specific configuration instructions for your unit.
Tweaking a router’s DNS settings applies the changes to all devices connected to it, including game consoles.
Moreover, you can change the DNS settings on your PC and share your VPN connection as explained above.
But if you use a VPN, you won’t have to worry about these settings. By default, you’d be using your VPN vendor’s DNS servers instead of your ISP’s.

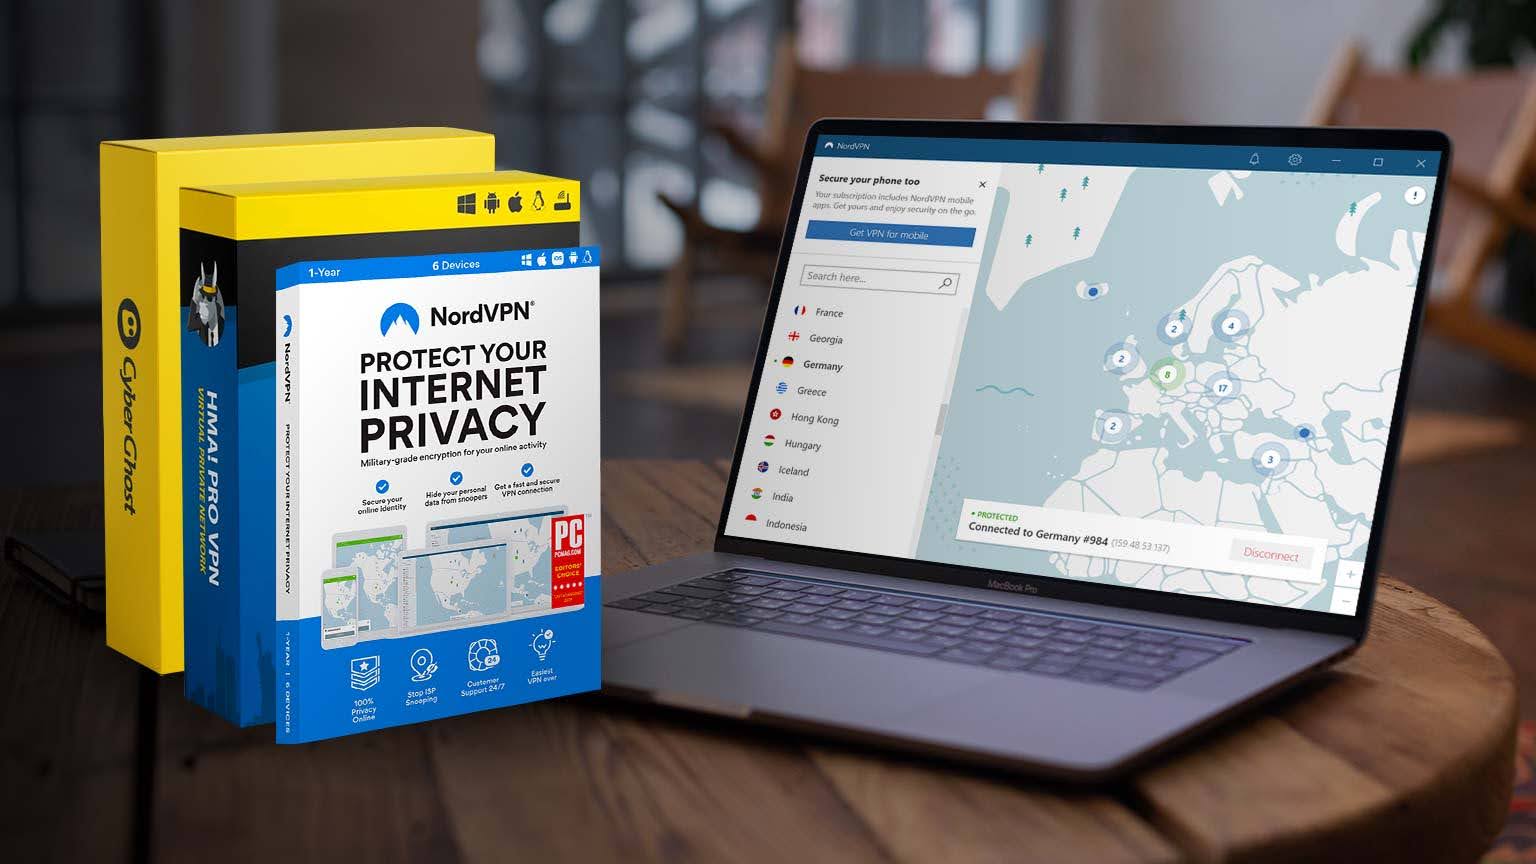
ExpressVPN
Enjoy lag-free gameplay on your console with this secure and fast VPN.Why is Warzone so laggy?
If you experience trouble playing Warzone on PS or Xbox, it’s likely due to one of these reasons:
- Internet throttling — That occurs when your internet service provider (ISP) intentionally slows down your connection speed to discourage you from consuming too much data.
While that’s undeniably unfair, the only way to avoid such issues is to hide your online activity.
- High latency — Latency pertains to the speed data travels between your console and the game server. The higher the latency, the likelier the chance of rubber banding.
To keep COD: Warzone lag to a minimum, your ping should be less than 100 ms. Any higher could affect your reaction during firefights and even get you temporarily banned from matchmaking.
So, what drives up latency?
It could be due to slow base connection speed or if you’re connected to Wi-Fi. Wired beats wireless any day.
- Low FPS — As a general rule, a higher frame rate means better game fluidity. That’s why low FPS can make Warzone feel less smooth to you.
Sadly, your console limits the highest amount of FPS you can enjoy. On PS4, the best you can do is 60 FPS. But on PS5 and Xbox X, it’s possible to get
- Console issues — Lag in Warzone may be because your console’s software is buggy or its hardware is shot. You can’t get the best performance from it unless it’s clean and updated.
If you experience high latency on all of your games and have no internet problems with your other devices, your PS or Xbox might be to blame.
Once you figure out what’s causing your Warzone trouble, you can take the steps to resolve it accordingly.
Wrap up
It’s a shame that such an awesome battle royale title is often plagued by performance issues.
Thankfully, our tips above can effectively fix any Warzone lag you may experience.
That way, you can focus on scoring victories instead of hoping the screen won’t freeze at the worst moment.
Read our disclosure page to find out how can you help VPNCentral sustain the editorial team Read more

Improve this guide

User forum
0 messages