5 Ways to Fix the NordVPN Authentication Error
Say goodbye to NordVPN’s login authentication error today.

Is the NordVPN authentication error locking you out of the app? Don’t worry, I’ve got you covered!
The problem typically pops up following failed login attempts. Even efforts to change passwords from NordVPN’s website hardly help.

Access content across the globe at the highest speed rate.
70% of our readers choose Private Internet Access
70% of our readers choose ExpressVPN
Browse the web from multiple devices with industry-standard security protocols.

Faster dedicated servers for specific actions (currently at summer discounts)
Whenever this happens, the VPN becomes impossible to use. Having been there before, I perfectly understand your frustration.
So, why does it happen and how can you fix it? Read along to find out.
What’s the authentication error on NordVPN?
NordVPN’s authentication error occurs when the service can’t verify your login details. This may arise due to several reasons, including the app malfunctioning.
Such an underlying issue can cause the VPN’s sign-in process to break. Accordingly, the service will lock you out to safeguard your account.
Your device antivirus could be another culprit that’s causing trouble. Some users report Kaspersky interfering with NordVPN’s connections.
This isn’t unusual because antiviruses tend to flag anything suspicious as a security threat. When that happens, it interferes with login, limiting your ability to use NordVPN.
The good news? This problem is super easy to fix.
NordVPN authentication error (Fixed)
Below are various workarounds to resolve NordVPN’s login authentication error glitch. They require little to zero technical know-how to execute.
1. Restart NordVPN services
NordVPN comes with several services that run in the background. Over time, they can get bogged down or encounter errors.
Restarting them clears any underlying problems, alongside freshening things up. Doing so helps to enhance the performance and stability of the VPN.
Follow these steps:
- Use the search option on your Windows PC.
- Search for the Services App and run it.
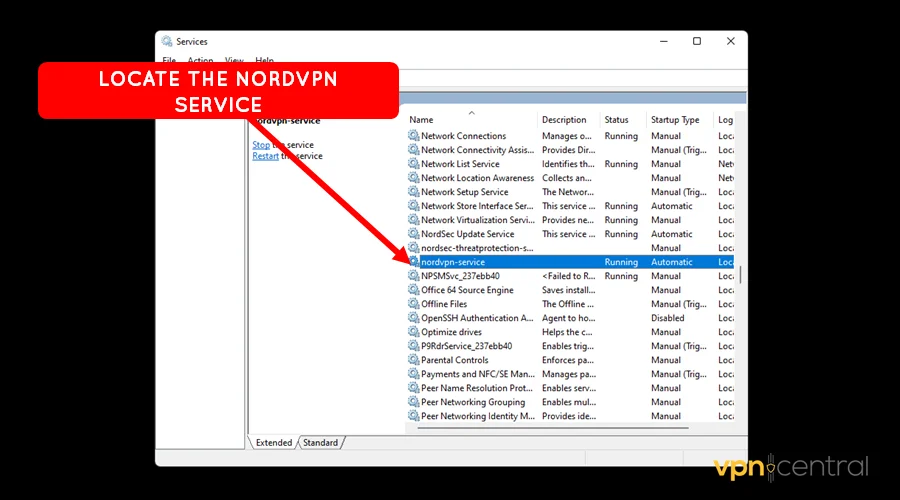
- Select the Extended tab and look for NordVPN-Service.
- Right -click it and choose Restart.
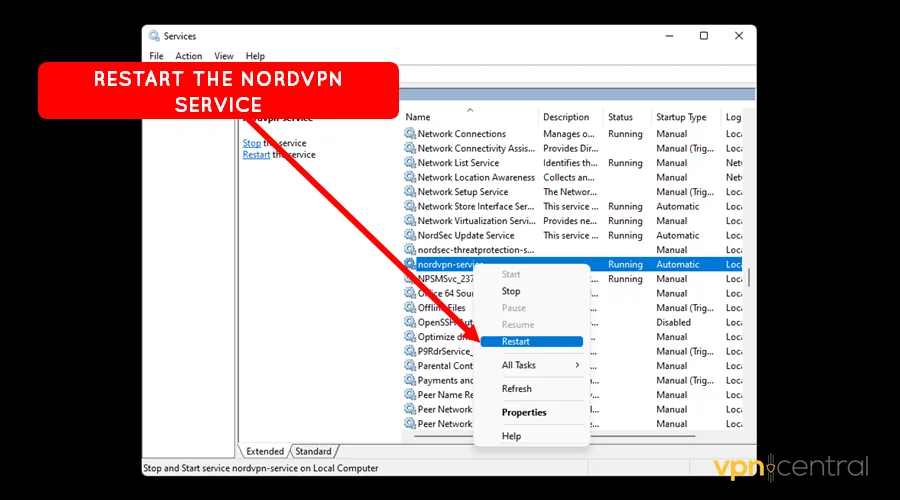
- Relaunch your NordVPN app and log in.
Unfortunately, this method is only available for Windows-based devices. However, the next workaround works on pretty much all computers.
2. Reset NordVPN/Clear cache
NordVPN depends on storing temporary data on your device to run smoothly. This is also known as cache, which helps improve the user experience.
Over time, it can get corrupted or cluttered, causing authentication issues to emerge. Luckily, performing a reset helps clear it and give the app a clean slate.
I’ll show you how this works on computers and mobile devices. Follow the guide below:
?️ For computers:
- Close the NordVPN app on your device.
- Right-click the NordVPN icon and select Open File Location.
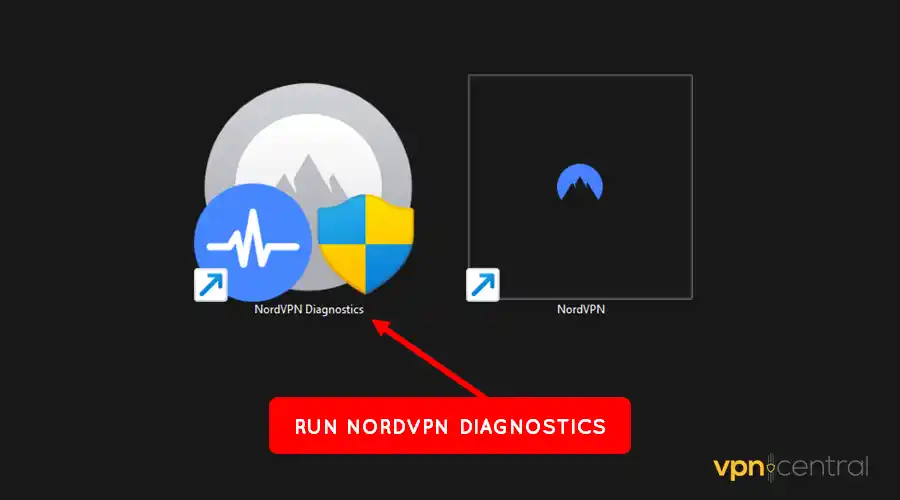
- Run the NordVPN Diagnostics app.
- Click the Reset App button and wait for the process to complete.
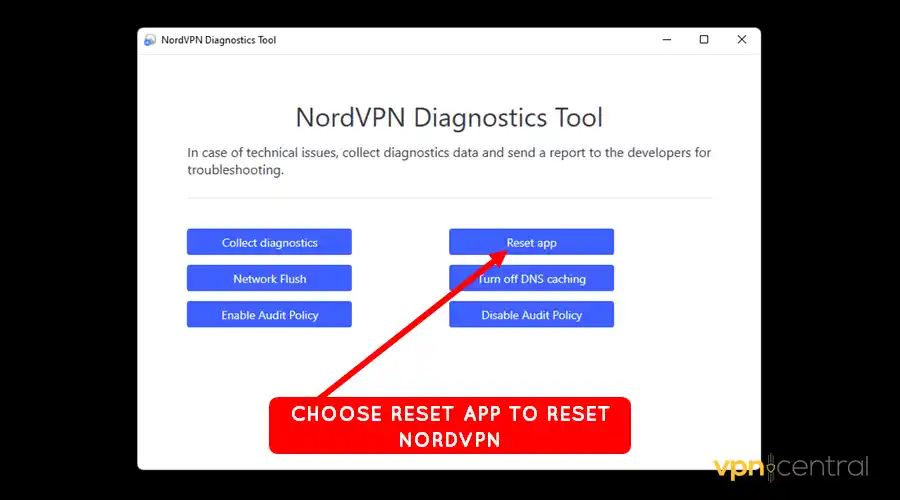
- Relaunch the NordVPN app and log in.
?For mobile devices:
- Open Settings on your device.
- Locate NordVPN under the list of apps.
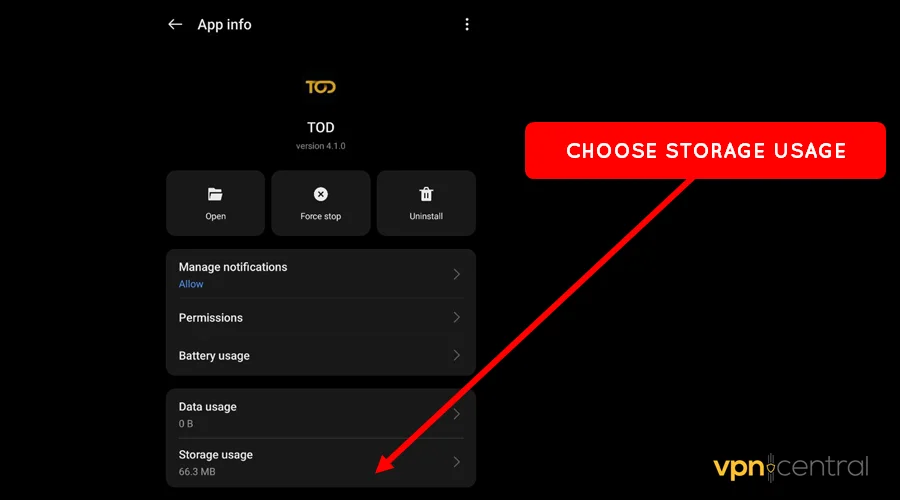
- Select the Storage Usage option.
- Choose Clear Data and Cache.
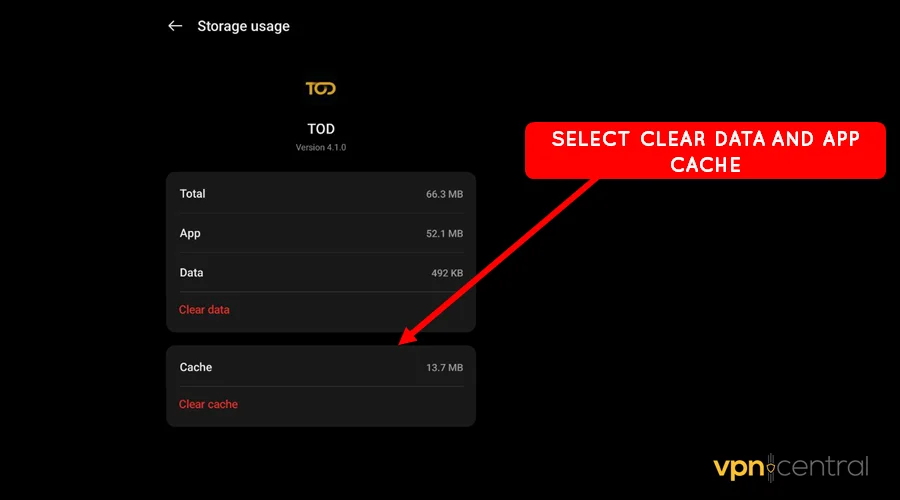
- Run the app and sign in as usual.
If this doesn’t work, there’s a chance that you’re using an outdated app. And this takes us to the next method.
3. Update NordVPN
Application upgrades provide critical bug fixes and improve performance. But, users hardly update apps when newer ones come out.
So, developers stop supporting the older versions to push you. You may encounter login issues when this happens with NordVPN.
The good thing? It’s effortless to update the app. Use these steps:
- Open your device app store.
- Search for NordVPN and select it from the list of options.
- Select the update button and wait for the process to complete.
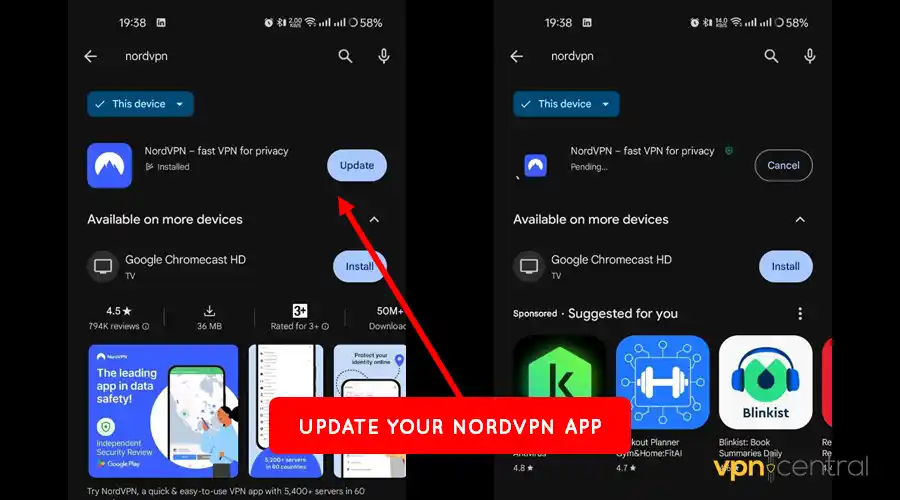
- Run the app and sign in.
Updating NordVPN will give you access to upgraded features. These can help enhance usability for a butter-smooth experience.
4. NordVPN antivirus exclusion
Antivirus programs fight the bad guys, but sometimes they get overzealous. Such occurrences cause them to block safe apps like NordVPN by mistake.
However, you can whitelist trusted services to prevent false flagging incidents. This will enable the VPN to connect and operate freely without interruptions.
This is how it works:
- Open Settings on your antivirus program.
- Locate and select Firewall Settings.
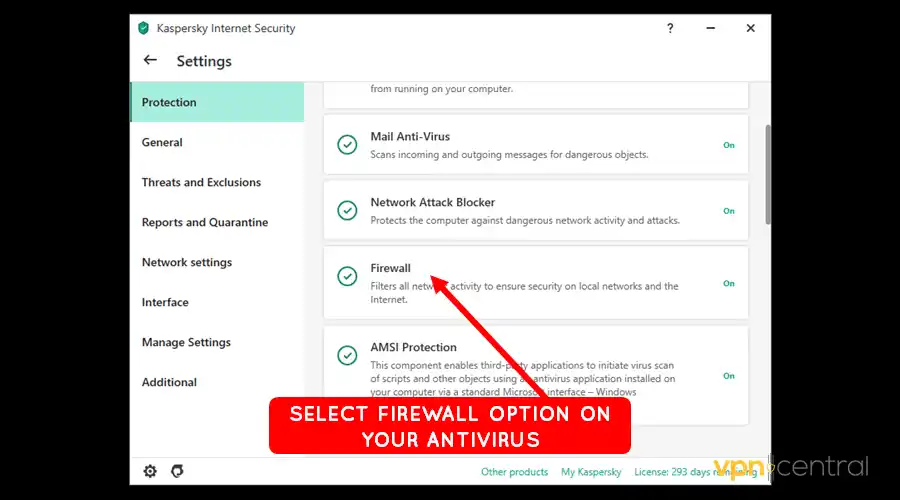
- Open Application Network Rules.
- Find NordVPN from the list of apps and set it to Allow.
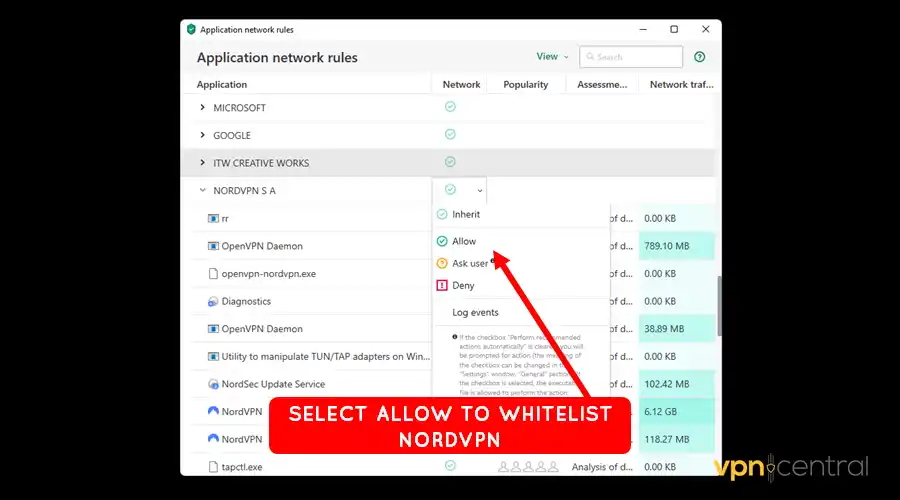
The process above may differ from one antivirus to another. Always refer to your vendor’s knowledge base before employing this workaround.
Still not working?
5. Clean reinstall NordVPN
Reinstalling NordVPN is a simple yet effective solution to many app-related problems. This process helps resolve issues arising from corrupted data and botched configurations.
It works more or less the same way like resetting/clearing app cache. However, this allows you to have a fresh start by ensuring everything is up-to-date.
Use this guide:
- Stop NordVPN from running by closing it.
- Go to your list of apps on your device.
- Find NordVPN and select the Uninstall option.
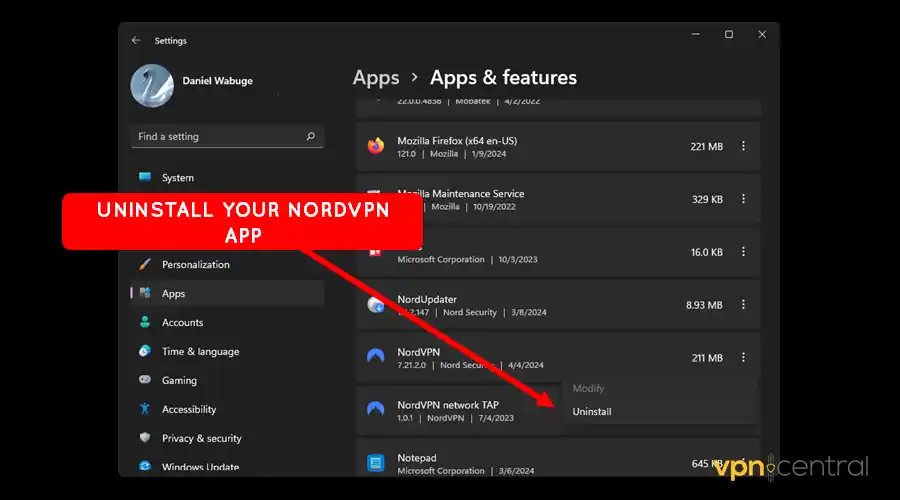
- Wait for the uninstallation to complete and reboot your device.
- Go to NordVPN, download the app, and install it.
Reinstalling may take time, but it’s worth it. It’s a simple, effective solution to many app-related problems.
That’s as simple as it gets.
Wrapping up
Experiencing the NordVPN authentication error can be pretty bothersome. The issue mainly occurs whenever the service fails to verify your login details.
Luckily, there are various novice-friendly ways to fix this problem. Should the problem persist, consider switching to other alternatives on the market.
That said, now it’s your turn to go ahead and fix this problem. Good luck!
Read our disclosure page to find out how can you help VPNCentral sustain the editorial team Read more

Improve this guide


User forum
1 messages