4 Easy Ways To Fix Pi-hole Not Working with a VPN
Both VPNs and Pi-hole are great tools for increased privacy on your Raspberry Pi, but they’re not always working great together.
Most commonly when your VPN is not working with Pi-hole, you’ll encounter loading errors, software crashes, or can’t view certain websites.
On top of those, another common issue is Pi-hole simply not being able to block ads after you connect to a VPN. In this post, we will show you how to fix the issue in a few simple steps.
Why is Pi-hole not working with your VPN?
In most cases, the following factors can cause issues when using Pi-hole with a VPN.
- DNS conflicts between Pi-hole and VPN
- Buggy Pi-hole app
- Using incompatible VPNs
We found some simple ways to fix these issues so that you can block ads and ensure your online privacy.
How to fix Pi-hole not working with VPN
1. Set your Pi-hole to listen on all interfaces
Allowing Pi-hole to listen on all interfaces configures your network to redirect all DNS requests through Pi-hole’s gateway.
To enable this setting, follow these steps:
- Open Pi-hole Settings and navigate to the DNS tab.
- Tick the box next to the Listen on all interfaces option.
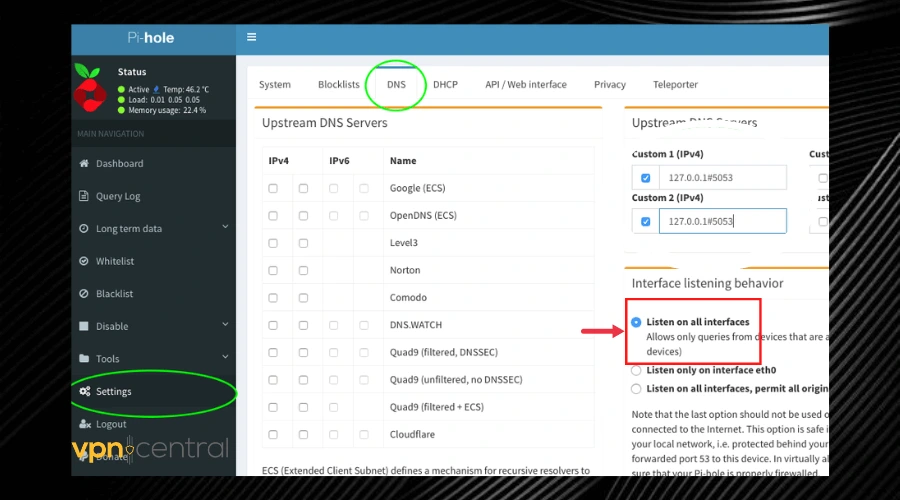
This will get rid of permission conflicts between your VPN and Pi-hole, allowing them to work together.
2. Disable DNS leak protection on your VPN
If none of the other options fix your problem and you still encounter errors, disable DNS protection on your VPN. Pi-hole uses a similar feature as well and having both enabled results in conflicts.
- Open your VPN app and go to Settings.
- Click the Advanced tab.
- Untick the box next to the Prevents IPv6 address detection while connected option.
- Click OK to apply the changes.
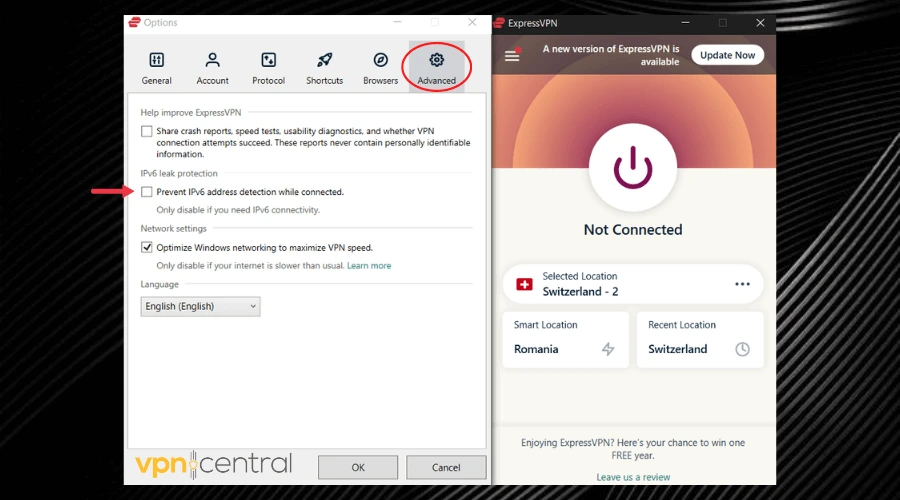
This method makes sense because Pi-hole has its own DNS so when your VPN’s DNS leak protection is active, your device cannot use other DNS addresses besides the one belonging to your VPN.
However, it is important to note that not all VPN services have the exact same interface as the one in the picture above, but it should be similar for clients that have the DNS protection feature.
Also, note that choosing this step will make your DNS requests visible.
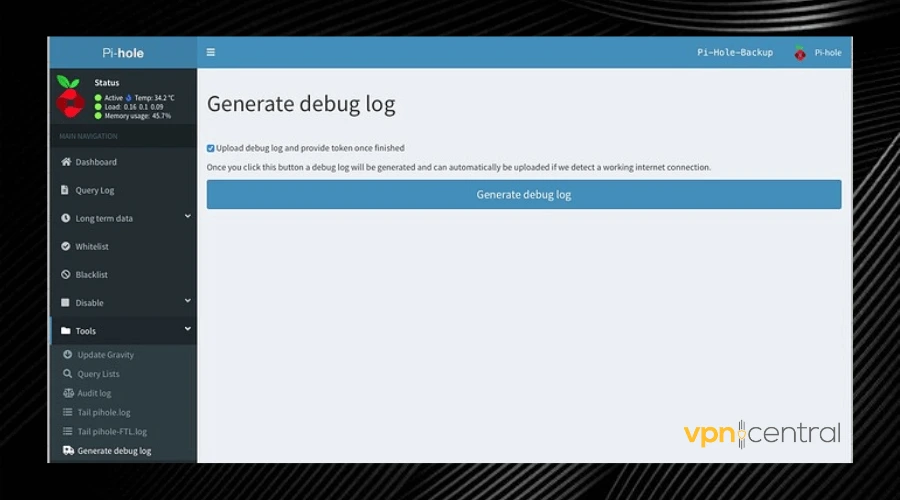
3. Debug Pi-hole
Bugs and errors can occur due to file corruption, faulty installations, or simply because you didn’t configure your setup properly.
Pi-hole being buggy can be the reason why it’s not working with your VPN, but you can easily fix it:
→ Using the web interface
- Log into your Pi-hole‘s web interface.
- Navigate to Tools to generate the debug token.
- Click the Generate debug log tab.
- Send the debug token to the support team.
→ Debug in Terminal
- Open Terminal.
- Enter
pihole -d. - Get the debug token and send it to the support team.
This option will allow you, with the help of the support team to understand and fix the issues that are particular to your configuration and find a proper solution when it’s not working with your VPN.
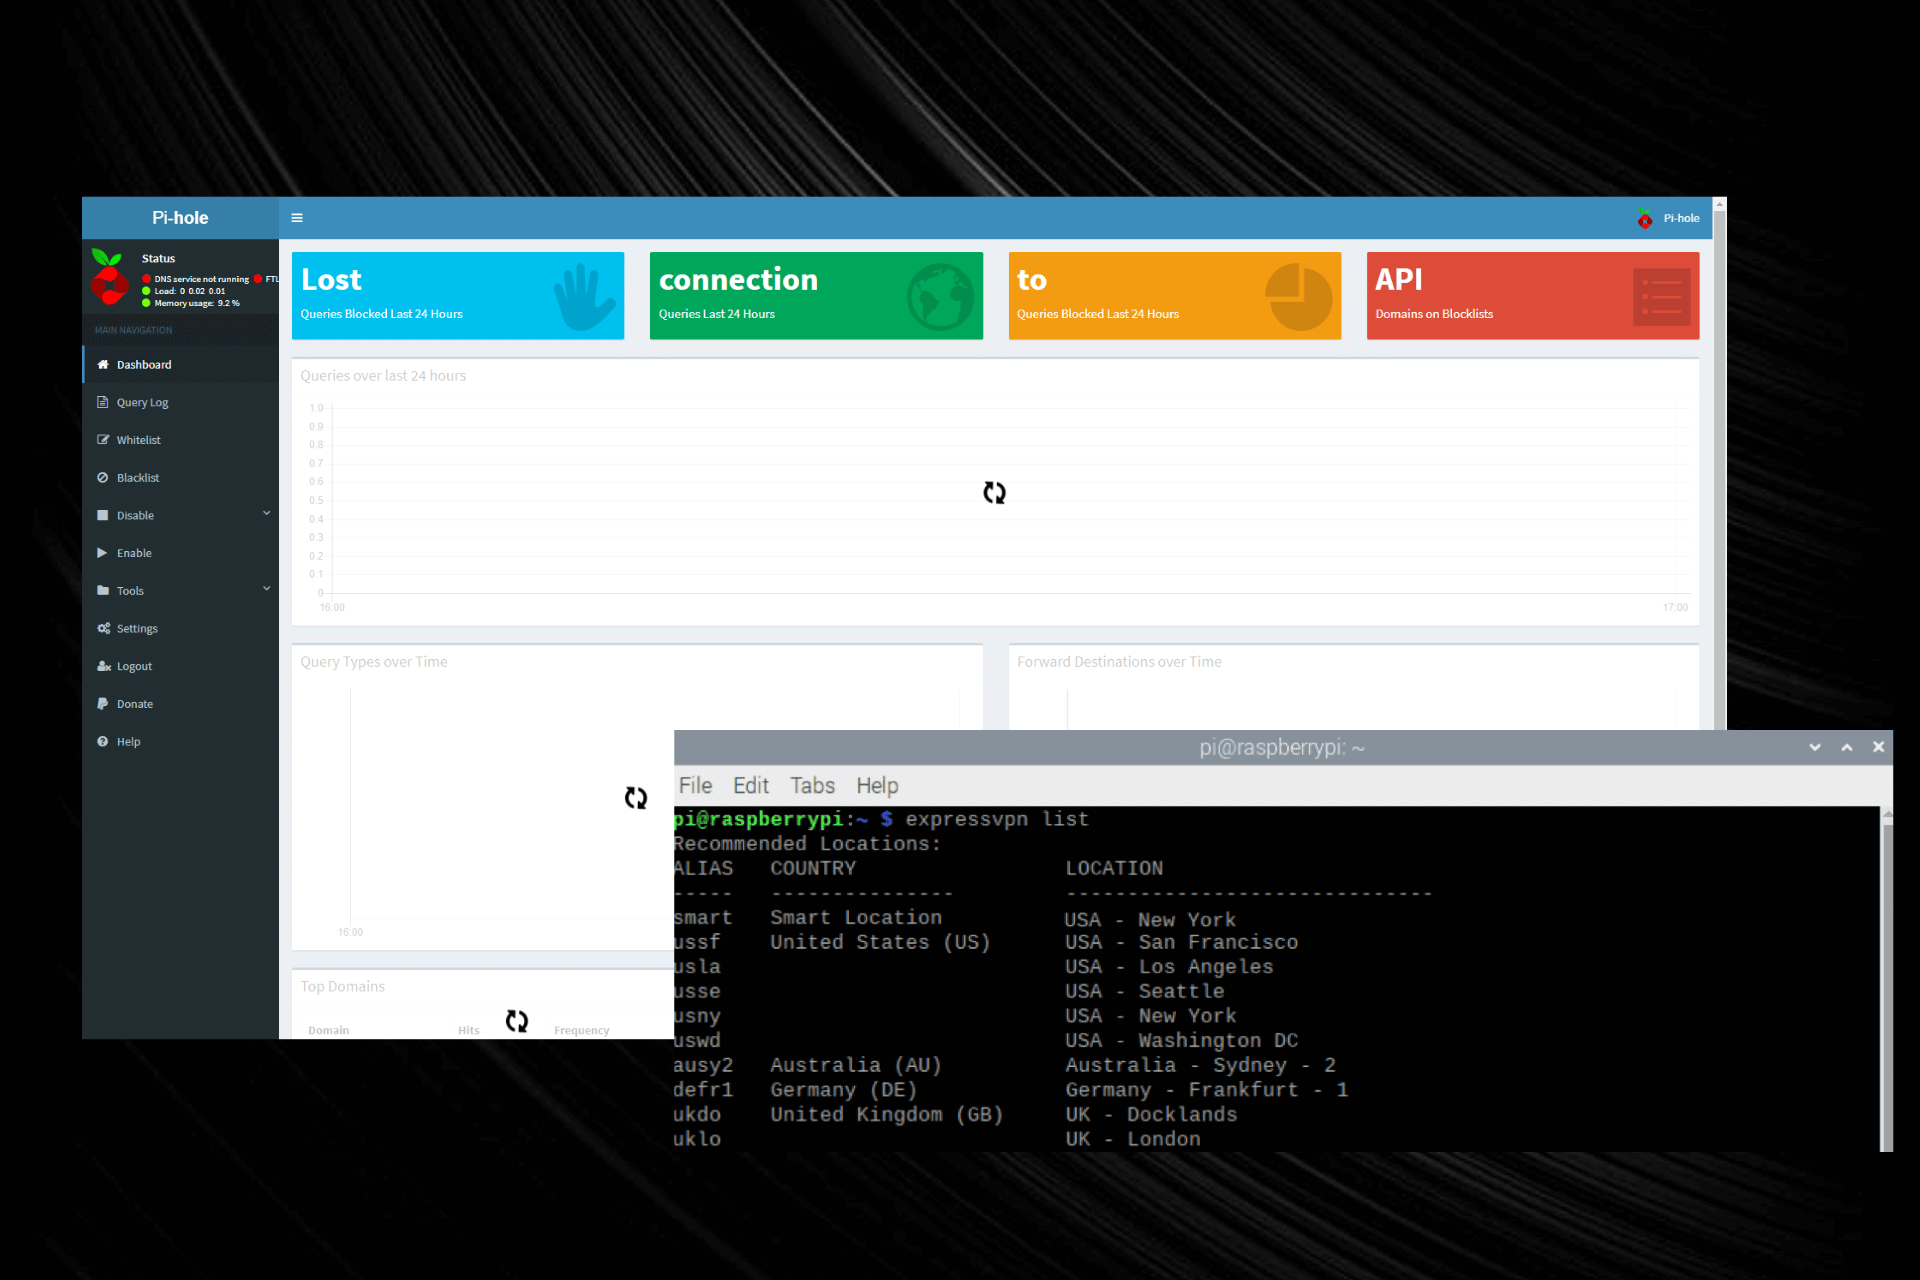
4. Change your VPN provider
If you are having issues using a VPN with Pi-hole, it’s about time you changed the VPN provider installed on your device or router.
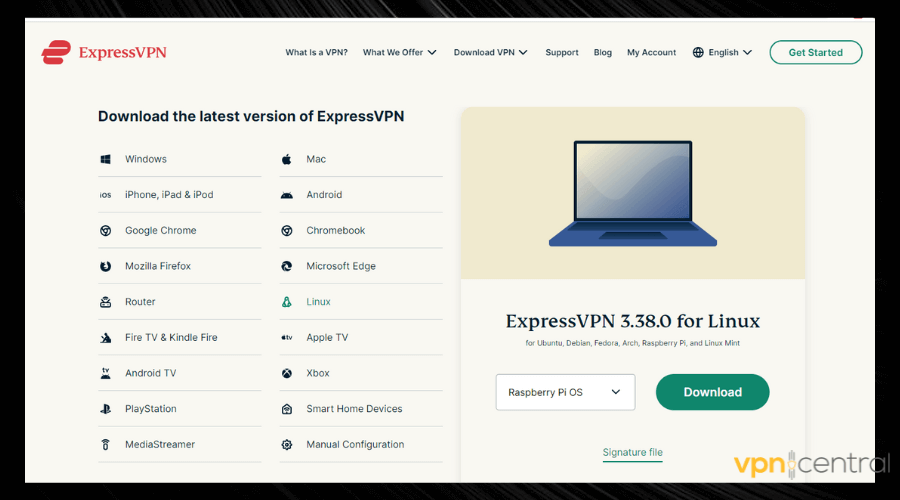
For the best experience with Pi-hole, we highly recommend ExpressVPN. Here is how to get it:
- Visit ExpressVPN’s website, choose a subscription, and download the app.
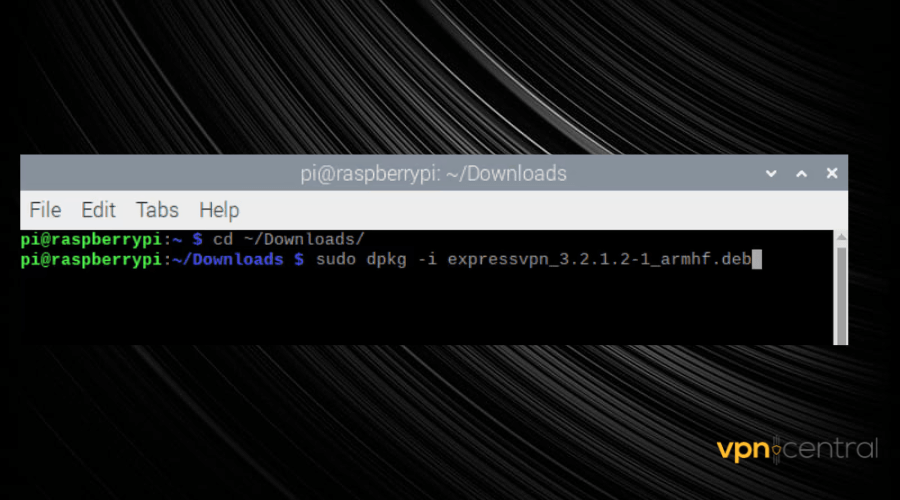
- Open Terminal and type
cd ~/Downloads/, press Enter.
- Type
sudo dpkg -i [installer filename]and press Enter.
Note: Replace the installer filename with the actual name of the installation file, as it’s displayed in your downloads folder. It should have the name of the software and the version such as expressvpn_3.38.0.
- Wait for the installation to complete, then type
expressvpn activatein Terminal.
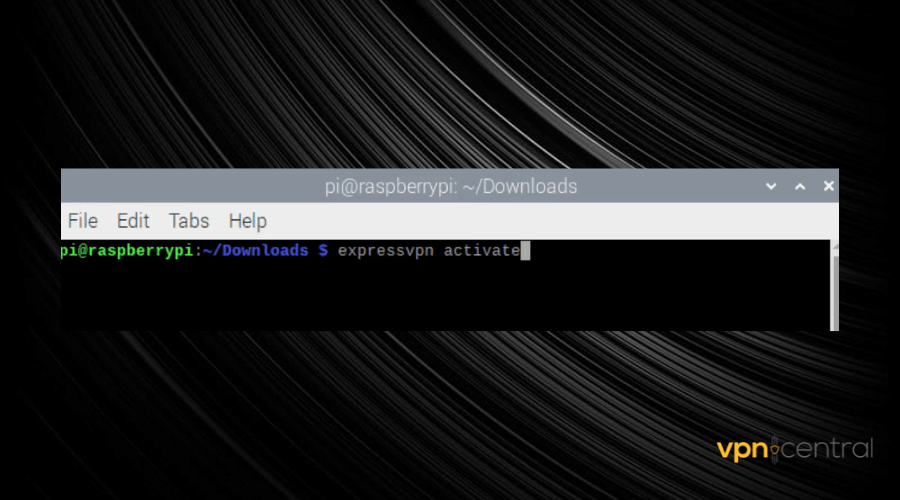
- Enter the activation code and connect.
Using ExpressVPN ensures that all your data is encrypted and your network traffic is directed through secure virtual servers thereby masking your identity and your browsing history.
The VPN provider has native support for Raspberry Pi and is compatible with a wide range of routers, making it an easy choice for most Pi-hole users.
Wrap up
Using Pi-hole with a VPN ensures that your privacy is protected at all times. And with the suggested fixes mentioned in this post, you will have an easy time fixing it if it’s not working.
Read our disclosure page to find out how can you help VPNCentral sustain the editorial team Read more

Improve this guide


User forum
0 messages