Browsec is an affordable and decent VPN for anyone trying to surf the Internet anonymously. However, many users have complained about Browsec VPN not working in certain situations.
But don’t fret: you can easily track down the cause of this issue. Our helpful guide will lead you through all the necessary steps. Let’s jump right in!
There are several potential reasons why Browsec is malfunctioning:
Exceeded limit of simultaneous connections: This service allows you to set up to 5 devices with the same account. As a result, you can’t connect when you exceed the limit.
Other active extensions: Other extensions might conflict with the Browsec VPN. So, you should turn off all add-ons on your device to see if the issue goes away.
Internet connectivity issues: If you’re dealing with internet connectivity problems, you won’t be able to successfully connect to this VPN.
Firewall or antivirus software: An active firewall or antivirus could block VPN traffic.
VPN server issues: Although Browsec VPN provides powerful servers worldwide, they might get overloaded or go down for maintenance.
Outdated VPN client software: VPN providers constantly release software updates to keep up with optimal security protocols. An outdated VPN client or browser leads to many issues.
Location-based restrictions: Although VPNs are legal in most countries, some block VPN traffic. Accordingly, you should use an obfuscated server to bypass such restrictions.
How to fix Browsec VPN when it’s not working?
Here’s what to try when your VPN isn’t cooperating:
Delete browser and cookies cache
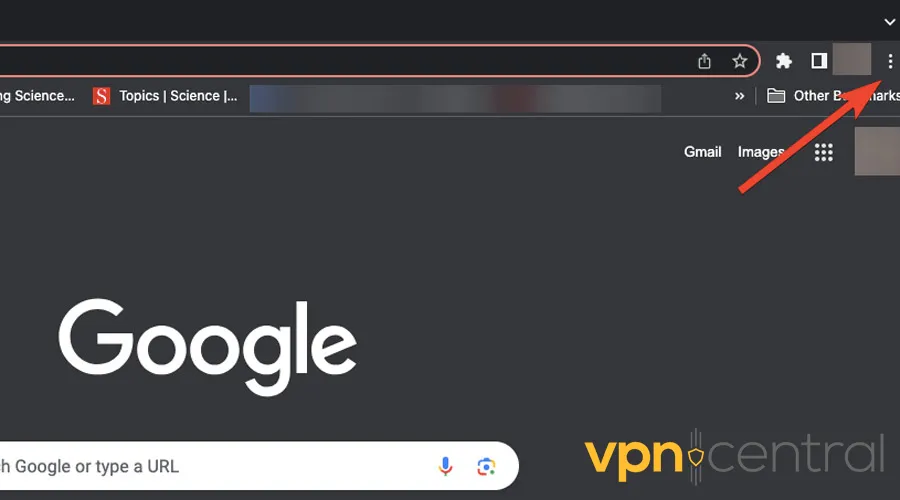
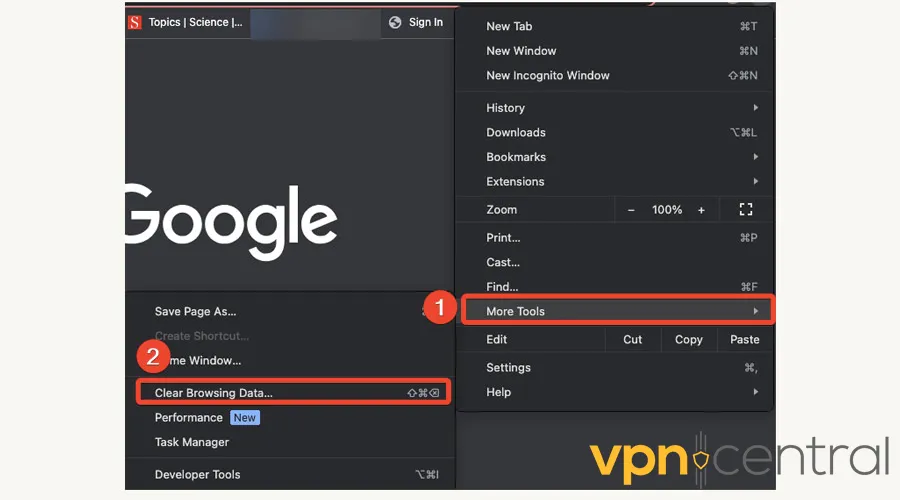
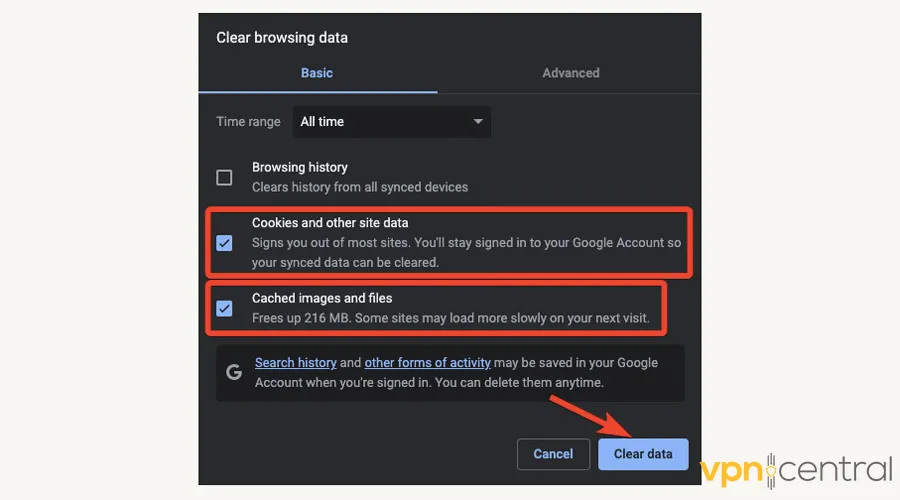
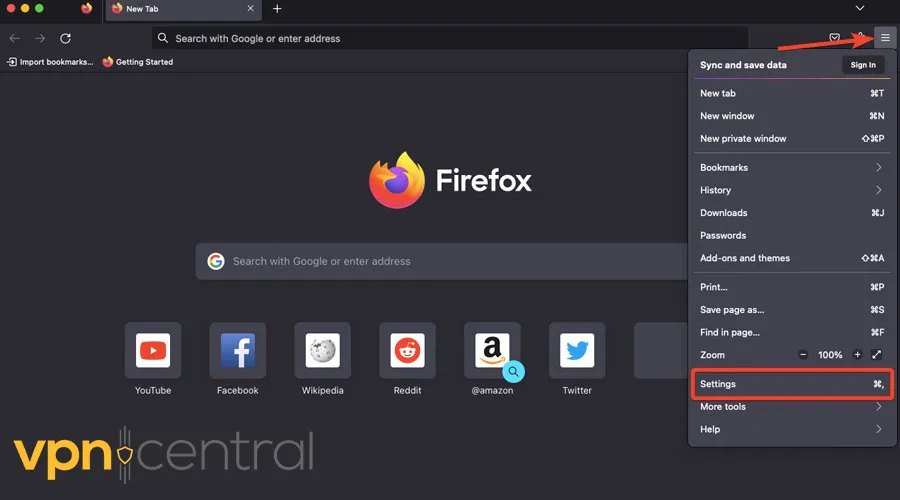
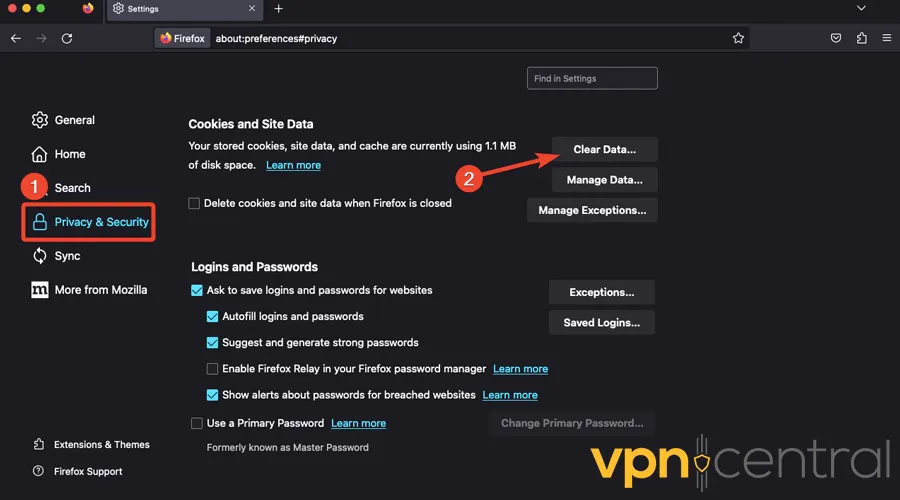
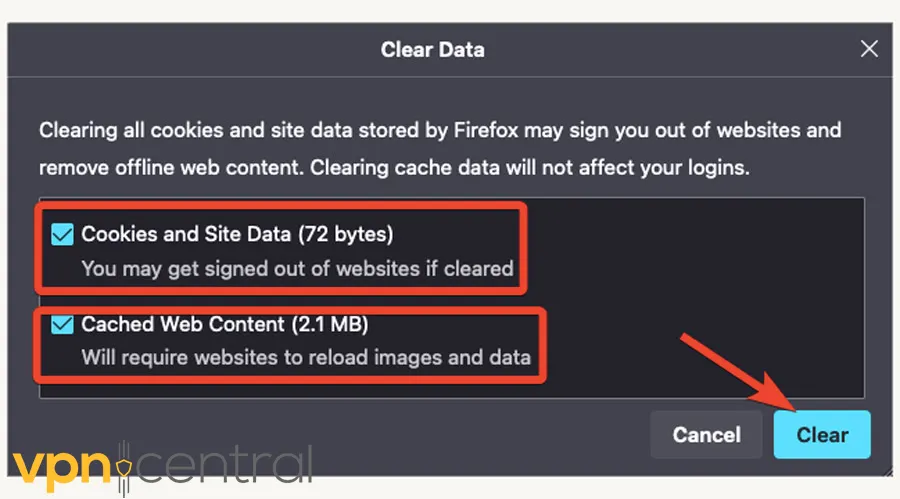
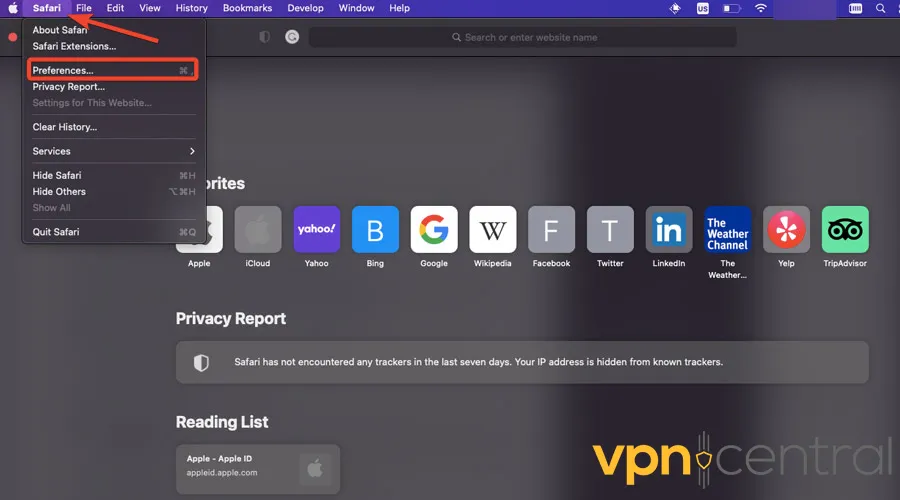
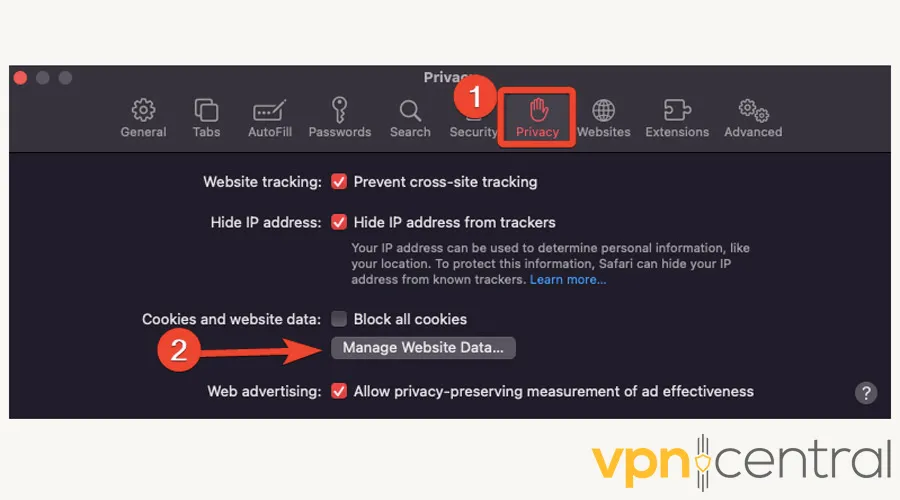
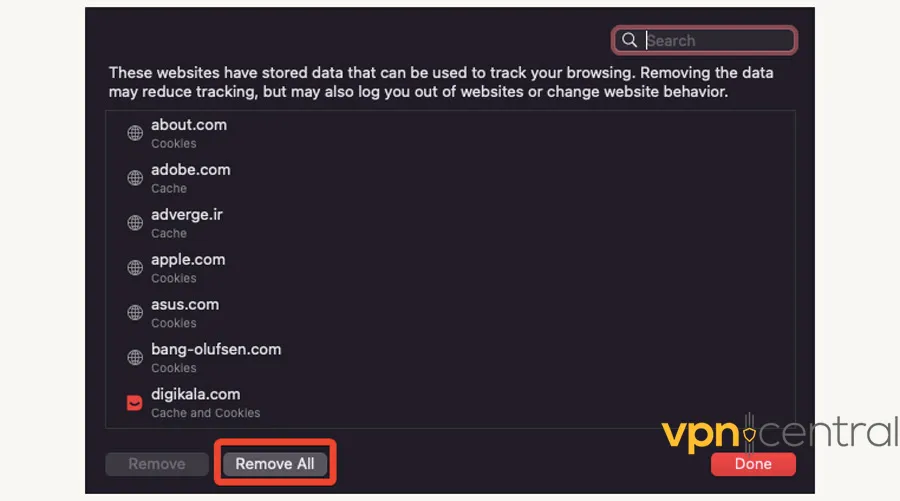
Previously saved information in your browser might prevent your VPN from connecting. The first thing you should do is to delete your browser cache and cookies. First, we’ll show you how to do this on Chrome. 1. Open Chrome and click the three dots icon in the top right. 2. Select More Tools and click Clear Browsing Data. 3. Set the time range to All Time and check the boxes for Cookies and other site data and Cached images and files. Then, click Clear data. Now, here’s Firefox: 1. Run Firefox, and open Settings from the menu in the top right corner. 2. Head to the Privacy & Security panel and scroll down to find Cookies and Site Data. Click Clear Data. 3. Check all the boxes and select Clear. Finally, here’s Safari: 1. Open Safari and click on the Menu bar at the top of the screen. Select Preferences. 2. Open the Privacy tab and select Manage Website Data. 3. Click Remove All. When this is done, open your VPN again and see if that has solved the issue.
Reset browser settings
If clearing Chrome’s cache didn’t work, maybe you should do something more drastic, like resetting your browser.
Here’s how to achieve that:
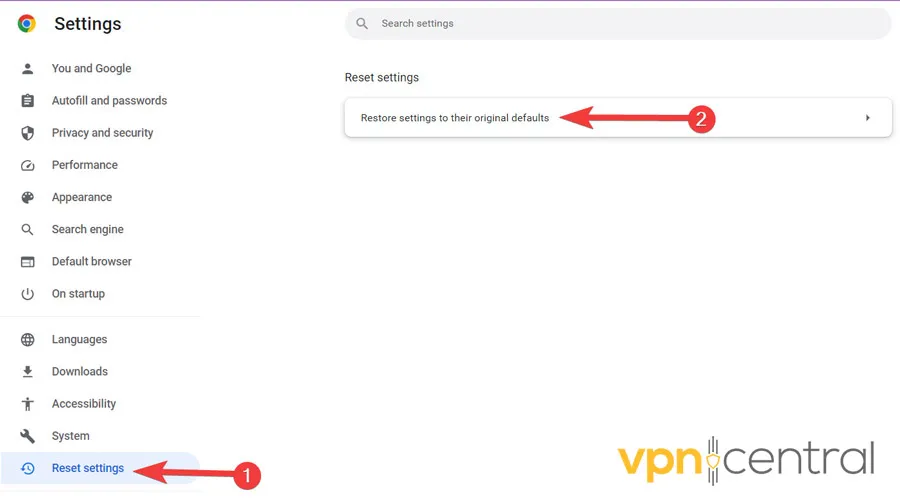
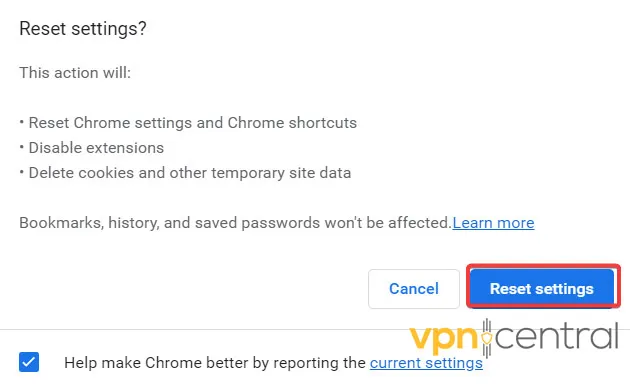
1. Click on the three-dotted menu in the top right corner of your Chrome, then select Settings. 2. Choose Reset settings from the left, and hit Restore settings to their original defaults. 3. Finally, confirm the process by choosing Reset settings. Now, open your VPN again and see if that has solved the issue.
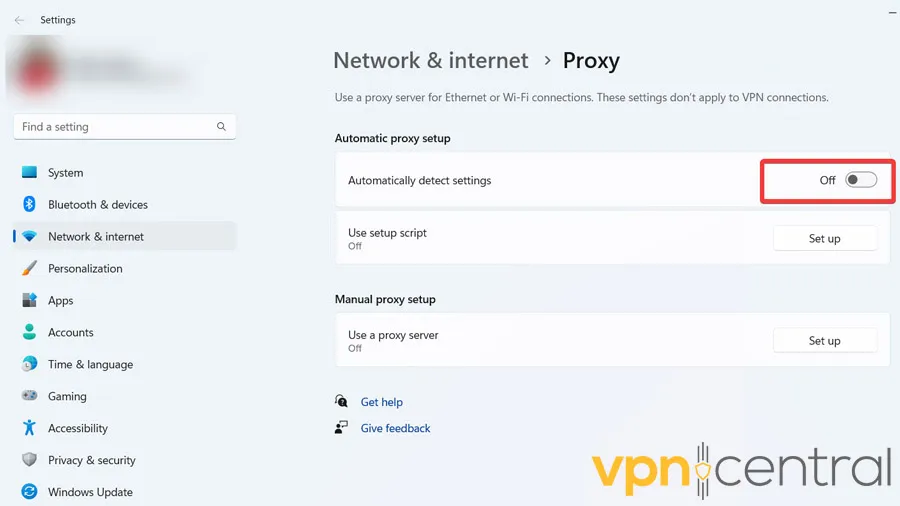
Turn off the proxy server
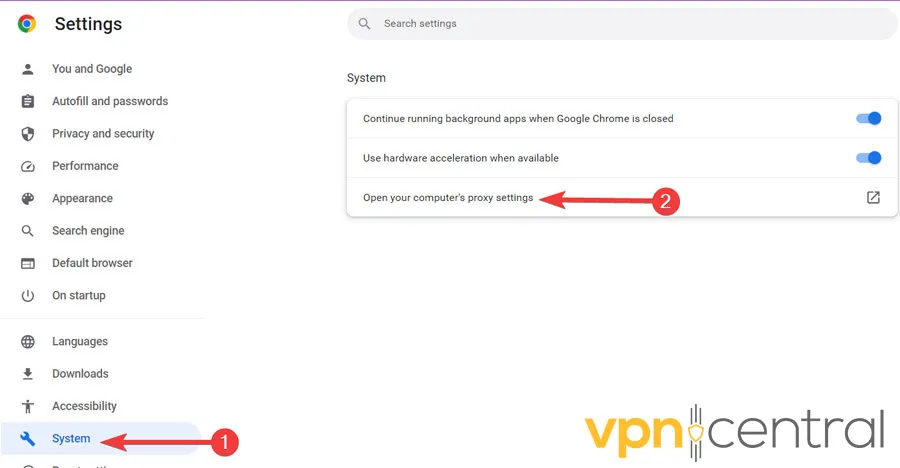
Sometimes the proxy server settings on Chrome prevent your VPN from connecting. Here’s how to turn them off: 1. Click on the three-dotted menu in the top right corner of Chrome, then select Settings. 2. From the left-hand list, select System and then click Open your computer’s proxy settings. 3. In the new window that opens, disable the Automatically detect settings option.
Clear DNS settings
Over time, the IP addresses accumulated in the DNS server can become outdated, interfering with your VPN’s function. The easiest way to resolve this issue is to clear your DNS settings. Here’s how: 1. Navigate to “chrome://net-internals/#dns” through Chrome’s Address Bar. Then, go to the DNS section and hit Clear host cache.
Try another VPN
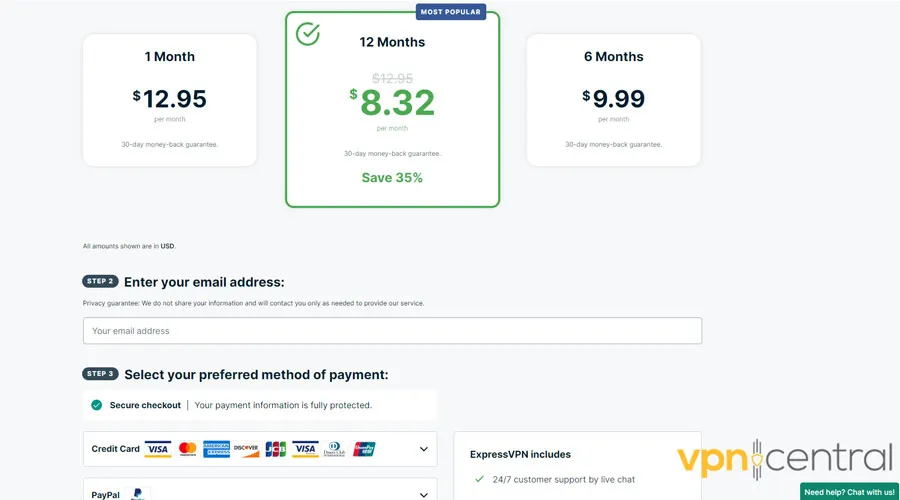
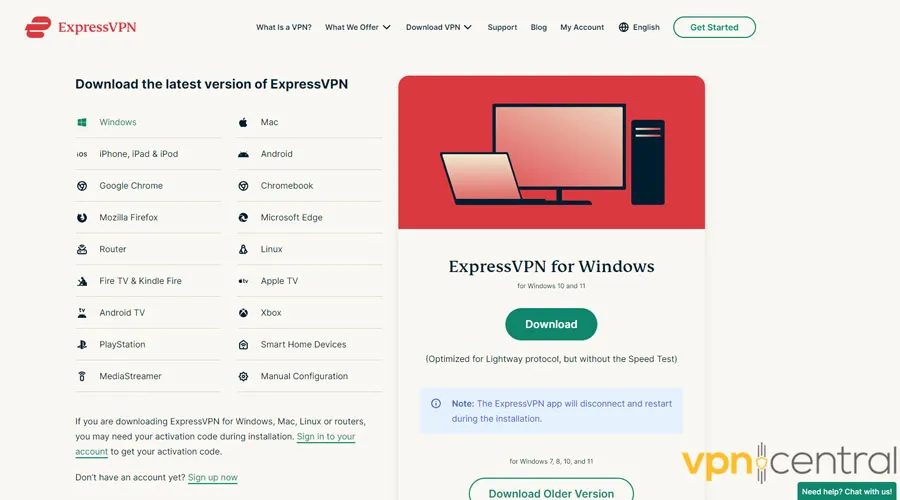
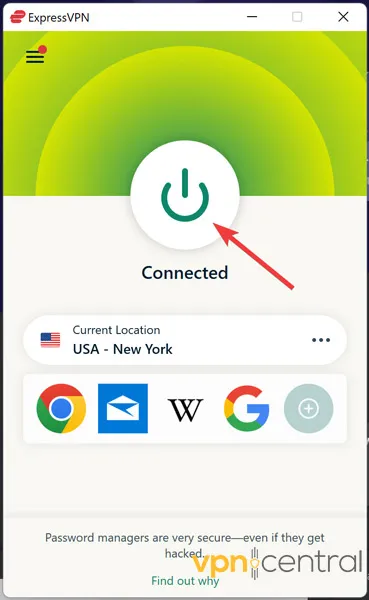
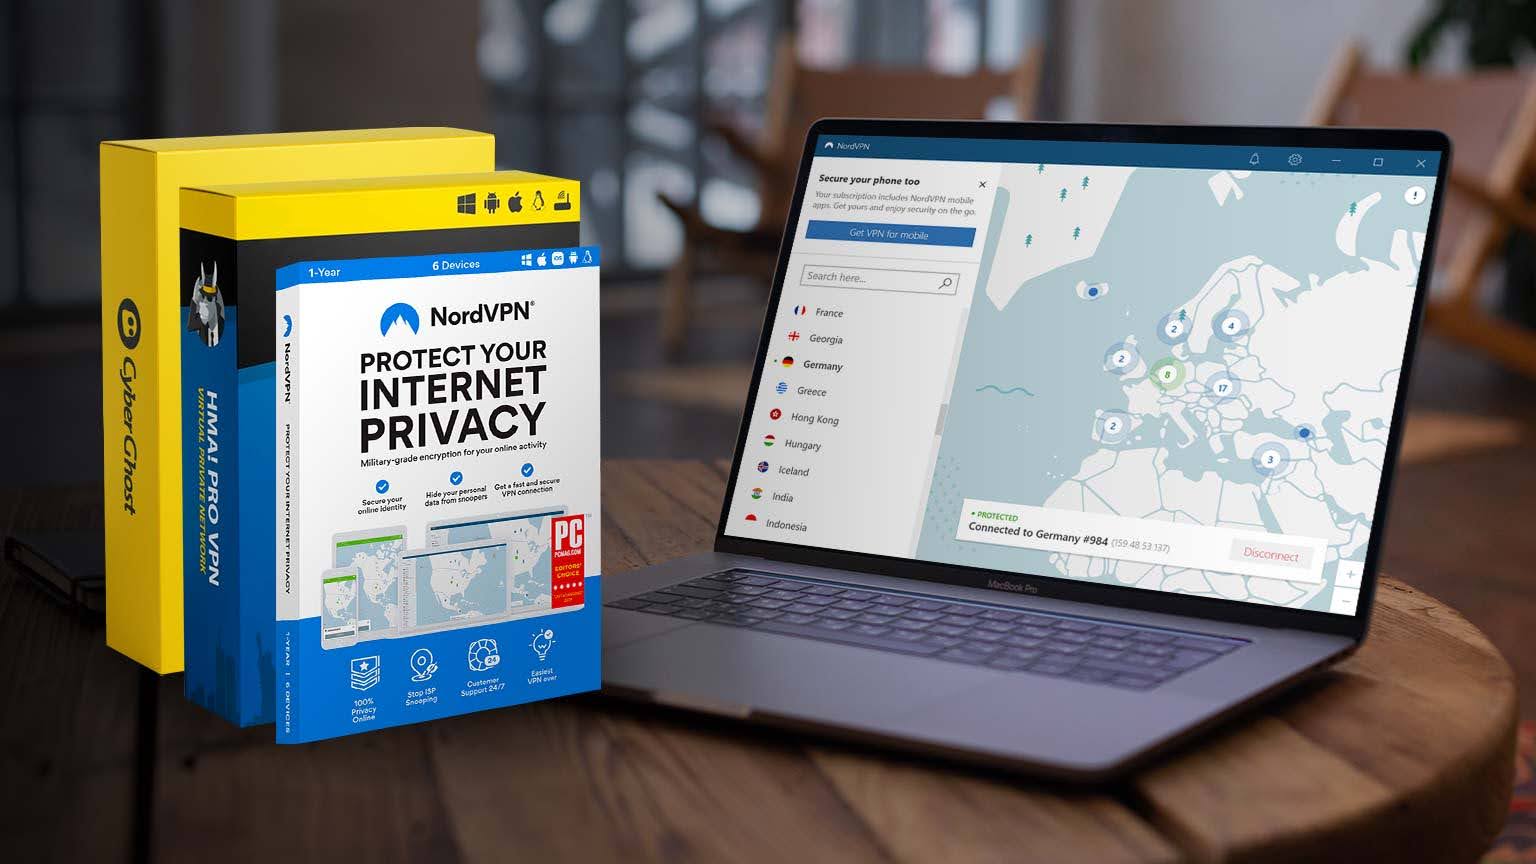
If all else fails, it might be time to look into another provider. Many other VPNs on the market can fulfill your requirements efficiently. We recommend ExpressVPN as an all-around robust service. Follow these steps to purchase and launch it: 1. Go to the ExpressVPN website and subscribe to the service. 2. Go to the download page and get the right version for your OS/device. 3. Launch the downloaded file and follow the guideline to install it. 4. Choose a server and click the Power icon to connect and enjoy.
ExpressVPN
If you value speed and security, ExpressVPN is more than an apt substitute for Browsec.
Whether you’re using a VPN app or an extension for your browser, there’s always the chance something will malfunction.
Still, you can easily fix the Browsec VPN not working error. In most cases, a simple browser reset or getting rid of cookies will do the trick. Good luck!
In 2014, Farhad graduated with a B.S. in Software Engineering. For more than ten years, he has been writing how-to guides on a wide range of topics, including cyber security, computer network, operating systems, and more.
Farhad has taken several classes to broaden his knowledge in this field, including Building a VPN Between Google Cloud and AWS with Terraform, for which he was certified by Google.
His insatiable thirst for knowledge has provided him with the expertise he needs to simplify complex topics in online privacy, particularly VPNs for his readers.
Readers help support VPNCentral. We may get a commission if you buy through our links.
Read our disclosure page to find out how can you help VPNCentral sustain the editorial team Read more


User forum
0 messages