Proton VPN Waiting for An Usable Network [Quick Fix 2026]
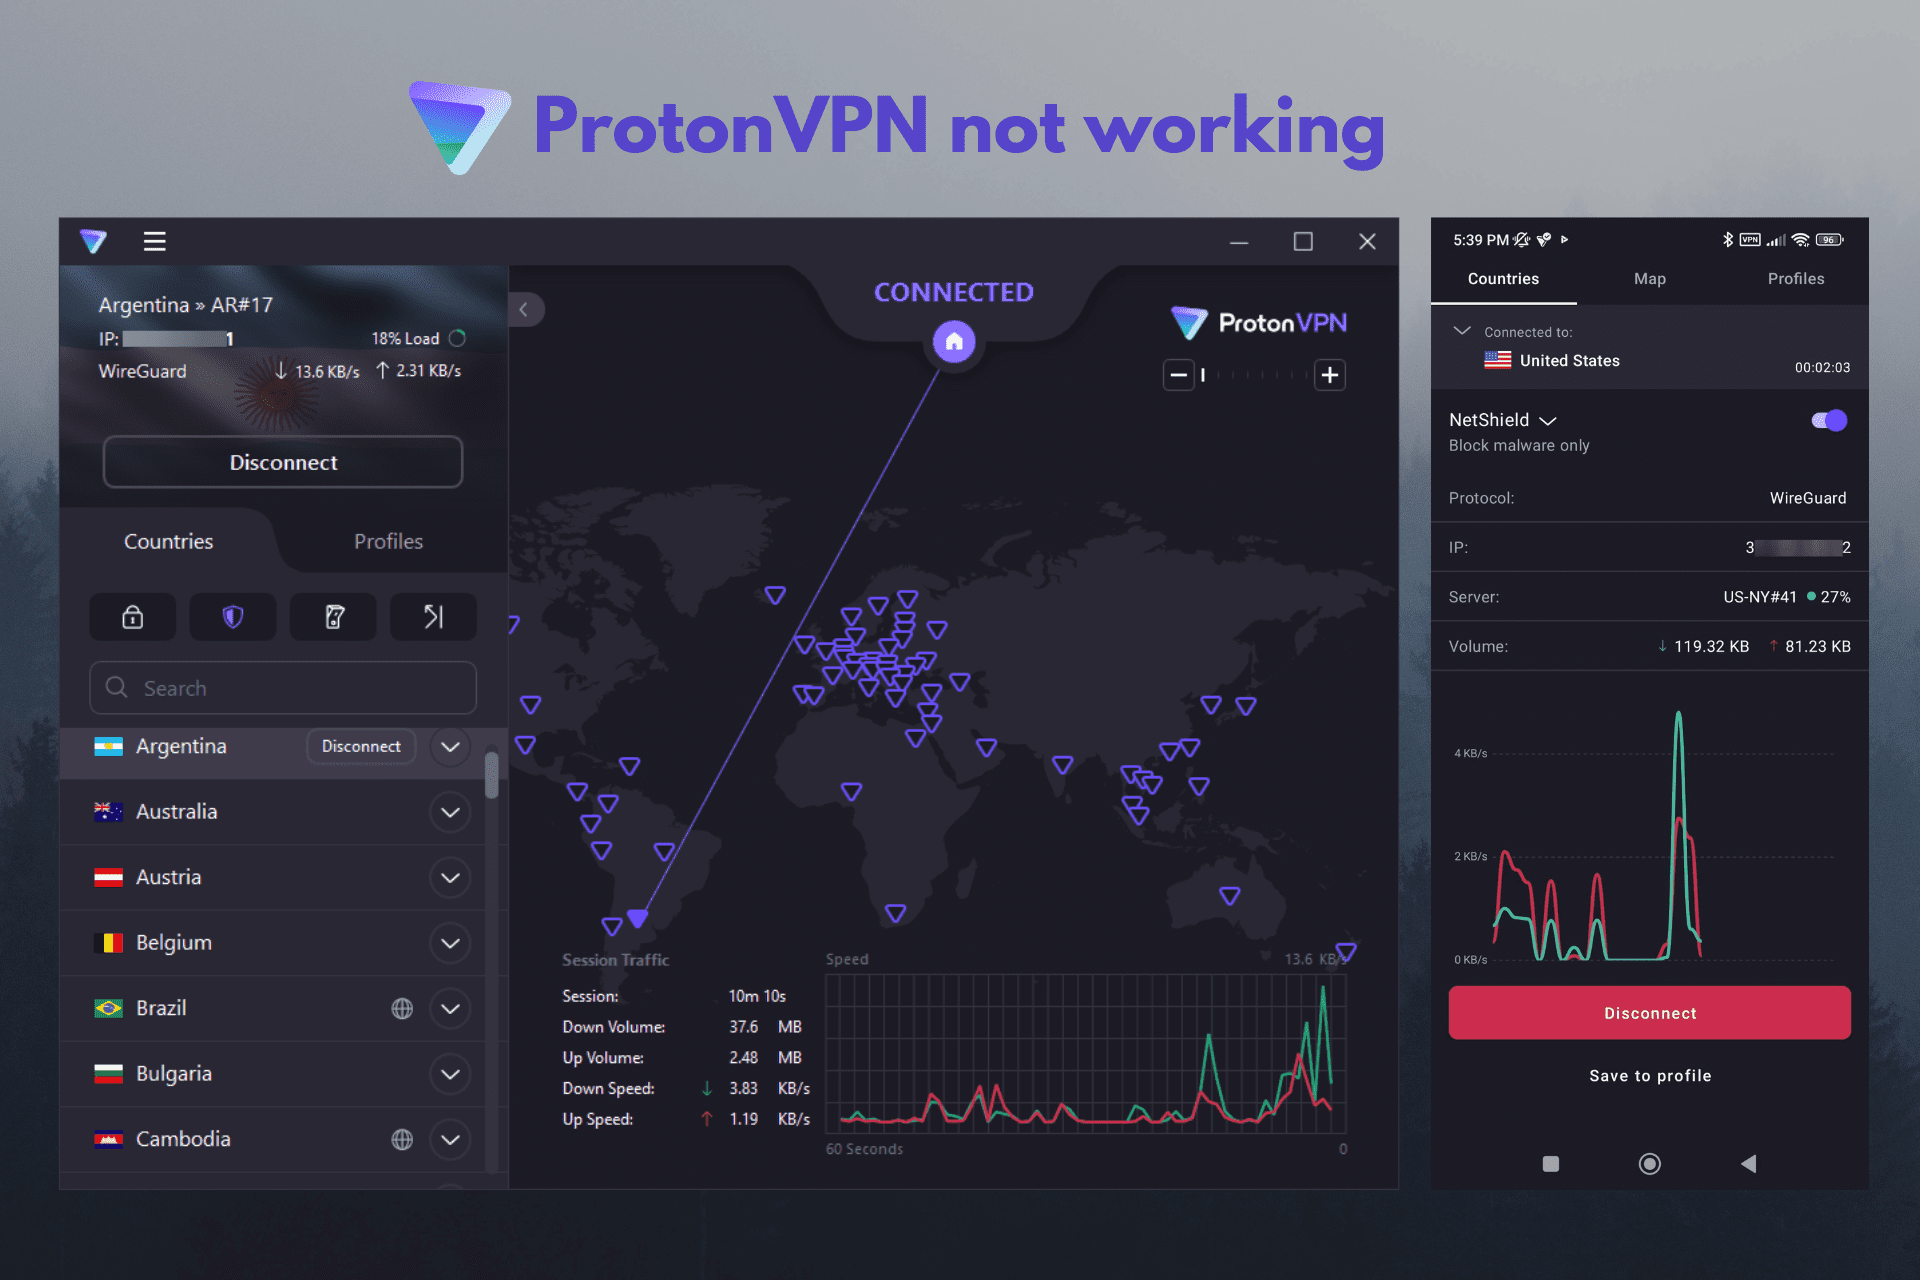
If ProtonVPN isn’t working, it could be an issue with the VPN client or your device. No worries, we’ve got solutions.
Whether you’re bypassing restricted websites or protecting your privacy, this guide will help you get it running smoothly.

Access content across the globe at the highest speed rate.
70% of our readers choose Private Internet Access
70% of our readers choose ExpressVPN
Browse the web from multiple devices with industry-standard security protocols.

Faster dedicated servers for specific actions (currently at summer discounts)
What can I do if ProtonVPN is not working?
1. Change VPN servers
- Open the ProtonVPN app on your device.
- Go to the server list (desktop or mobile).
- Select a different server from the list.

- Check the server load (hover on desktop, displayed on mobile).
- Choose a server with low load.
- Pick a server near your location for faster speeds.
- Select a server in your target country if needed.
- Connect to the new server and check if the issue is fixed.
2. Change VPN protocols
- Open ProtonVPN app.
- Go to settings and locate the protocol section.
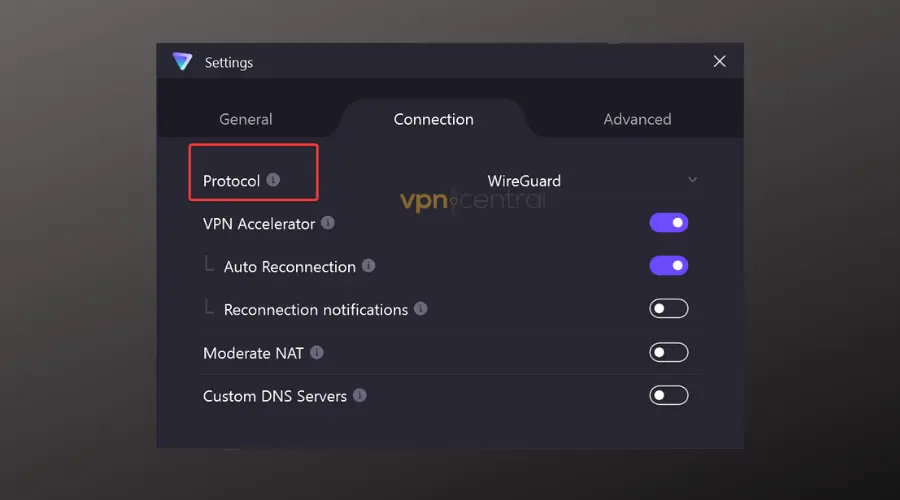
- Select a different VPN protocol (OpenVPN, IKEv2, WireGuard).
- If you encounter issues, enable the Smart Protocol option.
- Smart Protocol automatically selects the best protocol if one is blocked.
- Alternatively, manually switch protocols if needed.
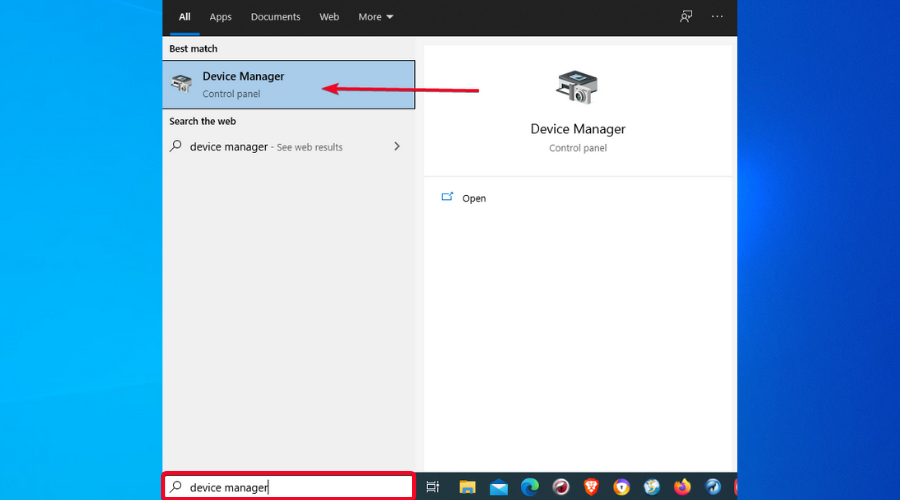
3. Reinstall the TAP driver
If the connection fails when you try to connect to a ProtonVPN server using the Windows client, then your TAP adapter might get corrupted during usage or when you install it on your system.
As a result, If the ProtonVPN TAP adapter is corrupted or missing, you need to uninstall and/or properly reinstall it as shown below.
- Type Device Manager in the search bar and click on it.
- Scroll down to Network Adapters and right-click on TAP-ProtonVPN Windows Adapter V9.
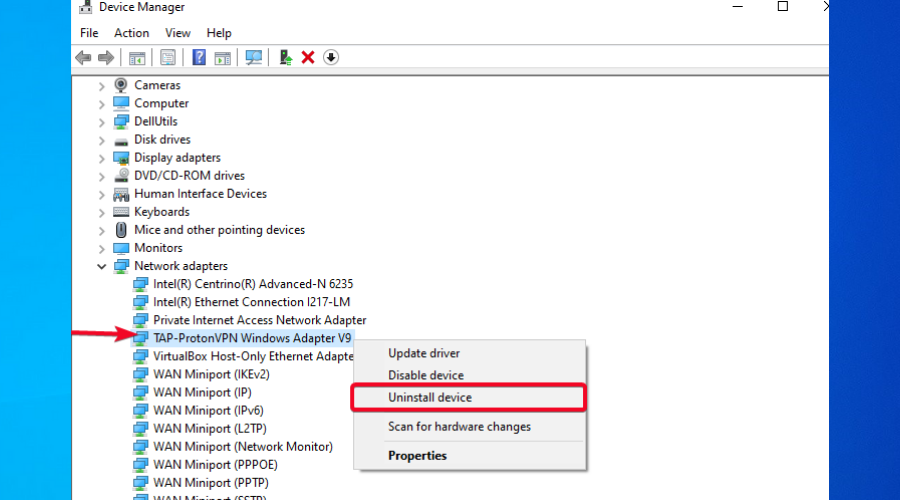
- Click Uninstall device.
- Install the driver again for your specific operating system:
An easier and faster solution is to automatically reinstall your TAP driver by using an automatic driver updater tool. It can install the right drivers, preventing any problems.
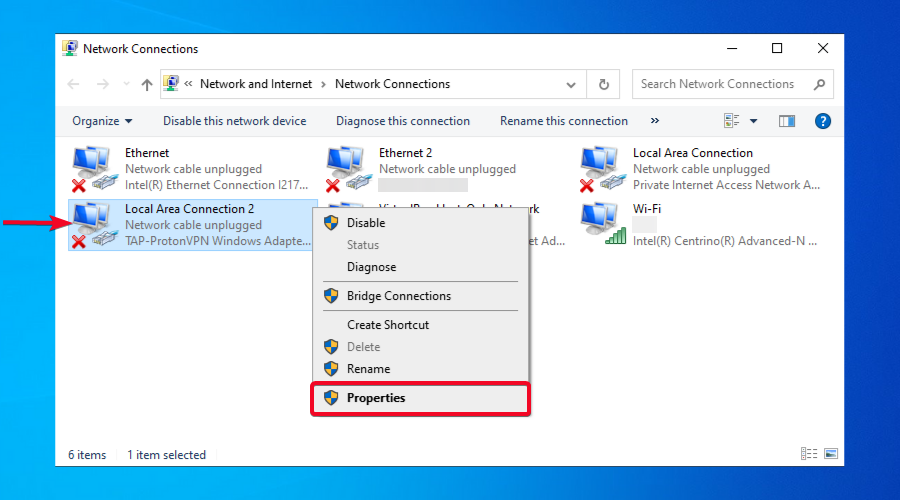
4. Set the TAP adapter DNS addresses to automatic
If your TAP adapter is not configured properly, your ProtonVPN client cannot establish a proper connection, so you need to make sure that the DNS addresses in the TAP adapter are set to automatic.
Below, we show you how to do this on a Windows 10 device. For Windows 11 users, the steps are quite similar.
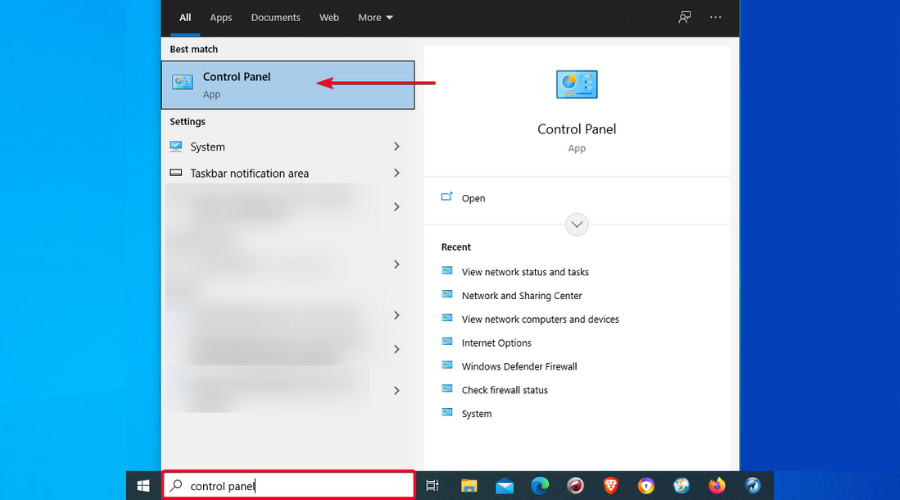
- Type Control Panel in the search bar and click on it.
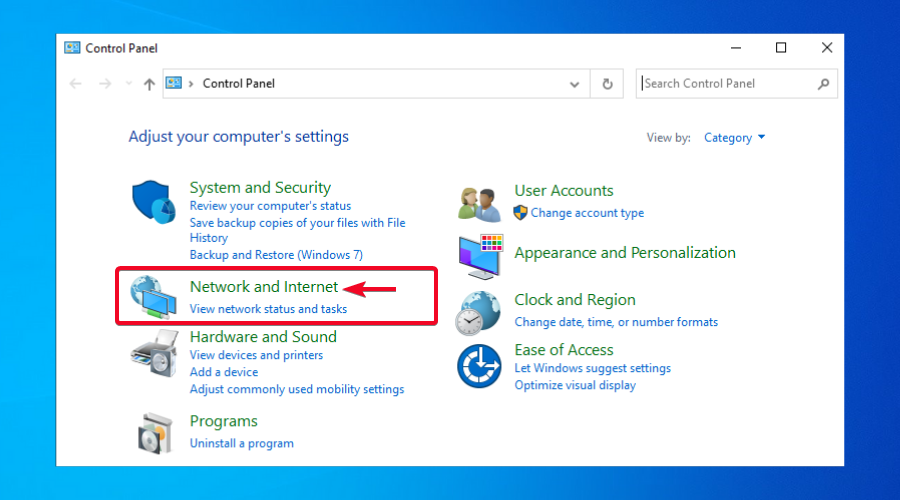
- Click on Network and Internet.
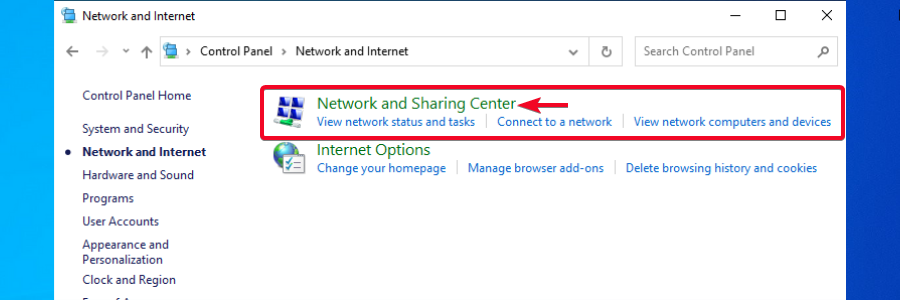
- Click on Network and Sharing Center.
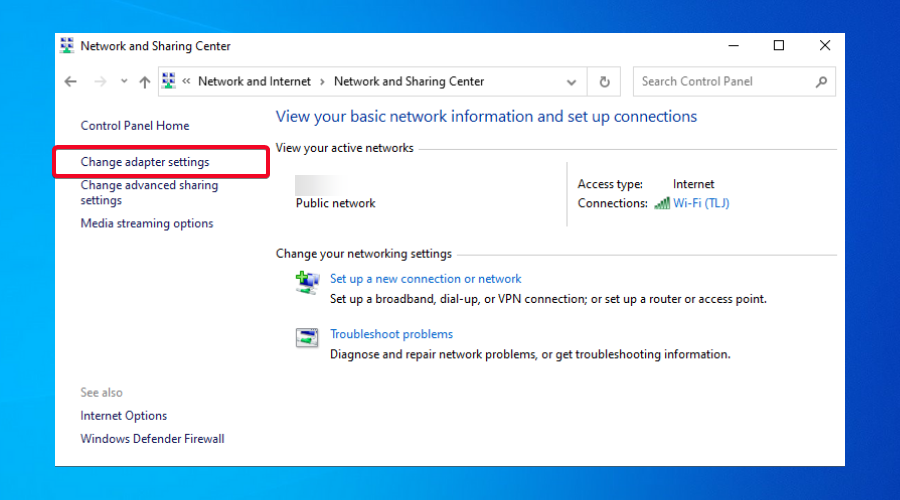
- Click on Change adapter settings.
- Right-click on the TAP-Windows Adapter V9 and select Properties.
- Uncheck IPv6, check IPv4 and click on it, then go to Properties.
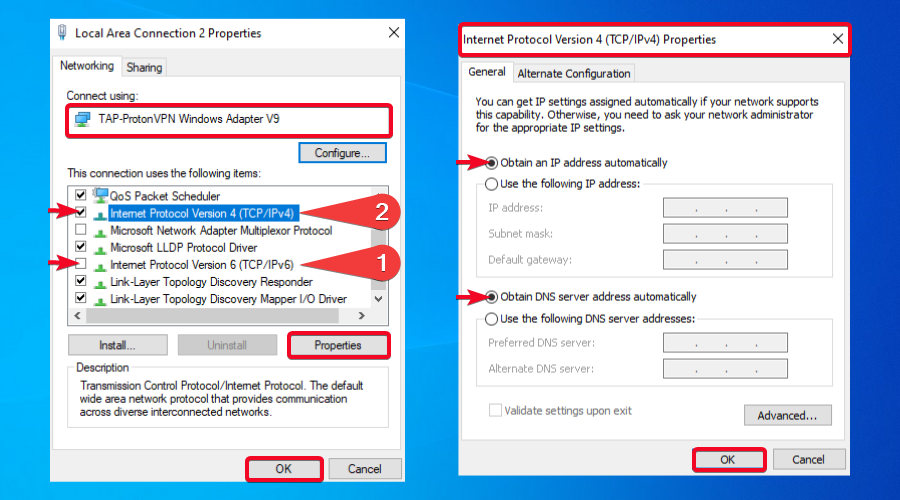
- Make sure both Obtain an IP address automatically and Obtain DNS server address automatically are checked.
5. Reconfigure your DNS settings
Although a VPN connection is established, you may notice that ProtonVPN is not working as expected when you try to access a certain URL but get no results.
If your DNS is not properly configured, the DNS settings do not get automatically updated. Therefore, you have to manually reset it by entering the commands below in Command Prompt.
In this example, you can see how to reset your DNS settings in Windows 11. For Windows 10, the same steps should be followed.
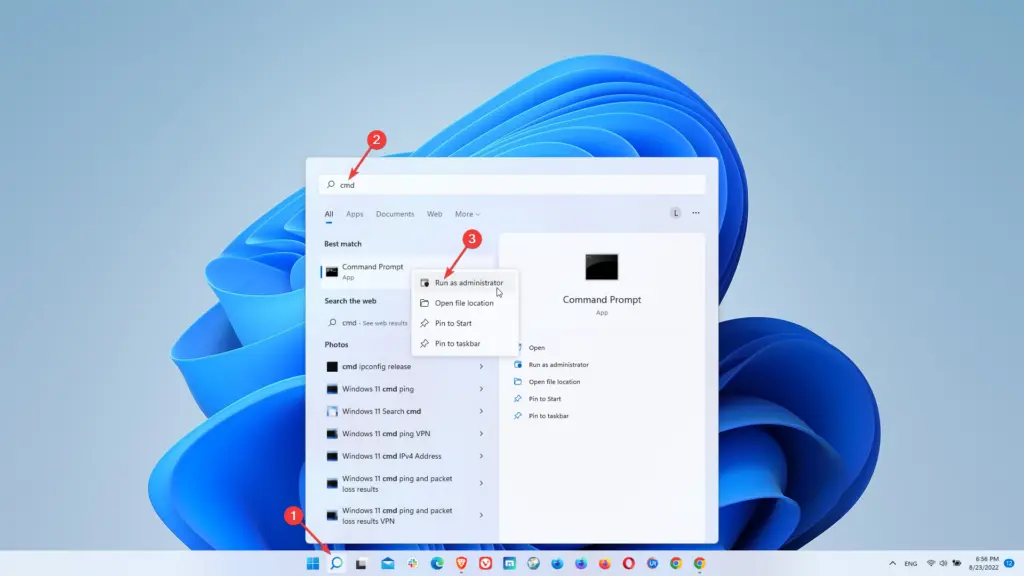
- Type cmd in the search bar.
- Right-click on it, then select Run as administrator.
- After opening the Command Prompt, enter the commands shown below one by one and press Enter after each, as shown in the image. N.B. Use a space after ipconfig.
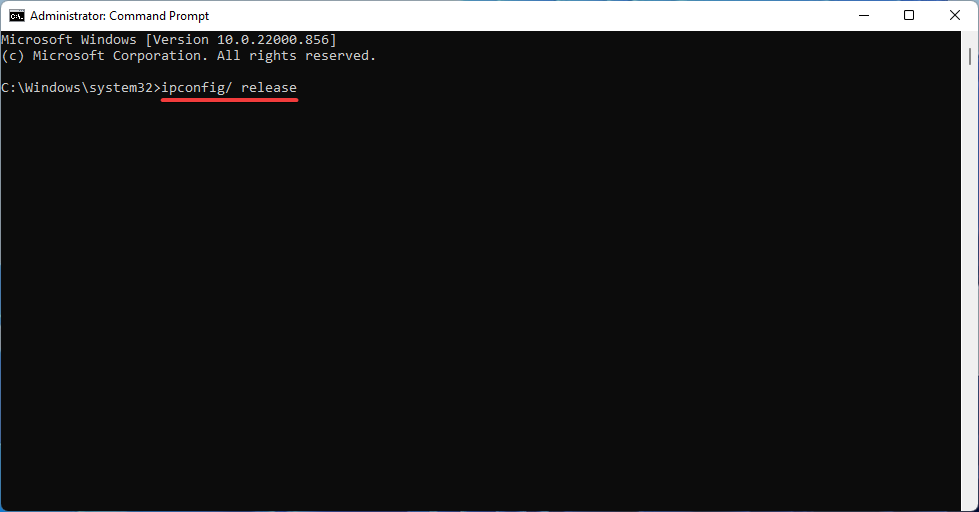
ipconfig /releaseipconfig /flushdnsipconfig /renewnetsh int ip resetnetsh winsock reset
- Restart your computer and try reconnecting again.
6. Make sure you’re not exceeding your connection limit
In case you’ve already surpassed the maximum number of allowed VPN connections, you won’t be able to use ProtonVPN on the current device.
ProtonVPN comes with two plans: Proton VPN Free and Proton VPN Plus. The former is free of charge and allows a single connection only. The latter is a premium plan that costs $4.99 and allows up to 10 simultaneous connections.
If ProtonVPN is not working because of reaching the connection limit, you will be notified via the VPN client, which will display this message: You have reached your maximum device limit.

As such, you must take the appropriate measures to not end up in this situation. If you’re using the free version, be sure to log out of the VPN client anytime you want to use ProtonVPN on a different device.
However, if you got the paid plan, please check all the devices (PCs or phones) on which you used ProtonVPN and make sure you’re not logged in with the same account on more than 10 devices.
If, by chance, you shared the subscription with other people, please verify that all the devices on which ProtonVPN is installed are properly accounted for.
7. Make sure the ProtonVPN client is up to date
It’s not uncommon at all to experience ProtonVPN issues when using an outdated version of the VPN software. Regardless of your device, it’s highly important to always use the latest version.
As with any software, VPN updates are very important since they come with various patches that fix security vulnerabilities. They also fix bugs found in older software and improve efficiency.
Besides increasing security and performance, VPN updates enhance device compatibility and provide access to newly-released features that may not be available unless you update the VPN.
Consequently, if ProtonVPN is not working, it’s definitely worth checking whether you have the latest version installed on your device.
If there’s an update available, do not hesitate to install it. This will help you prevent any VPN errors caused by an outdated ProtonVPN app.
Updating the VPN is very easy. If you’re using the desktop app, you will be notified of any existing updates. All you need to do is click install, and you’ll be all set.
Alternatively, you can check for updates manually in the ProtonVPN client by navigating to the About tab. This will show you all the details related to your actual VPN version and whether there’s an update available or not.
In case you’re using the mobile VPN app, you can update ProtonVPN directly from the appropriate store (Google Play Store or App Store).
8. Contact the ProtonVPN Support Center
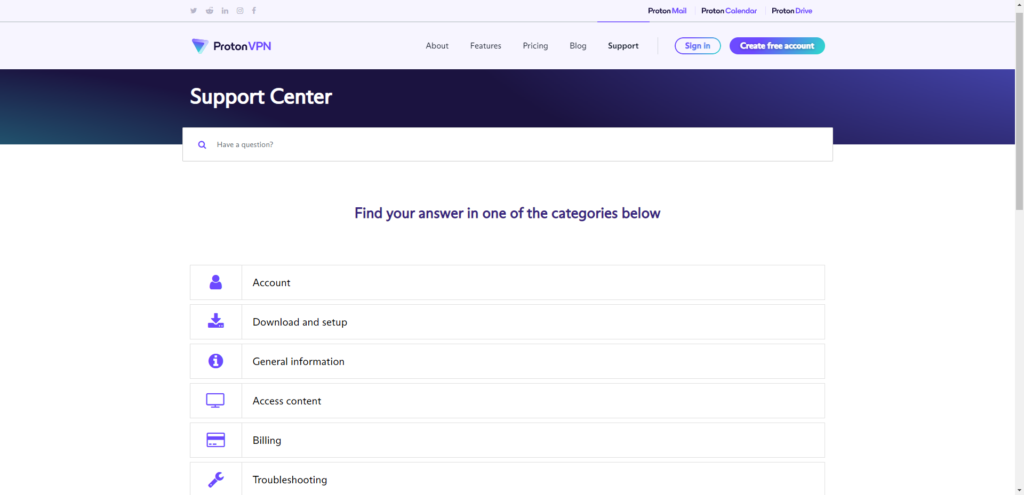
If ProtonVPN is still not working after trying the steps in the above solutions, there’s also the option of contacting the ProtonVPN customer support team.
Make sure to accurately describe your case and include in your message all the relevant details regarding your specific connection issues or error messages.
To help the support team isolate the problem, you should include your connection logs, which can be found in the following pathways on your computer:
C:Users<Your_Windows_Username>AppDataLocalProtonVPNlogsC:ProgramDataProtonVPNlogs
Whether the VPN issues are related to your device (operating system, settings) or to the ProtonVPN software itself, the people at the Support Center should be able to assist you.
9. Revoke login sessions
Revoking login sessions can help fix troubles with your VPN working. It logs out devices connected to your account so you can start afresh.
Here’s what you need to do:
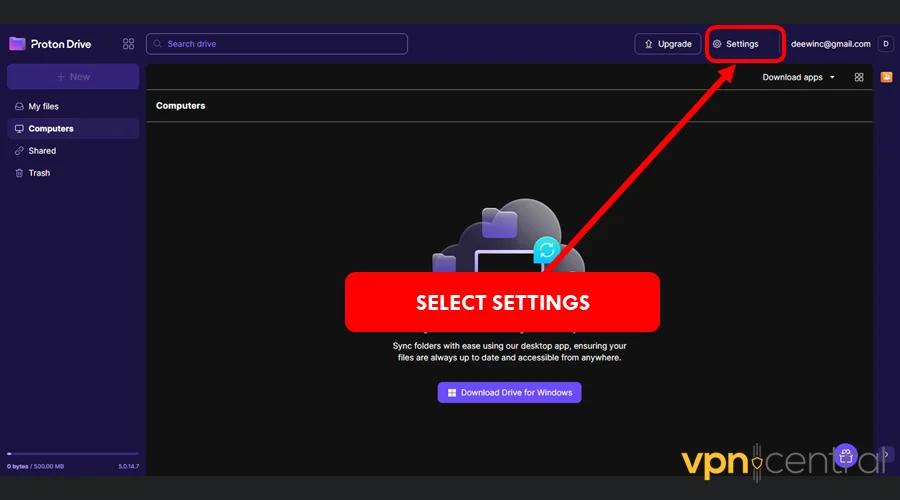
- Access your Proton account from the web browser.
- Go to Settings and choose Account.
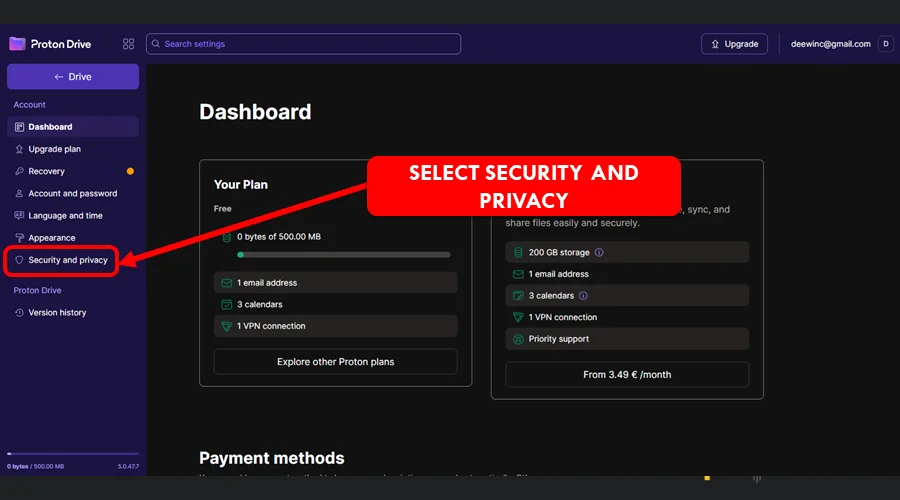
3. Select Security and Privacy.
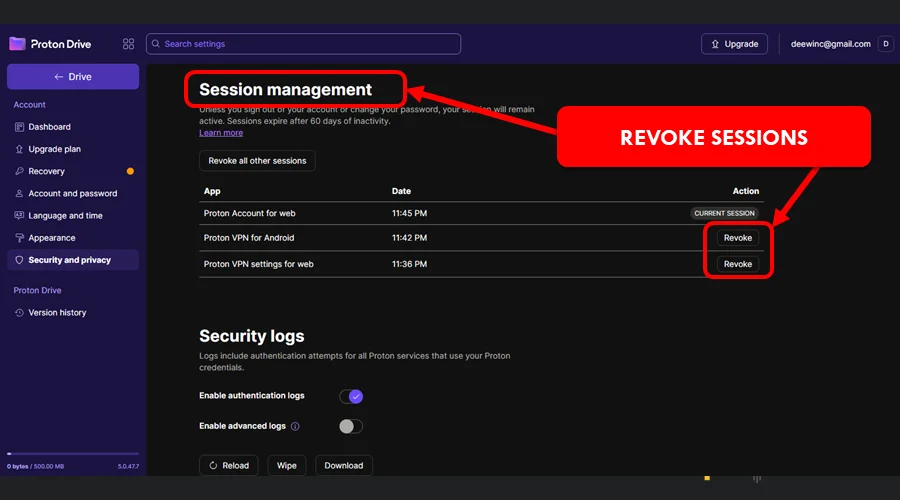
4. Scroll down and pause at Session Management.
5. Click Revoke Sessions to log out the devices.
6. Open ProtonVPN on your device and log in.
7. Choose a server and connect to the internet.
Revoking login sessions helps reconfigure your devices with ProtonVPN’s service. You should be able to reconnect successfully to the web after doing so.
10. Check antivirus/firewall settings
Your device’s antivirus/firewall could be blocking ProtonVPN from working. This might be a false flag due to the heavy traffic encryption it employs.
You can resolve this by disabling protection on your device temporarily. Then test your internet to see if it works with the VPN.
Alternatively, whitelist the ProtonVPN app on your antivirus/firewall. Here’s how to do it:
- Open Settings on your computer.
- Scroll down and choose Privacy & Security.
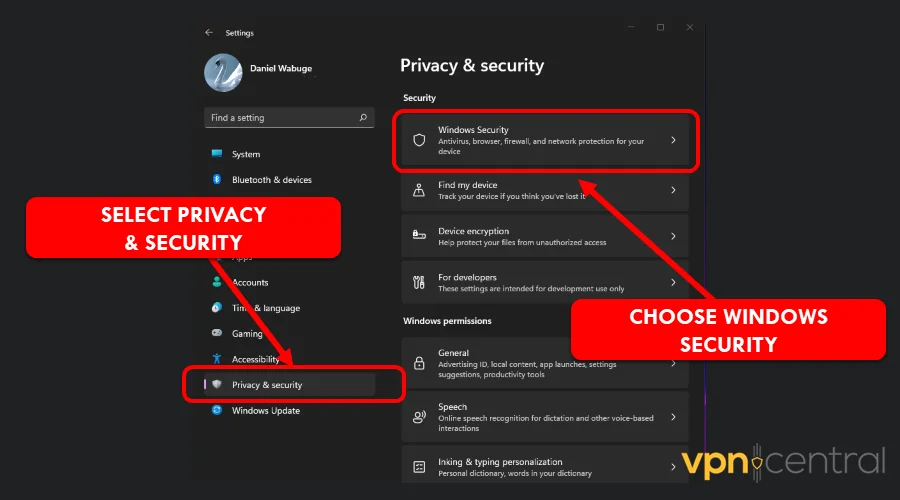
3. Select Windows Security on the next window.
4. Click Open Windows Security.
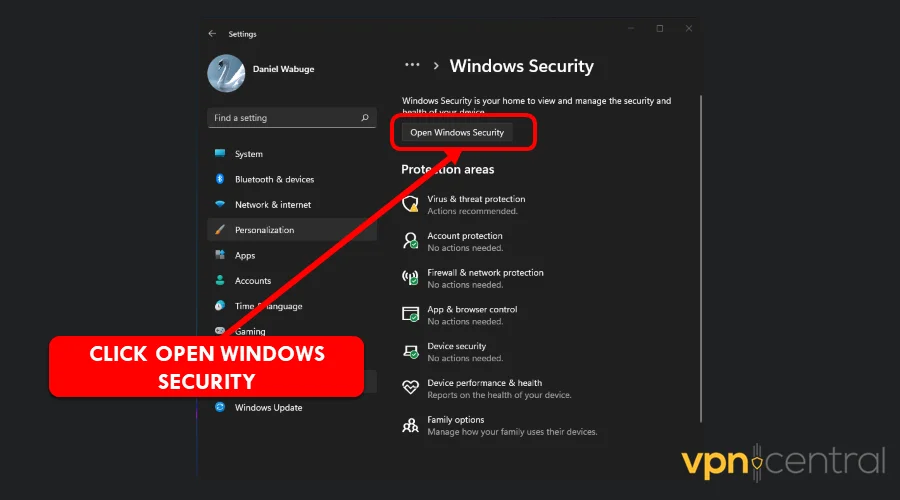
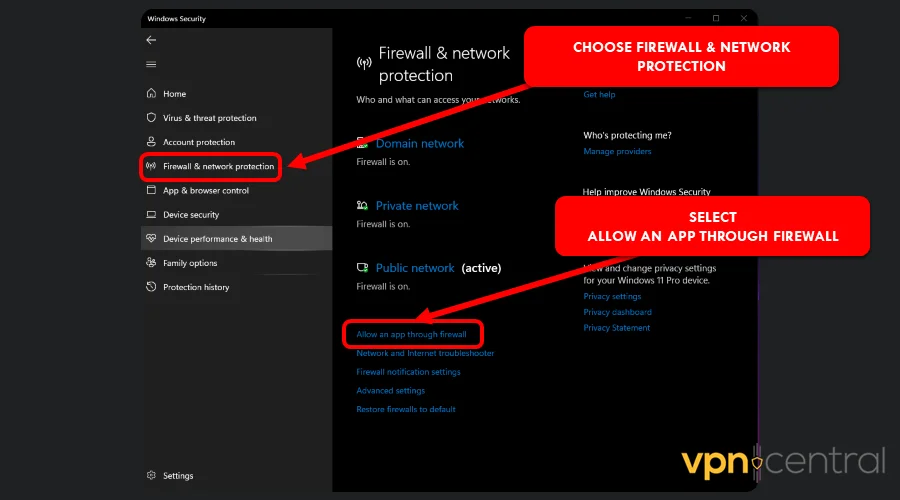
5. Choose Firewall and network Protection.
6. Click Allow App Through Firewall.
7. Select ProtonVPN and click Change Settings.
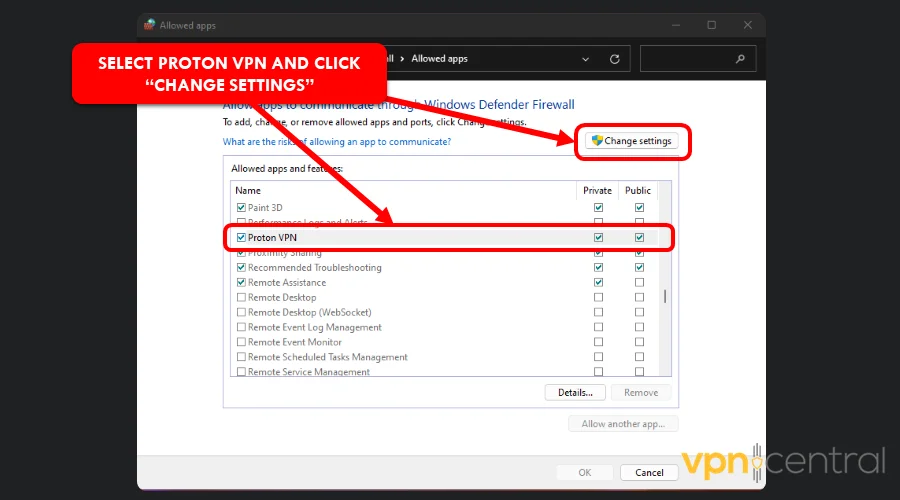
8. Check the two boxes under Private and Public.
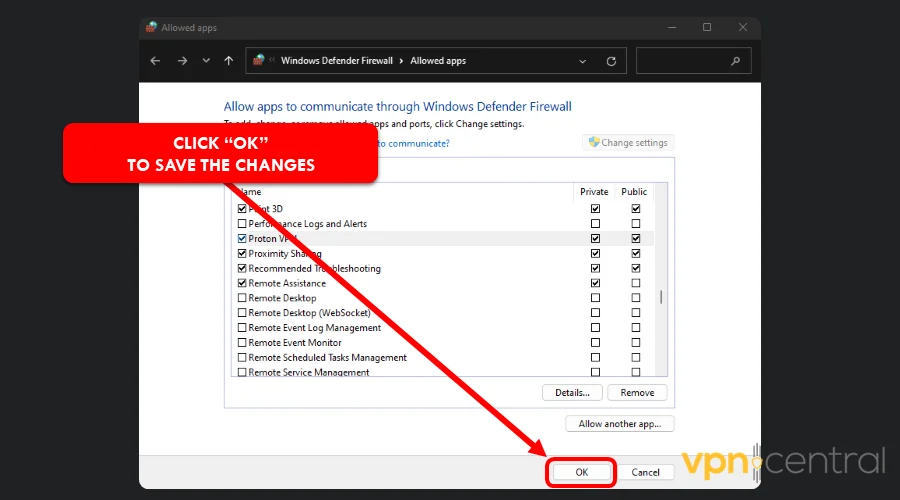
Click OK to save.
The above method allows Proton VPN to bypass any antivirus/firewall restrictions. Therefore, it will manage incoming and outgoing connections without fail.
Related reads:
Conclusion
All things considered, we’re hopeful this guide addressed the main issues that might make ProtonVPN not work smoothly on your device.
Fortunately, these errors can be fixed using basic troubleshooting. So, feel free to test our solutions by carefully following the steps presented in them.
You can start with any solution. However, we advise you to take them in the provided order, as this will help you isolate the issue more effectively.
ProtonVPN is a reliable service with a good reputation, being trusted by many users all over the world. Therefore, there’s no reason why you shouldn’t be able to use it hassle-free as long as you follow this troubleshooting guide accordingly.
In case you end up in a situation in which you consider this VPN service is not for you anymore, either due to frequent errors or poor performance, you have the option of choosing another VPN to continue to keep your online sensitive data private and secure.
Read our disclosure page to find out how can you help VPNCentral sustain the editorial team Read more

Improve this guide


User forum
0 messages