Best VPN for Meta Quest 2 & How to Install

We tested and layed out the best VPNs for Meta Quest 2. Find all you need to know about them, including how to install below.
So, if you want to use your VR without geo-blocks, increase online security and reduce latency, keep reading.

Access content across the globe at the highest speed rate.
70% of our readers choose Private Internet Access
70% of our readers choose ExpressVPN
Browse the web from multiple devices with industry-standard security protocols.

Faster dedicated servers for specific actions (currently at summer discounts)
Let’s get started.
What is the best VPN to use on Meta Quest 2?
Need help deciding which is the best VPN for Meta Quest 2 (formerly Oculus Quest 2)? The tested VPNs below offer unbreakable security, blazing speeds, and tons of servers for Oculus Quest 2.
- ExpressVPN – Fastest servers VPN for Oculus Quest and Oculus Quest 2
- CyberGhost – Gaming-optimized VPN with 90+ locations for worldwide Metaverse content
- NordVPN – Top-tier VPN security for all Oculus Quest VR environments
- ProtonVPN – Amazing free plan with no data limit to use for your Oculus Quest 2
- Hide.Me– Best VPN without registration and without login needed for Oculus Quest 2
Best free and paid VPN for Oculus Quest 2 VR
Find out more about our top 5 VPN choices for Oculus Quest 2 VR below:
1. ExpressVPN – best overall
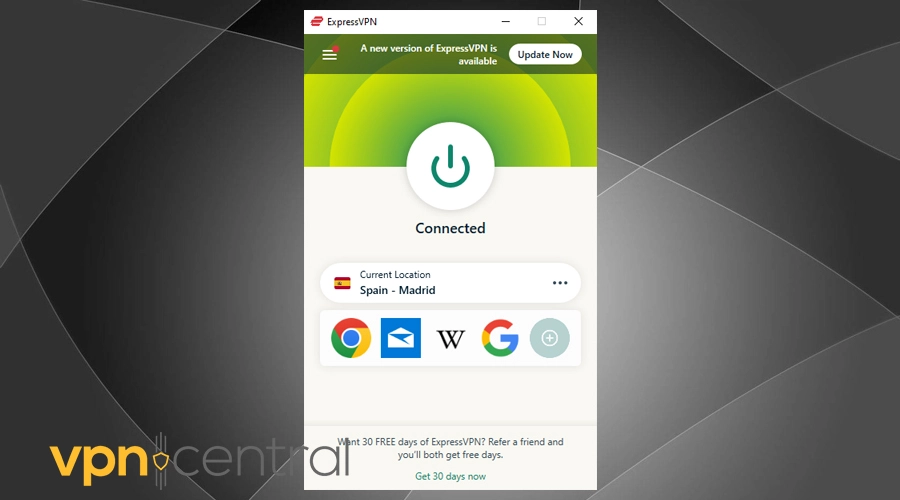
With all the privacy concerns VR gaming brings, you need a VPN you can trust to keep your data away from prying eyes. This is where ExpressVPN comes in as it guarantees top-notch security and privacy.
It offers a strict no-logs policy and AES-256 encryption, which is virtually uncrackable.
Obviously, speed is a critical factor for VR gaming and that’s another area in which this VPN shines. With it, you don’t have to worry about lag and slowdowns. This is also why ExpressVPN is a popular choice by all gamers.
Its global network includes over 3,000 servers spread over 94 countries. This makes bypassing any sort of geo-restrictions easy.
Compatibility is another strong suit of ExpressVPN, as you can easily set it up on your router.
Unfortunately, this VPN doesn’t offer a free plan. However, it has a 30-day money-back guarantee you can use to test its compatibility with Oculus Quest 2 VR yourself.

ExpressVPN
Enjoy the smoothest performance and privacy with this gaming-optimized VPN.2. CyberGhost – great server coverage
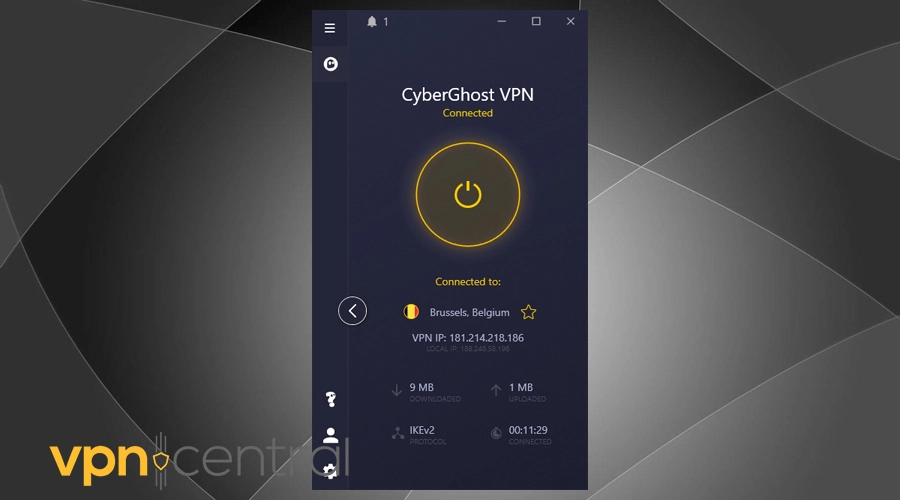
If you want a VPN that’ll keep your data safe and provide access to as many servers as possible, look no further than CyberGhost.
With 6,900 servers in 90 countries, you know you’ll always have a fast connection for VR gaming. Its vast network ensures maximum performance as there’s no overcrowding. What’s more, it has servers specifically optimized for gaming.
It uses industry-standard encryption and comes with a no-logs policy you can trust.
We also really liked how simple the process of installing it on your router is. This is another reason why CyberGhost is a great choice for all Oculus Quest 2 users out there.
While there’s no free version, this VPN also accepts refunds for 30 days after purchase if you’re unsatisfied with the service.

CyberGhost
Benefit from gaming-optimized servers and advanced security features with CyberGhost.3. NordVPN – excellent security features
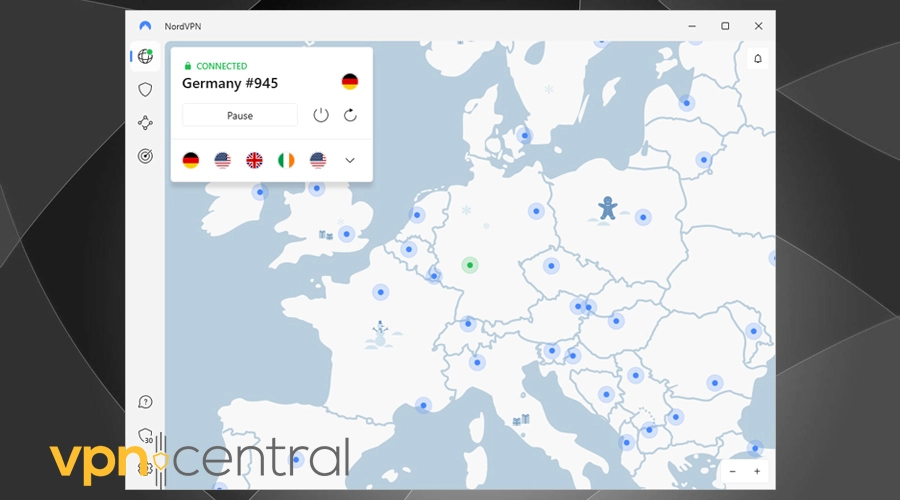
When it comes to speed, you can count on NordVPN to deliver exactly what you need for VR gaming.
This VPN has its own protocol called NordLynx that combines lightning-fast connections and all the security you need. It also has a privacy policy you can rely on and extra security features that’ll keep you safe at all times.
It has an impressive fleet of 5,500 servers in 60 countries. It also works in China, which isn’t the case with most VPNs on the market.
It’s easy to set up on your router, meaning you’ll be able to use it for VR gaming no matter how tech-savvy you are.
When you purchase a subscription, you also get a 30-day money-back guarantee.

NordVPN
Enjoy the perfect combination of security and performance with this versatile VPN.4. ProtonVPN – best free plan
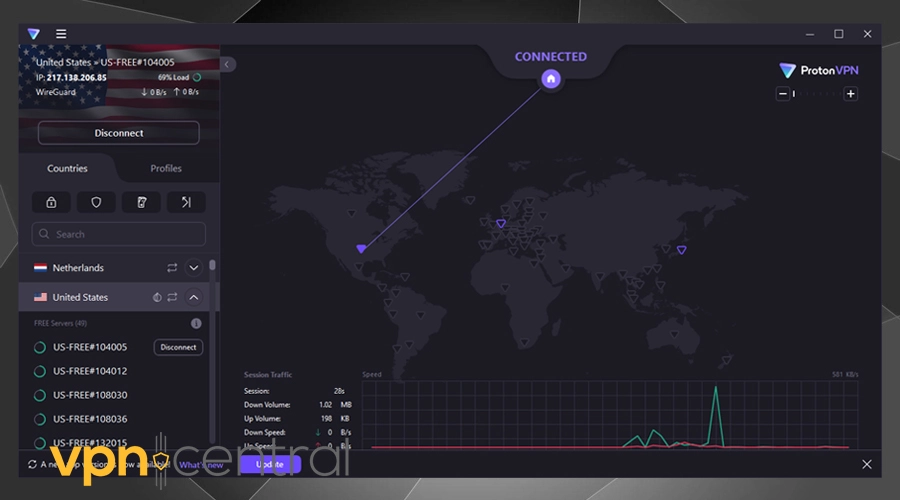
If you’re wondering which free VPNs you can use Oculus Quest 2, ProtonVPN is a perfect solution.
VPNs that you can use for free usually don’t offer the gaming performance you get with other options on the market. That’s not the case with ProtonVPN and you can still expect high speeds and lag-free gameplay even with a free plan.
This VPN is also known for its focus on privacy and security, so you don’t have to worry about your data as well.
This VPN has a network of over 2,500 servers across 68 countries. So, picking one for your next gaming session shouldn’t be difficult.
We should also point out that free users don’t get access to all locations, but there’s enough to ensure smooth gameplay.
Unlike some other free VPNs, ProtonVPN doesn’t limit the amount of data you can use per month.
ProtonVPN
Enjoy a capable free version or pick a premium plan for advanced features and server variety.5. Hide.me – extra security
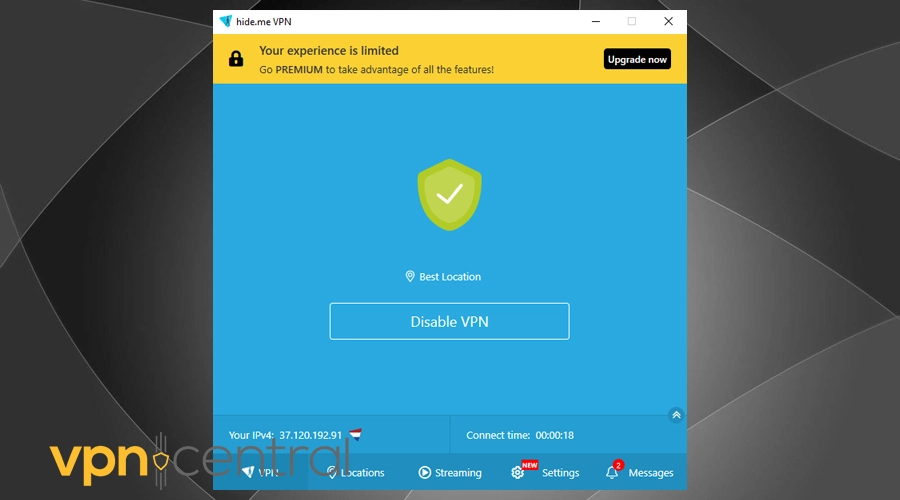
Hide.me is a great choice if you want to try a free VR VPN. Its speeds are more than enough for smooth VR gameplay, even when you don’t use a premium version.
With over 100 servers in 30 locations, there’s enough to always find a good location to connect to. The free version only offers a handful of locations, but it’s pretty fast and offers great privacy.
In that vein, privacy and security are top priorities for Hide.me and you can count on it to keep all your data safe. This means you can focus on your gameplay and let it do the rest of the work for you.
We liked how easy this VPN is to set up on a router so you’ll be ready for your next VR gaming session in no time.
Keep in mind that the free version of Hide.me comes with a 10GB of data limit per month.

Hide.me
Enjoy top-notch performance even on the free version, or update for an even smoother gaming experience.How to use a VPN on Oculus Quest 2?
1. Sideload a VPN Android app
- Enable developer mode on Oculus Quest
- Launch the Oculus app and go to Settings.

- Select your Oculus Quest headset and tap the arrow next to it.
- Choose More settings and click on Developer mode.
- Enable Developer mode.
- Once the site is launched, click the link below Create an organization.
- Log in to your Oculus account and set an organization name.
- After submitting the request, open the Oculus app.
- Go to Settings, select More settings and click on Developer mode.
- Enable Developer mode.
- Launch the Oculus app and go to Settings.
- Install SideQuest on a PC
- Visit the SideQuest page on GitHub or the SideQuest official download page.
- Download the latest version for your PC.
- Run the SideQuest installer and follow the on-screen instructions.
- Connect Oculus Quest with SideQuest
- Connect Oculus Quest to your PC using a USB cable.
- Fire up SideQuest and choose Connect Device.
- Put on the Oculus Quest to select Allow USB debugging.
- Enable Always allow from this computer.
- Install a VPN on Sidequest (we choose ExpressVPN)
- Sign up for an ExpressVPN subscription plan.
- Go to the download page and pick the Android app. Download the APK to your computer.
- Launch SideQuest and select Repos.
- Drag and drop the ExpressVPN APK in the Repos window.
- Connect to a VPN server
- Put on the Oculus Quest and access the home screen.
- Select Library and select Unknown Sources.
- Choose the Express VPN APK (or the VPN of your choice).
- Connect to a VPN server in Express VPN.
Sideloading a VPN app to Oculus Quest isn’t a foolproof solution. In fact, many users report that this method doesn’t work.
Nevertheless, you can still give it a shot. Otherwise, you can proceed to the following solutions, which are guaranteed to work.
2. Share a VPN connection with Oculus Quest
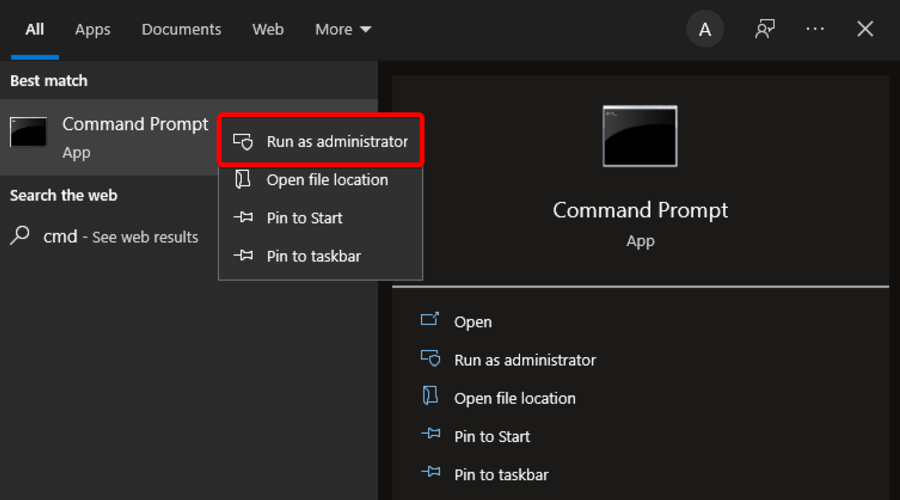
- If you’re using the Windows OS, hit the Windows key, type cmd, then right-click on the first result and choose to Run as administrator.
- Paste this code to create a hosted network**:
netsh wlan set hostednetwork mode=allow ssid=ConnectionName key=Password - Replace ConnectionName and Password with your info.
- Paste this to start the hosted network***:
netsh wlan start hostednetwork - Sign up for a reliable VPN like ExpressVPN.
- Download and set up the VPN on your computer.
- Launch the VPN application and connect to a VPN server.
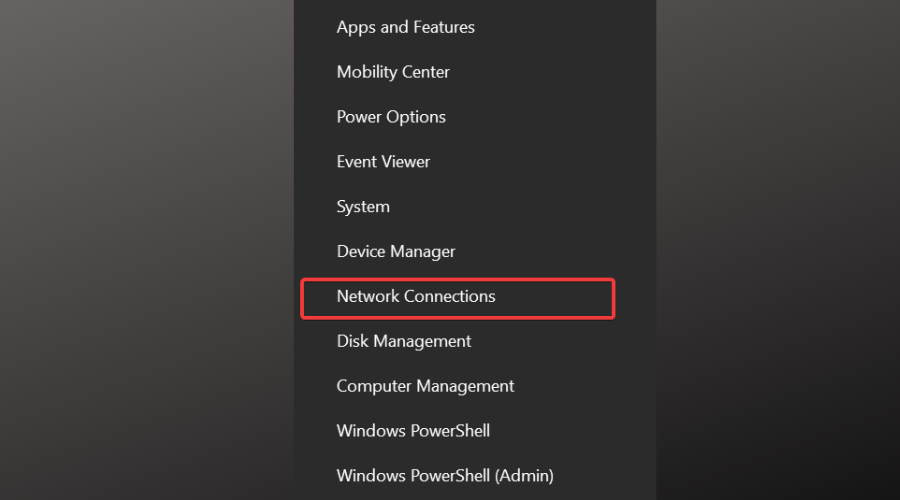
- Right-click the Windows 10 Start button and go to Network Connections.
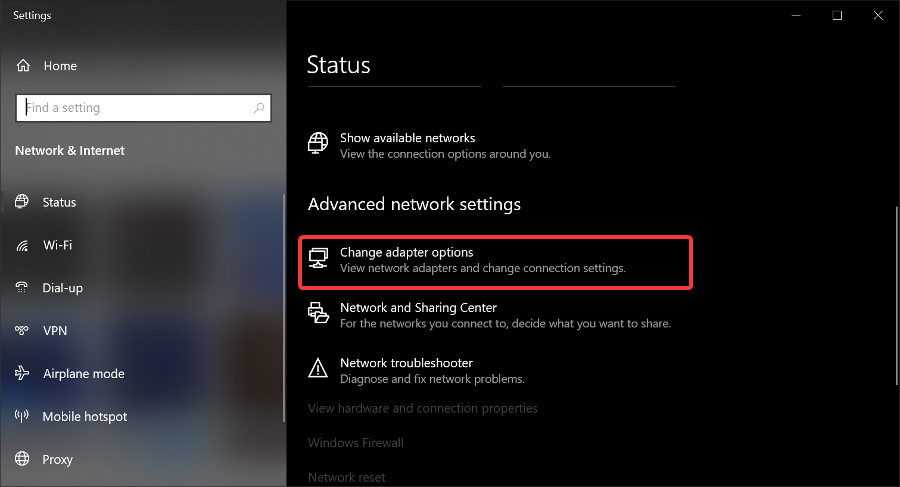
- Click Change adapter options.
- Right-click the VPN connection and select Properties.
- Switch to the Sharing tab.
- Activate Allow other network users to connect through this computer’s Internet connection.
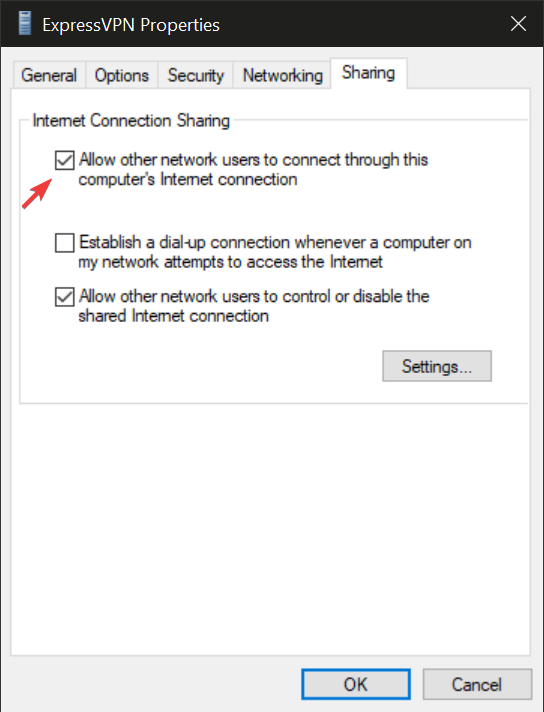
- Set Home networking connection to the hosted network.
- Put on the Oculus Quest.
- Go to Settings and select Wi-Fi.
- Select your Wi-Fi network.
- Enter the password and select Connect.
*Any issues with running CMD as administrator can be easily fixed by following our simple instructions.
**If you’re not sure that your PC supports hosted networks, use the netsh wlan show drivers command to check.
***Hosted network startup problems can be resolved by checking if Wi-Fi is enabled, Microsoft Hosted Network Virtual Adapter is working, and so on.
Setting up a VPN client on your Windows PC and then sharing the VPN connection is a simple way to provide VPN connectivity to any device without native VPN support, including Oculus Request.
The only downside here is that your Windows PC must remain running while using the VPN on Oculus Request. Plus, you might need to buy a new Wi-Fi adapter if the hosted network setup doesn’t work.
3. Set up the VPN on your router
- Use a web browser to log in to the router admin panel.
- Check if the router’s firmware supports VPN client mode.
- If so, sign up for a VPN subscription plan (we suggest ExpressVPN).
- Scroll down and click Go to OpenVPN Generator.
- Pick a VPN region and press Generate.
- Go back to the router admin panel and locate the VPN client section.
- Follow the steps to either copy the OpenVPN details or upload the OpenVPN file obtained from ExpressVPN.
- Put on the Oculus Quest.
- Head over to Settings and select Wi-Fi.
- Connect to your home Wi-Fi.
Note: The login address and the credentials to your router settings should be written at the bottom of your router device. Otherwise, go to Network Connections and click on Properties. Find IPv4 DNS servers and copy the corresponding address in your browser URL bar.
Setting up the VPN client at the router level is not the easiest method, but we think it’s the best solution for using VPN on Oculus Quest because the VPN affects the router.
Besides, everyone that connects to your home Wi-Fi will use the VPN to browse securely, access blocked sites, and watch unlimited streaming. You don’t even need a VPN for multiple devices or simultaneous connections.
That’s because you will be able to share your VPN account with your whole household, no matter how many simultaneous connections it supports.
Does Oculus Quest have a VPN?
There is no integrated VPN feature within Oculus Quest. However, the VR headset is compatible with multiple VPN services and it is recommended you connect it to one.
If you plan to use Oculus Quest for online games, it is very important to secure your connection. The web is filled with scammers and trackers that try to find your identity.
Plus, if your Internet Service Provider throttles gaming traffic, a good VPN can help you stop that once and for all.
This means that your ISP won’t know how much traffic you use and will not be able to restrict your data. You will get fast-paced connections all month round.
Is there any good free VPN for Oculus Quest?
Free VPNs do generally have a catch. They either have a pretty low number of serves or limited data. Some do even restrict how many servers you can access in a day.
If you want to compromise on traffic data and get limited options, you can benefit from a free VPN, but be careful what you pick.
The above-mentioned ProtonVPN is a great free option with unlimited data and very decent gaming performance.
Hide.Me VPN is also safe and doesn’t keep data logs, as opposed to other free VPNs. It is truly secure and reliable, although limited in terms of data.
Alternatively, consider that most reliable premium-tier VPNs have free trials or money-back guarantees. So you can test them out without financial commitment. Try out a few before you decide.
Wrap up
No matter what solution you go with, you need a reliable VPN that can secure your gaming sessions, protect you from hackers and DDoS attacks, reduce ping, and work in your country.
This has been our guide on how you can enable VPN on Meta Quest 2. We hope that the explanations above helped you. If you have the new version, check our guide on the best VPNs for Meta Quest 3.
Let us know which of these solutions you ended up trying and what VPN service is your best bet. If you have any suggestions or questions, feel free to use the comment section.
FAQ
Yes, Oculus tracks your activity and collects some data through its VR headset.
Meta, the company behind it, had some privacy issues in the past, so finding additional ways to protect your information is a good idea. Using a VPN for your gaming sessions can help hide your identity and keep your data safe.
Yes, Oculus Quest 2 is restricted in some regions. When traveling, you’ll find that your shop reflects the country you’re in.
If the device doesn’t work in the location you’re currently in, you can use a VPN to bypass the geo-restriction.
The best way to change your location on Oculus is to use a VPN. You can sideload a VPN on your Android device, set it up on your router, or share the connection from your PC to do so.
You can turn off tracking on Oculus Quest 2 by navigating to Settings > See All and deactivating the Tracking switch you’ll find there.
Keep in mind that this will clear your Guardian history and the cameras, but it won’t prevent the device from tracking and collecting your data. Using a good VPN for Oculus Quest 2 is still necessary to ensure your info is truly safe.
Read our disclosure page to find out how can you help VPNCentral sustain the editorial team Read more

Improve this guide


User forum
3 messages