Your IP Address Has Been Used Without Your Knowledge [Scam Fix]
Did you get an error reading that your IP address has been used without your knowledge during regular web browsing? Please refrain from clicking any links or calling any phone numbers.
This message is most likely a scam aimed to steal your data. Follow the steps below to eliminate the error and ensure it’s not showing up again.

Access content across the globe at the highest speed rate.
70% of our readers choose Private Internet Access
70% of our readers choose ExpressVPN
Browse the web from multiple devices with industry-standard security protocols.

Faster dedicated servers for specific actions (currently at summer discounts)
What does it mean if your IP address has been used without your knowledge?
When your IP address is used without your knowledge message pops up on your screen, the cause is one of the following:
- Fake error scam that tries to trick you into giving out your personal information
- Someone using your WiFi network without your permission
- Malware, virus, or spyware on your device that is allowing unauthorized access
What to do if you get such a message?
If such a prompt pops up on your screen, don’t click on any links or download any attachments in the message.
These are likely to be part of a scam attempting to steal your personal information or installing malware on your device.
Instead, try getting rid of it without interacting directly with the links/ buttons on it.
1. Close your browser
Immediately close the browser where the scam message appeared to prevent any interaction with potentially malicious links or buttons.
Simply close the browser window using the ‘X’ at the top right corner (on Windows) or top left corner (on macOS).
If you cannot close the browser normally:
On Windows:
- Press
Ctrl+Shift+Escto open the Task Manager. - Find your browser in the list of running applications.
- Click on the browser and then select ‘End Task’ to forcefully close it.
On macOS:
- Press
Command+Option+Escto open the Force Quit Applications window. - Select your browser from the list of applications.
- Click ‘Force Quit’ to close the browser immediately.
2. Reset your browser settings
If you get this error while using a particular browser, it’s possible you have suspicious extensions installed. Resetting to default should get rid of it.
Here’s how to do it on Chrome:
- Open Google Chrome and click on the three vertical dots in the top right corner.
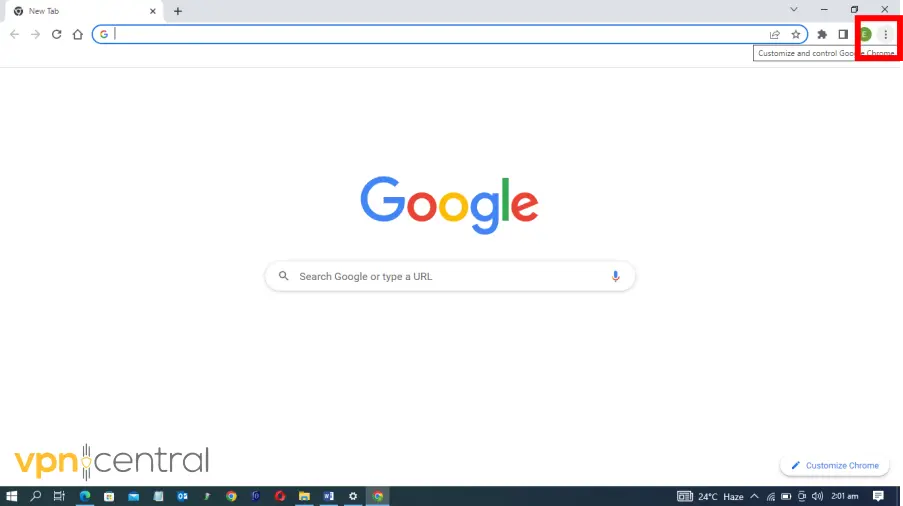
- In the drop-down menu, select Settings.
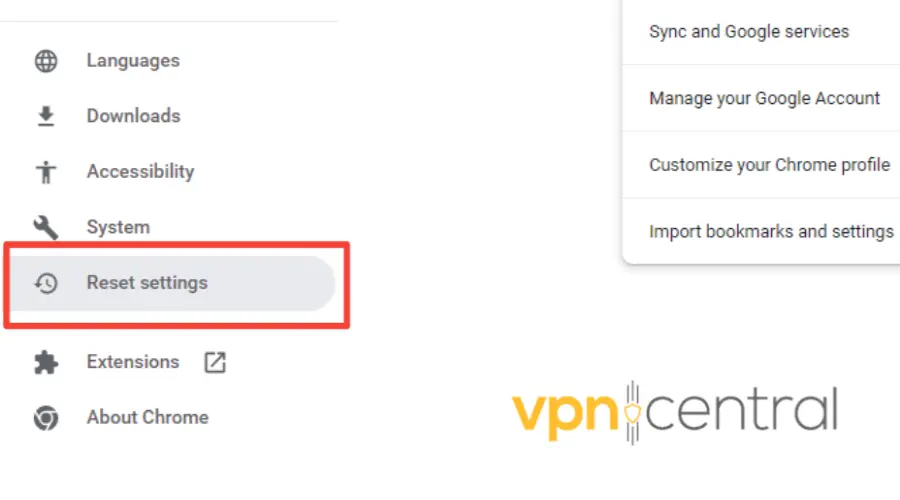
- Click the Reset settings option on the left side.
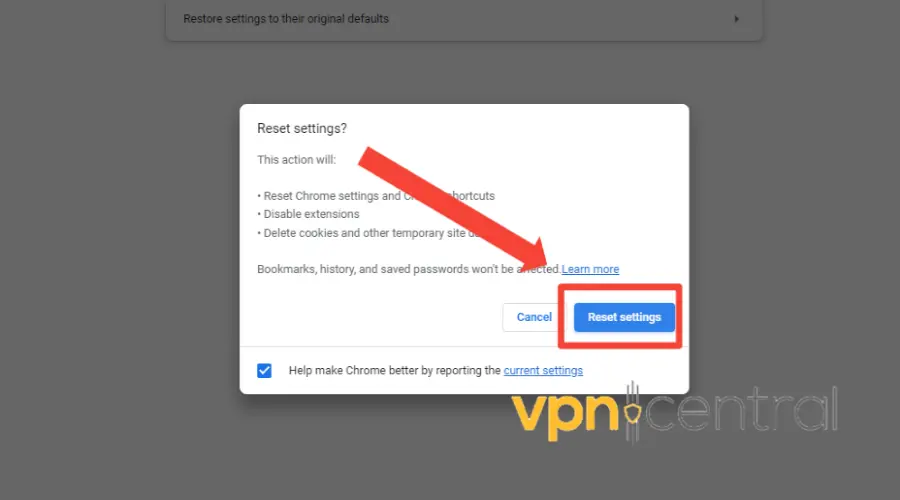
- Click Restore settings to their original defaults.
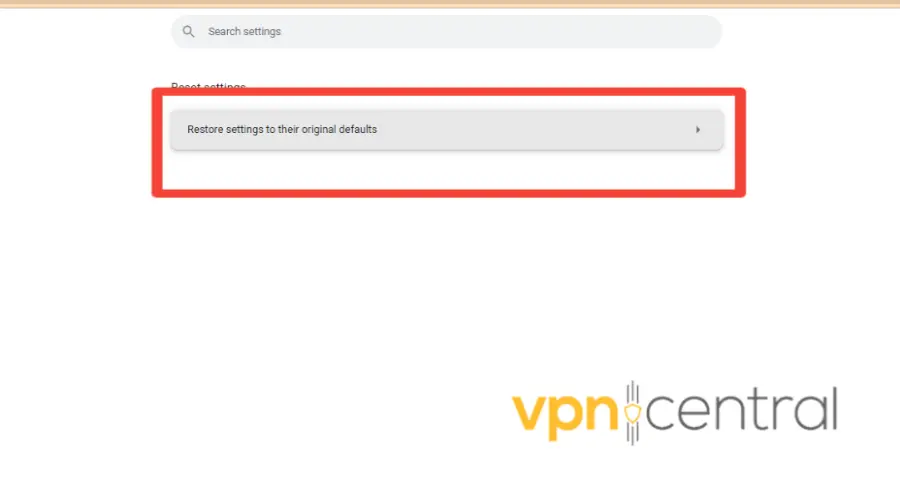
- Confirm your decision and click Reset settings.
While we use chrome as an example, this method works well also on other browsers, including Microsoft Edge and Firefox.
2. Clear your cache and cookies
Another browser-related issue that can lead to this error is your stored data.
Over time, it can interfere with your browsing and send off conflicting information to the websites you visit, like different IPs, location information, and more.
That’s why clearing cache and cookies can prevent this from happening again.
Here’s a quick guide on how to do that.
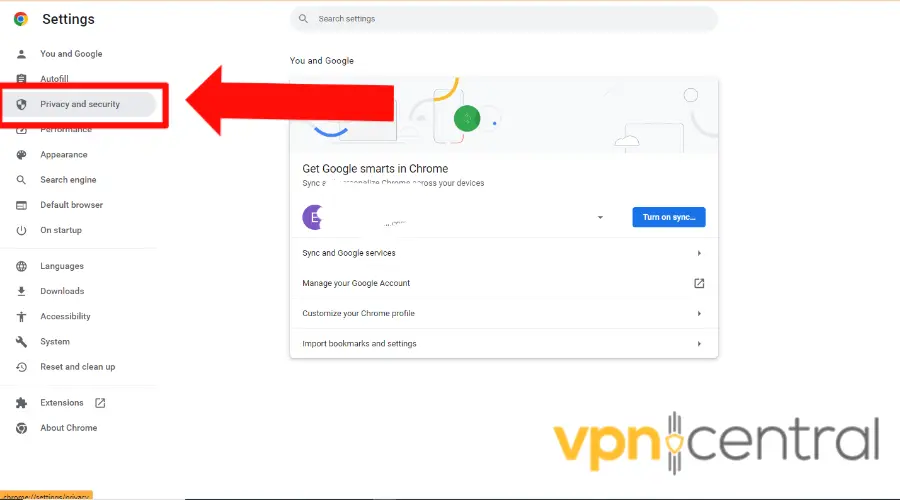
Access your browser’s settings by clicking on the three dots or lines in the top-right corner of your screen.
- Click on Privacy & Security.
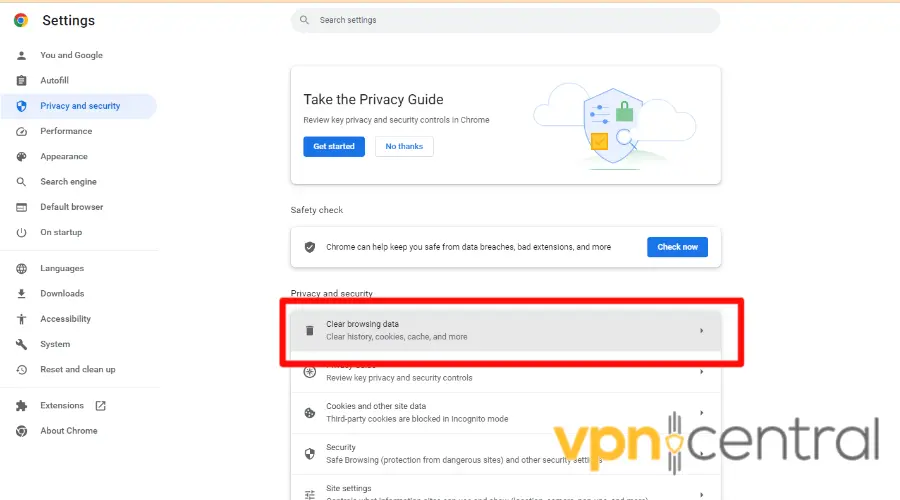
- Select Clear Browsing Data.
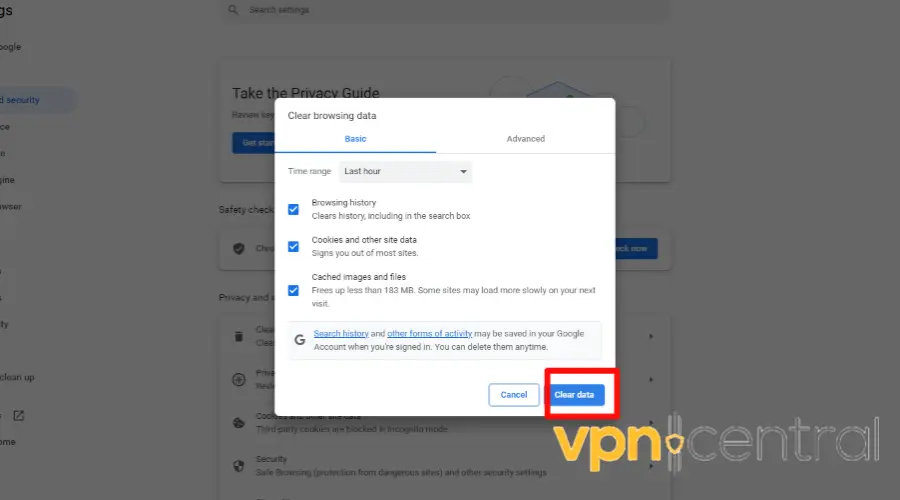
- Choose the option to delete all cookies and other site data, then select clear Data.
3. Check your network
Make sure that no one is using your Wi-Fi network without your permission. You can do that by checking the activity logs on your router.
While the general steps remain the same, the interface of your router may appear different from the screenshots shown. Attackers sometimes even rely on IP scanning tools like Angry IP Scanner alternatives to look for open or vulnerable devices on a network.
Follow the steps below to check your router’s browsing history:
- Open your web browser and log into your router admin panel. In general, you just have to type its IP address and enter your admin credentials.
- Click on the Advanced tab.
Note that the option you need may appear under a different name, such as “Administration,” “Logs,” or “Device History,” depending on the type of router you own.
- Select the System option.
Once again, the specific option you require may have a slightly different name. Look for something related to the “System Log” or “History.”
- Click on System Log.
- Scroll through your router’s history to view your browsing activity. Some routers allow filtering the results to display specific items in the log.
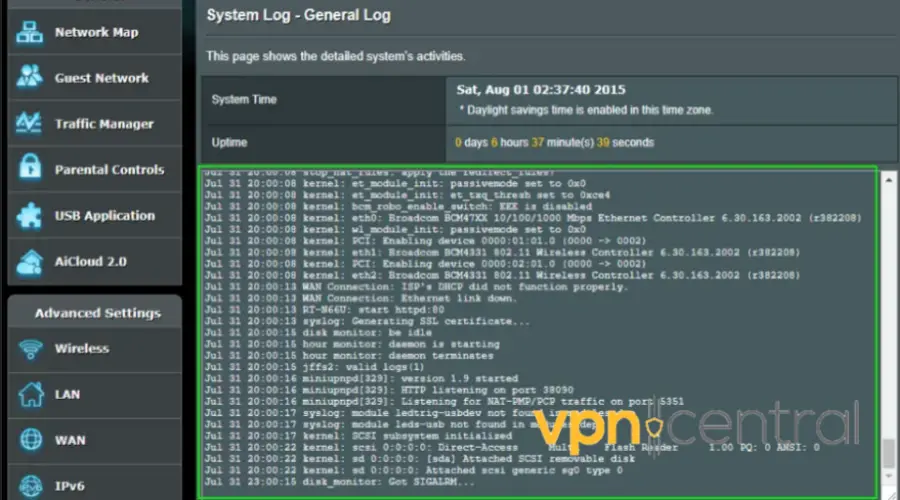
By following these steps, you should be able to view your router’s browsing history and keep track of the websites you or others have accessed from your network.
If you notice any unrecognized devices, someone else is using your WiFi, so you should change your login credentials.
4. Run a virus scan
If you encounter this issue on your Windows or Mac device, your device may already be infected with a virus or malware.
Try running an anti-malware program to run a thorough scan on your device. A reliable option that we trust is ESET Internet Security.
With an updated threat database and artificial intelligence-powered detection systems, it can find and remove pretty much any threat.
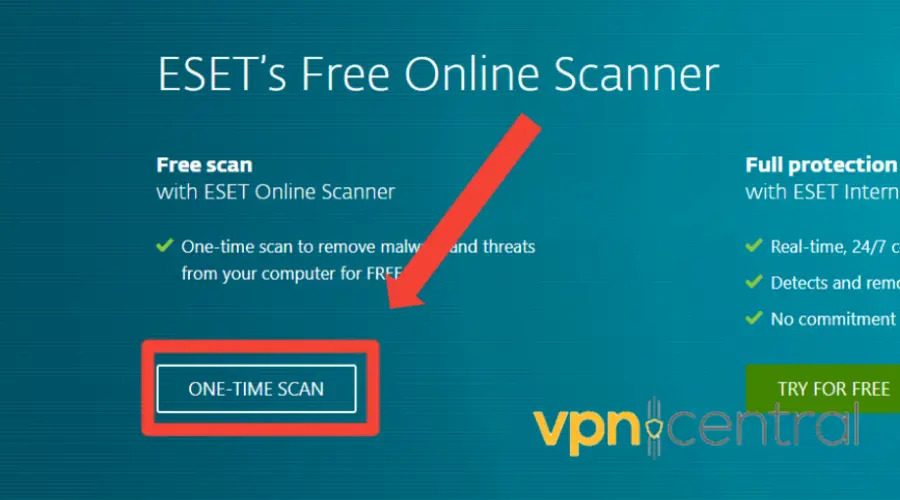
Moreover, it offers the Eset Online Scanner, which is a free, one-time tool that can quickly detect and remove malware from your computer.
Here’s a quick guide on how to use it.
- Open your browser and log in to Eset online scanner homepage.
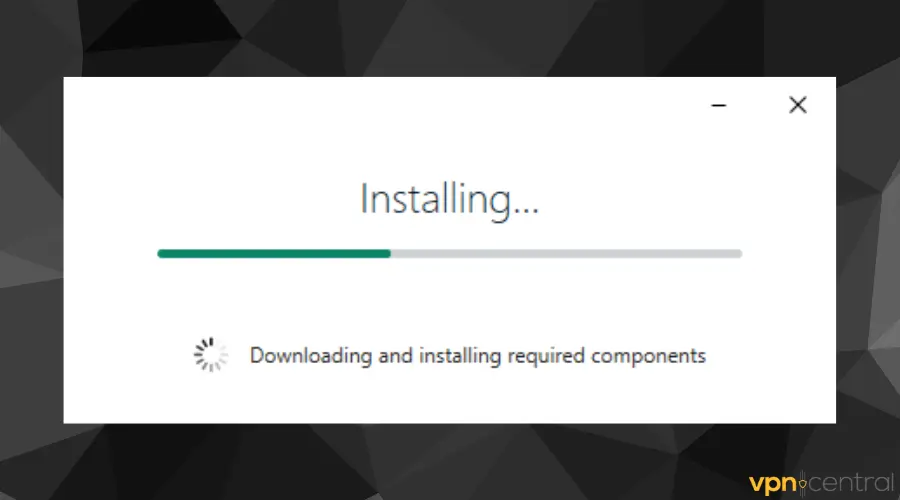
- Click on ONE-TIME SCAN. This will automatically download the file extension to your device.
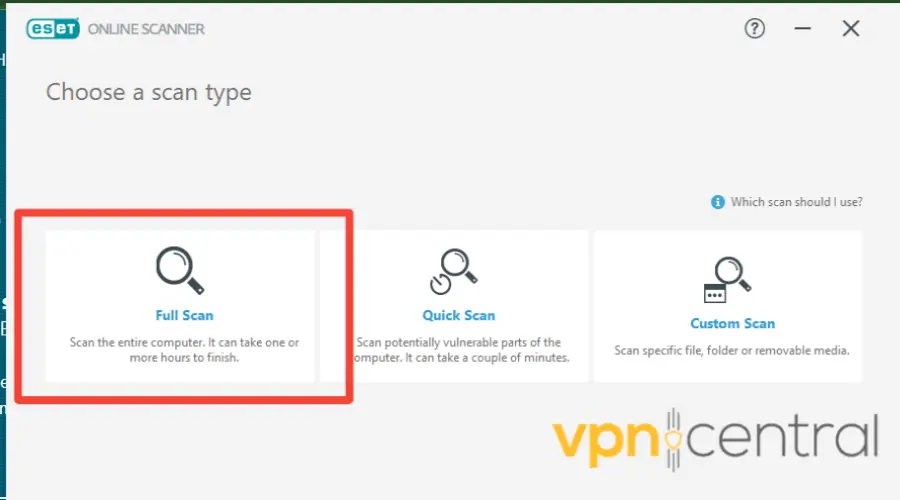
- Install and launch the app.
- Choose a scan type. To ensure your entire computer is scanned and free of potential malware, we recommend a Full Scan. However, this can take one or more hours to finish.
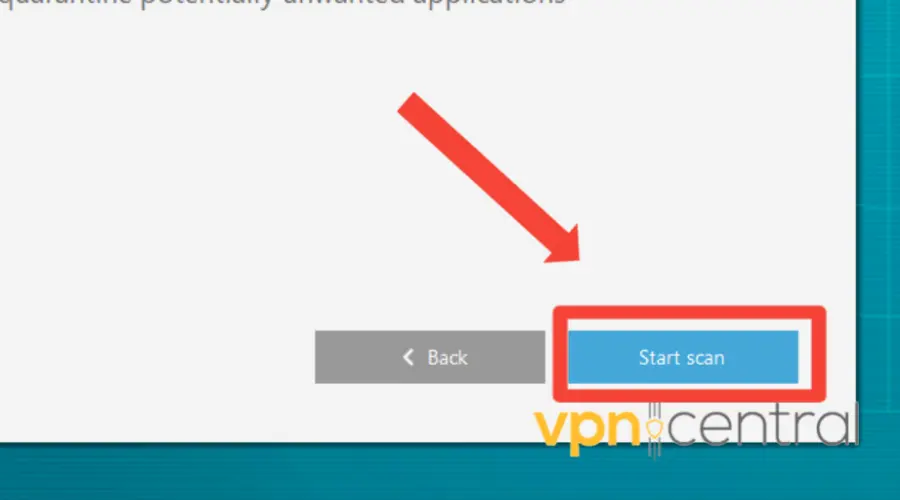
- Check the enable Eset to detect and quarantine potentially unwanted app button.
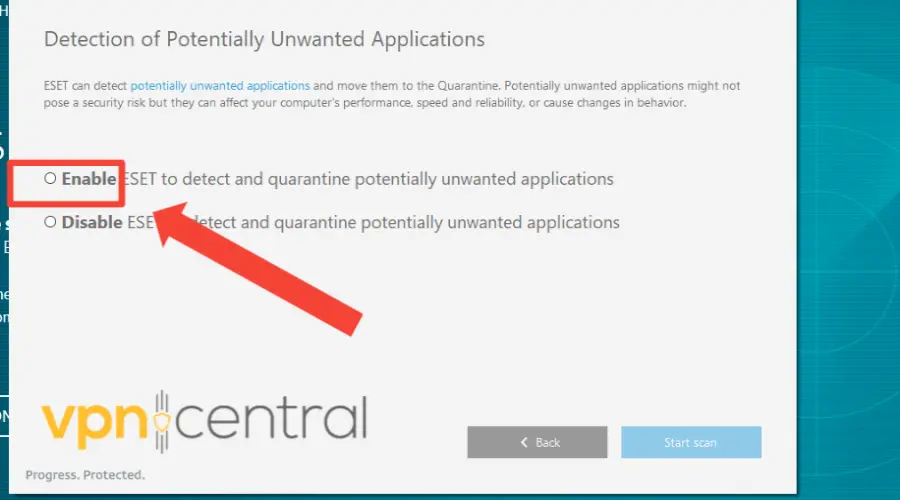
- Then click on Start scan.
- Wait for downloading module update.
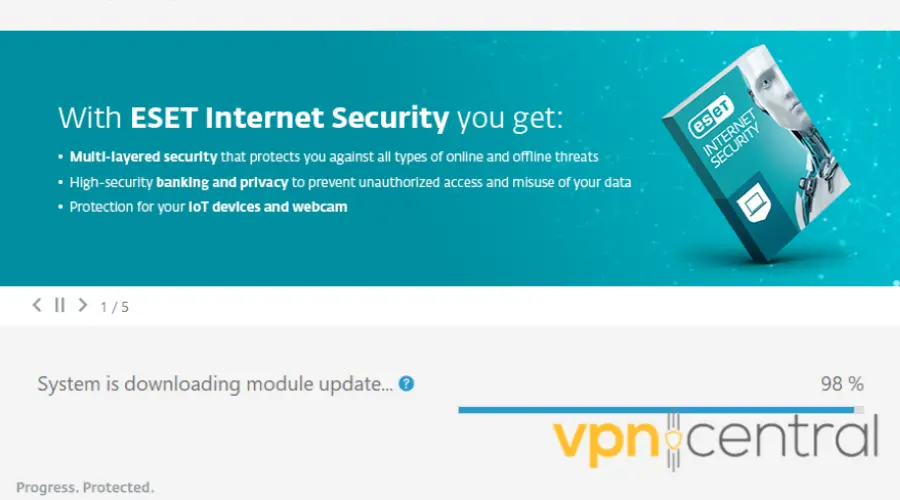
- Wait for scanning to finish.
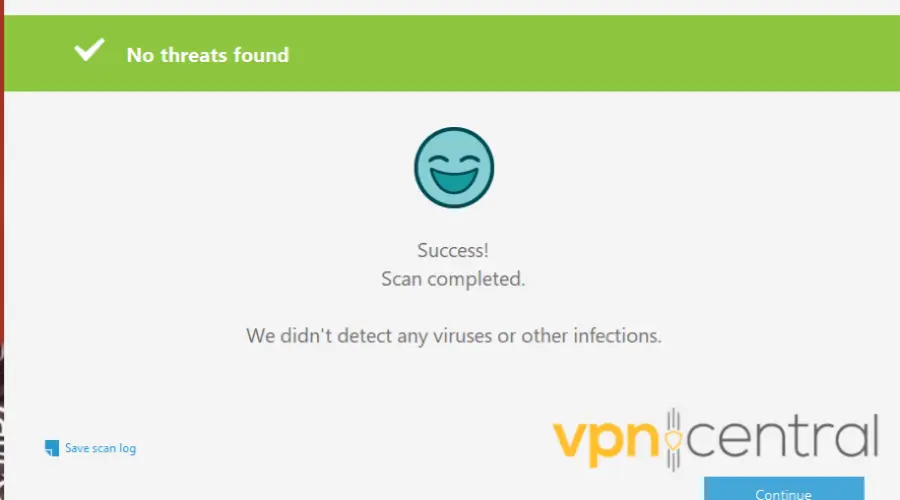
- Check if there are any detected objects and remove them.
This should get rid of the problem if the root of it is a computer infection. As mentioned, this scanner can only be used once.
If you want to run more thorough scans on your computer, you can download the full version of the antivirus. It has a 30-day free trial that includes all of its premium features.

ESET Internet Security
Keep your device threat-free with this full-featured antivirus and anti-malware utility!4. Report the scam
If you encounter a scam message, report it immediately. For Windows devices, use Microsoft’s scam report page here. For Apple devices, contact Apple Support here.
Provide details, screenshots, and any relevant information. Reporting helps track and mitigate such threats and protects others from falling victim to similar scams.
5. Secure your network
- Change Default Credentials: Modify the default username and password of your router to something complex and unique.
- Update Router Firmware: Check your router manufacturer’s website for the latest firmware updates and apply them. This helps patch known vulnerabilities.
- Adjust Router Settings:
- Enable WPA3 encryption for the best security on your Wi-Fi network.
- Turn off Public Wi-Fi features and WPS (Wi-Fi Protected Setup), which are often targeted by attackers.
- Consider disabling Remote Management features to prevent external access to your router’s settings.
How to protect your IP?
One of the best ways to protect your IP address is to use a VPN.
A VPN encrypts your internet connection and hides your IP address, making it much more difficult for someone to use it without your permission.
One of the best VPNs on the market is ExpressVPN.
- Subscribe to an ExpressVPN plan and download the software.
- Install the ExpressVPN app on your computer.
- Launch the app and login into your account.
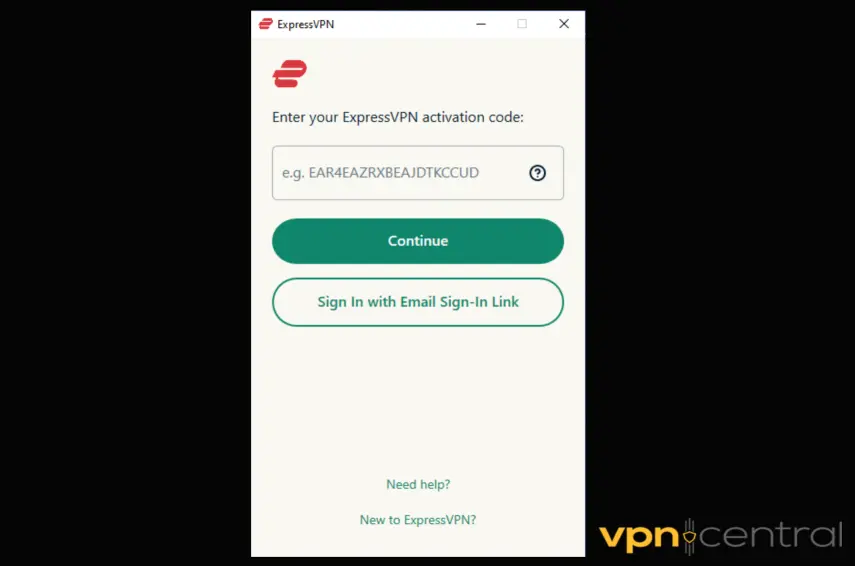
- Click on the power button to automatically connect to a server. Alternatively, click on the three dots option to expand the server list and manually pick a location of your choice.
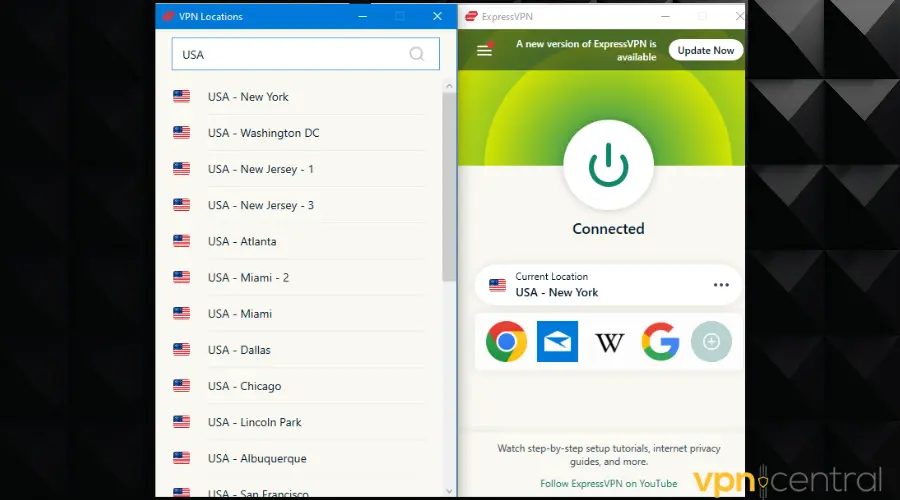
ExpressVPN has robust privacy and security features, including military-grade encryption and a strict no-logs policy.
Plus, it has a kill switch feature that automatically cuts off your internet connection if the VPN connection drops.
This protects your data in case the VPN disconnects. Below are the main benefits of this app that will for sure protect your IP address from being tracked or used without permission.
- Industry-standard AES-256 encryption to protect your data
- Independently audited no-logs policy that ensures your privacy
- A global network of servers in over 90 countries allows you to access content from around the world
- Split tunneling allows you to choose which apps or websites use the VPN connection and which do not
- User-friendly apps for all major devices and platforms
- Up to 5 simultaneous connections on your devices
If you still get the your IP address has been used without your knowledge error even when you use a VPN, you can be sure it’s a scam.
Close off the website and run a virus scan to make sure it didn’t get a chance to infect your device.

ExpressVPN
Keep your IP information completely private with this untrackable, highly secure VPN!Read more:
- Your Access to This Site Has Been Limited By the Site Owner [Fix]
- Fix: Posting from Your IP Range Has Been Blocked Due to Abuse
- FIX: Your IP Has Been Flagged for Potential Security Violations
Summary
If you receive a message saying that your IP address has been used without your knowledge, it’s crucial to take action to protect yourself, as it’s most likely caused by a virus or it’s a scam.
This can include checking your network, running a virus scan, and reporting the message if it’s part of a scam.
To prevent your IP address from being tracked in the future, use a VPN to always mask it when browsing the web.
By taking these steps, you can protect your online privacy and security.
FAQs
Check the website you visit. If it’s an unsecured website, just close it down and never access it again. If the problem occurs on several different websites, then clean up your browser by resetting it to default and clearing cookies and cache. Ultimately, if the problem persists, run a virus scan and remove all threats found.
The message is most likely a scam that occurs when you access suspicious sites, click on untrusted links, and download files from unknown/not secure sources. It is also possible to get a similar message that is actually legit. Those messages only show you the steps necessary to get rid of the problem, without any suspicious links and without asking for personal information.
Genuine Microsoft security alerts include your name or username and will not ask for personal or financial information. If you’re not sure, you can use a secondary device to check your Microsoft account status on their official website.
Read our disclosure page to find out how can you help VPNCentral sustain the editorial team Read more

Improve this guide


User forum
0 messages