Your IP Has Been Flagged - Why it Happens & How to Fix it
Your IP address has been flagged for possible suspicious activity that pops up when your IP is linked to suspicious activity, such as cybercrime or numerous login attempts.
It could happen to anyone. Even if you didn’t engage in suspicious activity. It can show up on social media, betting, and streaming apps. I’ll explain below what’s causing this and how to fix it for good.

Access content across the globe at the highest speed rate.
70% of our readers choose Private Internet Access
70% of our readers choose ExpressVPN
Browse the web from multiple devices with industry-standard security protocols.

Faster dedicated servers for specific actions (currently at summer discounts)
Why has your IP been flagged?
The “Your IP has been flagged” error typically occurs when your IP address has been identified as suspicious or potentially harmful by a website or online service. Here are some common causes for this error:
- Excessive login attempts: When there are too many failed login attempts from a specific IP address, it may signal a hacking attempt or unauthorized access.
- Rapid data requests: A high volume of automated data requests from an IP address may suggest scraping, data harvesting, or querying with tools like alternatives to Angry IP Scanner. This activity can strain server resources and violate usage policies.
- VPN/Proxy use: a history of abusive activities coming from your VPN/proxy IP can lead to flagging for all users of the service
- Shared network abuse: Similar to VPNs and proxies, if someone on your home, work network, or public WiFi engages in abusive behavior, it can result in the entire IP address being flagged
- Security breach: your IP address is associated with hosting or distributing malware, phishing attempts, or other security threats
- Inappropriate behavior: Engaging in behavior that violates a website’s terms of service, such as spamming, abusive behavior, or other policy violations
- Server misconfiguration: Misconfigurations on the server handling an IP address, such as incorrectly set up firewalls, security systems, or other protective measures
What to do if your IP has been blacklisted?
Here’s how to get rid of the error.
1. Check for malware or unusual activity
- Run a full antivirus scan on your computer.
- Remove any identified malware or viruses.
- Check your system for any unusual network activity using the task manager or network monitoring tools.
Run a thorough antivirus scan on your computer to check for any malware or viruses. Look for any unusual network activity that might be triggering the flagging.
2. Request IP address delisting
If you are positive you didn’t break any terms of use, you can contact the site/service that flagged your IP and request a delisting.
Some sites require some investigation before giving you access, so it may take a while, but it’s worth it. Each site and service has its system, but it’s usually under an intuitive name like Delist IP address or Blacklisting.
For instance, on Twitter, you’ll have to go to “Appeal an account suspension or locked account”.
3. Use a VPN to change your IP
Virtual Network Providers has been around for quite some time and it’s a go-to tool to mask your real IP address.
Once you connect, the traffic is routed through the VPN server, and your real IP is replaced with the VPN’s IP.
To do that effectively, you need a VPN that has a decent number of servers. This way, you’ll have a lower chance of landing on a blocked IP address. Moreover, VPNs with good security are more difficult to block.
- Subscribe to a reputable VPN.
We recommend ExpressVPN for its high-quality servers and top-of-the-line security features.
- Download and Install the software on your device.
- Launch the VPN and log in with your details.
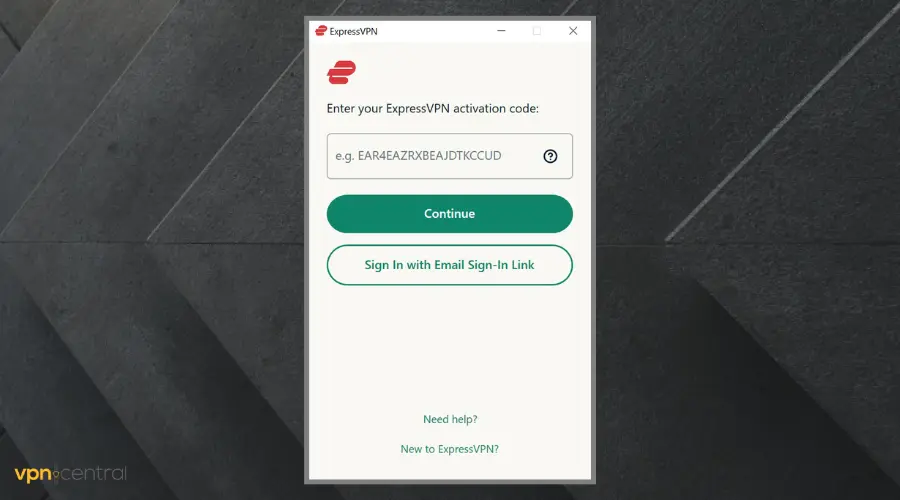
- Connect to any server of your choice.
- Visit the website or app again. We are certain you’ll gain access this time.


ExpressVPN
Easily bypass IP bans and restrictions by connecting to ExpressVPN!2. Use a SmartDNS
You can also use a SmartDNS to change your IP address. As opposed to VPN, it doesn’t feature encryption, so your traffic information will be visible.
But it can pass for a quick tool to switch addresses.
Follow the guidelines below to set up SmartDNS on PC:
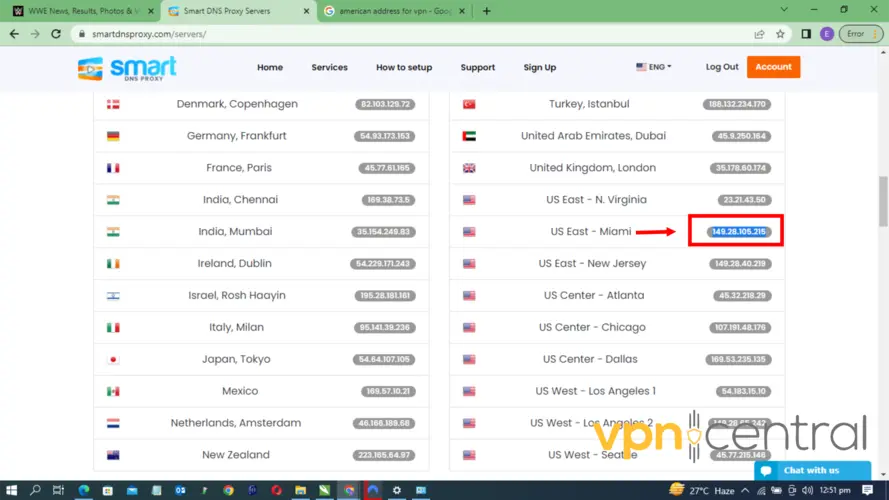
- Signup for a SmartDNS Proxy account.
- Go to the location list and pick a server address of your choice. Keep the tab open.
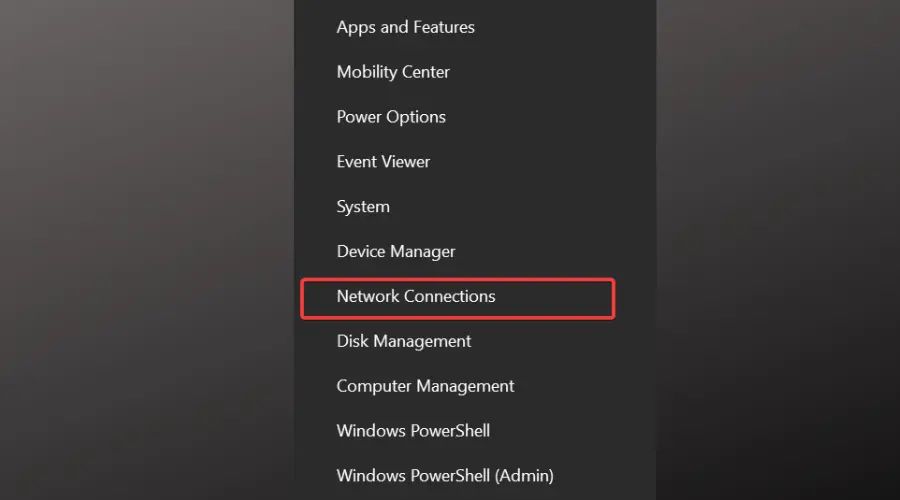
- On your PC, right-click on the Start button.
- Click on Network Connections.
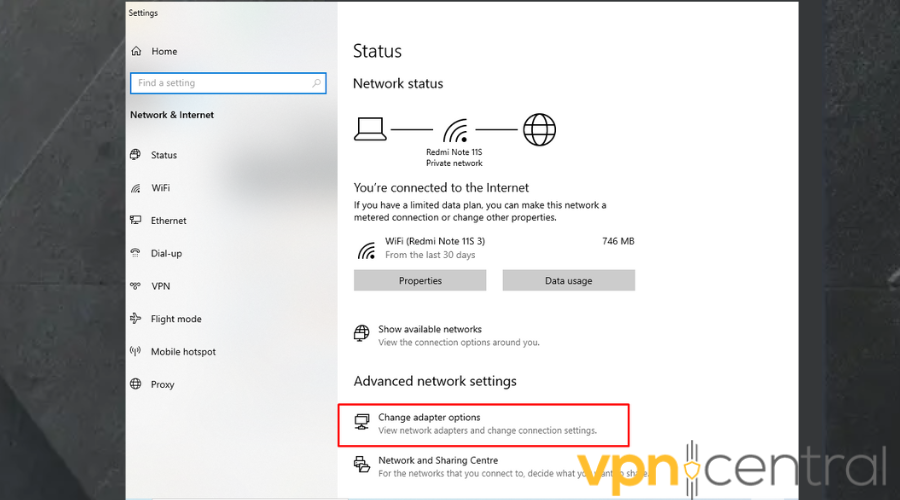
- Click on Advanced Network Settings.
- Select Change adapter options.
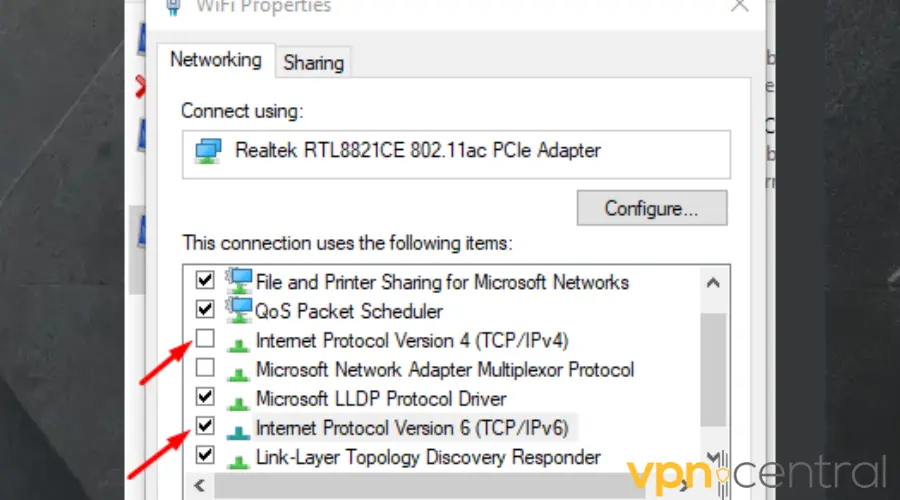
- Right-click on your active connection and choose Properties.

- Uncheck the Internet Protocol Version 6 (TCP/IPv6).
- Double-click on Internet Protocol Version 4 (TCP/IPv4). Click on Properties below this window.
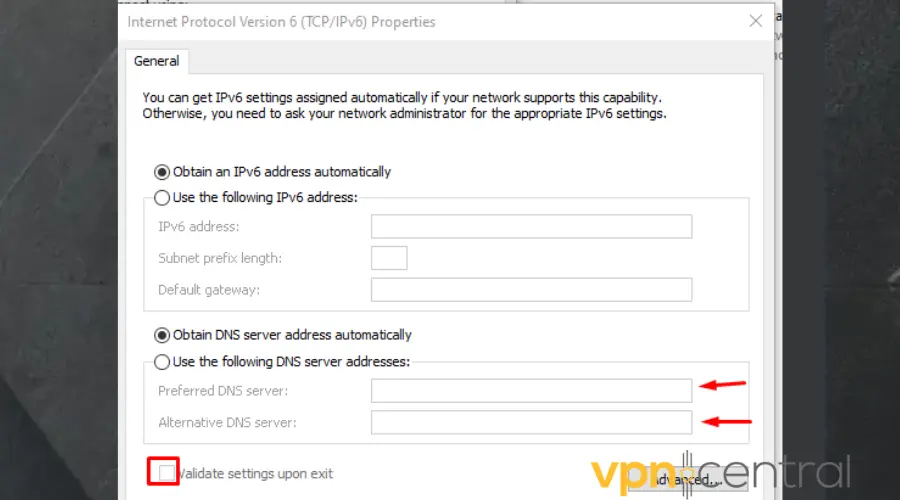
- In the General tab, click on Use the following DNS server addresses.
- Enter the Preferred address and Alternative address from the server list from step 2.
- Check the box beside validate settings upon exit.
- Click OK.
- If the Windows diagnostics runs, allow it. Restart your computer after that.
- Go back to the website and try to access it again. You should have access by now.

Smart DNS Proxy
Get rid of IP restrictions on any website or app using this reliable service!3. Use the Tor browser
Although you can use the Tor browser without any configuration, the following setup will prevent any website from blocking you in the future.
To set a specific country’s IP in a Tor Browser, you need to follow these steps:
- Download the Tor browser to your device.
- Launch the Tor Browser on your device.
- Click on the folder on your device where the Tor browser is located to open.
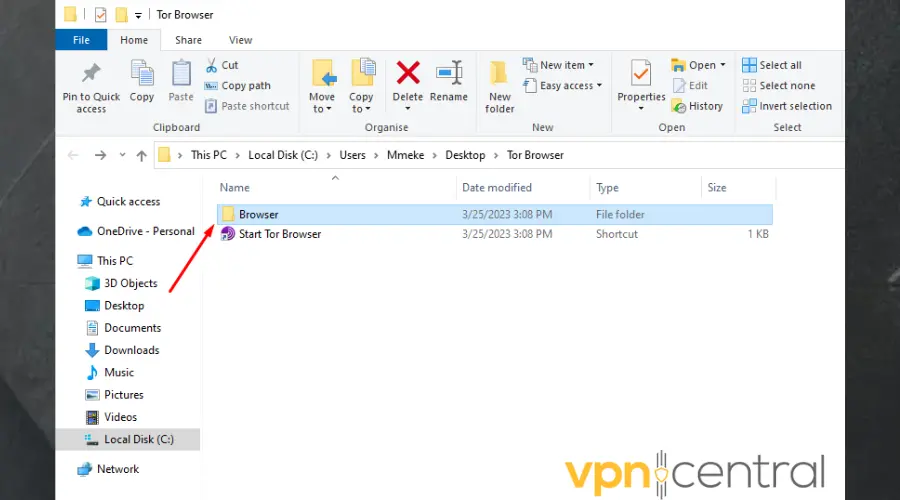
- Inside this folder, double-click on the TorBrowser folder.

- Click on the data folder inside the TorBrowser folder.
- Then double-click on the Tor folder you find.
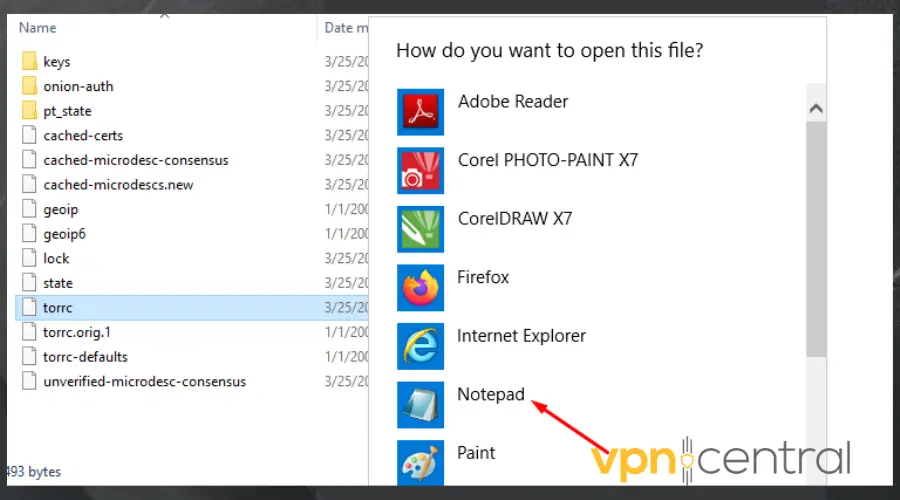
- Scroll down to the torcc file. This is a configuration file that you can make changes to.

- Click on the file to open it. Ensure to select a text editor like Notepad. Then click Ok.
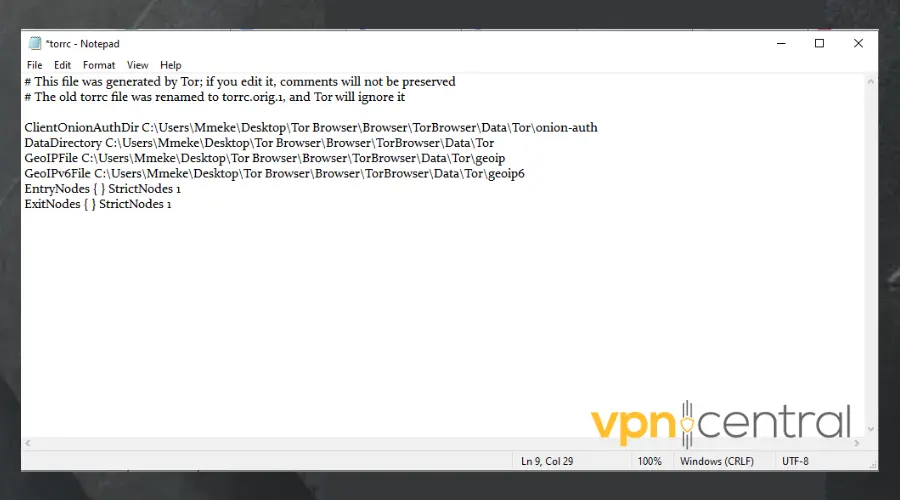
- Place your cursor below the last line of the text in the document, then type in EntryNodes { } StrictNodes 1 and press Enter to go to the next line.
- Type ExitNodes { } StrictNodes 1 in the current line.
- Visit the Online Browsing Platform website and pick the 2-digit codes for the two countries of your choice.
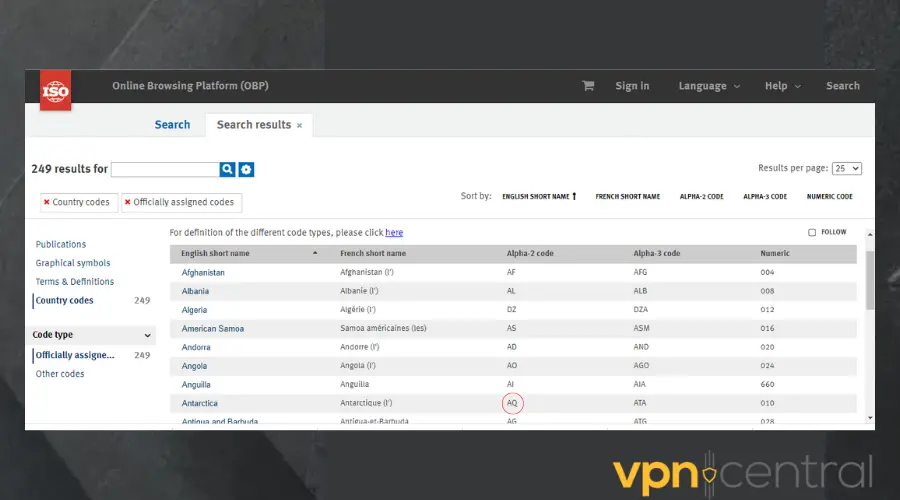
- Enter those codes individually inside your entry and exit codes.
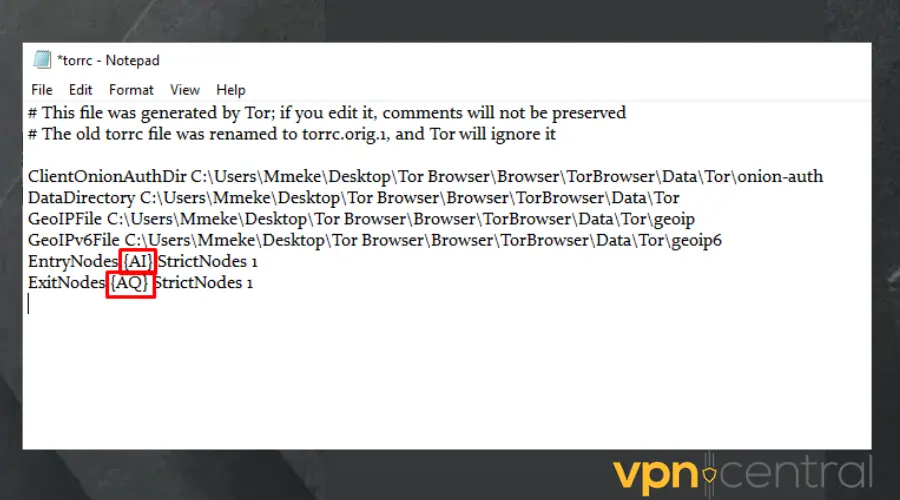
- Disable the entry and exit nodes by replacing the 1 with 0 if you want the Tor browser to use other countries if the connection fails.
- Click on File, and select Save to update the changes. Exit the document.

- Go back to the website that flagged your IP and try to gain access again.
That’s it! You have successfully set a specific country in your Tor Browser.
Depending on the app or website you want to access, you may need to use the IP address from a specific country, so make sure you pick a location that’s not blocked.
Read more:
- Your Access to This Site Has Been Limited By the Site Owner [Fix]
- Your IP Address Has Been Used Without Your Knowledge [Fix]
- FIX: Your IP Has Been Flagged for Potential Security Violations
Summary
It is common on some websites for your IP to be flagged. Naturally, this happens if your IP has been used in the past for scamming, phishing, and other cyber crimes.
By using a VPN, a SmartDNS, or Tor browser, you can change to a different server location which in turn substitutes your IP address. Then you’d be able to bypass any blocks.
Read our disclosure page to find out how can you help VPNCentral sustain the editorial team Read more

Improve this guide


User forum
0 messages