WireGuard Connected but No Internet: Causes and Fixes
10+ fixes for nop-notch WireGuard peformance
If you have no internet access while using WireGuard, I’m here to help you out.
A VPN is a great way to protect your online privacy. However, sometimes you might face connectivity issues while on the WireGuard protocol.

Access content across the globe at the highest speed rate.
70% of our readers choose Private Internet Access
70% of our readers choose ExpressVPN
Browse the web from multiple devices with industry-standard security protocols.

Faster dedicated servers for specific actions (currently at summer discounts)
In this guide, I’ll help you troubleshoot and resolve the problem in no time. But first:
Perform preliminary checks
Before diving into complex solutions, let’s start with some basic checks:
1. Test your internet connection
Before suspecting any issues with WireGuard or your VPN app, ensure that your base internet connection is working correctly.
- Disconnect VPN: Turn off the VPN and try accessing the internet.
- Check different websites: Visit several websites to confirm the internet is working without a VPN.
- Restart your router/modem: Unplug your router/modem, wait for about 30 seconds, and plug it back in. Wait for it to fully restart and try connecting again.
2. Restart your device
A simple restart can often resolve a range of connectivity issues.
- Restart your computer: Fully shut down your computer and turn it back on. This can clear temporary glitches in the system.
- Reconnect to the network: After restarting, reconnect to your Wi-Fi or Ethernet network before activating the VPN.
3. Update your VPN app
Using an outdated VPN app can lead to compatibility and performance issues.
- Check for updates: Visit the official website of your VPN provider or check the app store (if applicable) for any available updates.
- Install updates: If an update is available, install it and restart the app to see if the issue is resolved.
4. Temporarily disable antivirus software
Sometimes, these security applications can interfere with VPN connections. Temporarily disable your antivirus program and check if the VPN works.
5. Test on a different device or network
This step helps determine if the issue is with your device or network.
- Different device: Try connecting to the VPN on another device using the same network.
- Different network: If possible, connect to a different network (like a mobile hotspot) and see if the VPN works there.
6. Consult the VPN app’s FAQ or Help section
Many VPN providers offer a FAQ or help section that addresses common connectivity issues.
- Look for guides: Check the VPN provider’s website for troubleshooting guides or FAQs.
- Specific instructions: Look for instructions specific to WireGuard or your device type.
By going through these preliminary checks, you can often identify and resolve basic issues that might be causing problems with your WireGuard VPN connection.
If these steps don’t solve the problem, you should get into more advanced troubleshooting:
How to fix the WireGuard no internet issue
If you’ve completed the preliminary checks and still experience issues with your WireGuard VPN connection, it’s time to delve into more detailed troubleshooting. Here’s a step-by-step guide:
1. Switch servers
Sometimes, the issue might be with the specific VPN server you’re connected to.
- Switch servers: Open your VPN app and look for the option to change servers. It’s usually labeled as Locations, Servers, or something similar.
- Choose a different server: Select a server in a different location. Ideally, choose one that’s geographically closer to you for better speed and stability.
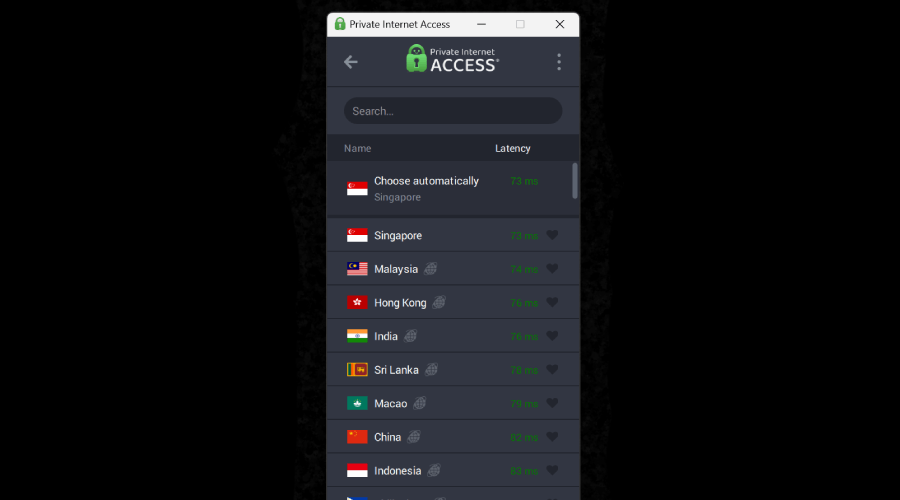
- Reconnect: After switching servers, reconnect to the VPN and check if the internet access issue is resolved.
2. Check WireGuard’s settings in the app
Ensure that WireGuard is correctly set as your VPN protocol.
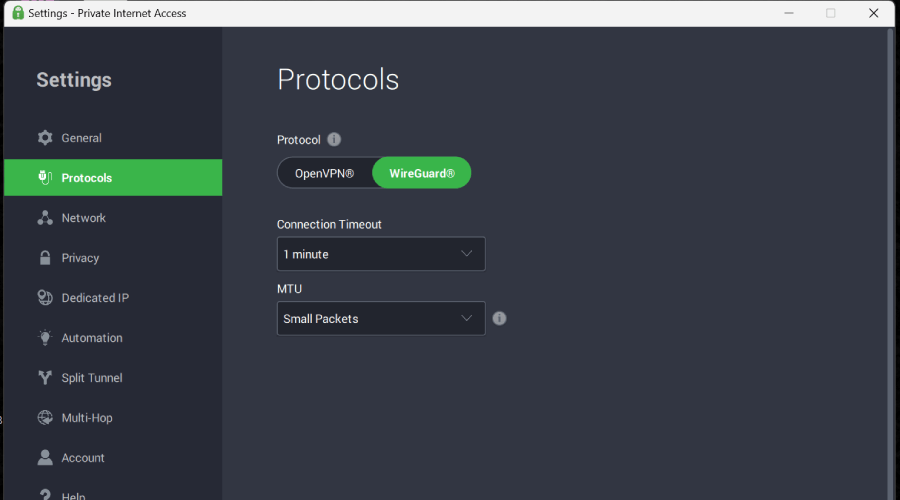
- Access Settings: In your VPN app, go to the settings or preferences section.
- Locate Protocol Options: Look for a section labeled Protocol, VPN Protocol, or similar.
- Select WireGuard: Make sure WireGuard is selected as the active protocol. If it’s not, select it and save your changes.
3. Change your VPN’s DNS settings
Incorrect DNS settings can lead to connectivity issues.
To fix that:
- Find DNS settings: In the VPN app, look for DNS settings. This might be under Network Settings, Advanced Settings, or a similar section.
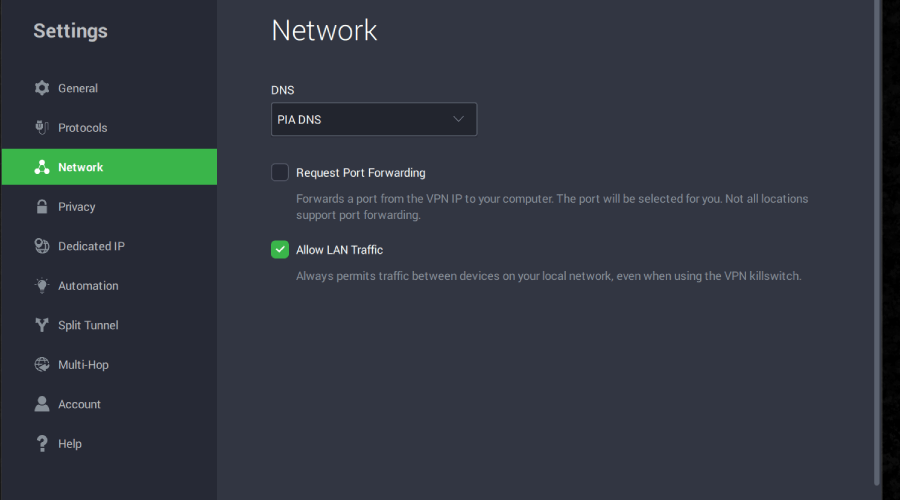
- Change DNS servers: If possible, change the servers to a public DNS service like Google DNS (8.8.8.8 and 8.8.4.4) or Cloudflare DNS (1.1.1.1).

- Save and reconnect: Save your changes and reconnect to the VPN to test the new DNS settings.
4. Temporarily disable firewall
Disabling the firewall on your computer can be necessary for troubleshooting network issues, including WireGuard internet problems. Here’s how to do it:
For Windows:
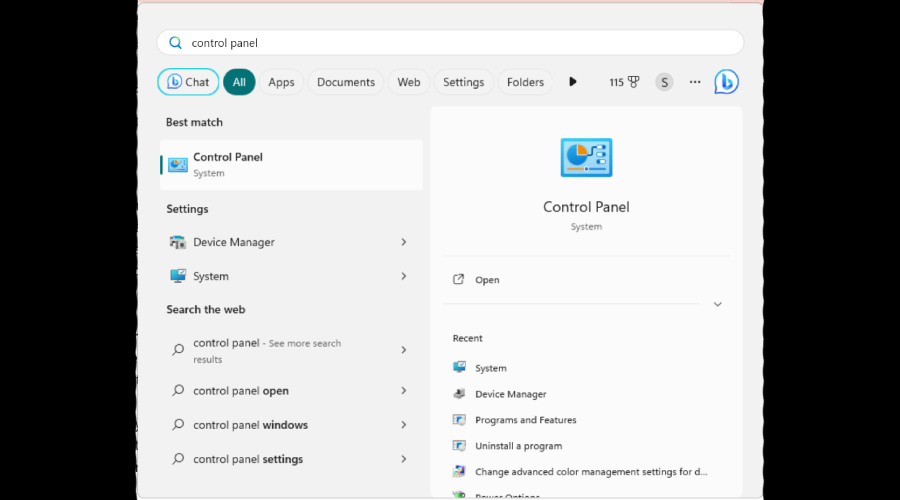
- Click on the Start menu or press the Windows key.
- Type “Control Panel” and click on the Control Panel app to open it.
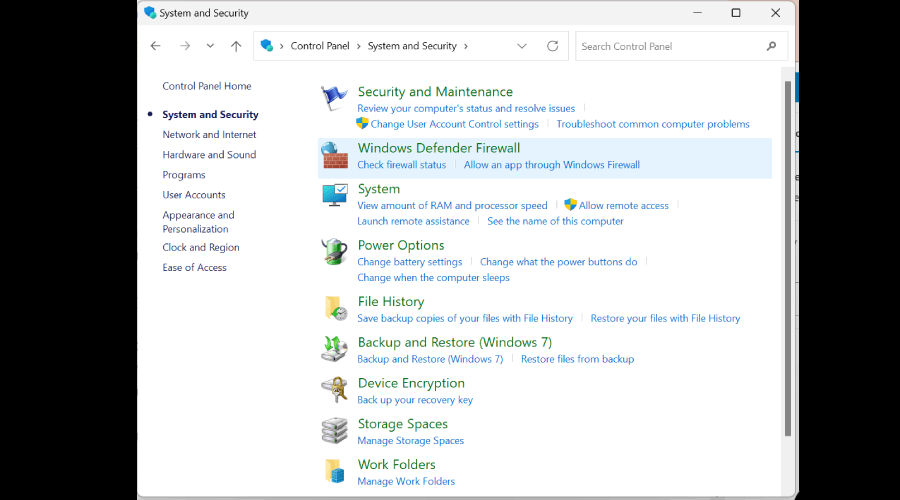
- In the Control Panel, find and click on System and Security.

- Within System and Security, click on Windows Defender Firewall.
- On the left-hand side, you’ll see an option that says Turn Windows Defender Firewall on or off. Click on it.
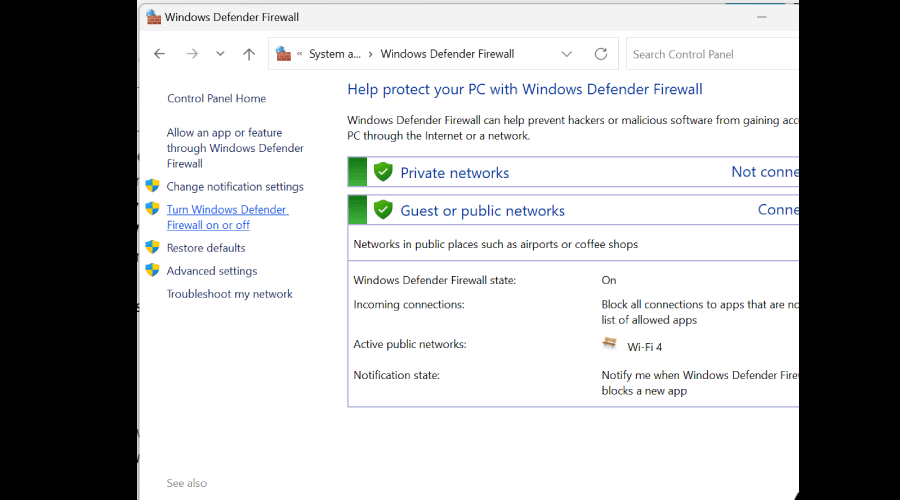
- Under both the Private network settings and Public network settings, select the option Turn off Windows Defender Firewall.
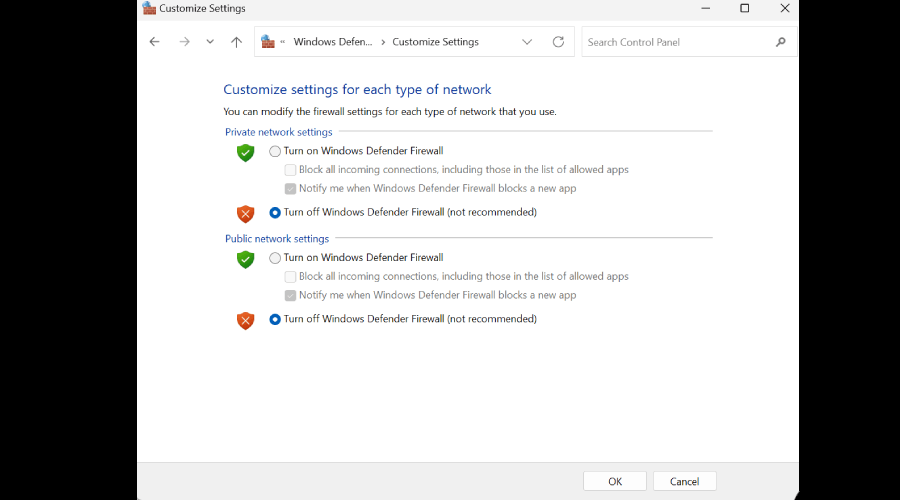
- Be cautious about turning off the firewall for public networks, as this can significantly increase security risks.
- Click OK to save your changes.
- Once you’re done troubleshooting, follow the same steps to turn your firewall back on. This time, select Turn on Windows Defender Firewall under both settings.
For macOS:
- Click on the Apple icon in the top left corner of your screen.
- Select System Settings from the drop-down menu.

- In System Settings, click on Network.
- In the Network window, go to the Firewall tab.
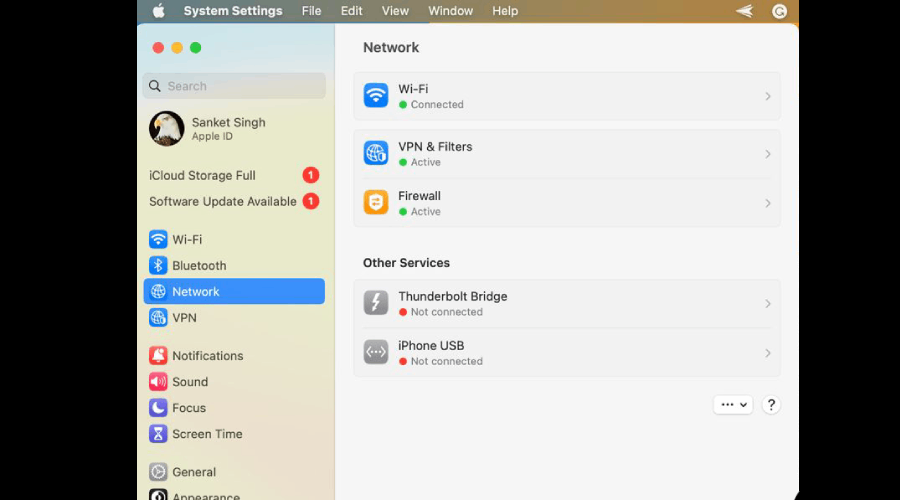
- If the settings are greyed out, click the lock icon at the bottom left of the window.
- Enter your administrator password to make changes.

- Click the Turn Off Firewall button to disable the firewall.
- After finishing your troubleshooting, ensure you go back and turn the firewall back on for your protection.
Remember, while your firewall is off, your computer is more exposed to security risks. Always make sure to turn it back on as soon as possible after completing your troubleshooting tasks.
5. Tweak network adapter settings
Changing the adapter settings is a common step in troubleshooting network issues on a Windows computer. Here’s a step-by-step guide to help you through the process:
- Right-click on the Start menu and select Network Connections.
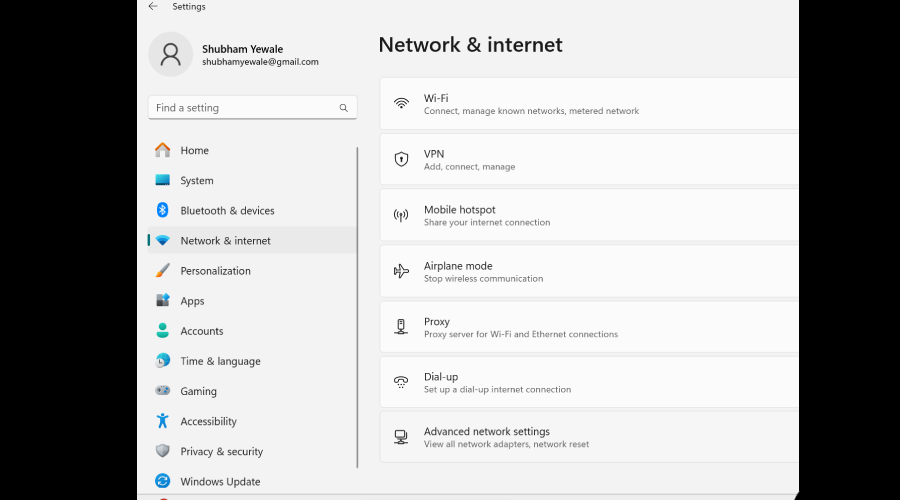
- alternatively, press Windows Key + I to open Settings, then go to Network & Internet.
- In the Network & Internet settings, scroll down and click on Change adapter options under the Advanced network settings section.
- In the Network Connections window, you’ll see a list of network adapters. These could include Ethernet, Wi-Fi, or others like VPN adapters.
- Expand the network adapter you want to configure (e.g., Ethernet or Wi-Fi) and select Edit.
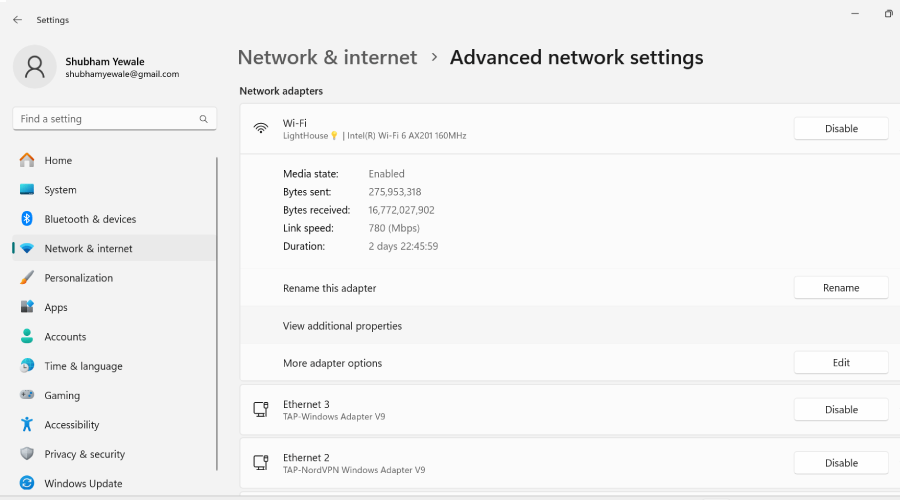
- Select Properties from the context menu.
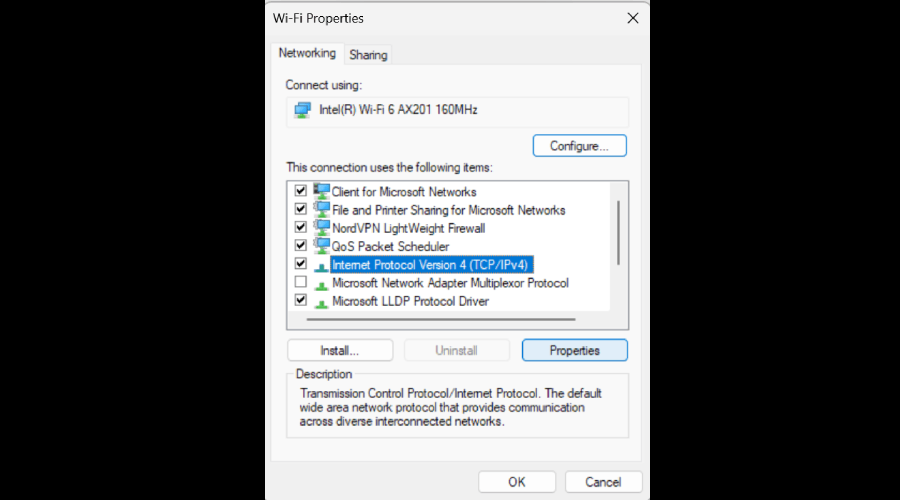
- In the Properties window, you will see a list of items used by the adapter. Here are some common changes you might need to make:
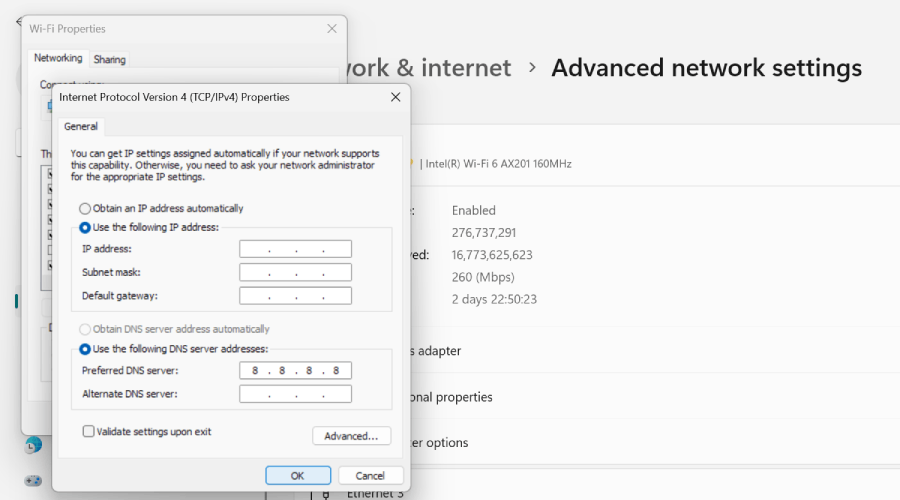
- To Change IP Settings: Select Internet Protocol Version 4 (TCP/IPv4) or Internet Protocol Version 6 (TCP/IPv6) and click Properties. Here, you can switch between obtaining an IP address automatically and using a specific IP address.
- To Change DNS Settings: In the same Internet Protocol Version 4 (TCP/IPv4) or Internet Protocol Version 6 (TCP/IPv6) properties, you can set the DNS server addresses at the bottom of the window. You can choose to obtain a DNS server address automatically or use specific DNS server addresses (like Google DNS: 8.8.8.8 and 8.8.4.4).
- After making the necessary changes, click OK to save. You might need to restart your computer or disable and re-enable the adapter for the changes to take effect.
- Once you’ve saved your changes and restarted your adapter or computer, check to see if your network issue is resolved.
6. Flush DNS cache
Here’s a step-by-step guide to flush the DNS cache on both Windows and macOS. You need to have administrator rights to use this option.
For Windows:
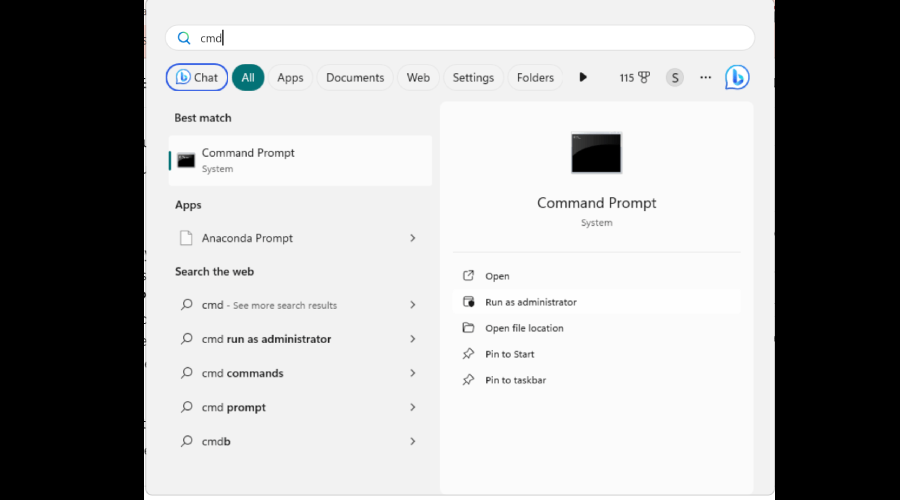
- Press Windows Key + R to open the Run dialog.
- Type cmd and press Enter or click OK. This opens the Command Prompt.
- In the Command Prompt window, type the following command: ipconfig /flushdns
- Press Enter. This command clears the DNS cache.
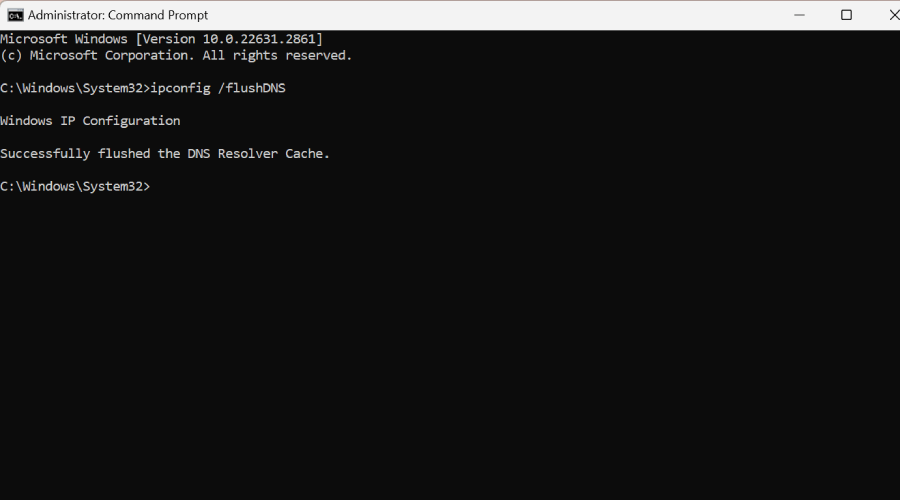
- After executing the command, you should see a confirmation message like: Successfully flushed the DNS Resolver Cache.
- You can now close the Command Prompt window.
Try accessing the website or service you were having trouble with. Flushing the DNS cache often resolves connectivity issues related to DNS.
For macOS:
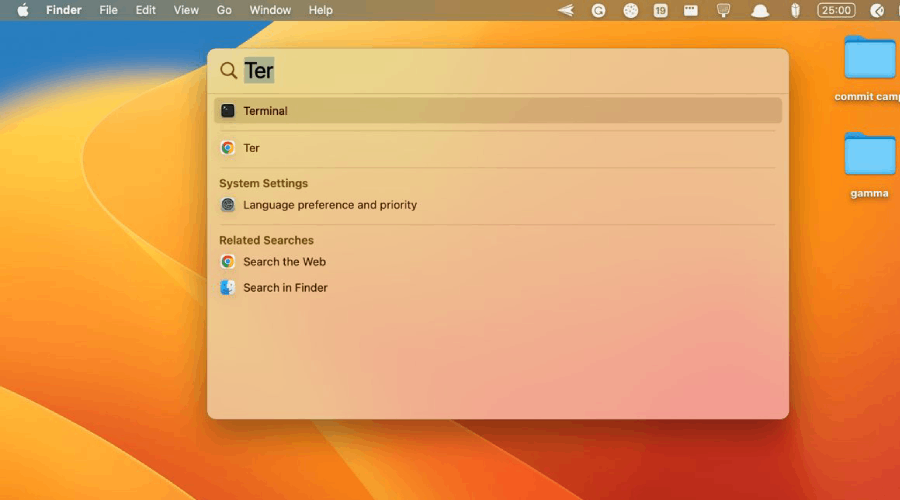
- Go to Finder, then Applications, and then Utilities. Find and open Terminal.
- Alternatively, you can use Spotlight by pressing Command + Space, typing “Terminal”, and pressing Enter.
- The command to flush DNS cache varies slightly depending on your version of macOS:
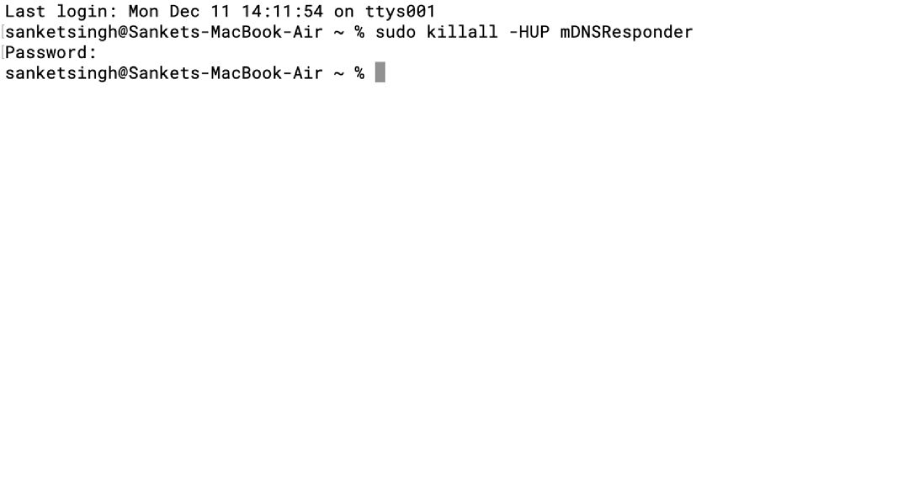
- For macOS Sierra and later: Type sudo killall -HUP mDNSResponder and press Enter.
- For OS X Yosemite: Type sudo discoveryutil mdnsflushcache and press Enter.
- For OS X Mavericks, Mountain Lion, and Lion: Type sudo killall -HUP mDNSResponder and press Enter.
- For Mac OS X Snow Leopard: Type sudo dscacheutil -flushcache and press Enter.
- If prompted, enter your administrator password. This is the password you use to log in to your Mac. Note that the password won’t be visible as you type.
- Unlike Windows, macOS doesn’t typically show a confirmation message. If you don’t see an error message, the command has executed successfully.
- You can now close the Terminal window.
- Try accessing the website or service again to see if the issue is resolved.
7. Reinstall your VPN app
A fresh installation can sometimes fix unexplained issues.
- Uninstall the App: Go to your system’s application settings and uninstall the VPN app.
- Download Latest Version: Visit the VPN provider’s website and download the latest version of the app.
- Install and Reconnect: Install the app, log in, and try connecting to the VPN again.
8. Change your VPN provider
If all of the above solutions fail, then your current VPN may be at fault.
By switching to a VPN like Private Internet Access, you not only enhance your chances of resolving connectivity issues but also benefit from improved security and privacy features.
Installing PIA is straightforward. Here’s how you can do it on Windows and macOS:
- Visit PIA’s website and pick a subscription.
- Download the right app for your operating system.

- Open the installer file and follow the on-screen instructions.
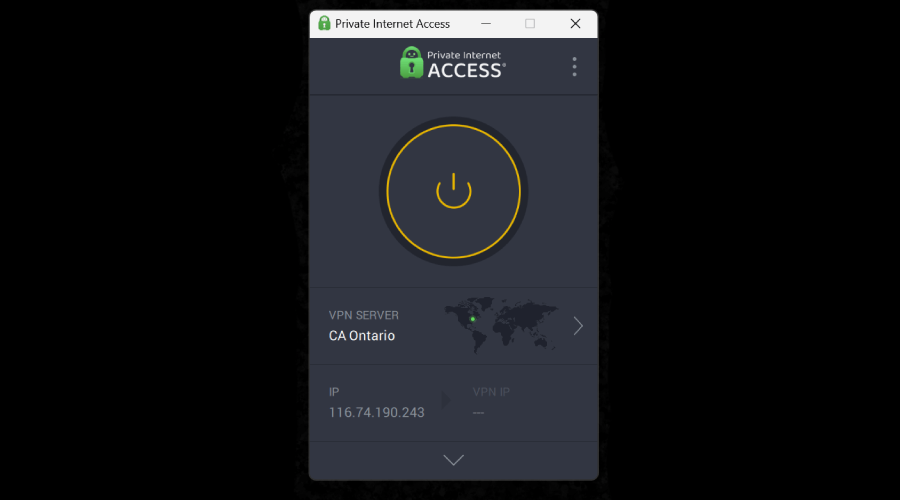
- Open the PIA app and log in with your credentials.

- Select a server based on country or region and click Connect to establish a VPN connection.
Private Internet Access
Enjoy a smooth connection and top-notch security and performance with this leading VPN provider.Conclusion
Troubleshooting VPN problems can be a bit daunting, but by following these steps, you can resolve the no internet issue with WireGuard.
Just start with the easiest fixes and work your way down the list until you find one that works.
Read our disclosure page to find out how can you help VPNCentral sustain the editorial team Read more

Improve this guide

User forum
0 messages