How to Watch US History Channel in Australia Without Restrictions
If you want to watch the US History Channel in Australia but are unable to get around geo-restrictions, you’re more than welcome to try the solutions presented in this guide.
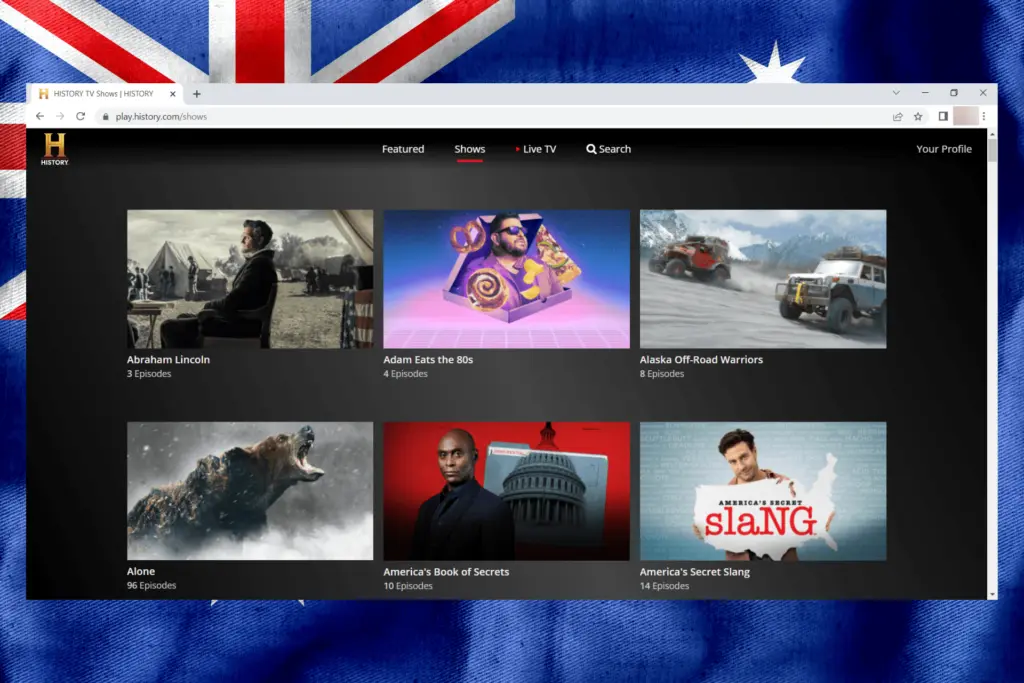
Unfortunately, the US History Channel is not available for users in Australia. As such, if you live in the country or are traveling, you will have to deal with geo-blocking when accessing the platform.

Access content across the globe at the highest speed rate.
70% of our readers choose Private Internet Access
70% of our readers choose ExpressVPN
Browse the web from multiple devices with industry-standard security protocols.

Faster dedicated servers for specific actions (currently at summer discounts)
Nonetheless, you should rest assured, about how to watch History Channel in Australia there are two ways by which you can circumvent it, namely, using a VPN or a smart DNS service to conceal your actual location.
Why can’t I access the US History Channel in Australia?
The History Channel has international editions in different foreign languages, which are available for certain regions and countries, including:
- North America (the USA and Canada)
- Latin America (Argentina, Bolivia, Brazil, Chile, Colombia, Costa Rica, Dominican Republic, Ecuador, El Salvador, Guatemala, Honduras, Mexico, Nicaragua, Panamá, Paraguay, Perú, Puerto Rico, Uruguay, and Venezuela)
- Europe (Denmark, Finland, Germany, Ireland, Italy, the Netherlands, Norway, Poland, Portugal, Spain, Sweden, and the UK)
- Asia (Brunei, Cambodia, Hong Kong, India, Indonesia, Japan, Macau, Malaysia, Maldives, Mongolia, Myanmar, Pacific Islands, Papua New Guinea, the Philippines, Singapore, South Korea, Taiwan, Thailand, and Vietnam)
- Africa (Kenya, Malawi, South Africa, Tanzania, Uganda, and Zambia)
- Oceania (Australia and New Zealand)
If you live in any of the above locations, you may watch the History Channel version that is specifically designed for that region or country.
Otherwise, if you live outside the supported areas, you won’t be able to access other versions. For example, if you’re currently located in Australia and want to watch the American edition of the History Channel, you will be blocked.
History isn’t available as a single channel to which you can subscribe but rather as one that is part of a list of channels offered by a TV provider operating in a certain location.
Consequently, due to licensing and copyright agreements that the History Channel and local content providers need to abide by, users will experience geo-blocking when trying to access versions that aren’t designated for their areas.
Unfortunately, there’s nothing you can do about that except for using a VPN or smart DNS service to conceal your geolocation.
What can I do to watch the US History Channel in Australia?
1. Use a circumvention tool to evade geo-detection
Before watching the History Channel in Australia, first, you’ll have to get a reliable VPN or smart DNS service and set it up on your system in order to bypass geo-blocking.
1.1. Use a VPN service that is optimized for streaming
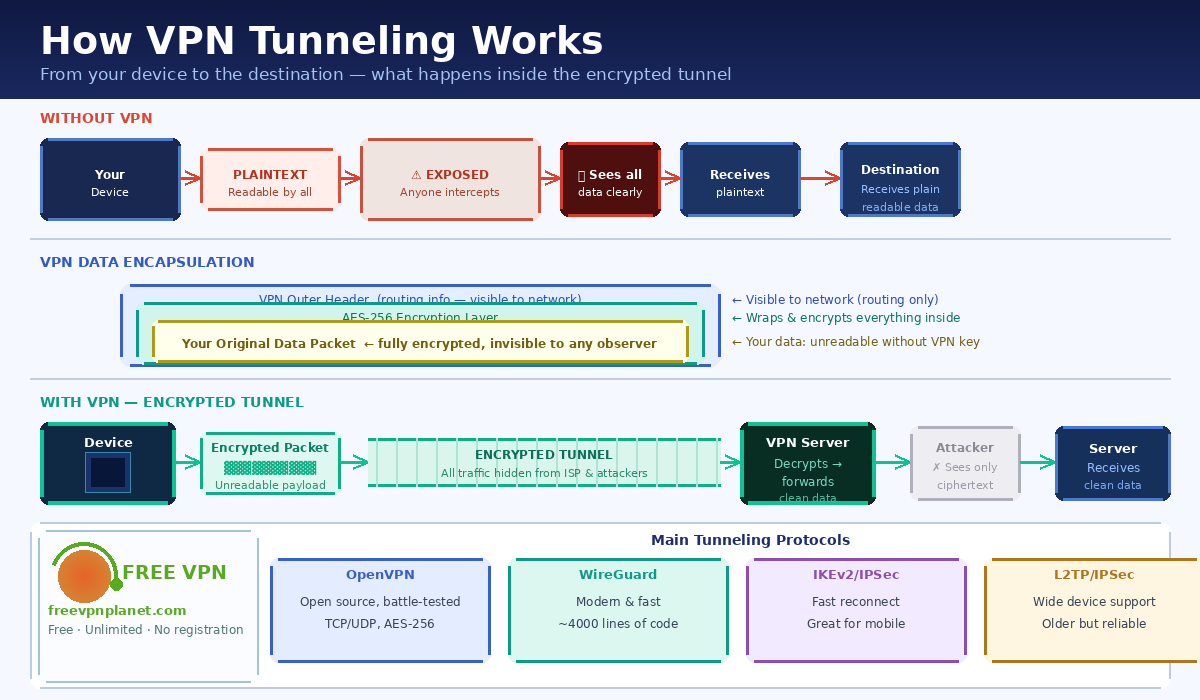
A Virtual Private Network (VPN) is a very effective circumvention tool that allows you to evade geo-detection and access content unavailable in your country or region.
It works by masking your original IP address that was assigned by your ISP. That is to say, the VPN will replace your IP with a new one in a different location.
The new IP address will vary depending on the location of the VPN server to which you connect. For instance, if you want to watch the US History Channel from Australia, you will need to connect to a VPN server in the USA to get an American IP.
This way, you will hide the fact that you’re physically located in Australia, which is based on your IP. Therefore, when accessing the History Channel from kangaroo country with a US IP, you will trick the system into thinking that you’re actually surfing from Uncle Sam.
By masking your IP, you will conceal your digital identity and surf the web anonymously. Besides, the VPN will also encrypt your traffic by redirecting it through a secure VPN tunnel.
This encryption will ensure full privacy since it will hide your digital footprints or activity from prying eyes. Moreover, it will also add total security for your sensitive data so that no one will manage to intercept them anymore.
Currently, there are many VPN services on the market. However, not all of them are effective at bypassing geo-blocks, some being easily detected.
Configure the VPN software on your device
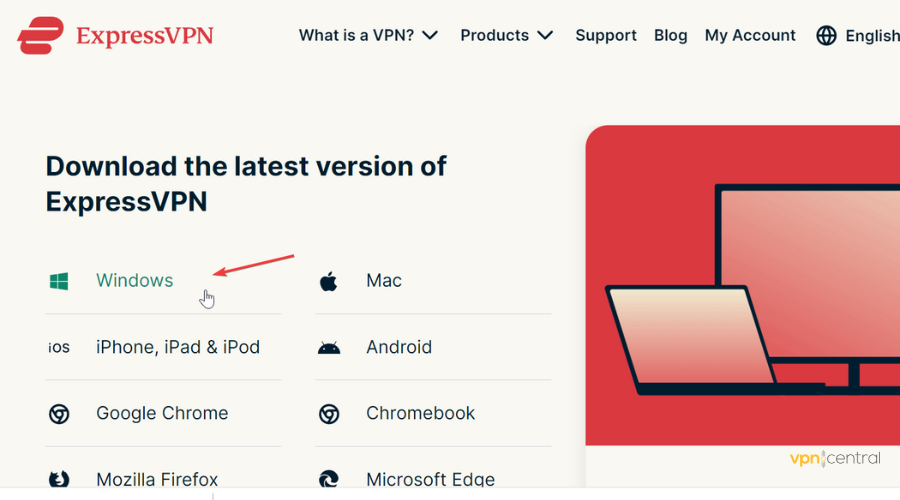
In the example below, we show you how to set up ExpressVPN on a Windows 11 device. We tested this service, and the results showed that it worked perfectly with the US History Channel from Australia.
If you want to use a different VPN product or another device for that matter, the steps will be quite similar. Regardless of your option, you can take the following setup guide as a general reference.
- Get an ExpressVPN subscription, then download the VPN client.
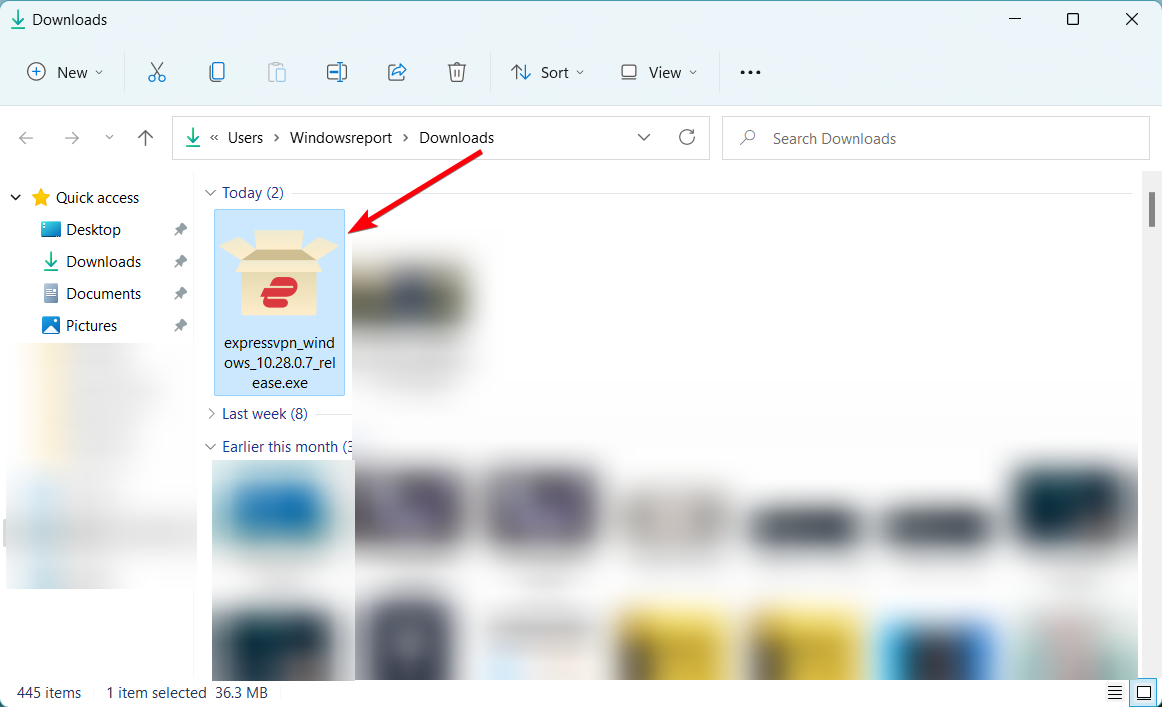
- Find the download location and click on the file.
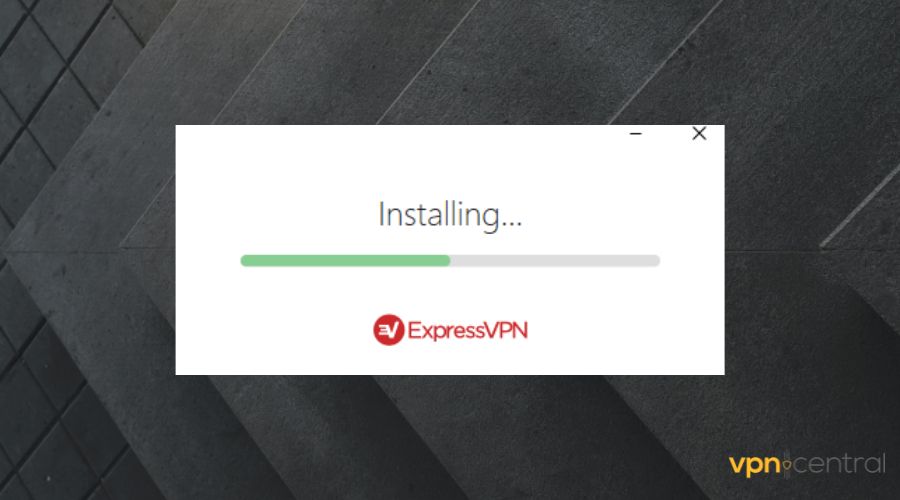
- Follow the instructions and wait for the installation to complete.
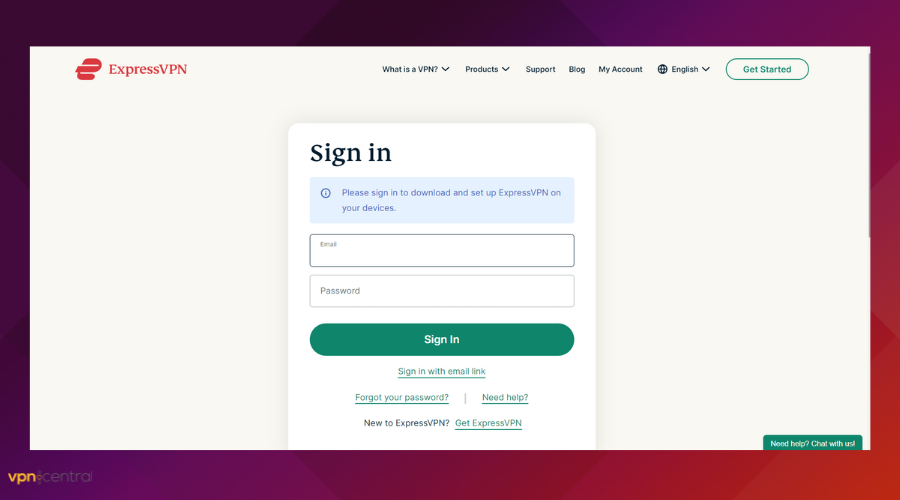
- Launch the VPN app and log in with your credentials.
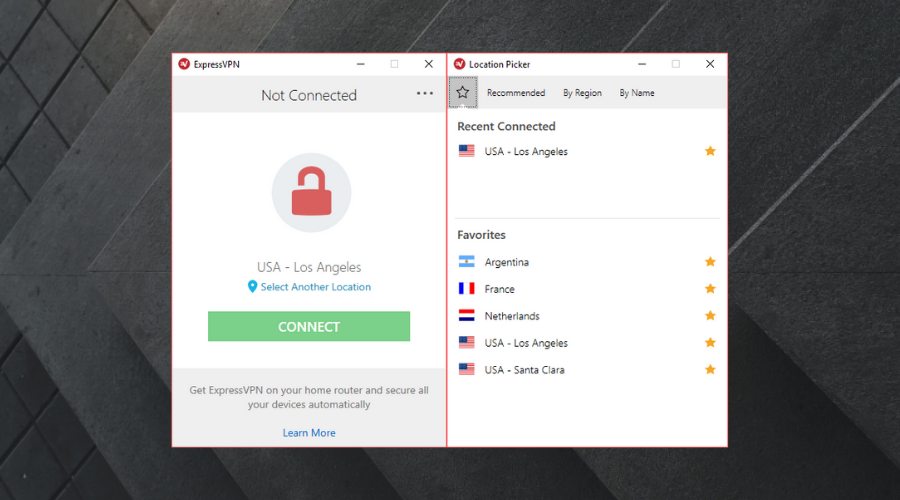
- Go to the list of available countries to find the USA.
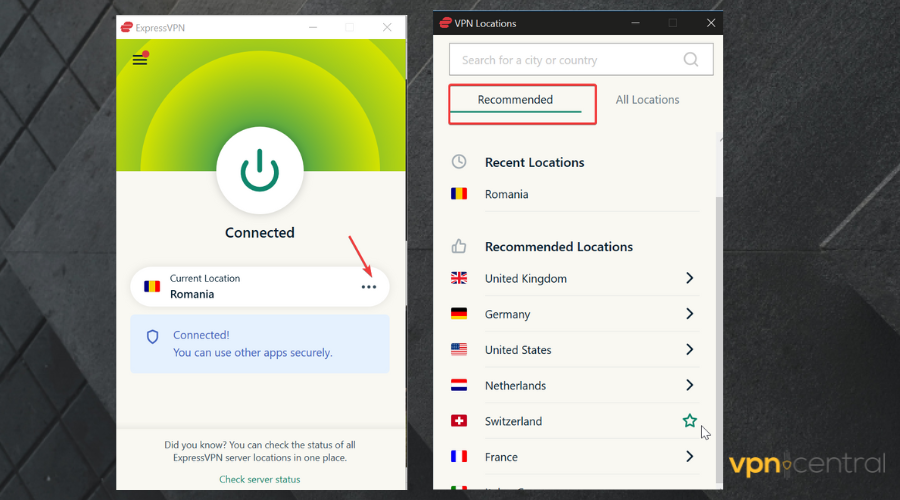
- Select a US server and click on it. N.B. You’d better choose a streaming server.
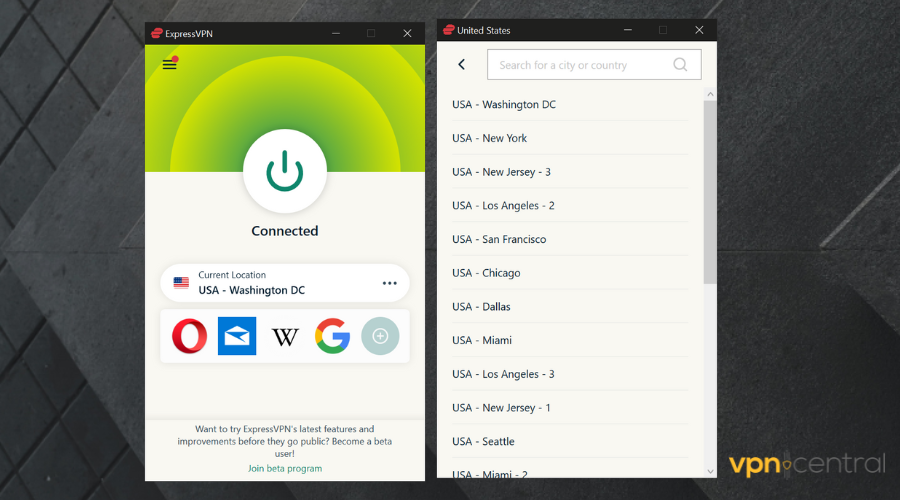
- Connect to the chosen VPN server.
- Now the connection with the US server should be established.
Some relevant details about ExpressVPN
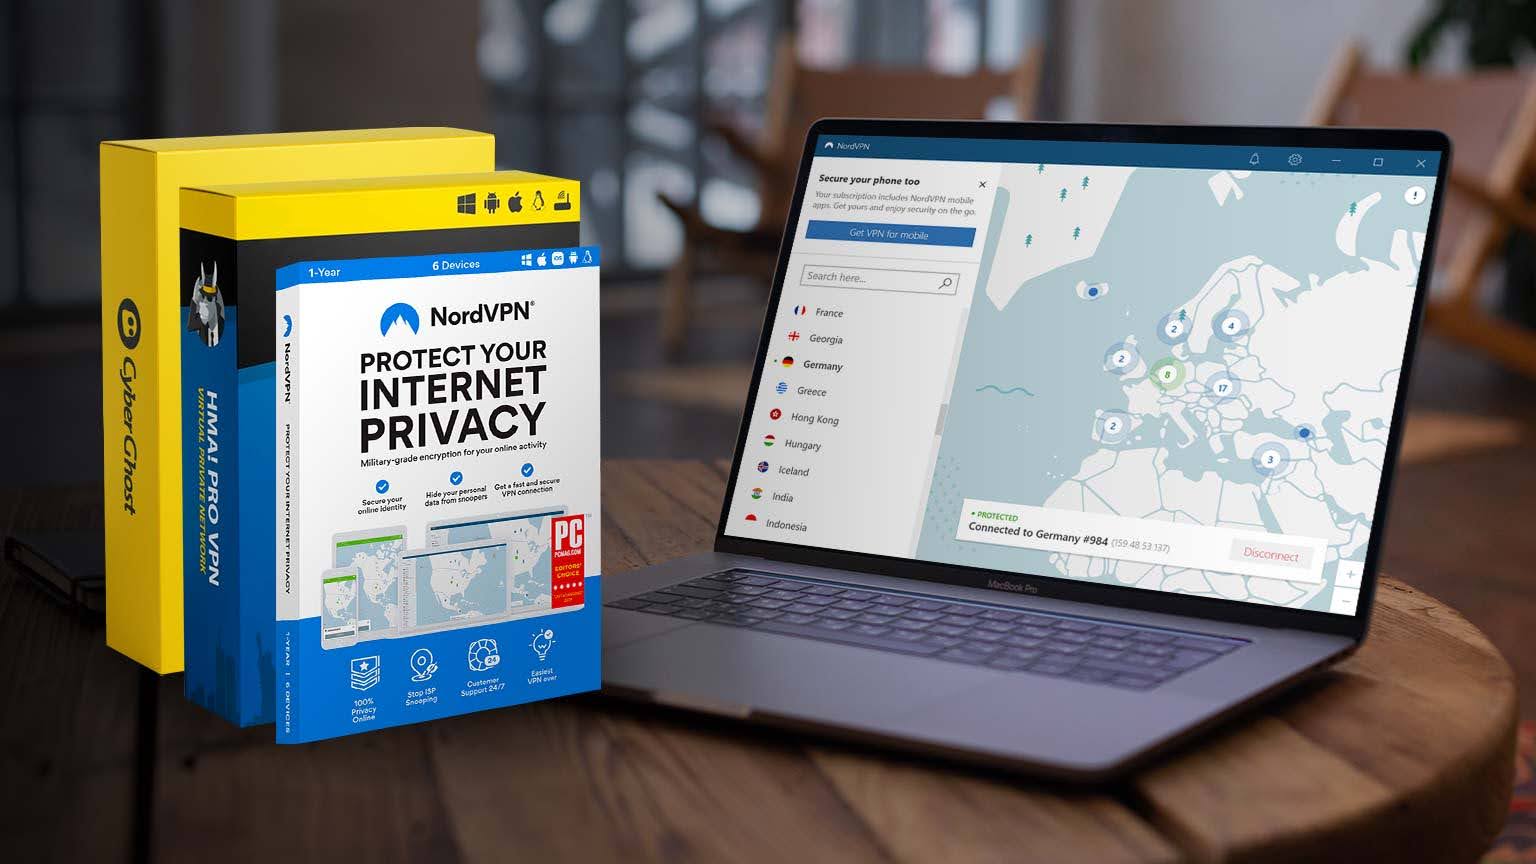
ExpressVPN is operated by Kape Technologies – a digital security company that owns other popular VPN products, such as CyberGhost VPN and Private Internet Access.
This VPN service is already a household name in the VPN market, boasting more than 20 million users worldwide. We tested the product multiple times both for speed and unblocking capabilities, and the results were amazing each time.
ExpressVPN has an easy-to-use interface and provides apps for all major operating systems, including Windows, MacOS, Linux, Android, and iOS.
Moreover, ExpressVPN offers browser extensions for Chrome, Firefox, and Opera.
Obviously, it also includes servers in many locations (cities) across different US states (both on the East Coast and West Coast). Thus, you’ll have more than enough options to choose from.
The VPN redirects your traffic using AES-128 (GCM) or AES-256 (GCM) military-grade encryption, which is the most advanced encryption standard currently available.
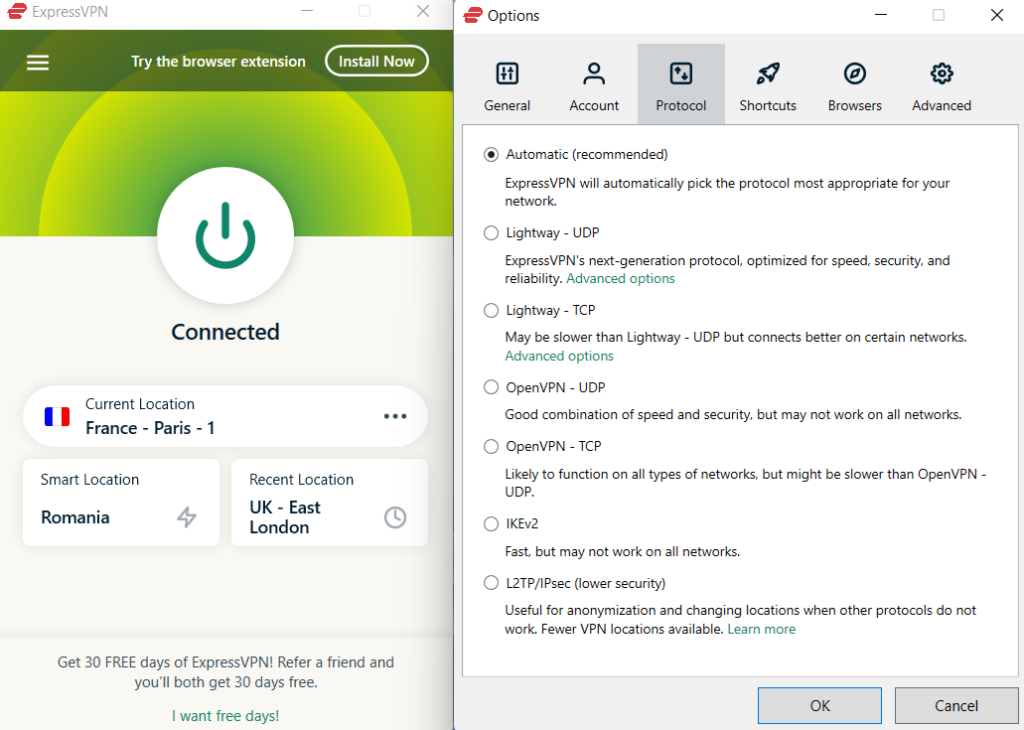
In order to determine how the VPN tunnel is formed, ExpressVPN uses the OpenVPN (UDP or TCP) and Lightway VPN protocols.
OpenVPN is open-source, fast, secure, and very stable. It represents the industry standard and is used by many top VPN providers on the market.
ExpressVPN also created the Lightway VPN protocol.

ExpressVPN also includes many other useful features for the safest and smoothest online experience:
- Extensive server network
- Very fast speeds
- Unblocks all streaming services
- Very user-friendly interface
- Split tunneling for all users
- Lightway protocol
- Audit tested security & privacy
1.2. Use Smart DNS Proxy
Using a smart DNS service to watch the American History Channel in Australia without getting blocked is another effective solution.
Unlike a VPN service, a smart DNS neither hides your original IP address nor does it encrypt your traffic. So, it does not ensure anonymity, privacy, and security.
However, when it comes to bypassing geo-blocking, it can be very effective, especially for streaming. Since the smart DNS doesn’t use encryption – which can slow you down – you can stream, download, or view content much faster.
Of course, this comes at a cost of security and privacy. However, it is up to you to decide when is more appropriate to use a VPN or a Smart DNS service.
Now let’s get back to how a smart DNS works. DNS stands for Domain Name Server and is responsible with translating human-readable domain names – which are part of URLs – into machine-readable IP addresses.
Since it’s easier to remember and use a domain name rather than a string of numbers (IP), the DNS makes accessing websites both easier and faster.
On the other hand, a smart DNS replaces your ISP-assigned DNS address with one belonging to the smart DNS server. Your original DNS address may reveal your geo-location to websites and services you access on the Internet.
However, when you set up smart DNS, this service will reroute your DNS requests via a dedicated server in a different location, which will make you appear to be coming from that location instead of your actual one.
Therefore, depending on the smart DNS service’s server availability, you will manage to circumvent geo-blocking by using different DNS server addresses.
1.2.1. Use a smart DNS from a VPN provider for your smart TV or console
Some popular VPN providers also offer a smart DNS feature that you can activate in case that provider doesn’t include native VPN apps for your device.
For instance, many VPNs do not provide apps for smart TVs or gaming consoles, and therefore they give you the option of using a smart DNS on those devices instead.
ExpressVPN includes a smart DNS feature with its premium plan. You can use ExpressVPN Smart DNS on the following devices:
- Apple TV
- Chromebook
- Chromecast
- PlayStation
- Roku TV
- Xbox
- Other Smart TVs (Samsung, LG, etc.)
In order to use ExpressVPN Smart DNS on any of the above-supported devices, you must first obtain the DNS server address for the chosen location and device and then continue with the setup.
Below, you have two examples for each procedure. The steps for obtaining the ExpressVPN Smart DNS IP addresses are identical regardless of the devices you want to use them on.
However, although the configuration process will differ across platforms, that shouldn’t represent a big deal for you. Once you know how to use it on a device, you can easily infer the main steps that are necessary for other devices.
1.2.1.1. Acquire your ExpressVPN Smart DNS IP address
Before setting up ExpressVPN Smart DNS on your device, you need to get the smart DNS address from the ExpressVPN What Is My IP page. Please follow the steps below to get it.
- Got to the ExpressVPN login page and enter your account credentials.
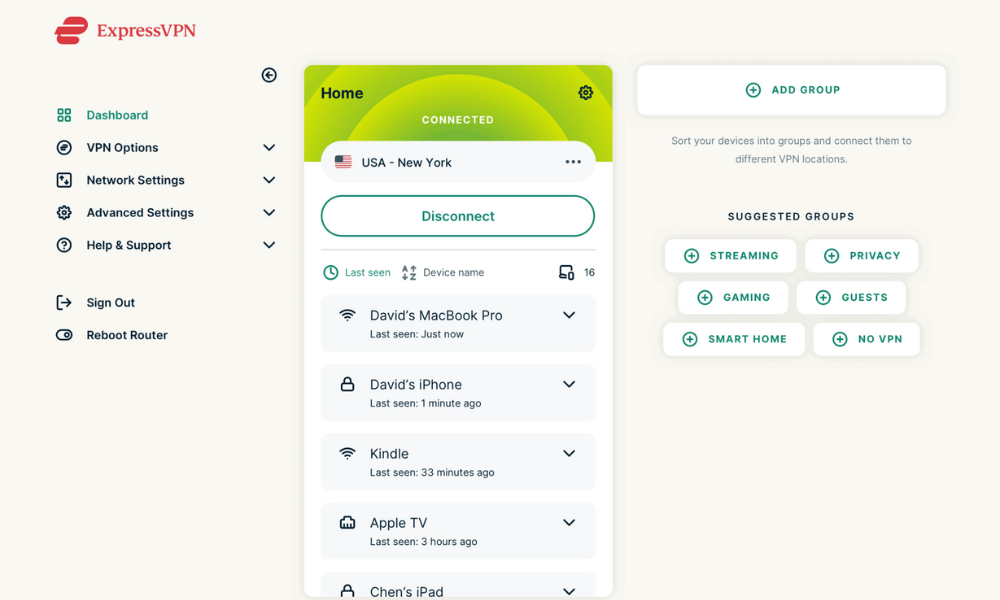
- Go to the ExpressVPN DNS settings.
- Enter the verification code that is sent to your email.
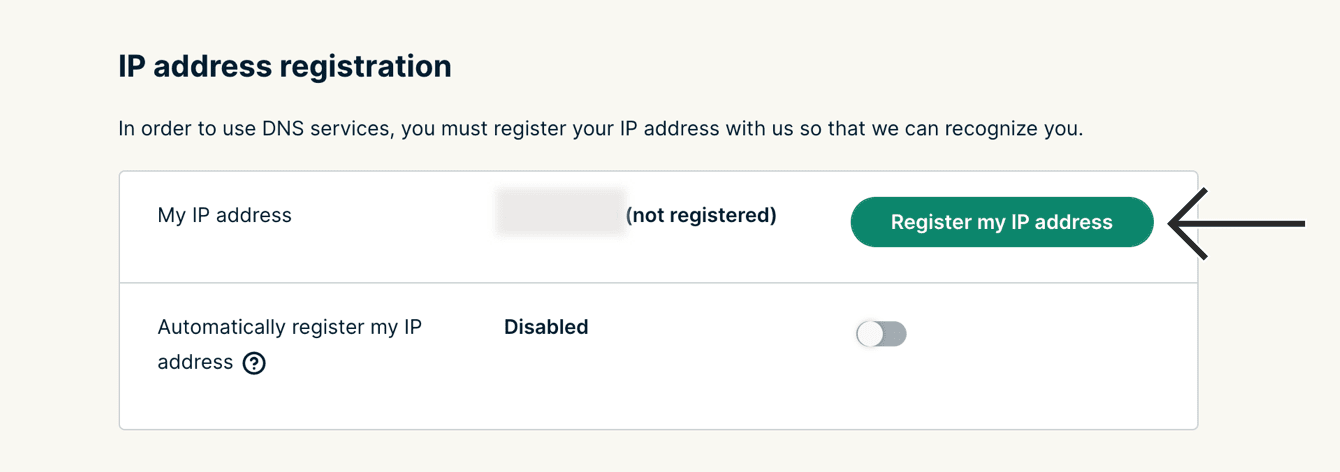
- Under IP address registration, click Register my IP address. If it already reads “registered” next to your IP address, there is no need to select this option again.
- Toggle Automatically register my IP address to be always on.
1.2.1.2. Configure Express Smart DNS on your device
Now that you’ve obtained the Smart DNS IP, you can configure ExpressVPN Smart DNS on your TV or console. In the example below, we show you how to do this on a Samsung smart TV.
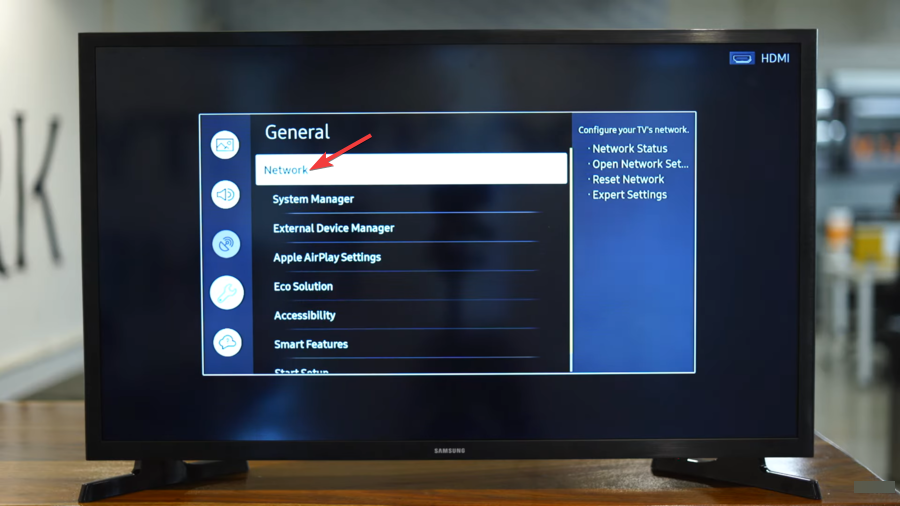
- Turn on your Samsung smart TV and press the MENU/SETTINGS button on your remote.

- Go to the General tab.
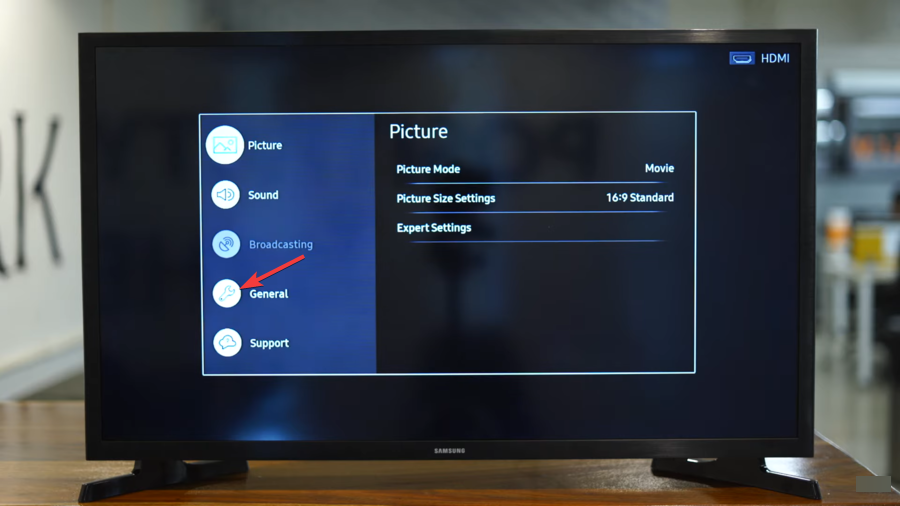
- Now go to the Network tab.
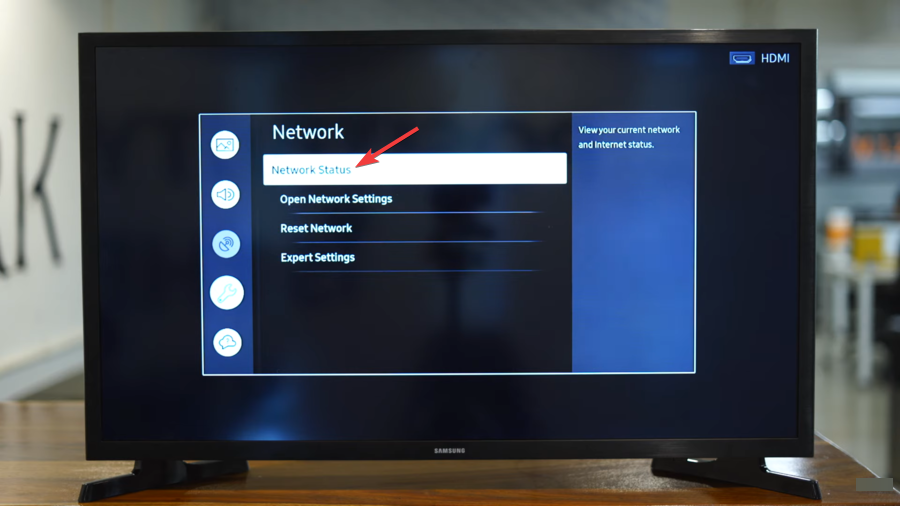
- Once there, select Network Status.
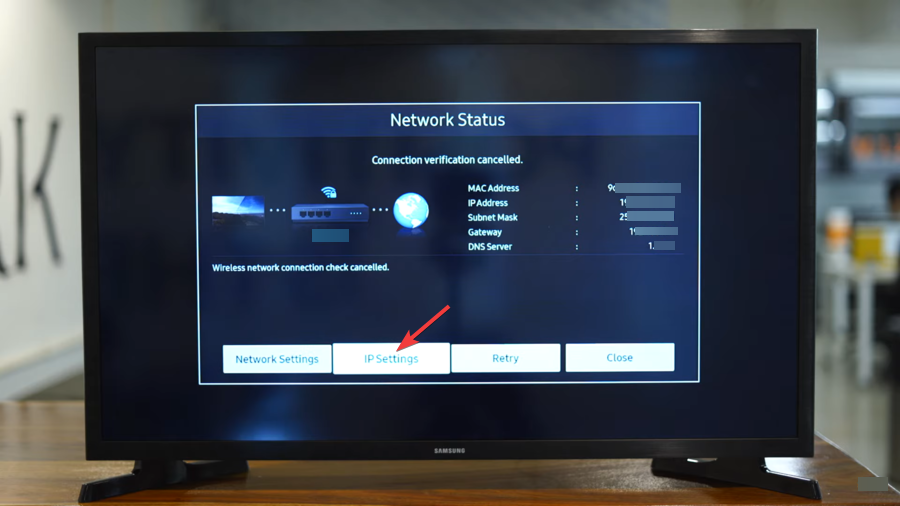
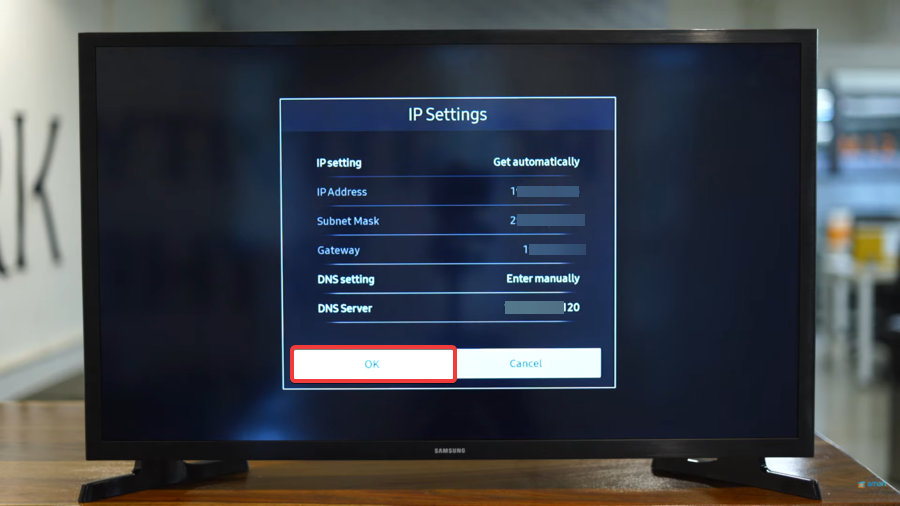
- Go to IP Settings.
- Go to DNS setting and select Enter manually.
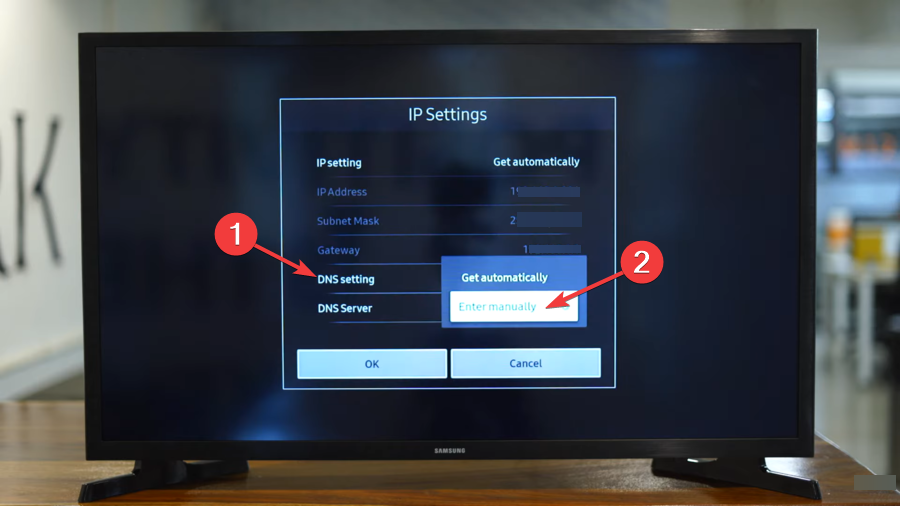
- Next to DNS server, enter the ExpressVPN Smart DNS IP address you acquired previously.

- After you enter the address, select OK to save the IP Settings.
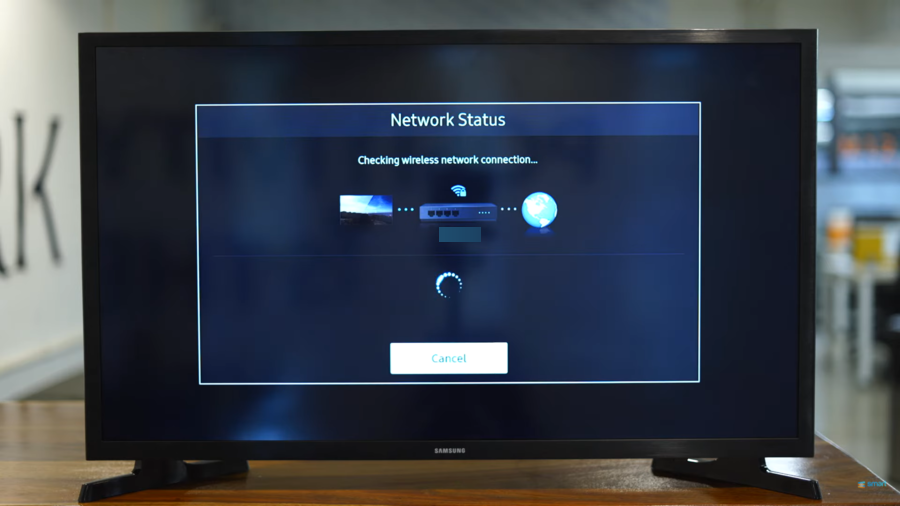
- Wait for the TV to check your network connection.
- If you entered the DNS address correctly, the status will show Your TV is connected to the Internet.
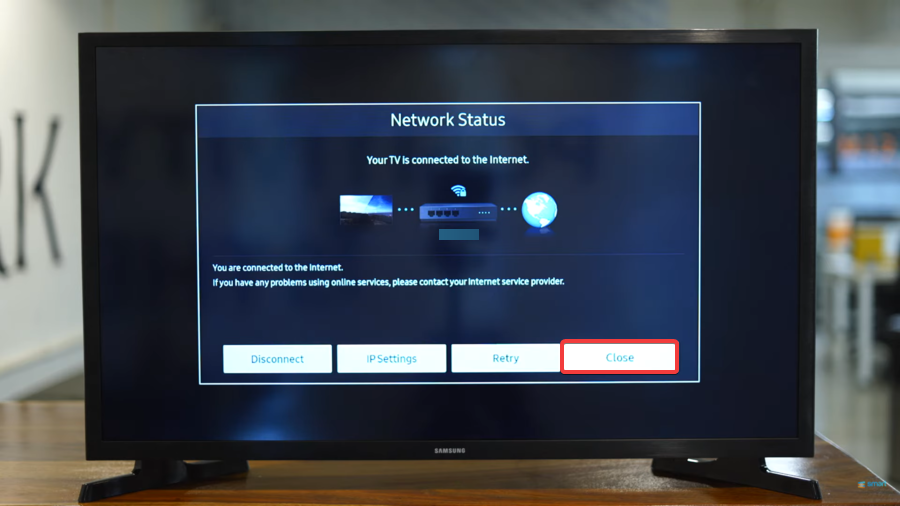
- Restart your Samsung smart TV to update the settings.
Alternatively, you can also use a VPN on your phone and use the Samsung Smart View app to screencast.
1.2.2. Use a third-party smart DNS for multiple devices
The Smart DNS features included with premium subscriptions from VPN providers generally support devices for which no native VPN clients are available.
However, there are third-party smart DNS services on the market that can be used on multiple devices, from phones and tablets to PCs and laptops to smart TVs and gaming consoles.
One of them is Smart DNS Proxy – a very popular smart DNS service that allows users to unblock a lot of websites, apps, TV channels, and streaming services.
Smart DNS proxy supports the following devices:
- Computers (Windows, macOS, Ubuntu, Chromebook)
- Smartphones and tablets (iOS and Android)
- Smart TVs (Samsung, LG, Sony, Panasonic, Toshiba)
- Set-top boxes (Amazon Fire TV, Apple TV, Chromecast, Roku)
- Game consoles (PlayStation, Xbox, Wii)
- Various routers (Asus, Belkin, D-Link, DD-WRT, Linksys, Netgear, Tomato, TP-LINK, etc.)
As you can see, you have plenty of available options to use Smart DNS Proxy. Plus, it comes with a 14-day free trial so you can test its unblocking capability and see for yourself whether it’s worth every penny or not.
Smart DNS Proxy
If you want to get rid of geo-blocking and watch the US History Channel in Australia hassle-free, try Smart DNS Proxy for 14 days. No credit card is required!1.2.2.1. Acquire your Smart DNS Proxy configuration settings
Once you create an account, you must configure your region settings. For instance, some changes will be necessary depending on the channels, streaming services, and countries you want to unblock. In the actual situation, you need to properly configure them for the US History Channel.
After that, you will need to get your Smart DNS Proxy server addresses which will be necessary when you set up the smart DNS on your device.
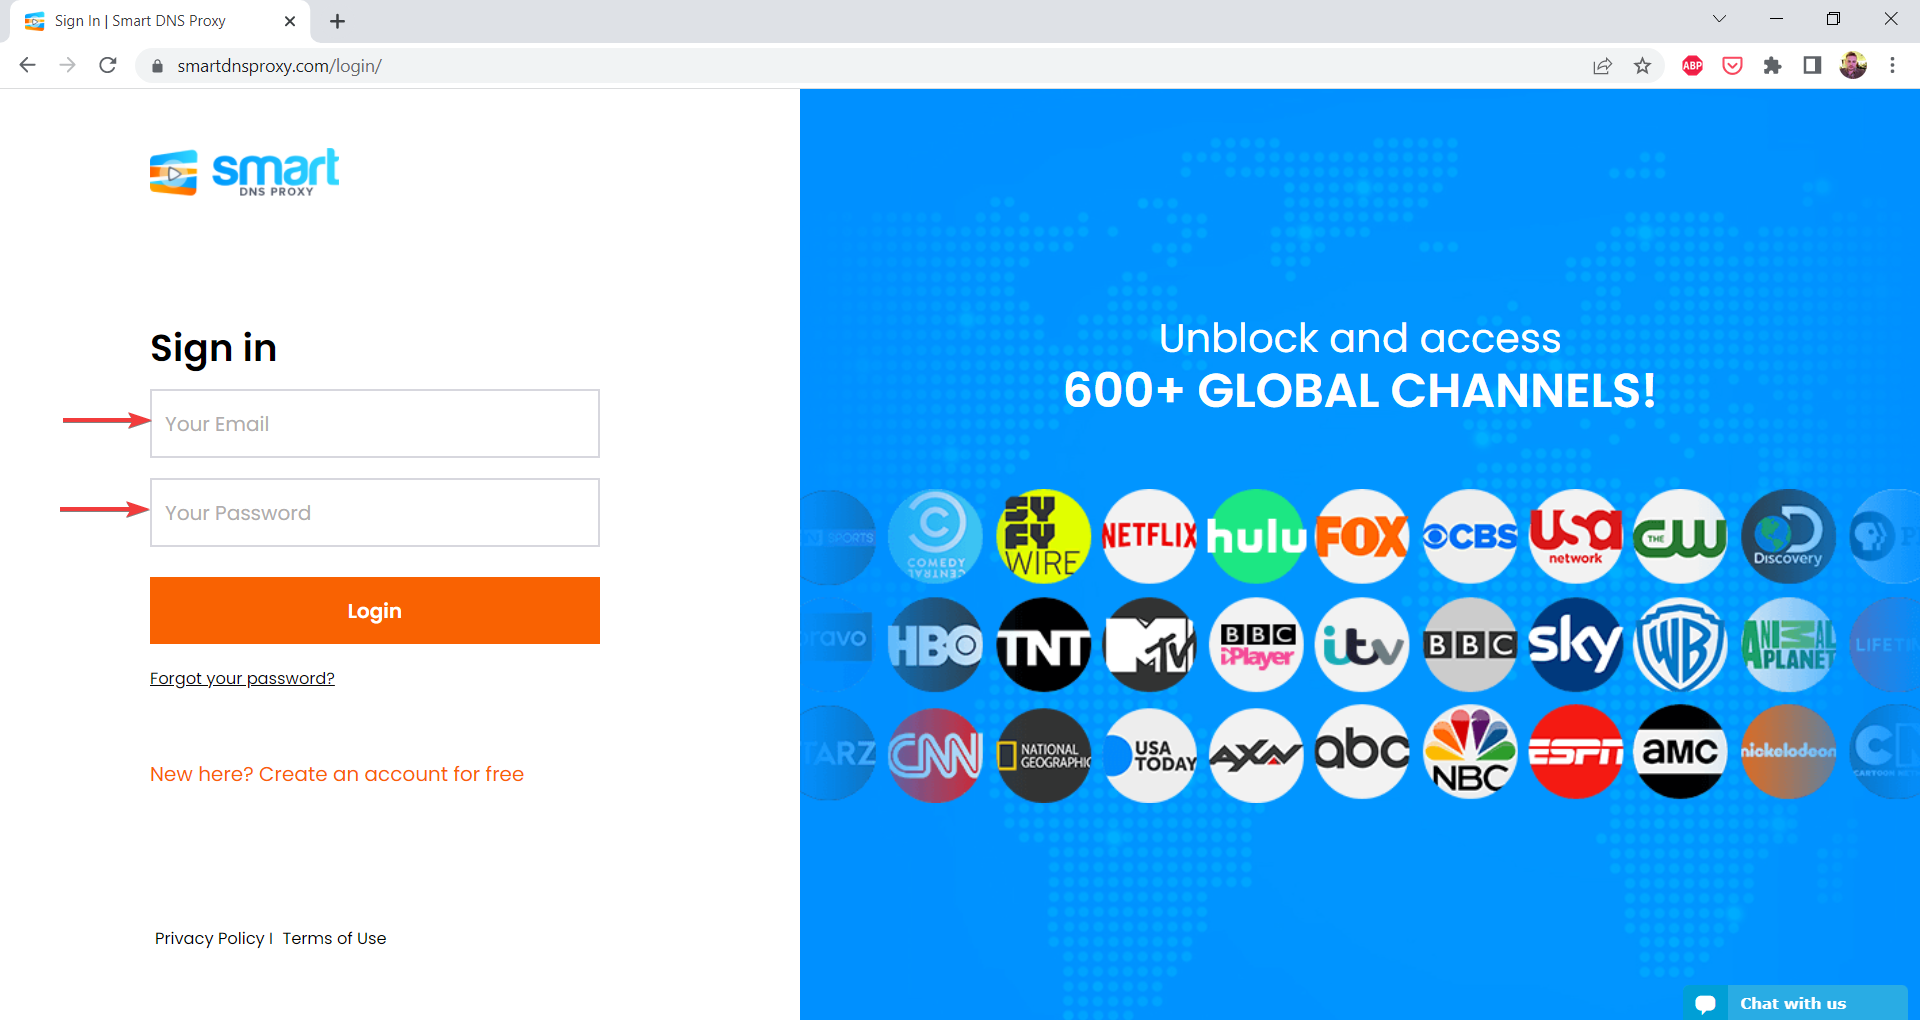
- Go to the Smart DNS Proxy login page and sign in with your credentials.
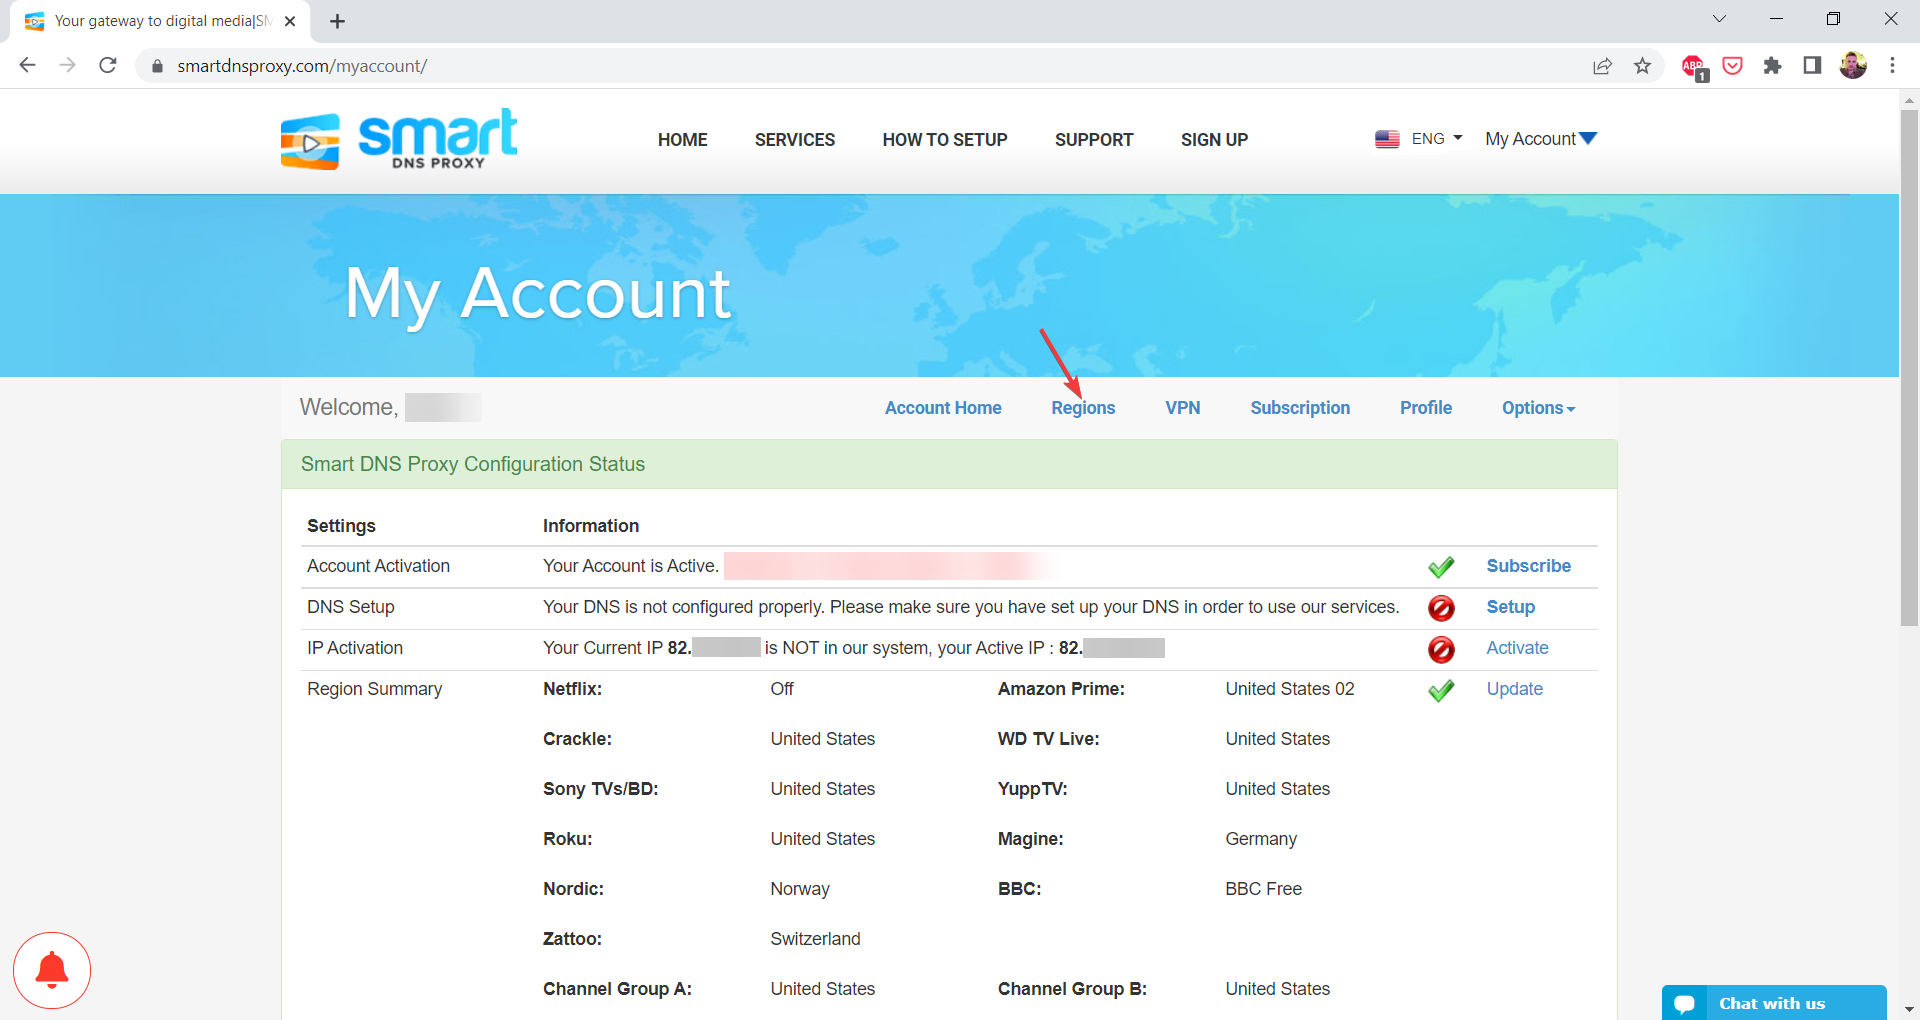
- Go to Regions to configure the Region Settings.
- Scroll down to Channel Group A to find The History Channel.
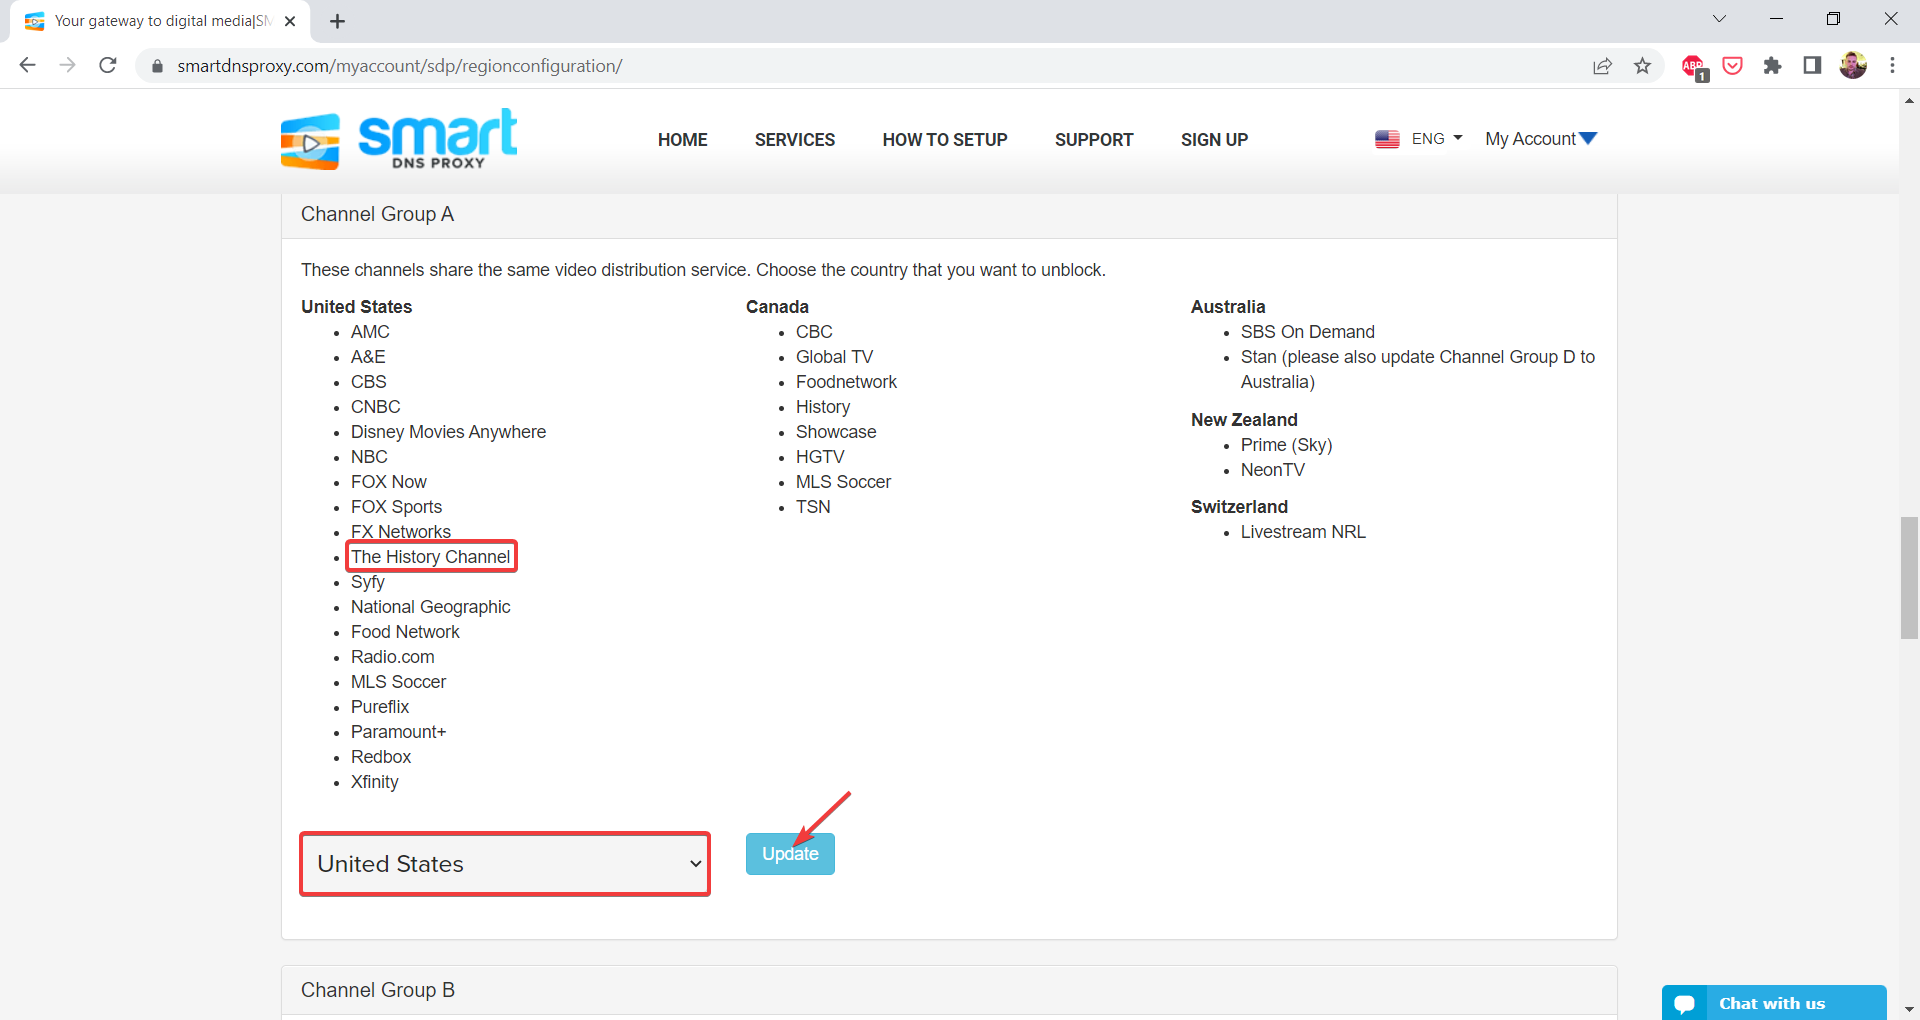
- Select the United States and click on Update. This means that, when you access the History Channel from Australia, it will appear as if you’re coming from the United States.
- Go to the list of Smart DNS Proxy servers and choose two smart DNS server locations. N.B. For the best experience, you should select two DNS servers that are closest to your location.
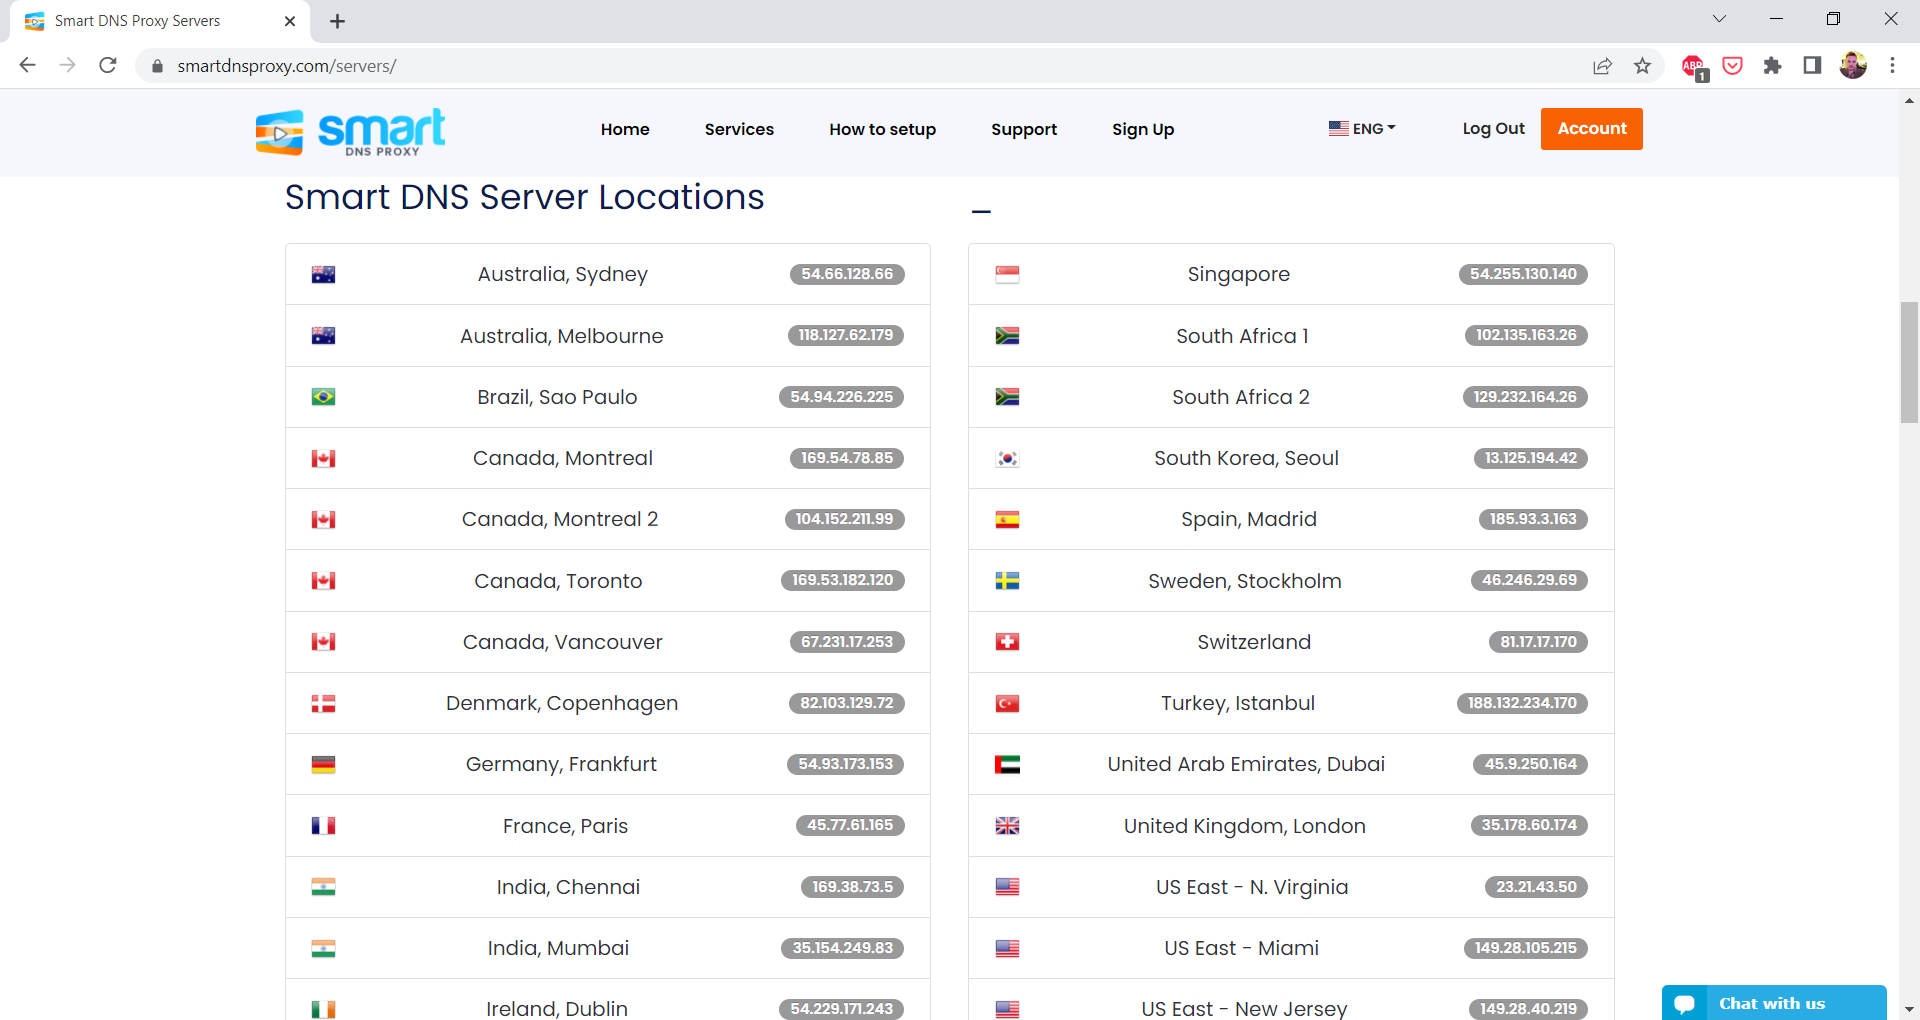
- Copy the corresponding DNS server addresses, as they’ll be required for the next step.
1.2.2.2. Configure the smart DNS on your device
In the next example, you will see how to change your DNS settings to use smart DNS on a Windows 11 device. For that, you will need the two DNS server addresses obtained before.
Whether you use Smart DNS Proxy or another smart DNS service, the steps presented in this list are identical for Windows 11 and very similar for Windows 10.
Even though our example is with a Windows 11 OS, Smart DNS Proxy can be configured on multiple operating systems and platforms with ease.
- Press the Windows + I key combination to open Settings.
- Click on Network & internet.
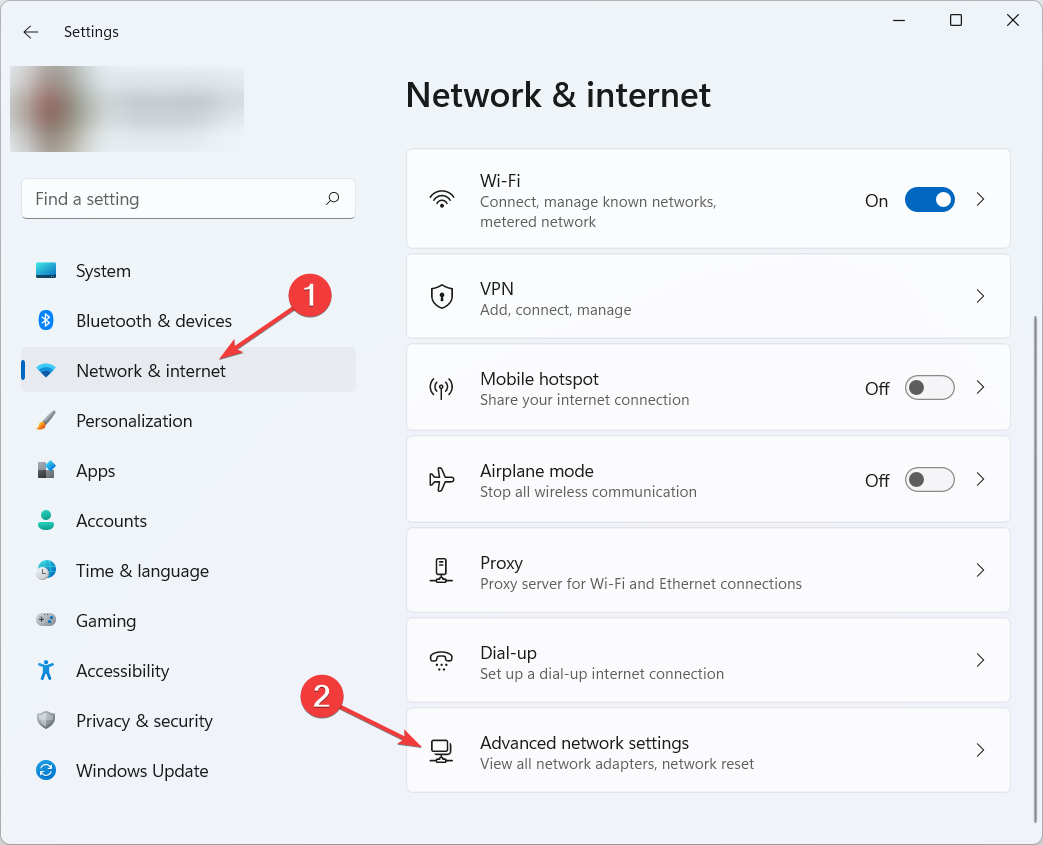
- Scroll down to Advanced network settings and click on it.
- Scroll down to More network adapter options and click on it.
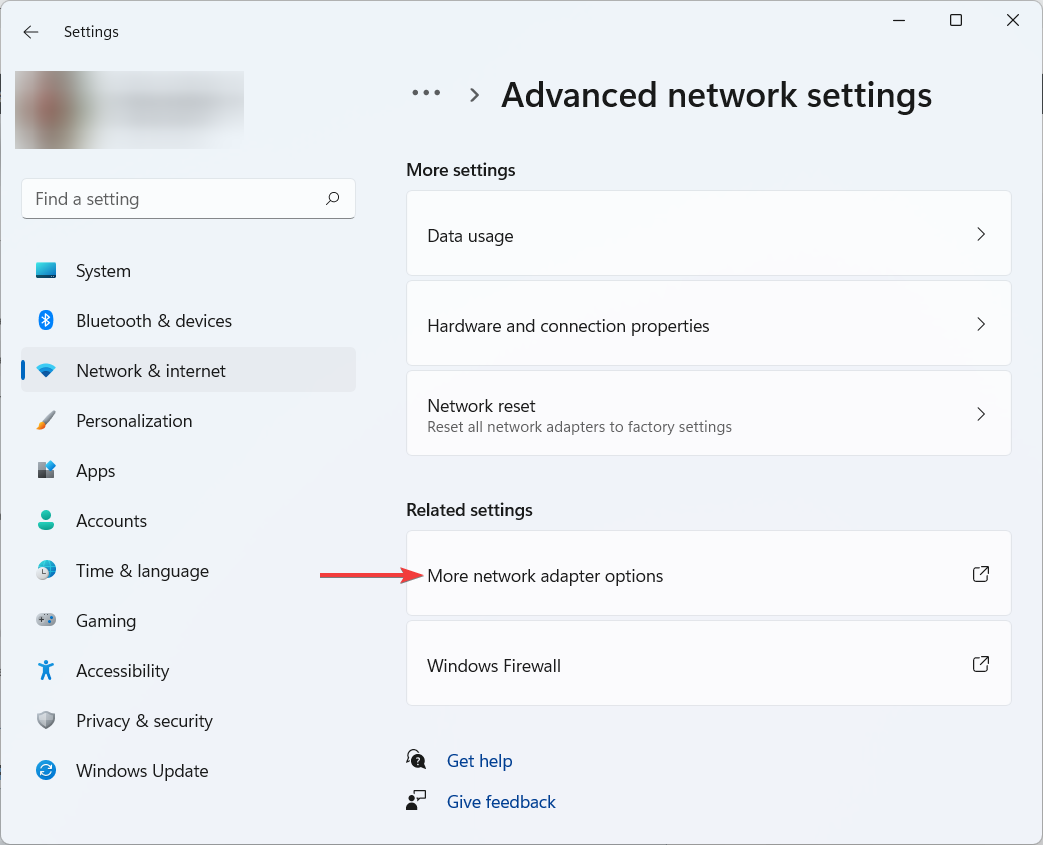
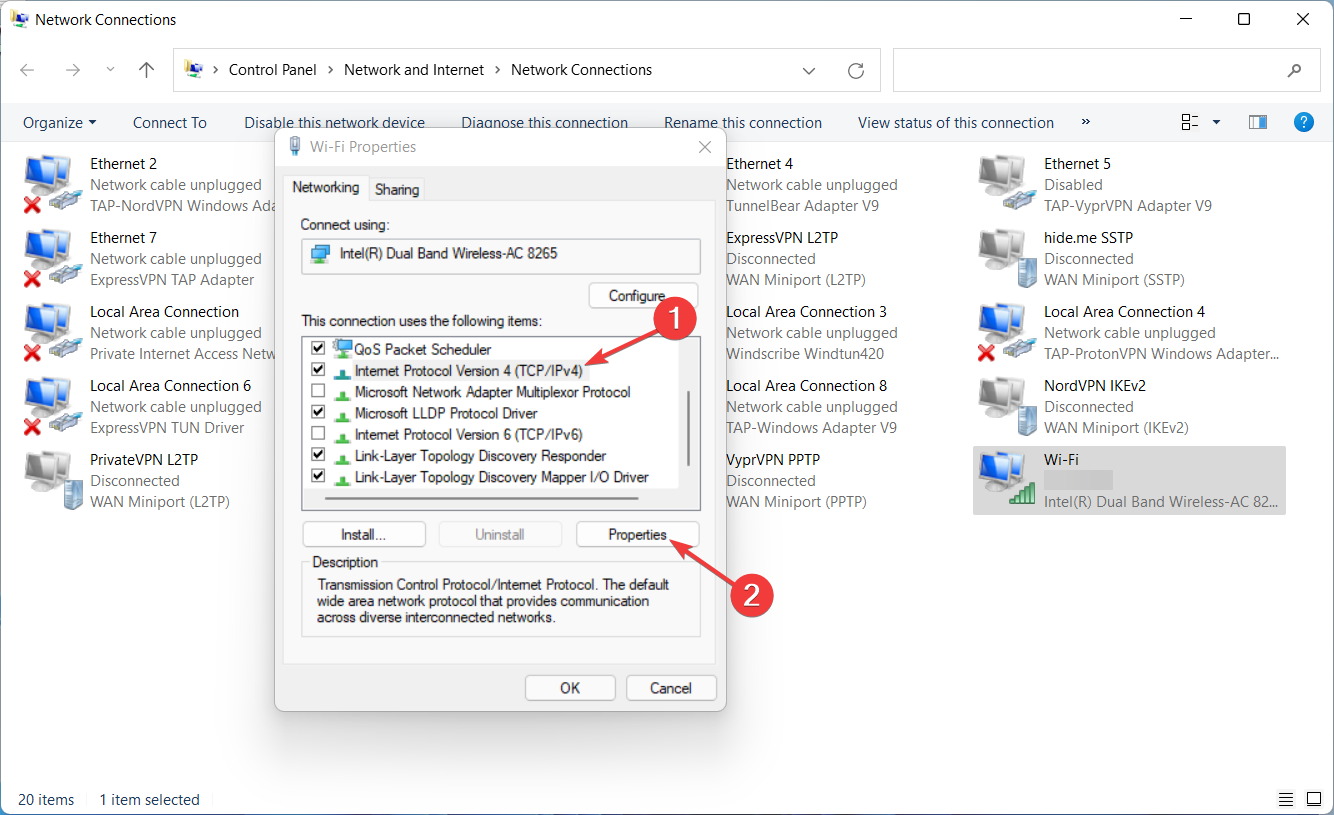
- Right click on your network adapter (usually Wi-Fi), then click on Properties.
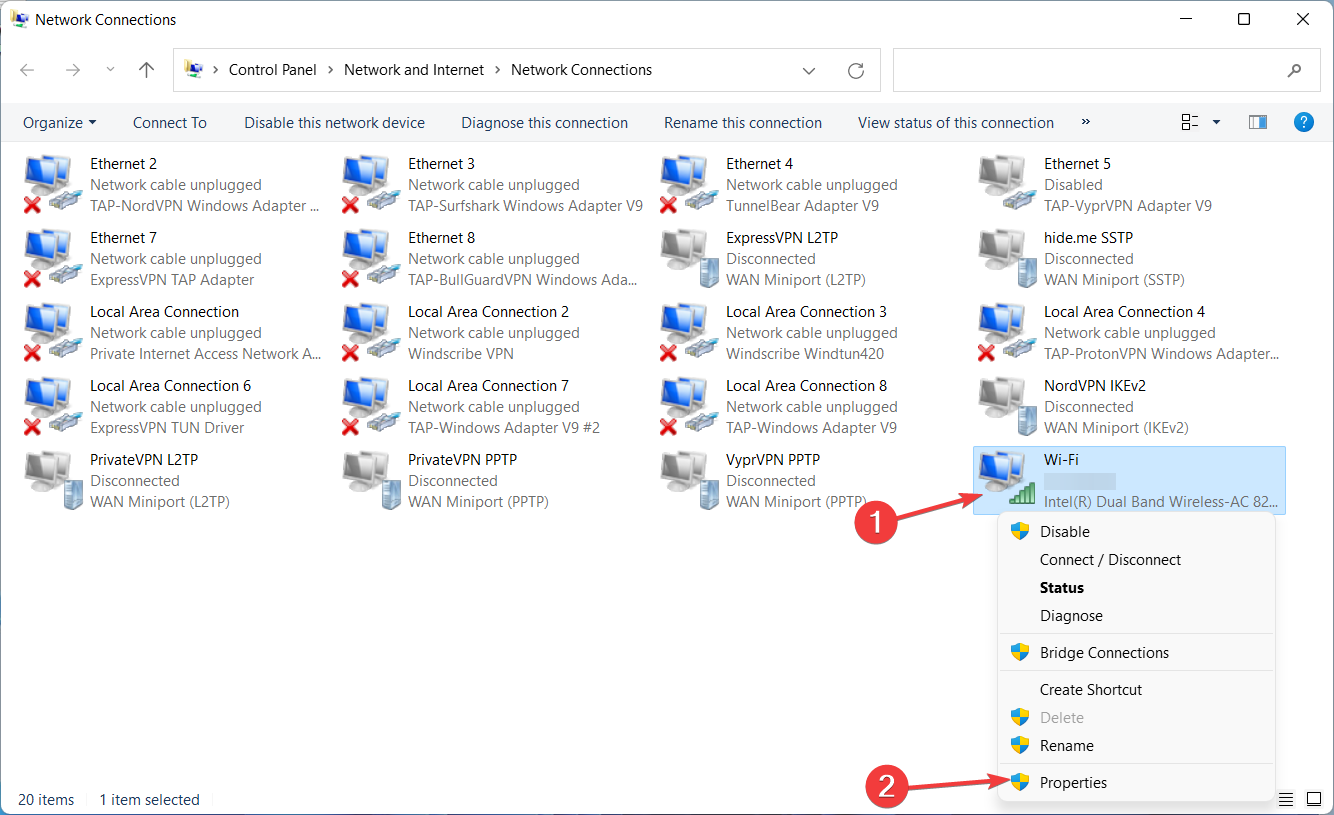
- Uncheck the Internet Protocol Version 6 (TCP/IPv6).
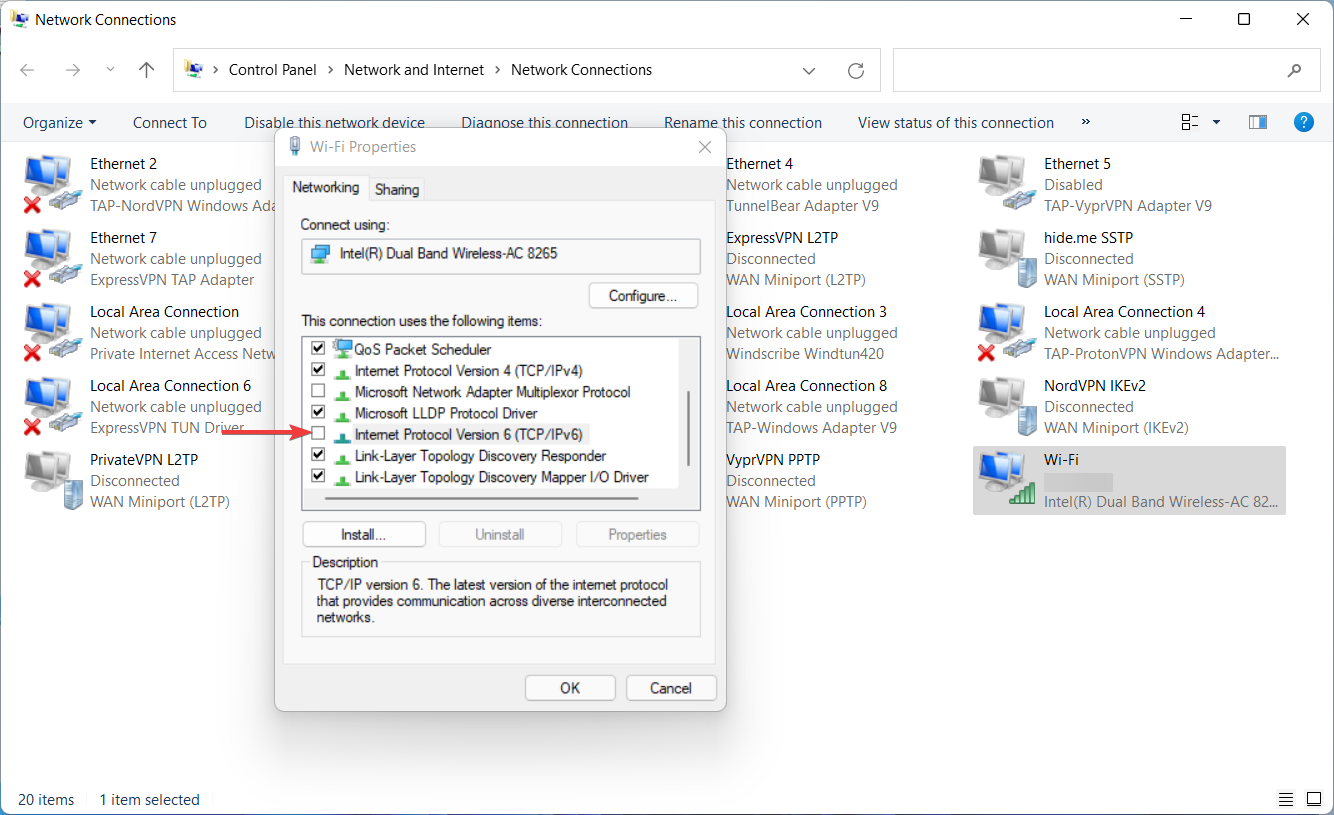
- Go to Internet Protocol Version 4 (TCP/IPv4), then click on Properties.
- In the General tab, click on Use the following DNS server addresses:.
- Enter the DNS addresses for Preferred DNS Server and Alternate DNS Server.
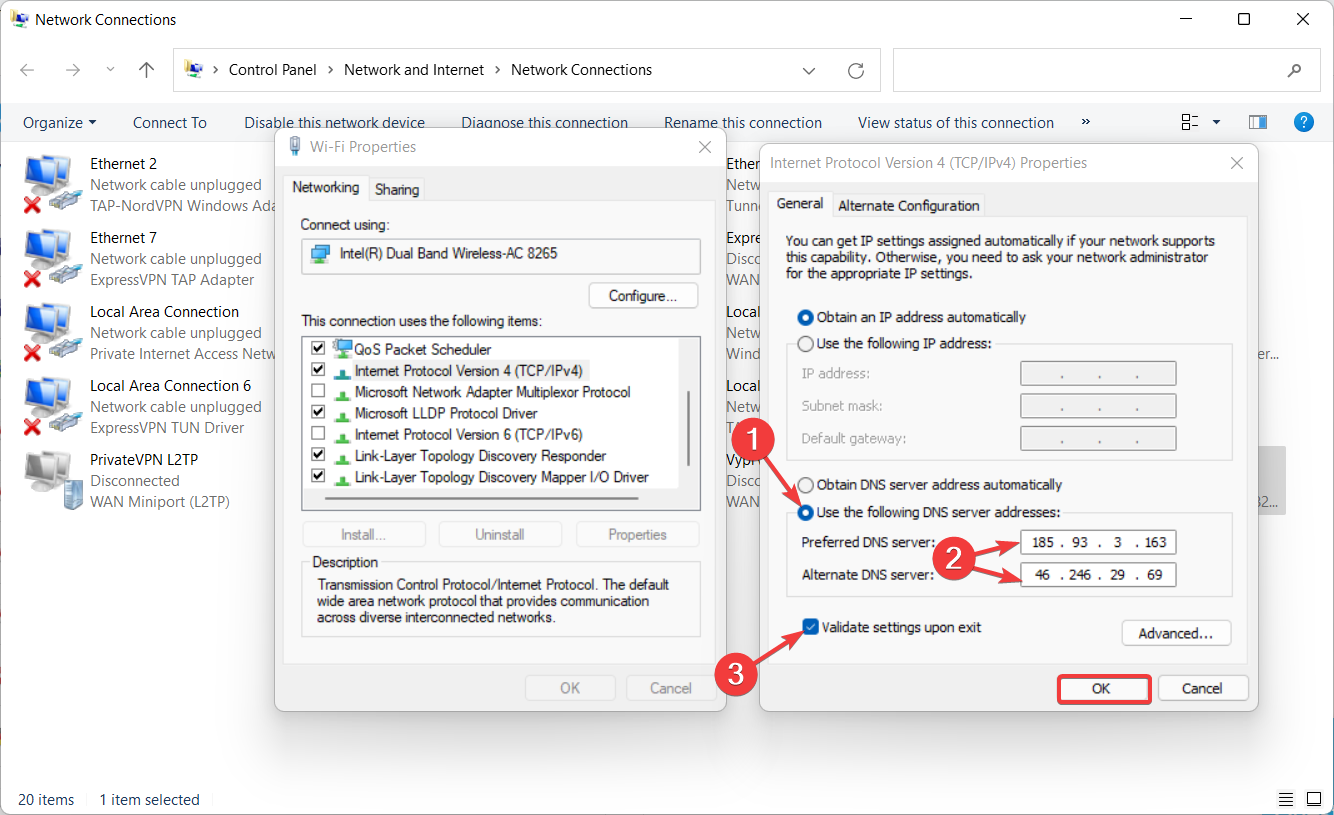
- Check Validate settings upon exit, then click OK.
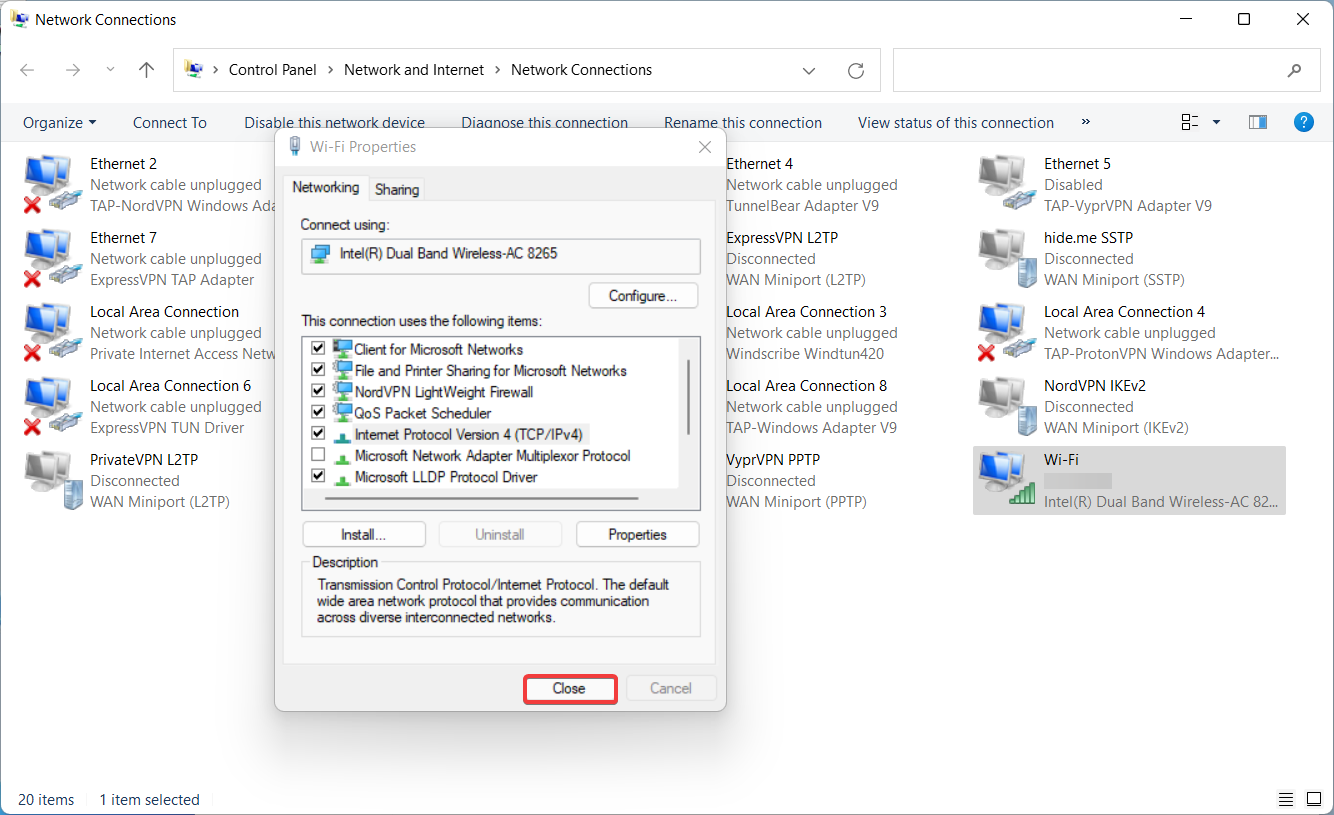
- Close the Properties dialog box.
- Wait to see if Windows Network Diagnostics detects any problems.
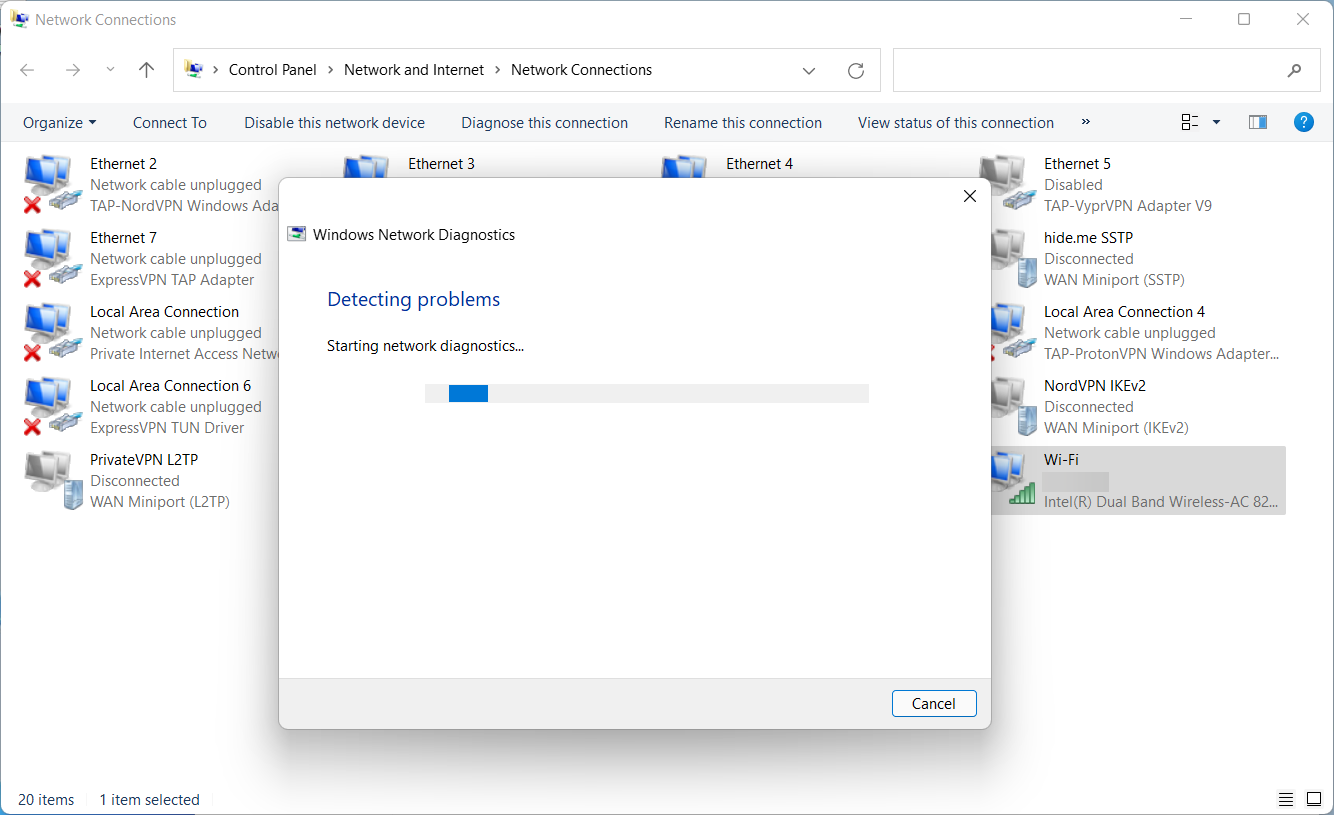
- If your settings are correct, you should get this message: Troubleshooting couldn’t identify the problem.
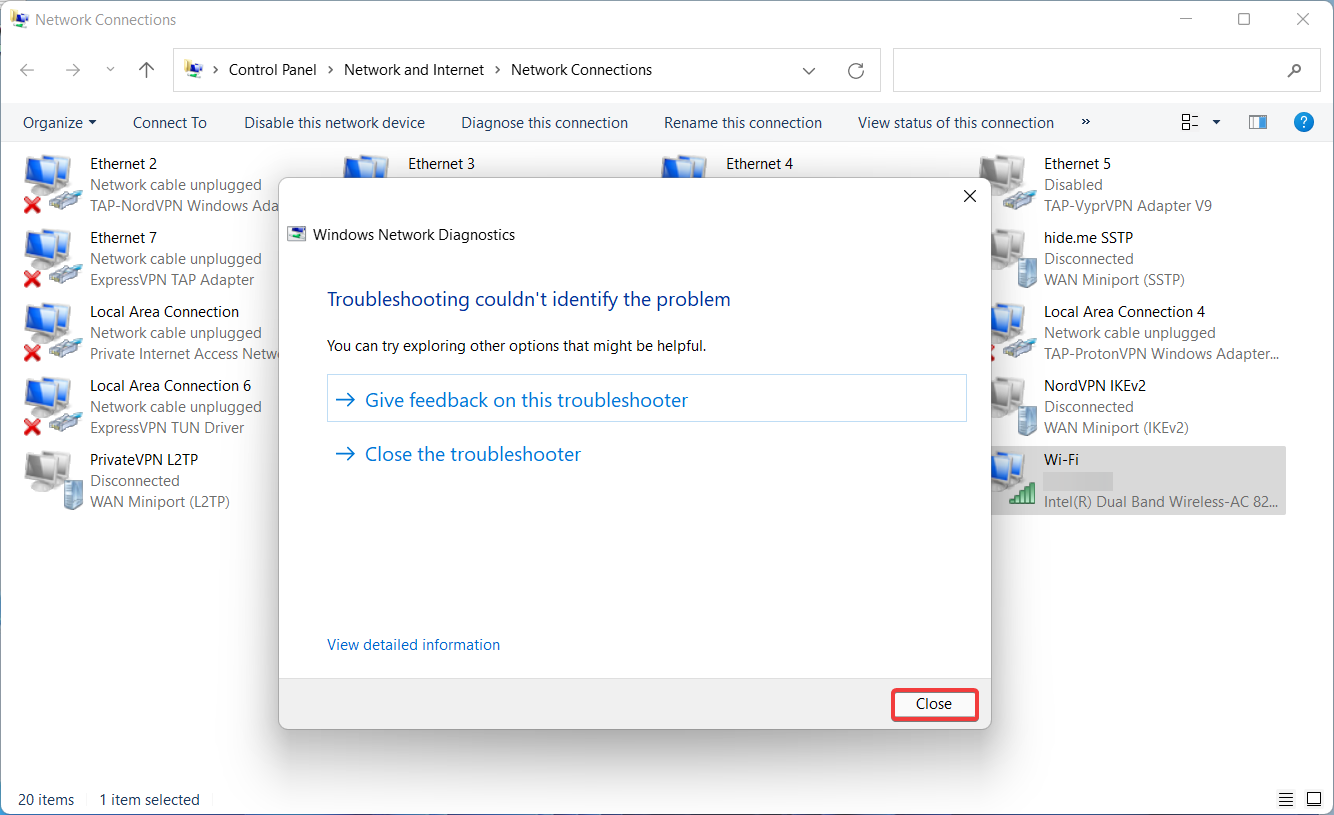
- Click Close and restart your computer for the changes to take effect.
1.2.2.3. Make sure the DNS setup is configured properly and activate your IP address
After you’re done with changing your DNS settings, you need to head over to your Smart DNS Proxy account to check whether the DNS setup was configured properly.
In addition, you will need to activate your IP address. This can be done automatically with one click, as the system will detect it anytime you access your Smart DNS Proxy account.
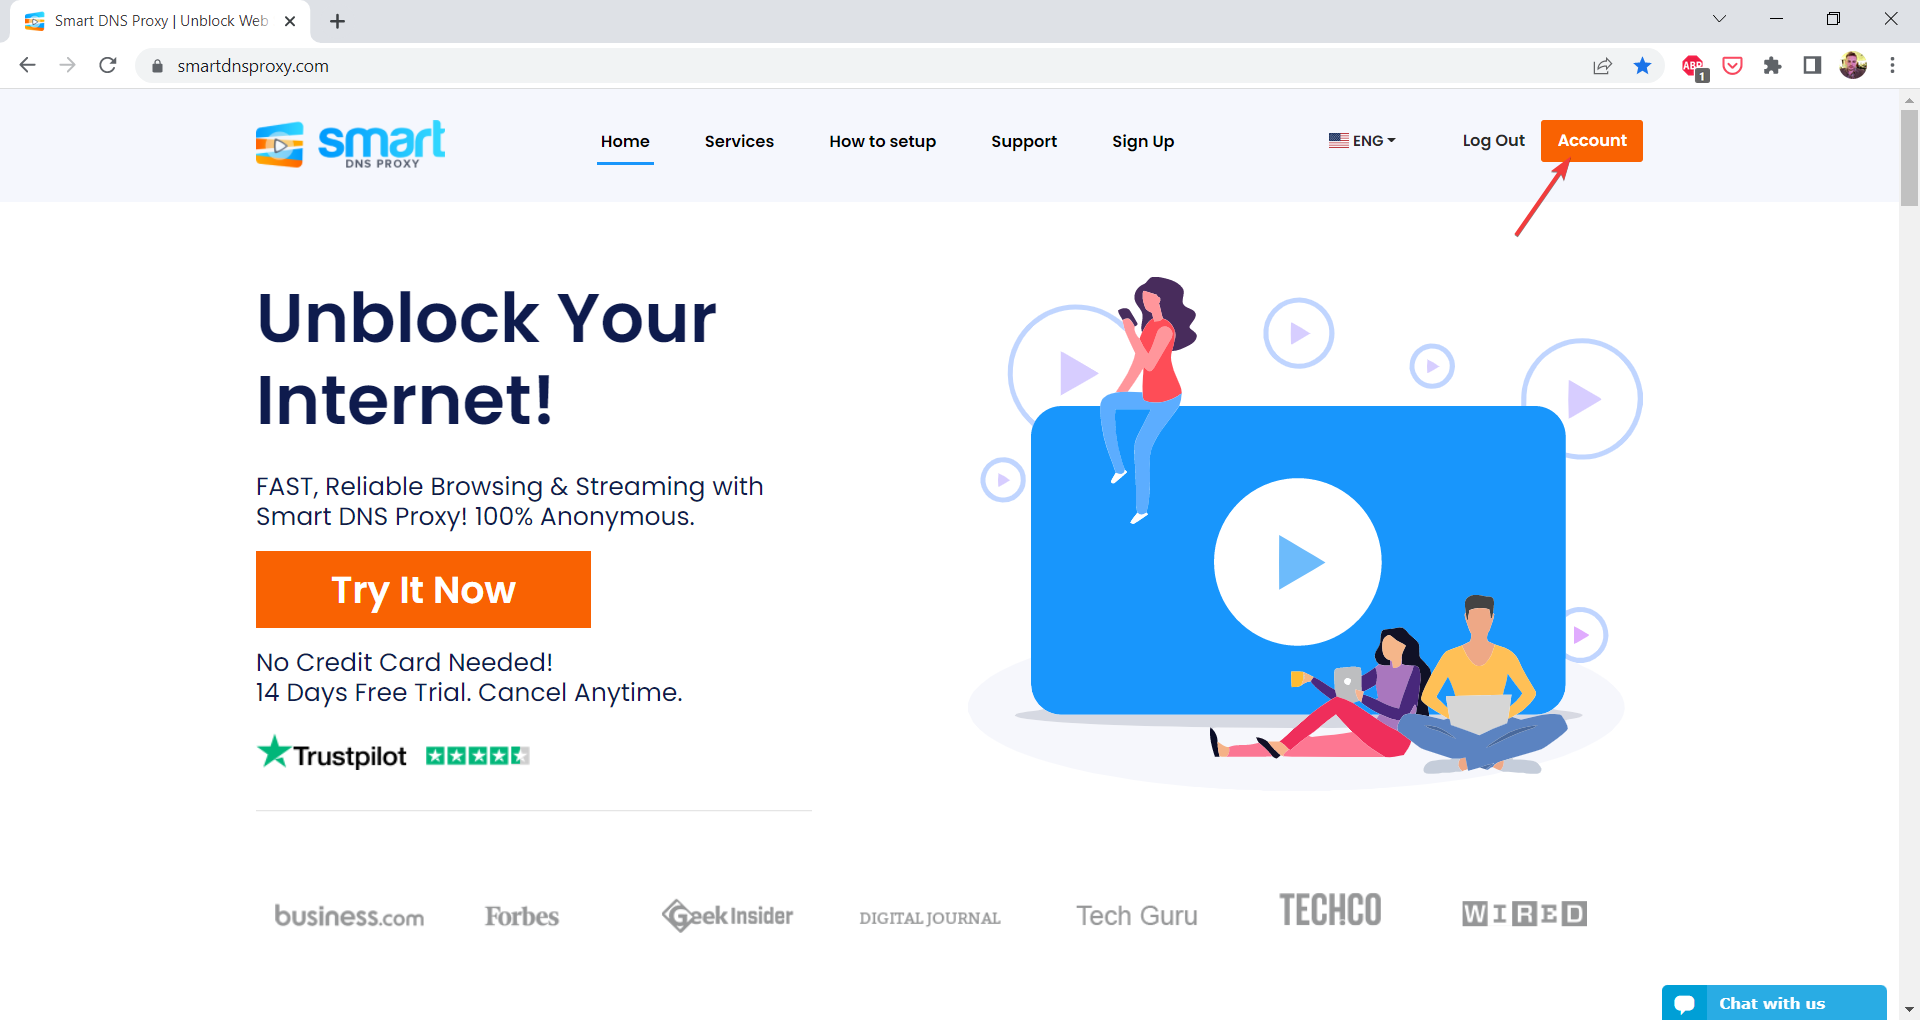
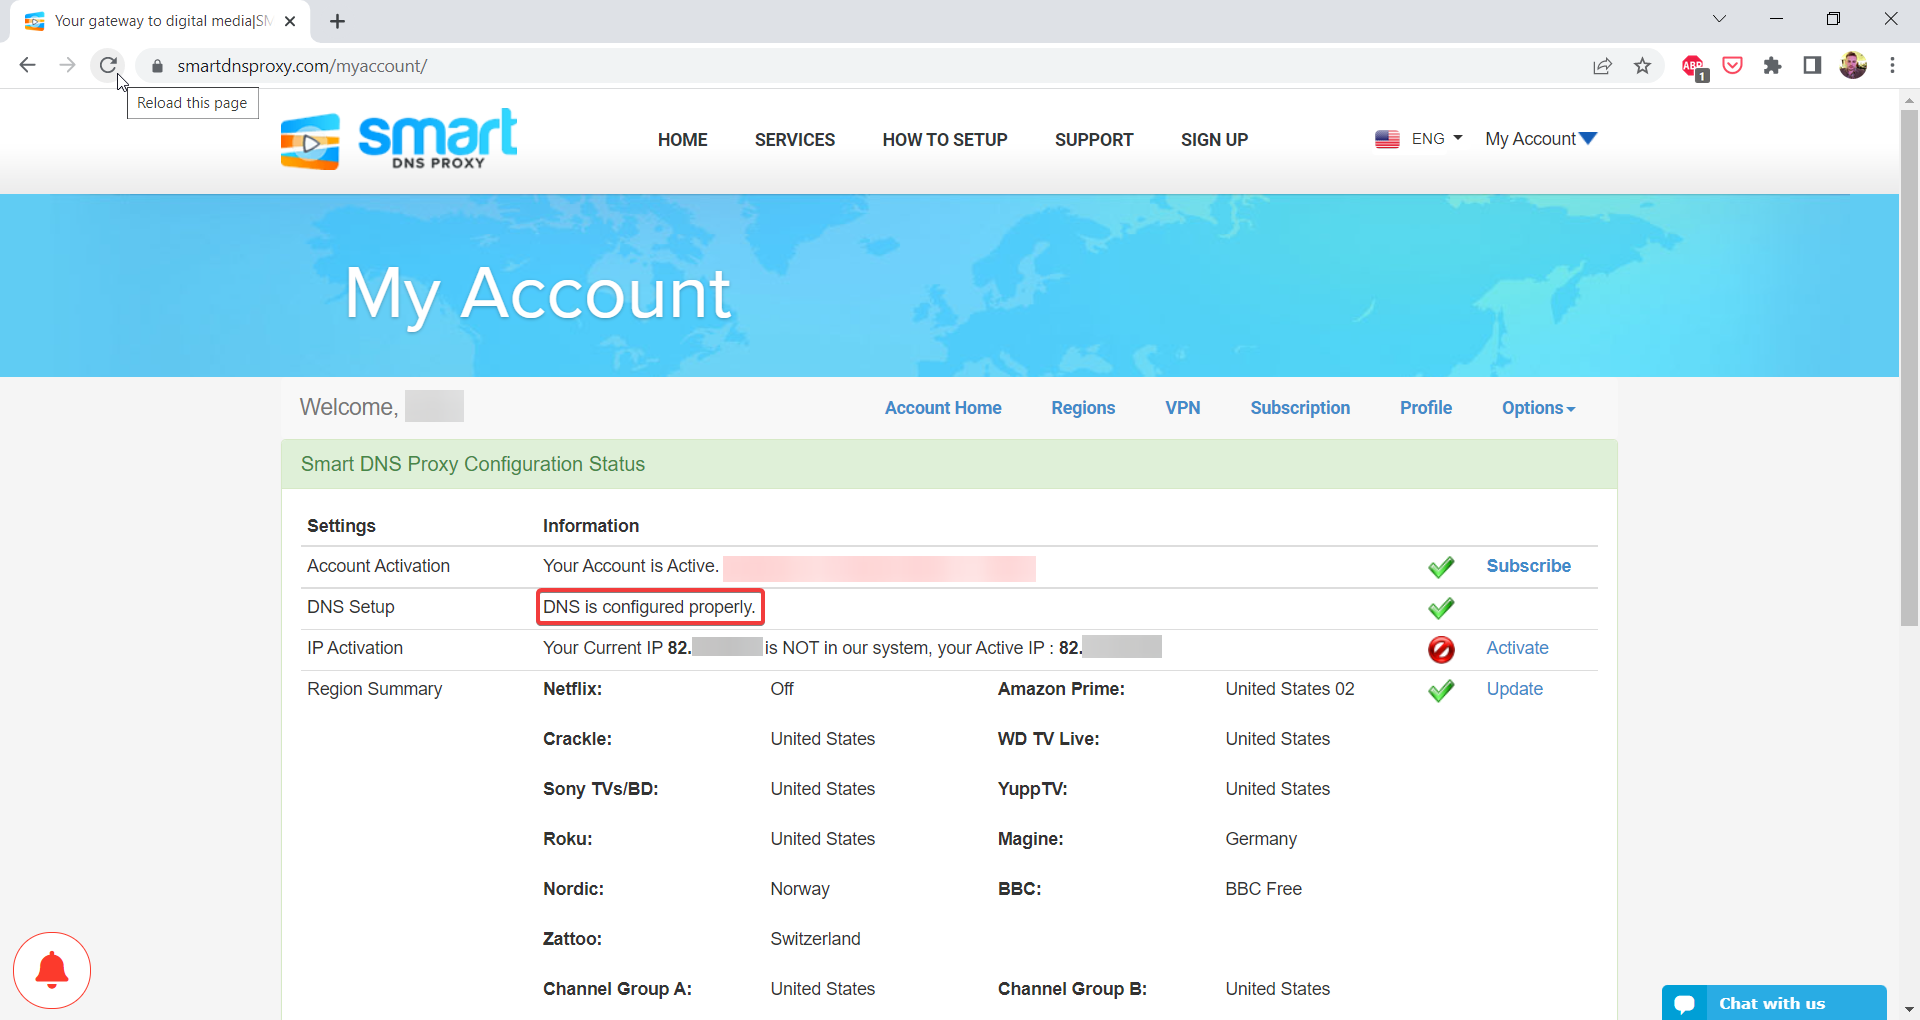
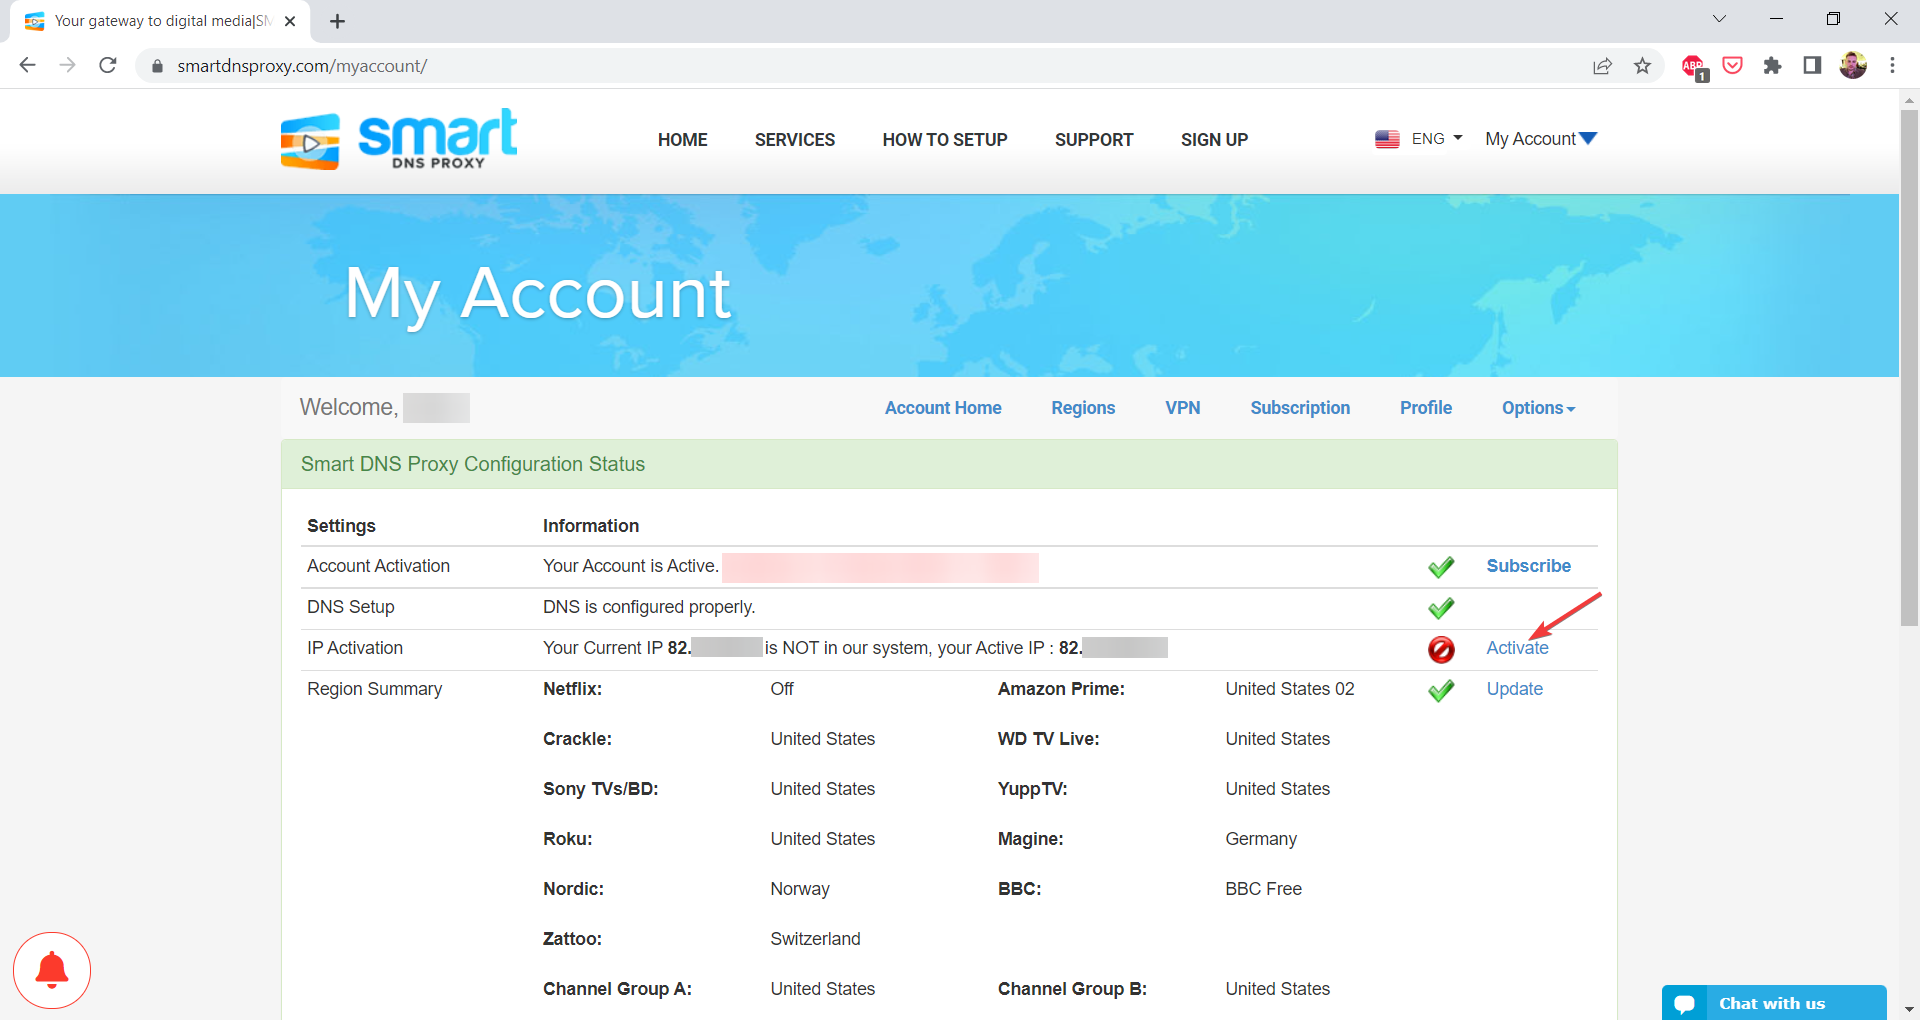
- Visit the Smart DNS Proxy website and go to Account.
- In general, the status for DNS Setup should be updated automatically. So, if you followed the above steps accordingly, it should show DNS is configured properly.
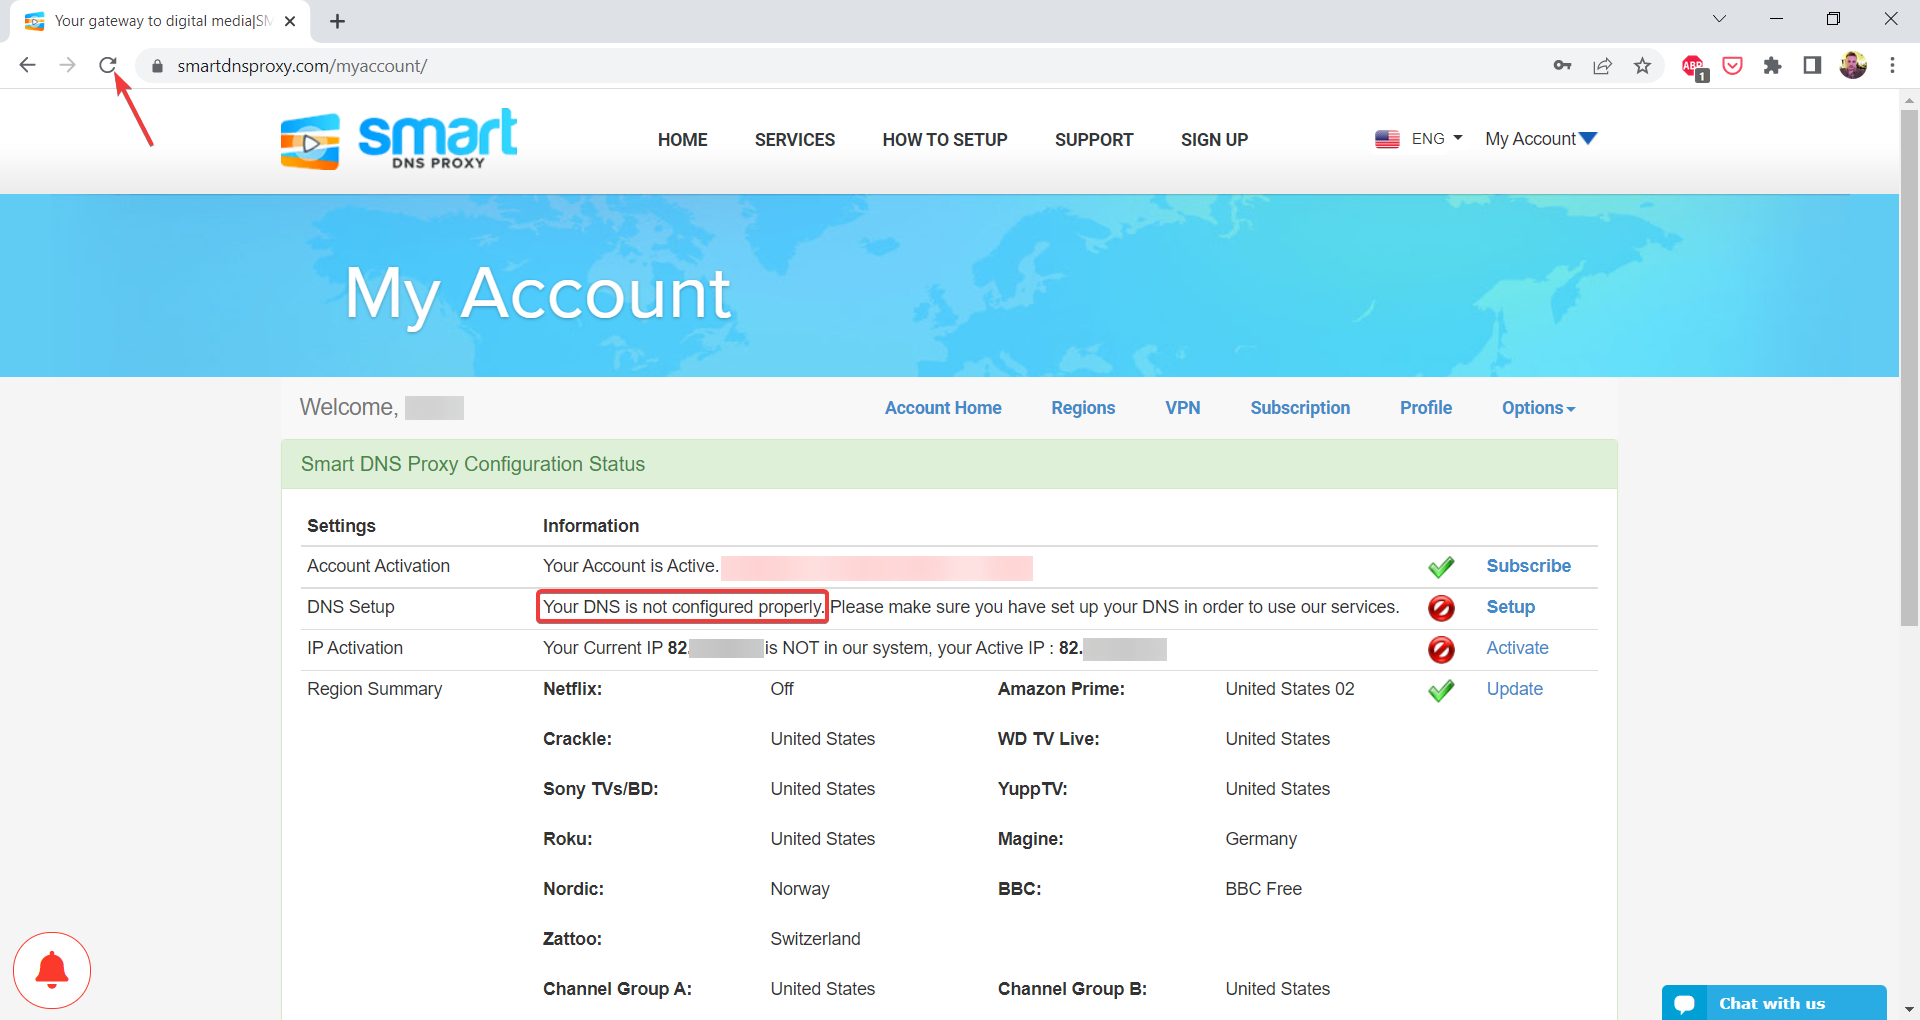
- Otherwise, if it shows Your DNS is not configured properly, try reloading the page. If you still get the same message, redo the configuration and check again.
- If you got the green checkmark for the DNS configuration, go to IP Activation and click Activate.
- Provided that the activation was successful, you’ll see the message Your IP is activated in our system.
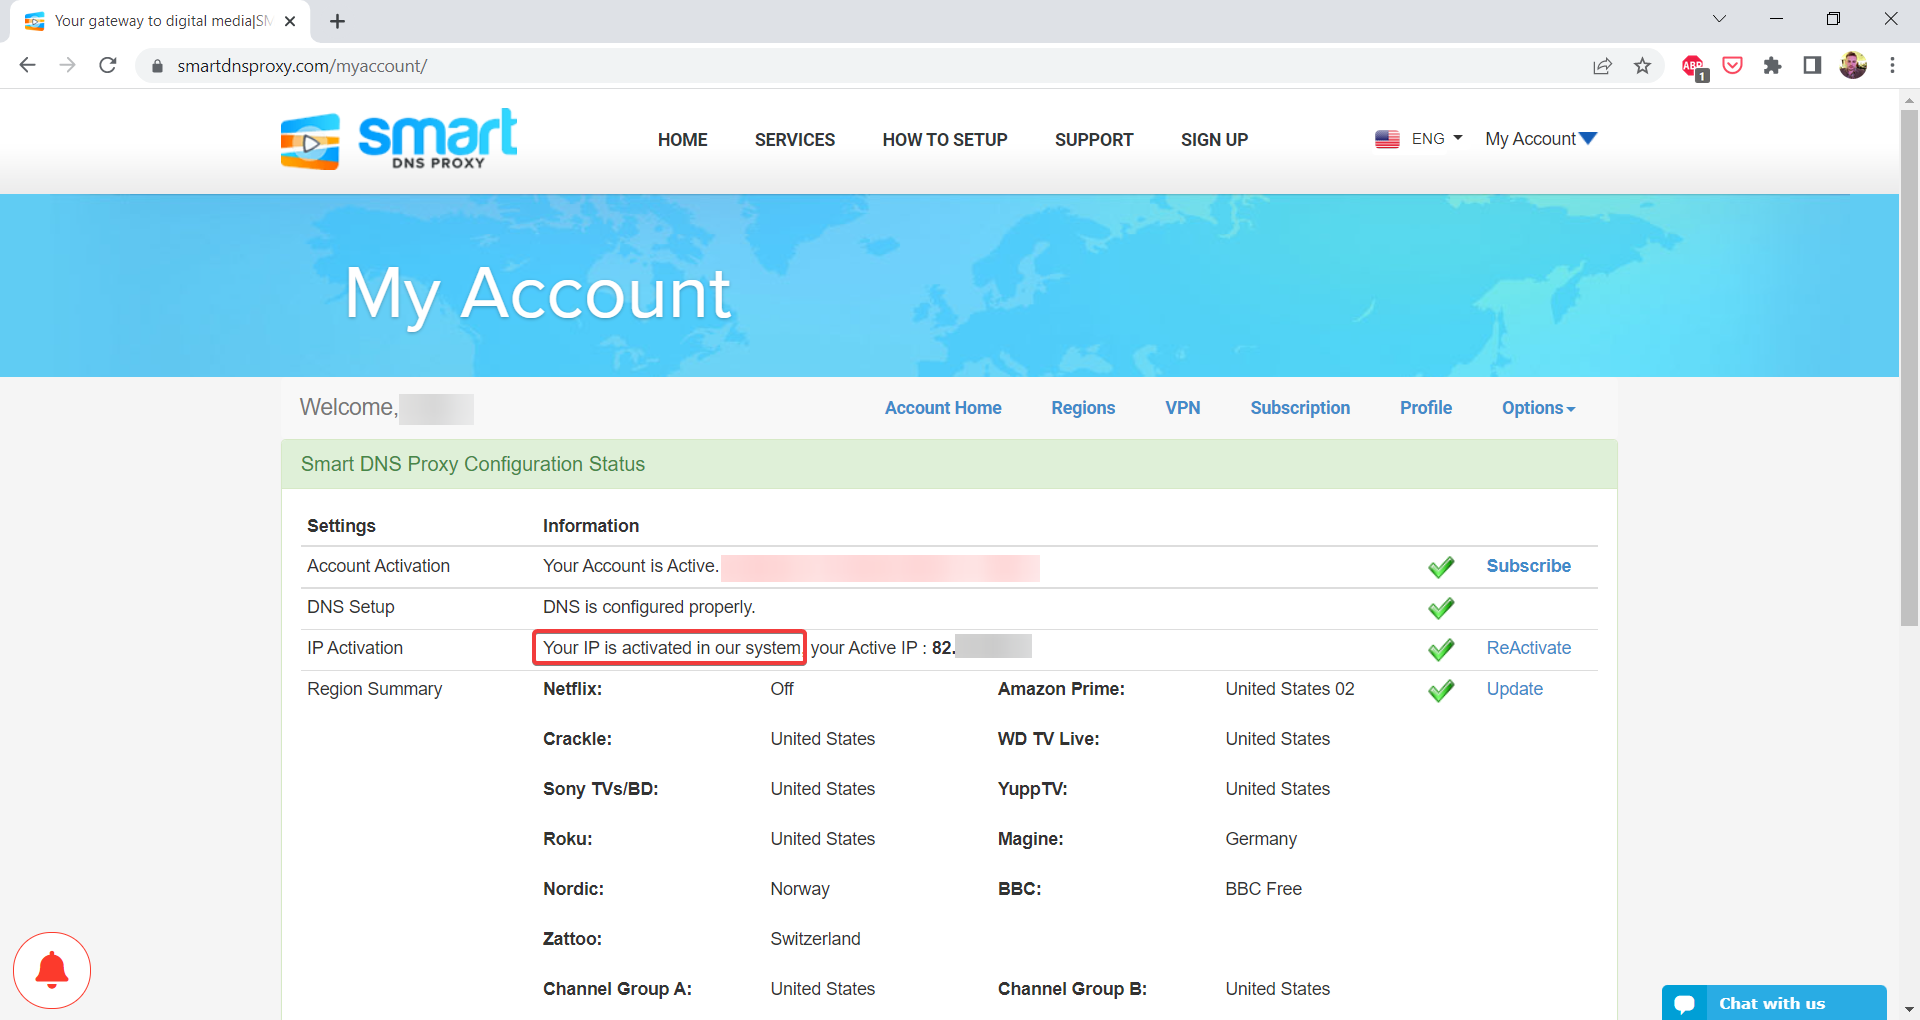
- Now Smart DNS Proxy should be properly configured on your Windows device.
2. Subscribe to an American TV provider that offers the History Channel
History is available via its main website, dedicated apps for mobile devices and smart TVs, and also different TV packages from certain TV providers.
The following phone and TV devices are currently supported by History:
- iOS and Android
- Android TV
- Amazon Fire TV
- Samsung TV
- Roku
- Chromecast
Unfortunately, the History Channel doesn’t come as a single-channel subscription that you could pay for separately, nor with an Internet-only or phone plan.

This means that you won’t be able to subscribe directly to the History Channel. What you’ll need to do first is subscribe to a US TV provider that includes the channel in their subscription package.
After that, you will manage to unblock content from History.com or the available apps.

Currently, viewers in the USA can watch History programming by signing up for a service with the following providers:
- Local cable: Xfinity, Cox, Spectrum, Verizon Fios, Optimum
- Satellite: Dish and DIRECTTV
- Streaming TV services: DIRECTTV Stream, Hulu + Live TV, Philo, and Vidgo
However, since you’re located in Australia, you won’t be able to access these TV providers, as they are available for US viewership exclusively.
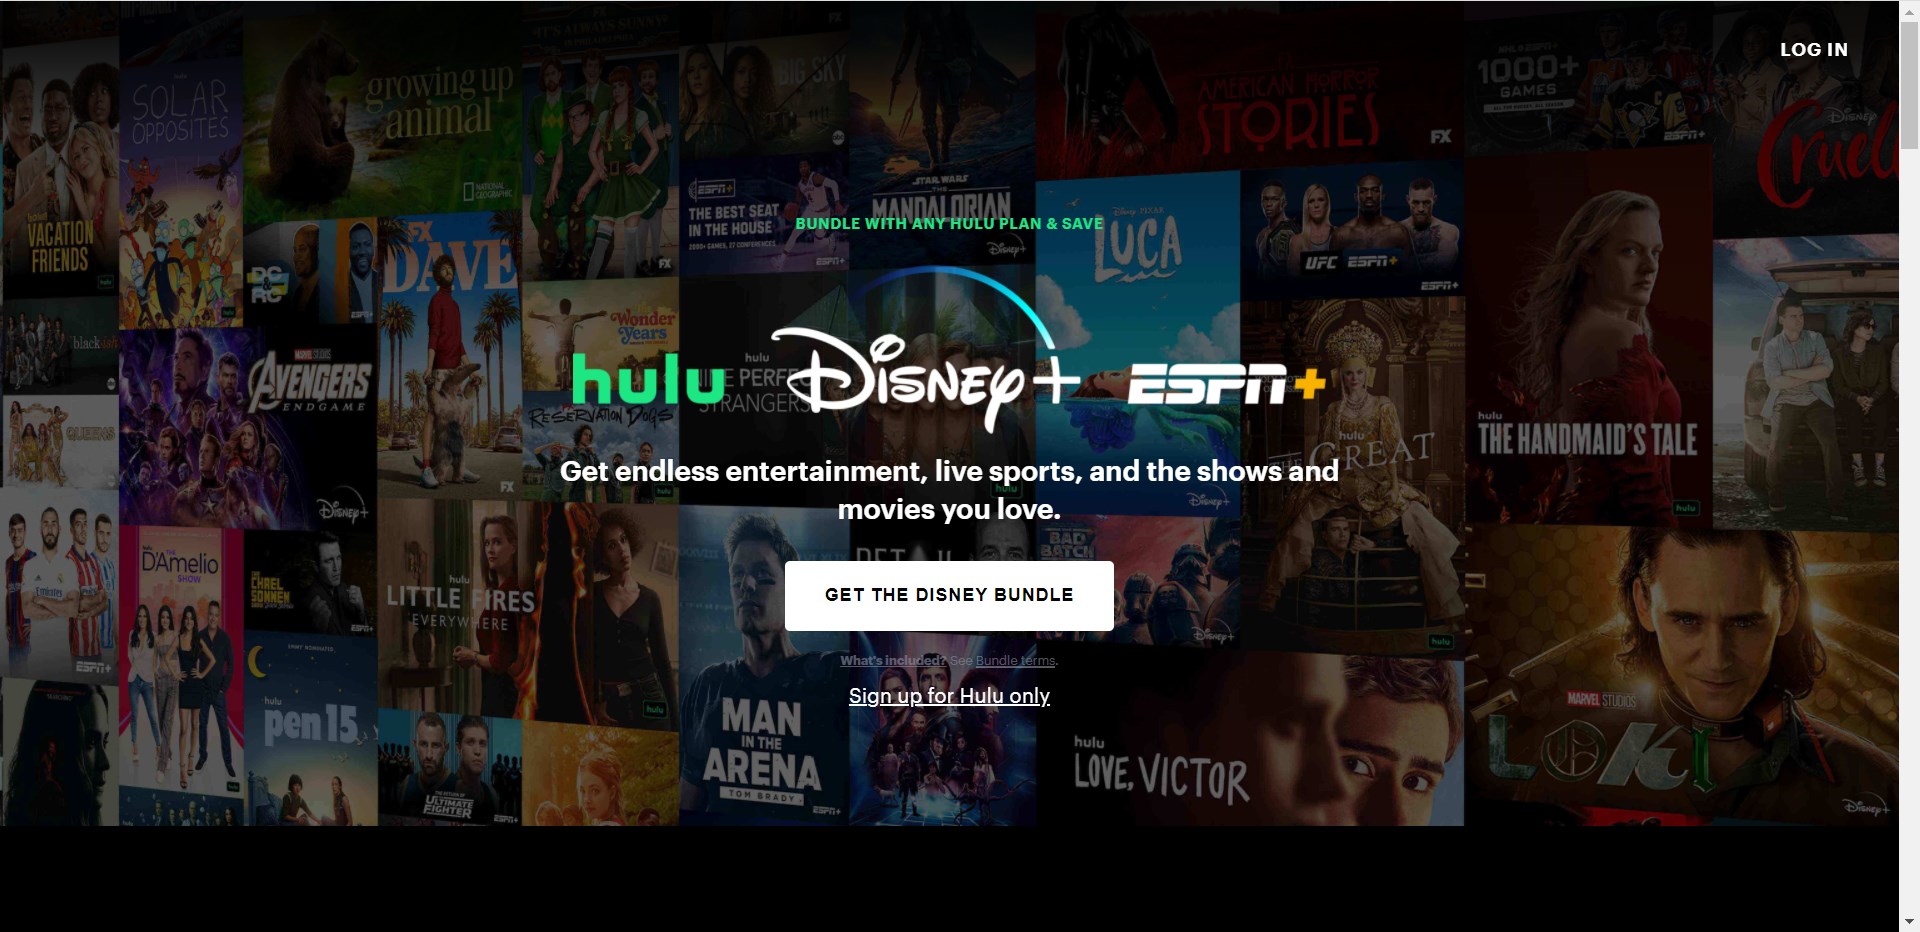
The easiest way to watch the US History Channel in Australia would be by subscribing to a streaming service, such as Hulu or DIRECTTV Stream.
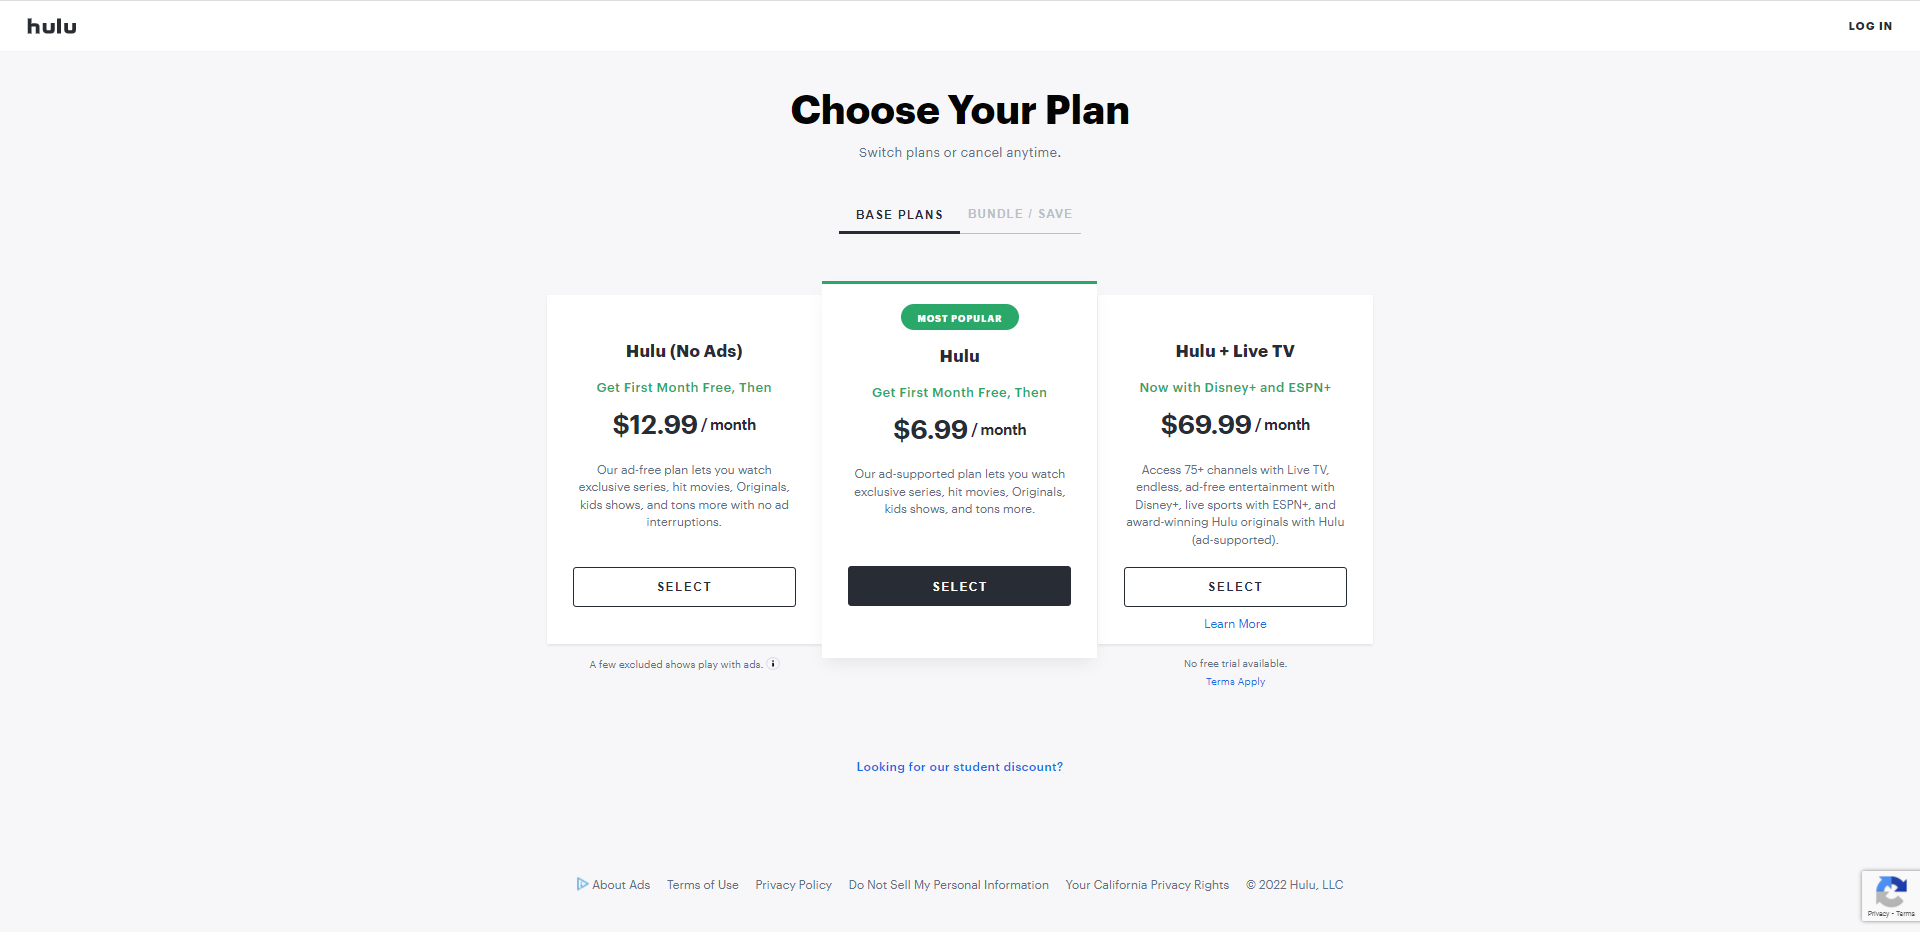
Hulu comes with 3 base plans and 3 bundle/save plans, the latter also offering Disney+ and ESPN. Each plan category includes a Hulu + Live TV plan.

While you can watch content from the History Channel in Australia with any of the Hulu plans, live programming is only available with the Hulu + Live TV plan.
Obviously, you should feel free to choose whatever streaming service or TV provider you wish. Hulu is just an example of the many US TV providers that offer the History Channel.
2.1 How to subscribe to Hulu
Below, you have an example of how to subscribe to Hulu from Australia in order to watch the American History Channel.
Although the steps may slightly vary from provider to provider, you can use them as an example in case you opt for a different service.
Before proceeding, make sure to connect to a VPN server in the USA. Or, in case you’re using a smart DNS, make sure it unblocks the service you intend to use and also to have your settings configured adequately.
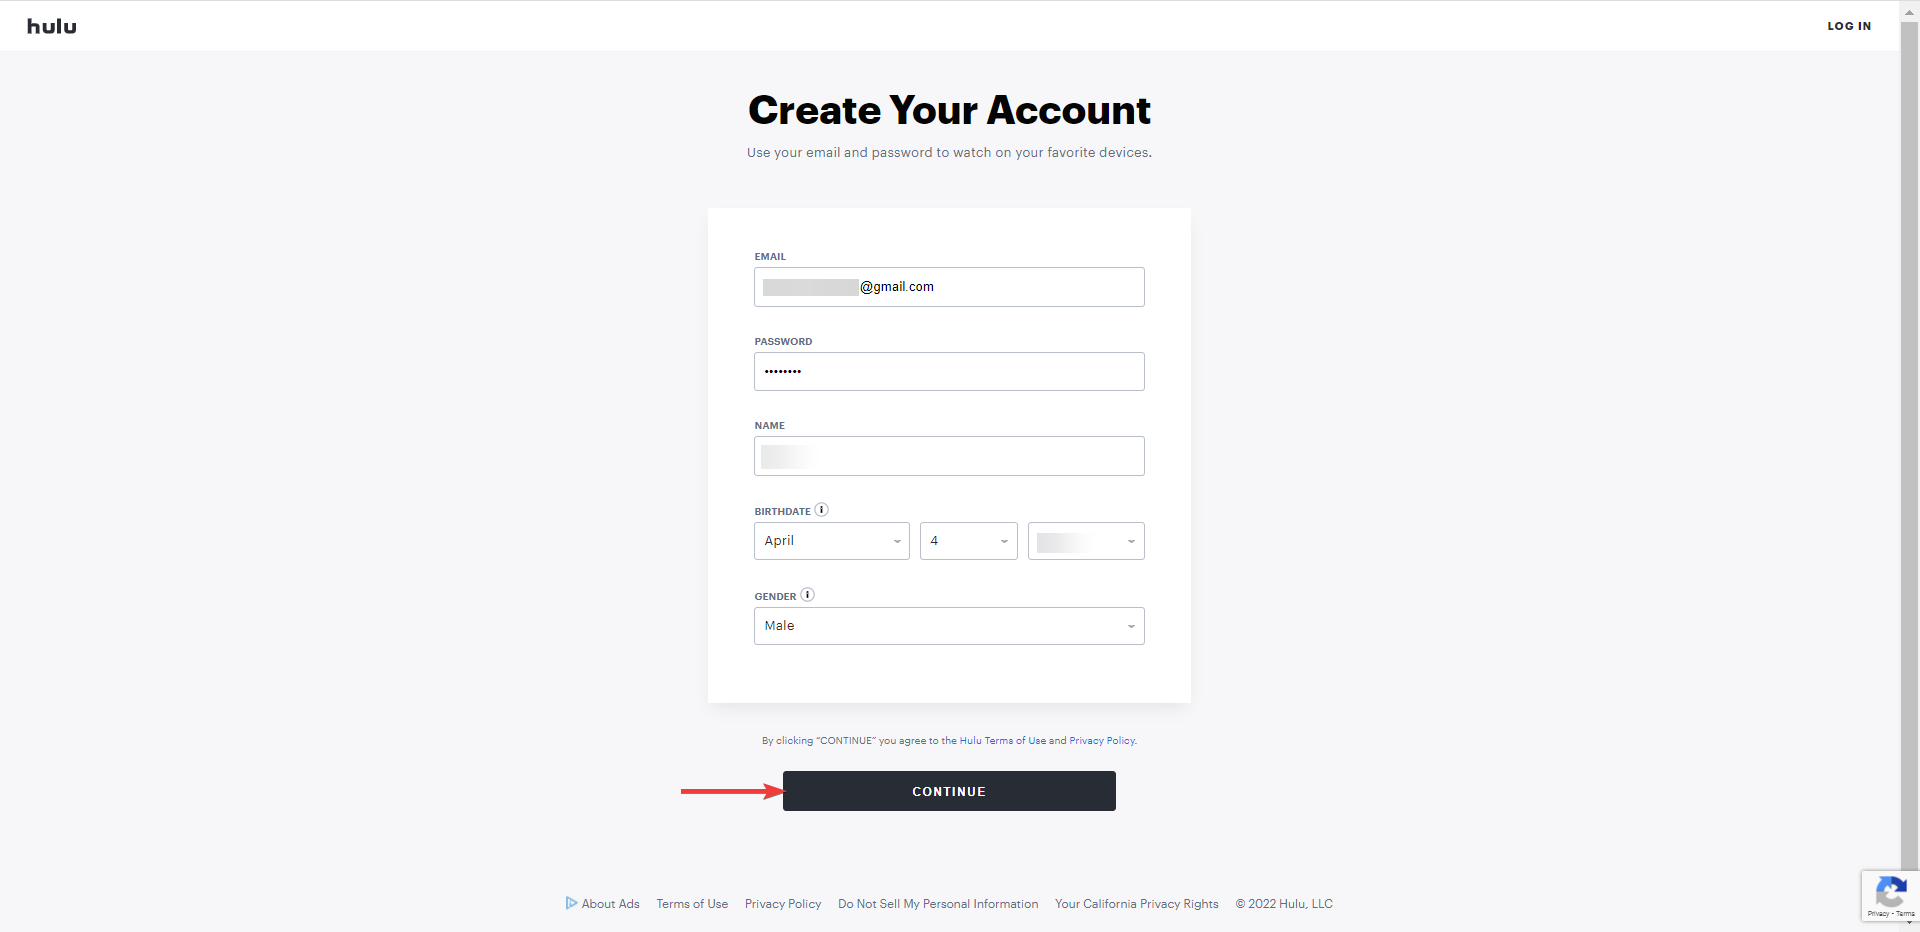
- Go to the Hulu website and choose a subscription option.
- Select your plan (2 of the 3 base plans offer a 1-month free trial).
- Enter your account details, then click CONTINUE.
- Enter your billing information, then click SUBMIT.
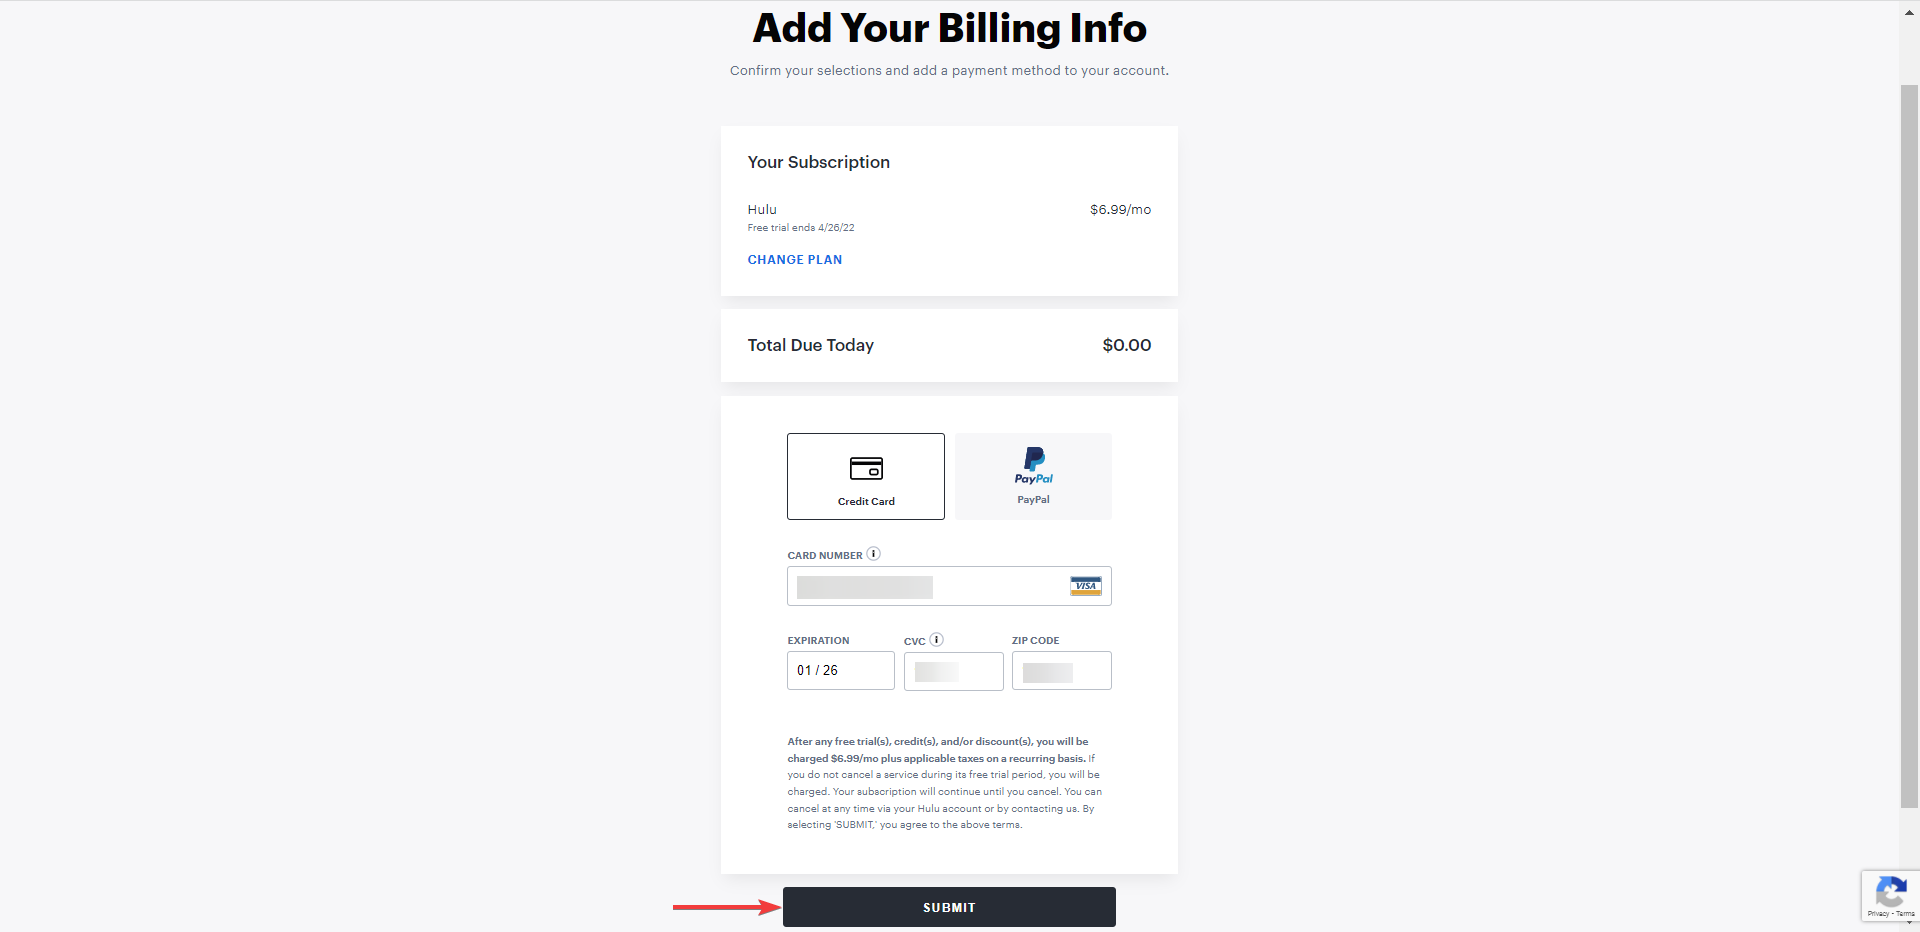
- Start watching the History Channel in Australia directly on the Hulu platform.
- Alternatively, you can access the History website or download the appropriate app for your device, and then log in with your provider’s credentials.
Summary
In conclusion, if watching the US History Channel in Australia was a real challenge for you, that should no longer be the case as long as you follow the above solutions accordingly.
Whether you’re a permanent resident or traveling to Australia and want to stream History shows or watch live TV programming, a VPN or smart DNS service will do the trick.
Just pick your preferred type of service and product, and you’ll manage to bypass geoblocking in no time. However, if you find it difficult to find the right product, our tested recommendations will save you the bother.
It’s important to mention, though, that not all services are effective at tricking the geo-detection, even less so these days when streaming platforms use sophisticated technology to detect and block VPNs, smart DNS services, or proxy servers.
Although we’ve already explained how a VPN and a smart DNS work and compare, as well as what benefits they offer, you should keep in mind the main difference between them.
That is the fact that, although both services let you hide your geo-location to watch the US History Channel from Australia or access any other geo-restricted websites or apps for that matter, only the VPN protects your sensitive data and keeps your activity anonymous and private.
Read our disclosure page to find out how can you help VPNCentral sustain the editorial team Read more

Improve this guide

User forum
0 messages